Tag Archives: blog

Zucchini, Tomato and Sweet Potato Gratin

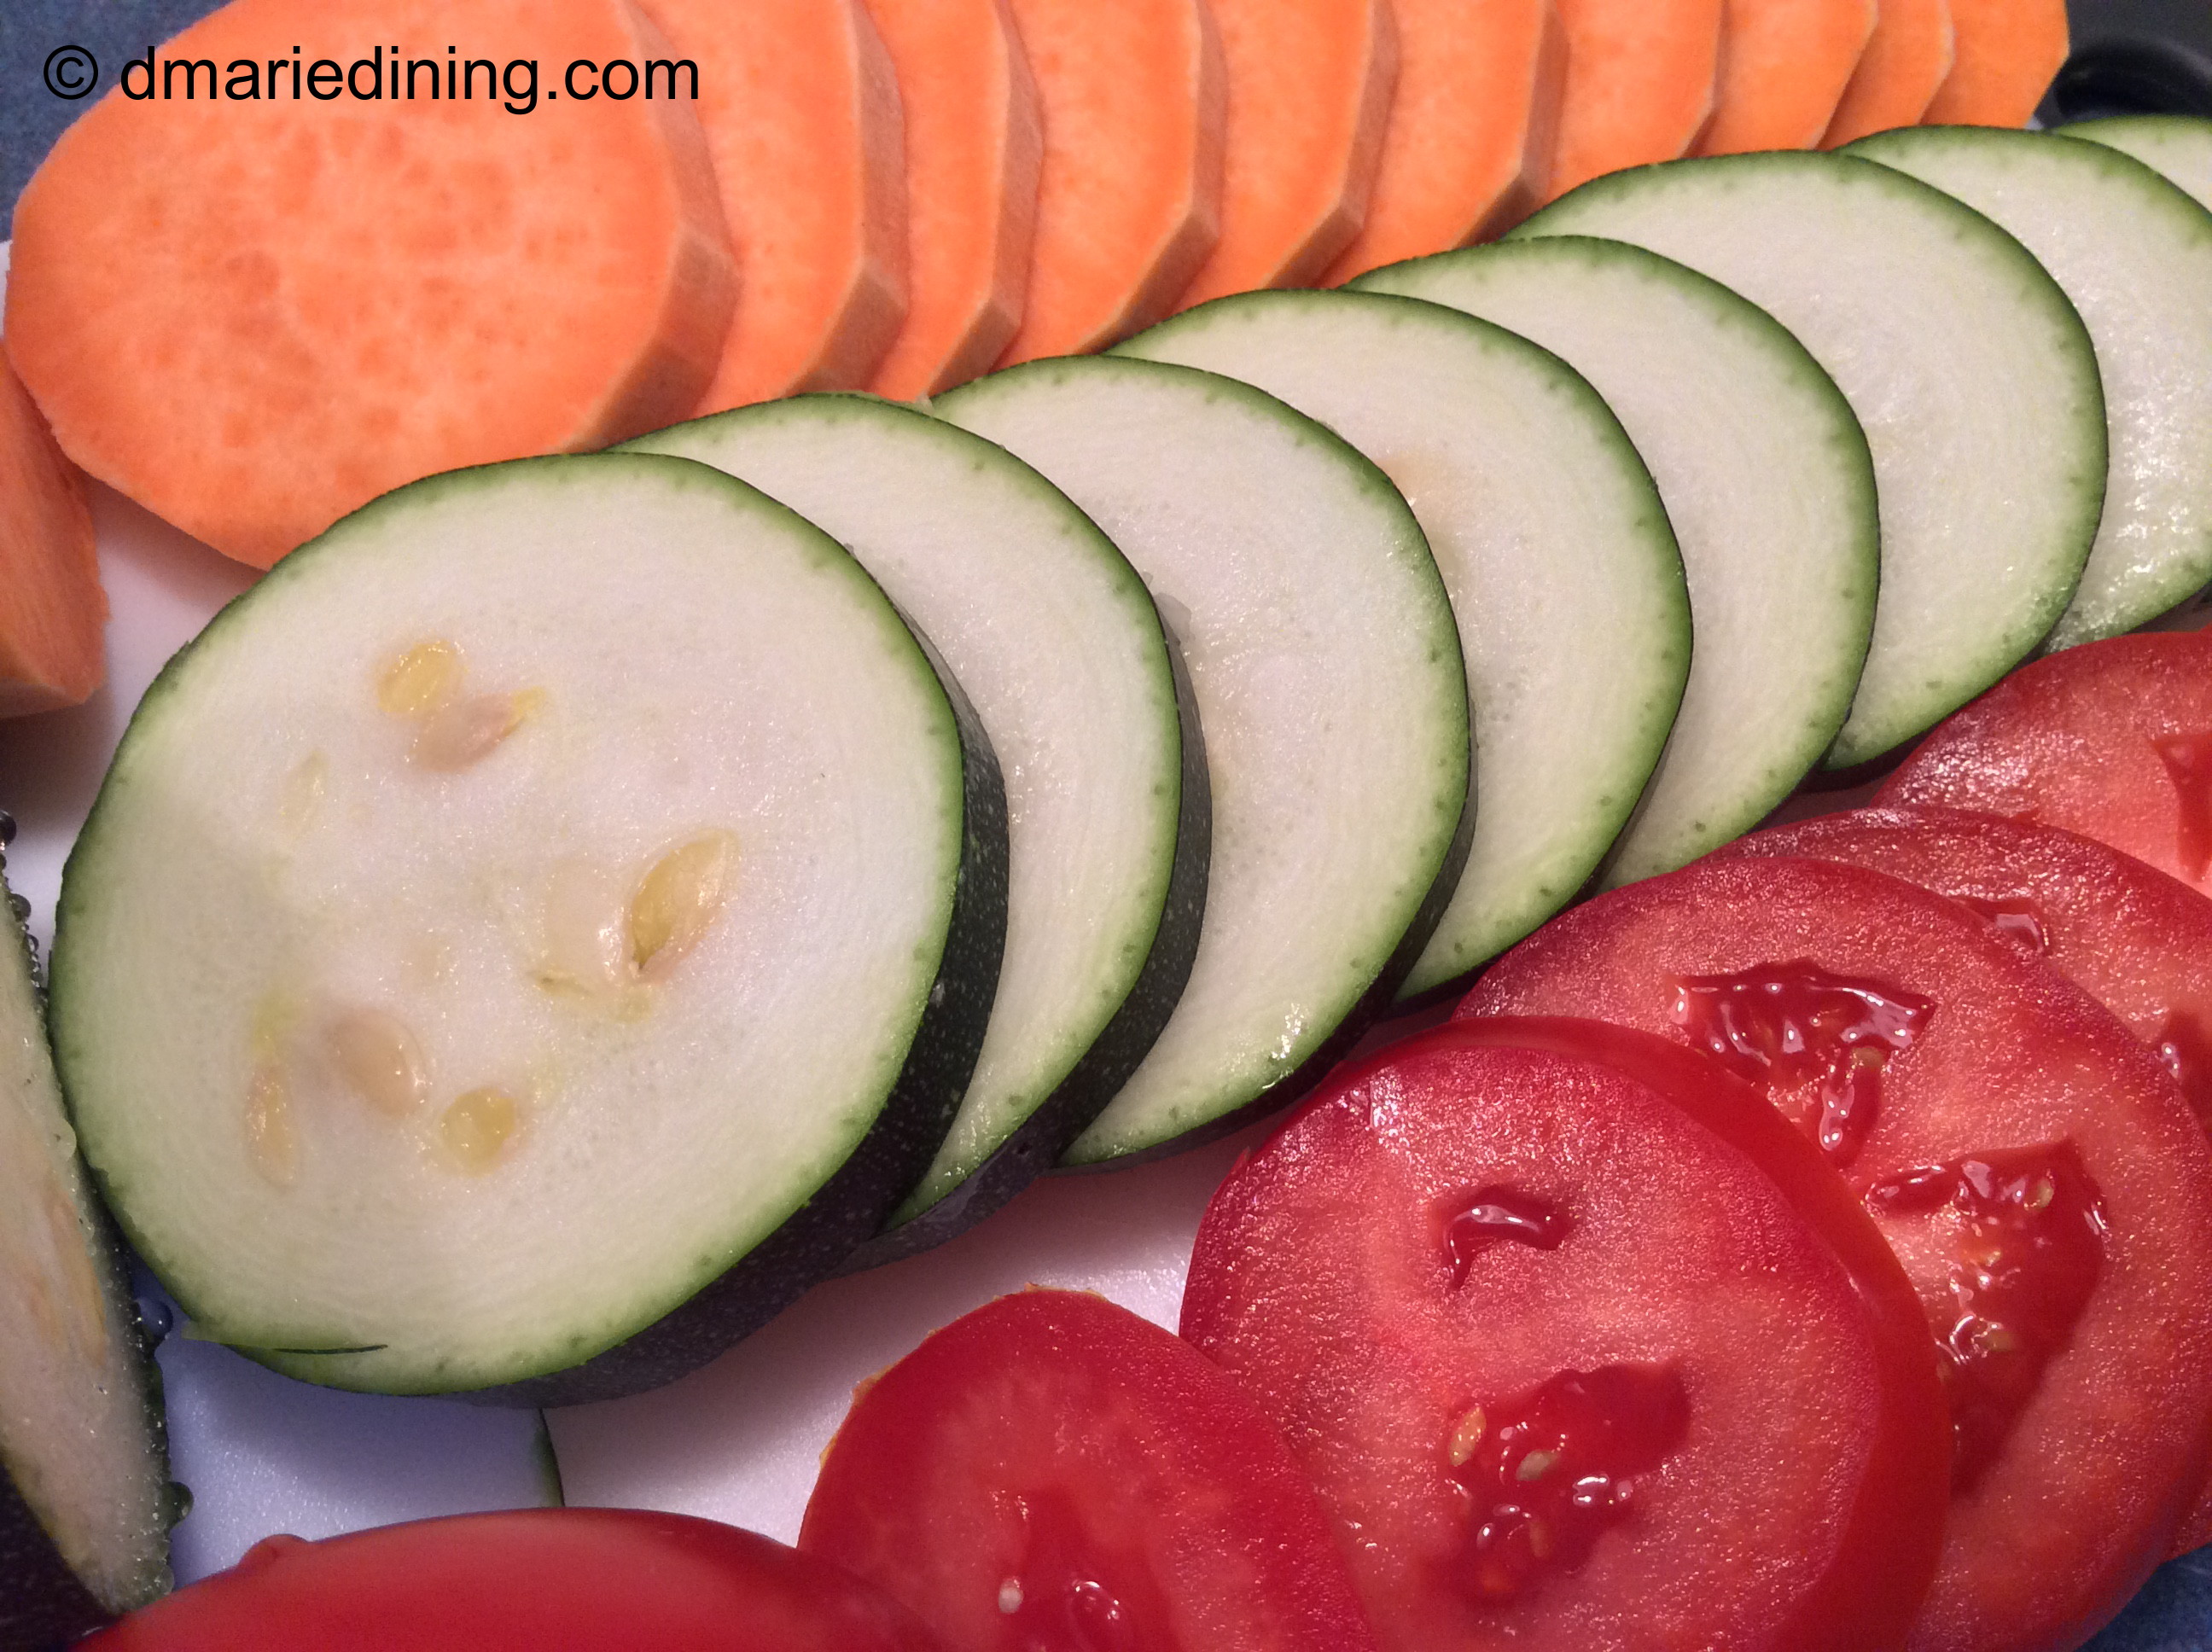
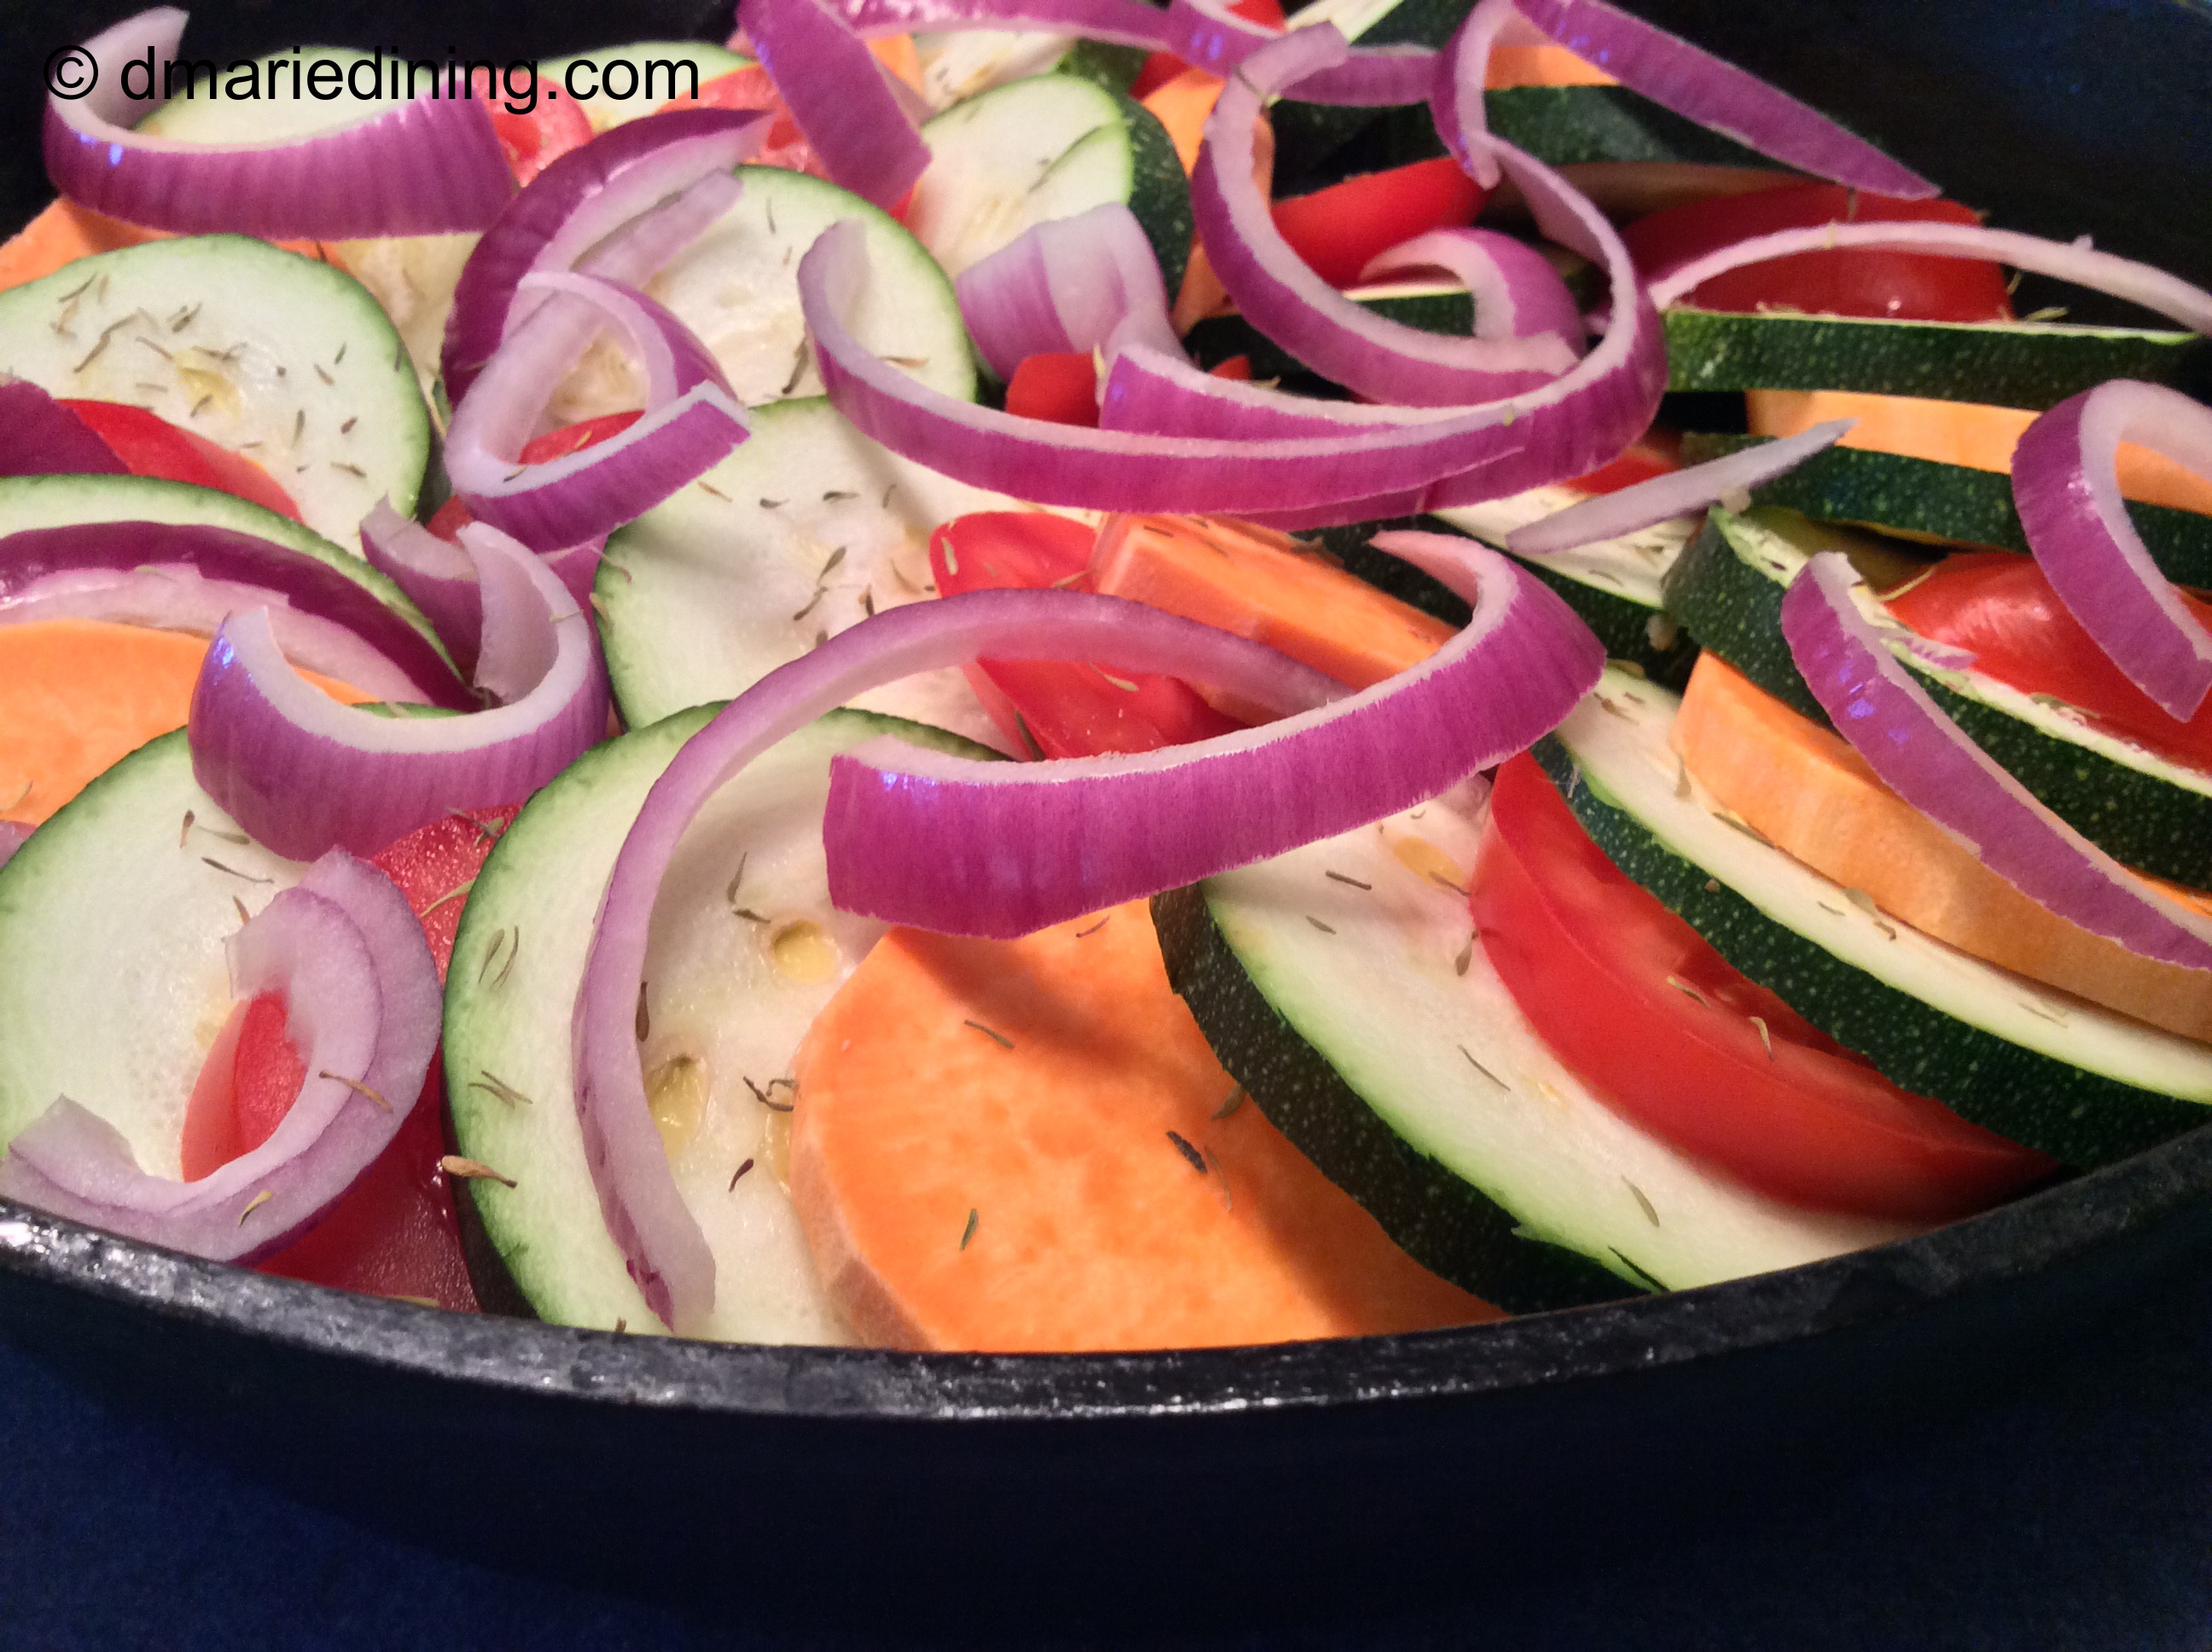
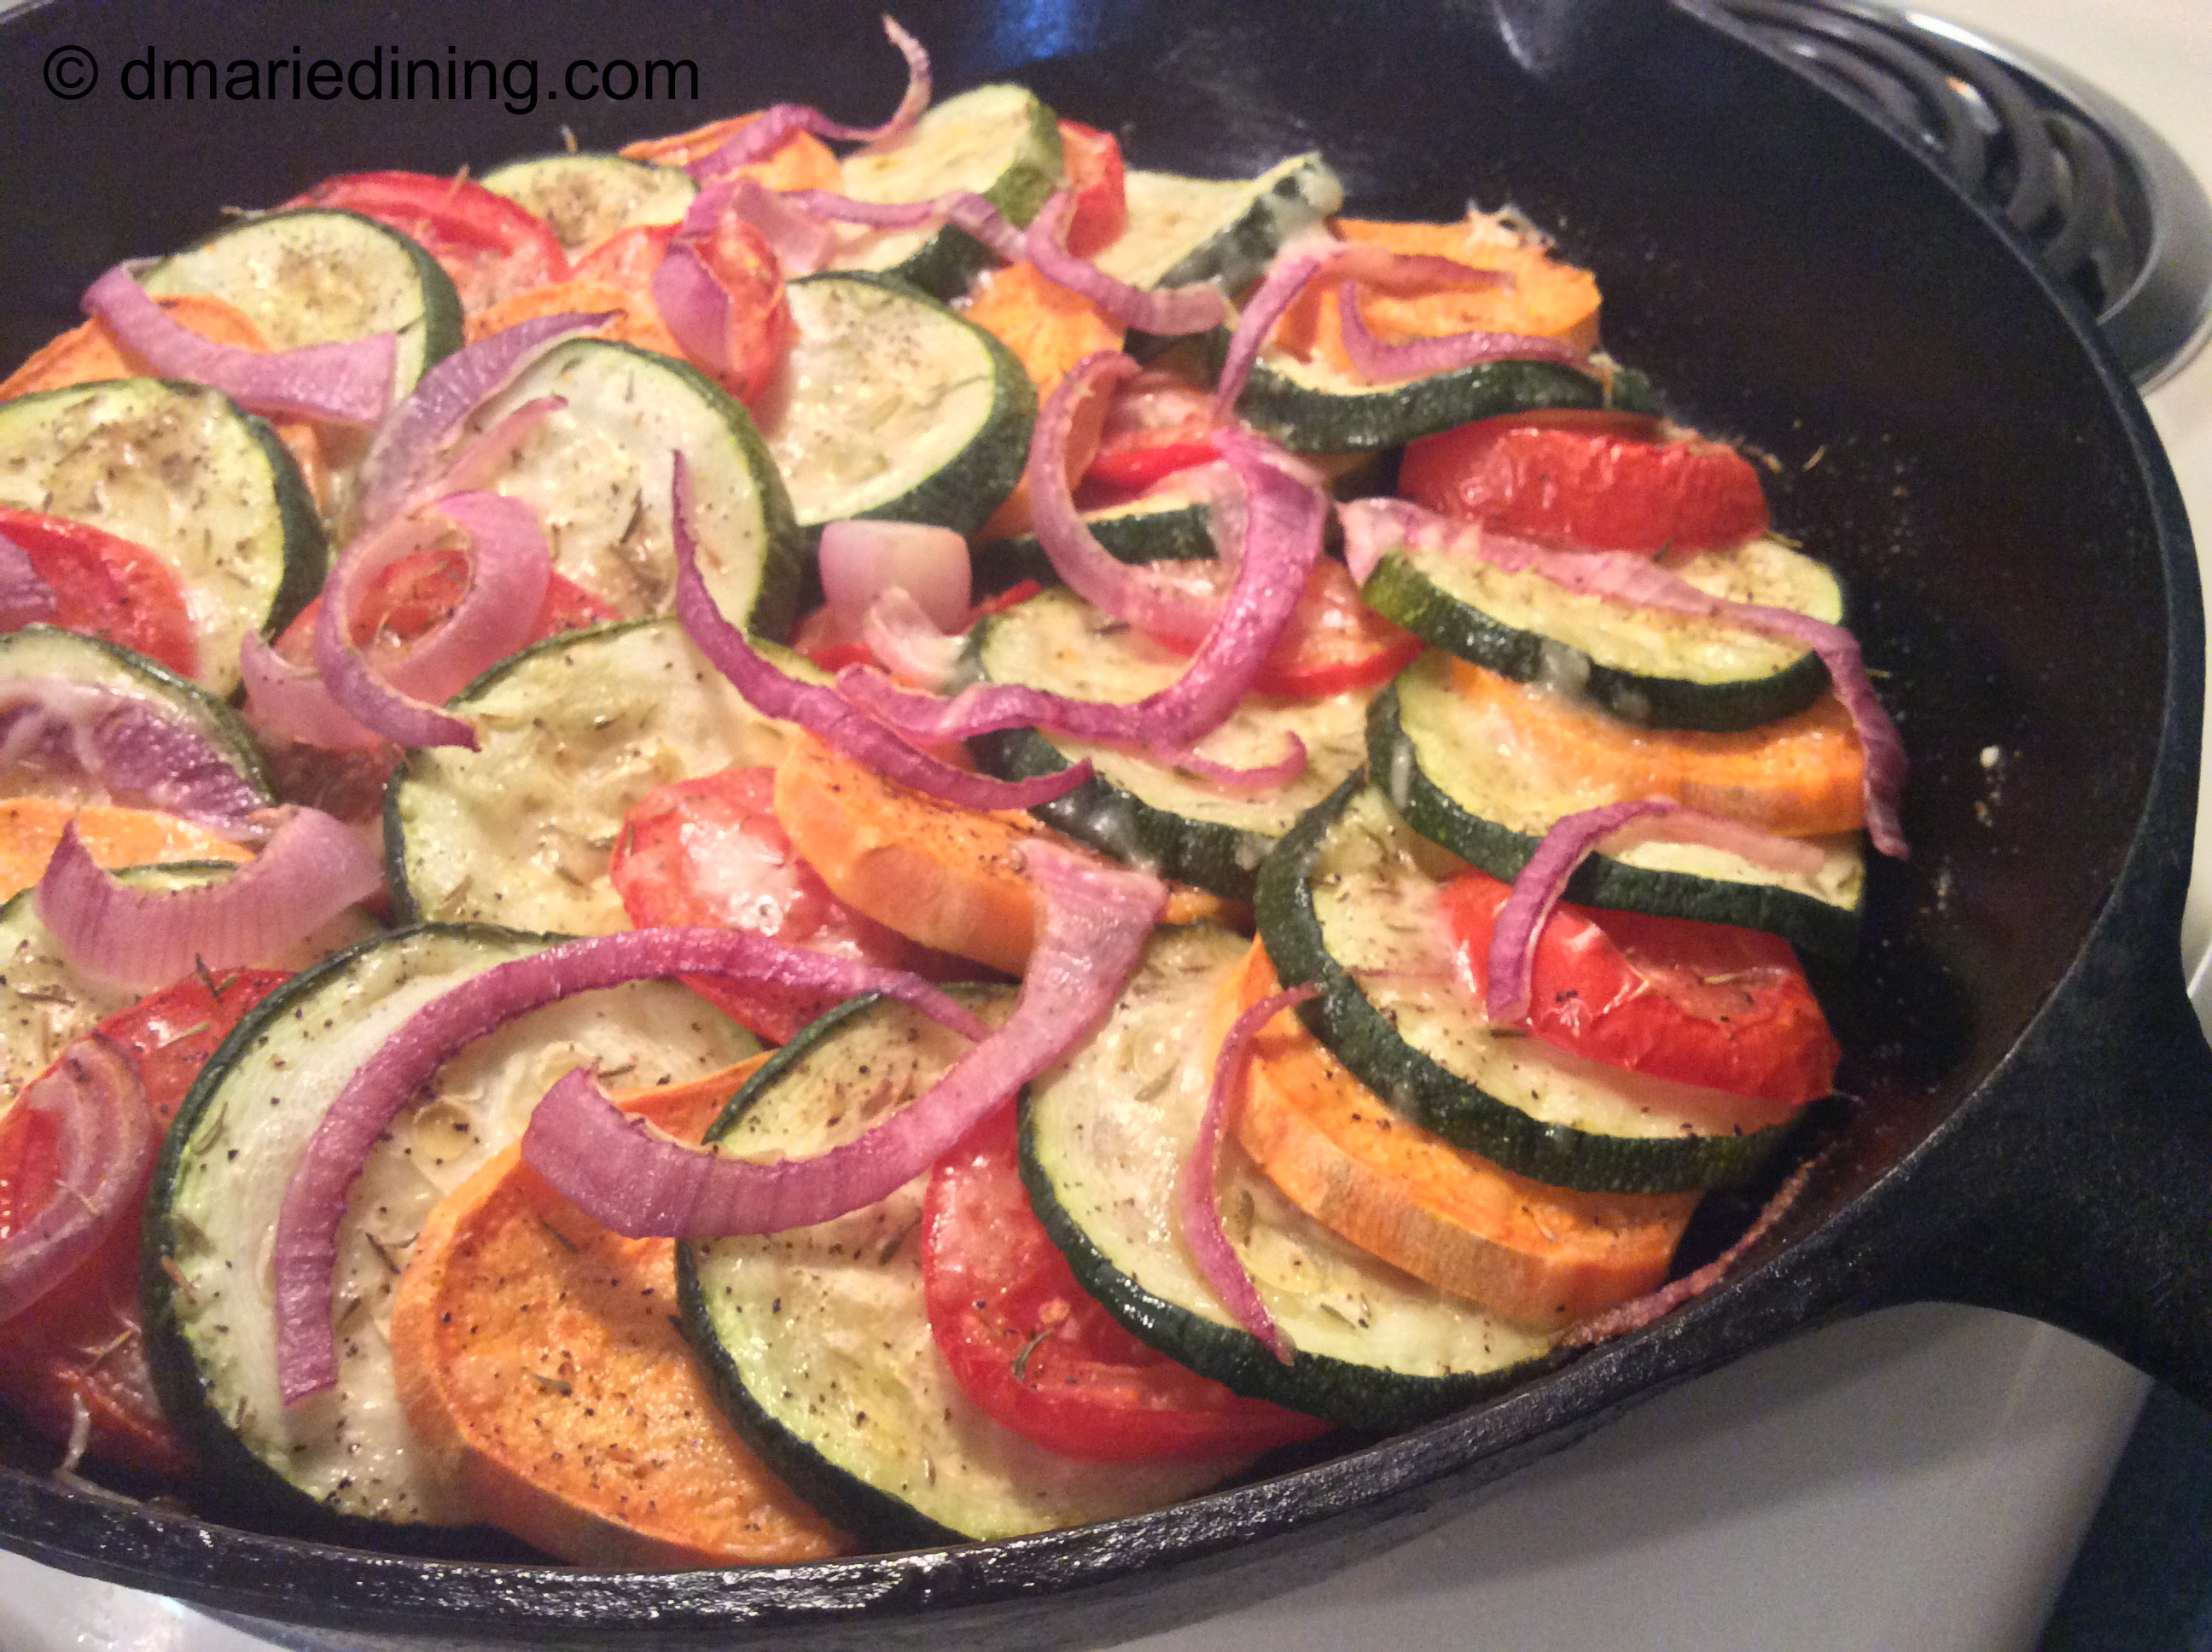
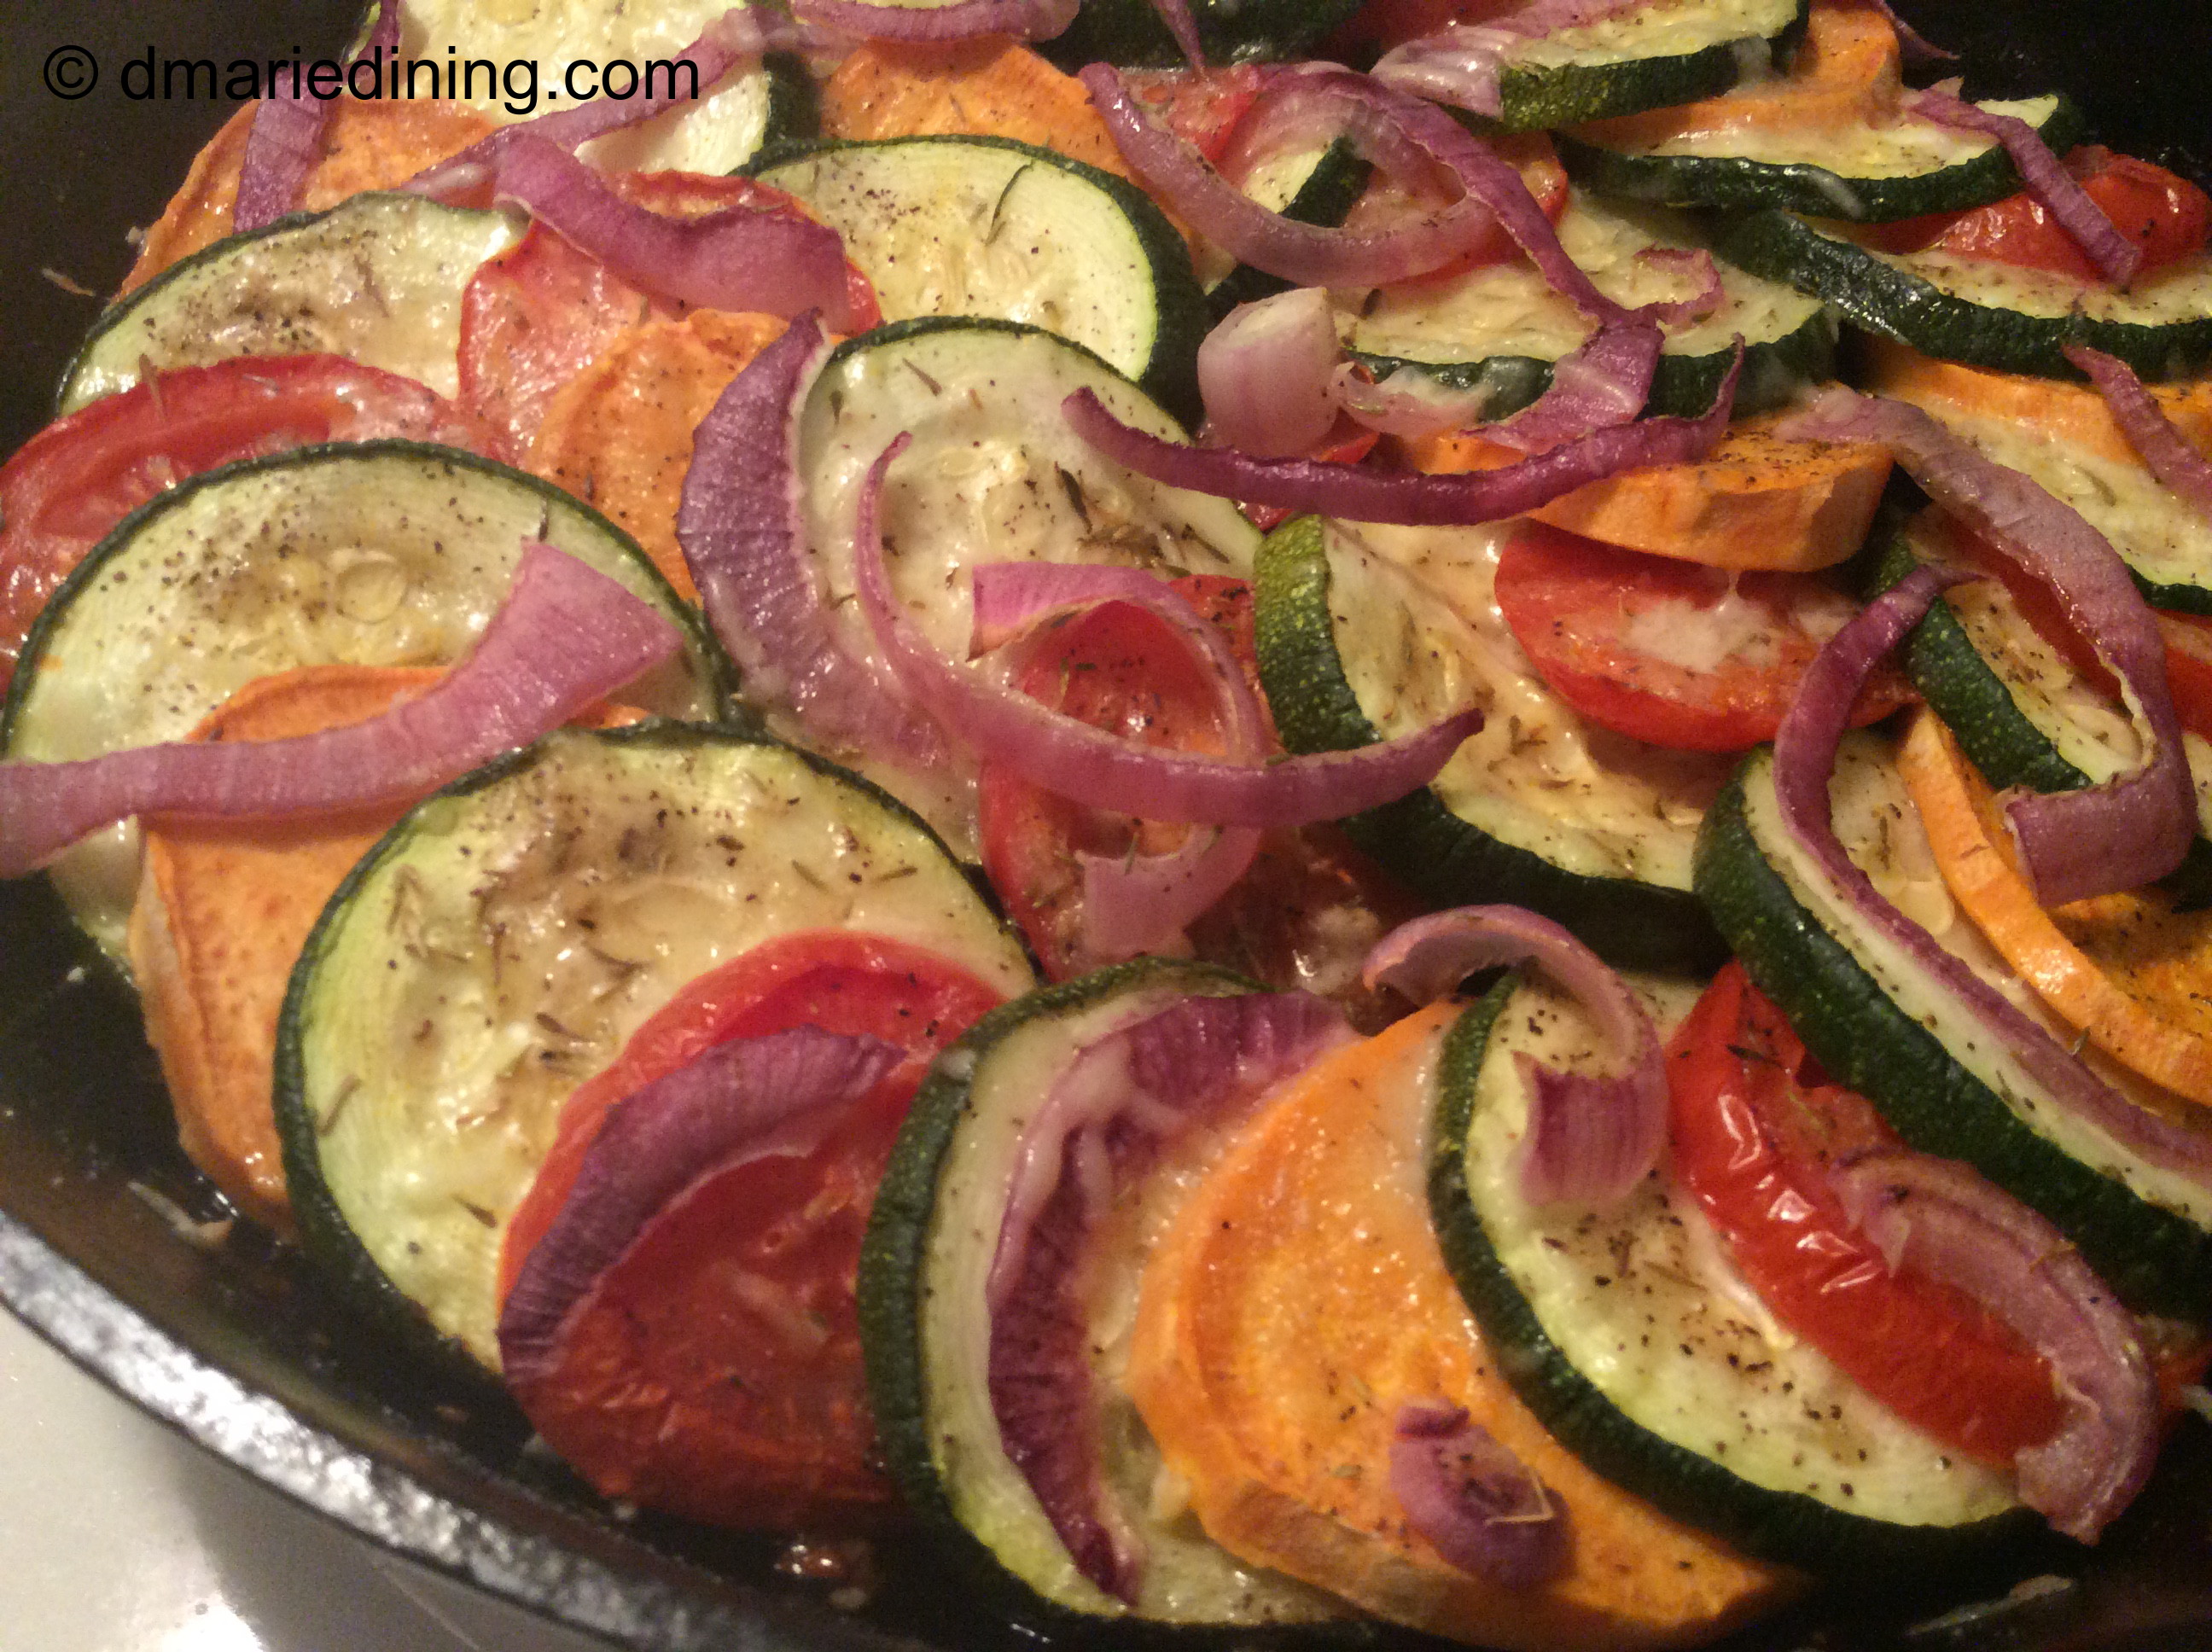
Eating with your eyes is just as important as tasting with your tongue. I know I have mentioned this in the past but it is worth mentioning again. If you are going to prepare a dish for family, friends or yourself, you want it to look appealing. Combining different colors is an easy way to create visual beauty with food. This recipe is a nice blend of green, red and orange. Layering the vegetables in a circular pattern also made this a very attractive dish.

Gratins originated in French cuisine and has been adopted in many other culinary cuisines. I wasn’t sure exactly what gratin was until I saw one made on a cooking show. On this particular show the chef made potato au gratin which was gorgeous because of the crispy brown topping. Turns out a gratin is considered the technique of topping a dish with breadcrumbs or grated cheese then browning it.

While most of the gratin recipes I have seen are made with sliced white potatoes I wanted to think outside the box and combine potatoes with other vegetables. Plus, I wanted to make the dish pop with color. Hence, my Zucchini, Tomato and Sweet Potato Gratin. A ring of beauty and a delightful dish.

Zucchini, Tomato and Sweet Potato Gratin

Ingredients:

2 plum or vine ripe tomatoes sliced

1 large zucchini sliced

1 large sweet potato peeled and sliced

½ red onion sliced

½ cup shredded Parmesan or mozzarella cheese

2 tbsp olive oil

2 tbsp minced garlic

1 tbsp salt

½ tbsp ground black pepper

½ tsp dried thyme

Preheat oven to 375 degrees.

Coat bottom of a large iron skillet with 1 tbsp olive oil.  Add minced garlic and spread around the skillet. Alternate slices of zucchini, tomatoes, and sweet potatoes in a circular pattern around the iron skillet. Place red onion slices over the other veggies then season with salt, ground black pepper and thyme. Drizzle with remaining olive oil and sprinkle with shredded cheese. Place on the lower shelf of the oven and bake for 35 minutes. Move to top rack and back for 20 – 25 minutes more. Test potatoes with a knife to make sure they are cooked and soft.


Follow my blog with Bloglovin

Advertisement

Asian Bowl with Lollipop Lamb Chops

Recently, I received a wonderful surprise in the mail. New bottles of Gazebo Room Salad Dressing and Marinade. I immediately started thinking about the kinds of recipes I could create that incorporated the dressings. I didn’t want to just use them as a dressing on top of one of my regular salads. I wanted something new and exciting!

Bingo! I finally decided to make an Asian Bowl with Lollipop Lamb Chops. I topped the Asian bowl with Gazebo Room Asian Vinaigrette Salad Dressing and Marinade. Yes, that is a mouthful to say and a delicious mouthful to taste. If you like tangy salad dressings, I think you will like this Asian dressing. I just would not put a lot of this dressing on a salad. A little goes a long way with this dressing because it is so flavorful.

Now back to my Asian Bowl with Lollipop Lamb Chops. In my mind, this is a very simple dish to make and the Asian bowl is both colorful and nutritious. I kept it simple by combining just a few veggies, thin lo mein noodles and of course the lamb chops. I have to admit I developed this recipe based on the lamb chops. As I usually do on the weekends, I was perusing the meat aisle looking for something other than chicken. Remember, I have nothing against chicken. We just eat it often so I try to break up the week with another meat if possible so that we don’t grow feathers. I spied a lone package of lollipop lamb chops among the packages of bigger lamb chops and grabbed them before anyone else could. It is rare for me to find these little jewels so I was quite happy with this trip to the grocery store.

When I pulled the recipe together I wasn’t totally convinced hubby would be on board since I had never prepared a “bowl”. I wasn’t even sure he had heard of an Asian bowl but he surprised me and said “Sure, go for it”, which meant he was on board. Hubby did come into the kitchen a couple of times to see what I was doing and guided me on how he wanted me to “create” his bowl. Yeah, let’s just call him my assistant on this recipe. Anyway, we both enjoyed the final product. Hubby really enjoyed it because he ate the whole thing. Normally, he leaves a little food on his plate but not this time. All I saw were two chopsticks and lamb chop bones sitting at the bottom of his bowl. That is what I call a successful dish!

Asian Bowl with Lollipop Lamb Chops

Ingredients:

2 Roma tomatoes diced

2 scallions sliced

2 bunches romaine lettuce shredded or small Napa cabbage shredded

1 package (6 – 8) lollipop lamb chops

1 package thin lo mein noodles

1 small can water chestnuts drained

1 cup snow peas

1 cup shredded carrots

¼ cup crispy rice noodles

¼ cup Gazebo Room Asian Vinaigrette Salad Dressing and Marinade

2 tbsp olive oil

1 tbsp minced fresh ginger

1 tbsp Worcestershire sauce

1 tbsp salt

½ tbsp black pepper

paprika

Season lamb chops with Worcestershire sauce, salt, black pepper and paprika. Set aside.

Heat olive oil in a medium sized frying pan over medium high heat. Brown lamb chops on both sides approximately 3 – 5 minutes on each side. Remove from pan and place on paper towels to drain.

Add snow peas, carrots and scallions to frying pan and saute until slightly softened but still has some crispness. Remove from the pan and set aside.

Build Salad:

Place lettuce in the bottom of the bowl. Arrange veggies around the bowl. Add lo mein noodles, water chestnuts and diced tomatoes. Place three lamb chops on one side of the bowl. Drizzle with dressing then sprinkle with rice noodles.

Enjoy!


Follow my blog with Bloglovin

Louisiana Style Soup

During the summer months I often have a taste for gumbo or jambalaya but those dishes can be a little heavy. So, to compensate and satisfy my taste buds, I will make a Louisiana Style Soup in warmer weather. This soup is much lighter than gumbo or jambalaya but it has similar flavors.

Creole food is the soul food of the south mid-west. Creole cooking is a blend of French, Spanish, Caribbean, West African, Portuguese and several other country cuisines. While Cajun dishes originate from a style of cooking by French speaking Acadians that were exiled to Louisiana. (a partial history lesson). Many people think there is no difference between Creole and Cajun foods but there really is a difference. The biggest difference is that Creole cuisines use tomatoes in most dishes while Cajun cuisines do not. Another difference is how each prepares a roux or thickening for dishes like jambalaya. A Creole roux is made with butter and flour while a Cajun roux is made with oil and flour. It may not sound like a big difference but it is when you are talking about flavors.

One more interesting tidbit about Creole vs. Cajun dishes is that Creole cooking is considered “city” food while Cajun cooking is considered “country” food. Hmmm… that may explain why hubby really likes Creole cooking while I enjoy Cajun foods. He is more of a city boy who loves tomatoes while I am a country girl at heart who just loves food.

Louisiana Style Soup

Ingredients:

1 pkg spicy ground sausage

1 cup frozen okra

1 cup frozen baby lima beans

1 cup corn cut off the cob or frozen corn

1 can fire roasted diced tomatoes

2 scallions diced

1 celery stalk diced

1 small green pepper diced

1 small white onion diced

2 cups chicken broth

2 cups water

1 tbsp tomato paste

1 tbsp butter

1 tbsp salt

1 tsp ground black pepper

1 tsp ground ginger

Brown spicy ground sausage in a large pot over medium heat. Remove from pot and drain on paper towels. Add butter to the pan along with green pepper, celery and onion. Season with salt and black pepper then saute for a few minutes until vegetables soften.

Add remaining ingredients to the pot along with sausage. Stir to blend then reduce heat and let simmer for 30 to 45 minutes. Serve with rice or top with garlic croutons.

Follow my blog with Bloglovin

Lobster Pasta

Sweet, sweet lobster meat! I have yet to meet anyone that has tried lobster and does not fall in love with it. Unless you are allergic to shellfish, I think that once you try lobster you are hooked. Whether you dip it in melted butter and lemon juice or create a Lobster Pasta I know you will enjoy a meal made with lobster.

Okay, I can hear the rumblings already about how expensive lobster can be. That is true. Lobsters can be expensive which is why I am always on the look out for lobster tail sales. Most of the meat is in the tail anyway so who needs the whole lobster. I would only buy a whole lobster if it were on sale and if I wanted to make a flavorful seafood stock with the shell. Lobster tails, of course, can still be pricey depending on the size but much less expensive than a whole lobster. If you find lobster tails on sale, pick up a few and freeze what you don’t need to use for a recipe. They really do freeze well.

Now back to my Lobster Pasta. I started out thinking about making a lobster pasta salad but got side tracked and landed on making Lobster Pasta. Maybe because I have seen so many Olive Garden commercials lately showing creamy pasta dishes with splashes of seafood. Or, it could be the fact that my family loves pasta and it is the easiest way for me to get them to try out new recipes. Since they love seafood and they love pasta I just put the two together.

I probably shouldn’t tell this story but I don’t think hubby will know. When hubby and I first got married I thought I would make a special lobster anniversary dinner. I found a couple of nice sized whole lobsters on sale at the fishmonger and although I had never cooked a live lobster I was game to try. I wasn’t sure if they would make noise like crabs do when you put them in hot water but since they had little rubber bands on the claws I figured they wouldn’t be too wild in the pot. I was able to cook the lobster without any trouble and made a beautiful salad, another side dish and a lemon butter dipping sauce. I placed the whole lobster on a plate with the rest of the meal to create a delightful presentation to hubby. Because it was our anniversary I decided to take dinner to hubby with a big smile on face. As soon as he saw the lobster on the plate he had a little freakout. The beady eyes, the long antenna and big head was too much for him. Hubby said there was no way he could eat the lobster looking at all of that. So, I had to take the lobster into the kitchen and broke it down to a tail and two claws. Needless to say, this is another reason why I only buy lobster tails and not whole lobsters. I don’t want to freak out hubby!

Lobster Pasta

Ingredients:

4 cooked lobster tails sliced

2 plum tomatoes cut into cubes

1 box vermicelli pasta

4 cups water

1 cup broccoli florets

1 cup seafood stock or chicken stock

2 tbsp butter

2 tbsp flour

1 tbsp lemon zest

1 tbsp sour cream

2 tsp salt

1 tsp ground black pepper

1 tsp chopped parsley

juice of ½ lemon

Prepare pasta according to package. Toss with a little olive oil and set aside.

Bring 4 cups of water to a boil with 1 tsp of salt. Add broccoli florets to boiling water for 3 minutes. Remove broccoli from boiling water and plunge into ice cold water (okay to add ice to the water) for 2 – 3 minutes. Drain and set aside.

Melt butter in a large no-stick skillet and add flour. Whisk until smooth then add stock. Continue to whisk until sauce begins to thicken. Add sour cream and whisk until blended. Add pasta, lobster, broccoli and remaining ingredients. Gently toss until lobster and broccoli are well incorporated with the pasta. Service with crusty garlic bread.

Simple Slaw

With the warm weather rolling in to say for a while, I thought it was time for me to create a few light dishes for the blog. Simple Slaw is just that …. simple. No fuss. No cooking over a hot stove. This recipe is as I said, just simple to prepare.

Summertime is my second favorite time of the year. My favorite time of year is fall because I love wearing sweaters and fall weather allows me to do that. Summertime, is the other favorite because I don’t have to wear a coat and I can wear sandals instead of shoes. I am a southern girl at heart so wearing shoes is the last thing I want to do in the summer. Plus, summertime forces me to paint my toenails to add that cute factor to the sandals. In the winter, what’s the point of painting your toenails if nobody can see how cute they are. Some may say “well why not paint them for hubby”? To that I say, he barely sees my toes in the house since we all wear socks to walk on the hardwood floors. Besides, winter is cold and you need to wear socks. But, I digress. Back to summertime and recipes.

Simple Slaw pairs well with just about any entree. I have prepared it with steak and potatoes as well as with hot dogs and baked beans. I think this would be a great dish to take to a picnic or barbeque because it travels well. There is no concern about mayo in the dressing so the slaw will keep much longer if sitting out. I know I have said this on a few occasions and I will say it again, colorful dishes are important to me. Besides the wonderful smell of food, the appearance of food helps to make a meal taste delicious. We first eat with our eyes then with our tongues. So the beautiful bright orange of the carrots and the deep purple of the cabbage will entice you to want to dig in. Go on. Try it! I am sure you will enjoy this light summertime dish.

Simple Slaw

Ingredients:

1 8oz pkg red cabbage shredded

1 8oz pkg carrots shredded

¼ cup golden raisins

½ tsp salt

½ tsp ground black pepper

¼ tsp parsley chopped or dried

¼ tsp cilantro

Dressing:

¼ cup Gazebo Room Greek Salad Dressing and Marinade

1 tbsp olive oil

1 tbsp sour cream

½ tbsp spicy brown mustard

Whisk together dressing ingredients in a small bowl and set aside.

Combine red cabbage, carrots, raisins and seasonings into a large bowl. Pour dressing over slaw and mix well. Cover with plastic wrap and allow flavors to marinate for 30 minutes. Stir again prior to serving.

Follow my blog with Bloglovin

Kicked Up Mussels

The other day I was watching an old episode of the Barefoot Contessa about a seafood salad she was making for a friend and it included mussels. That got me to thinking about an old mussel recipe I had but never really tweaked. Since I needed a new post idea I decided I would work on creating a Kicked Up Mussels recipe.

Both my hubby and I love seafood and besides eating a lot of chicken we eat a lot of fish. Once in a while I will throw together a shrimp or scallop meal if I have the ingredients. That is one of the issues I have in creating new meals during the week. It is too easy to keep using over and over again the same ol’ staples I keep in the pantry. Preparing a special meal takes planning and sometimes calls for an extra trip to the grocery store. Because I work full-time I don’t always have a lot of time to be creative with dinner. However, I have been known to have a burst of creativity now and again if I have not had a tough day at work. The weekends are really the best time for me to test out recipes and take my time to fashion a new recipe or try an old recipe with a new twist.

img_6344_1

Okay, back to the Kicked Up Mussels. I had to search a couple of my old recipe journals to find my mussel recipe and was happy to discover it was a pretty simple one. My original recipe called for beer instead of white wine like most other recipes. I could not remember if this was a good idea or bad idea. But hey, I use beer in a few of my recipes and I have not heard any complaints yet so I guessed it was a good idea. Since I was using beer instead of wine I had to find a nice light beer with a hint of citrus flavors rather than a dark beer which I thought would be heavy. I am not a beer drinker so my apologies to true beer drinkers if I don’t know what I am talking about. I did a little research by perusing the beer isle at a local liquor store with a large variety of beers. I landed on Namaste White which is by Dogfish Head Brewery located in Delaware.

img_6354_1

As a non-beer drinker I must say I enjoyed taking a swig of Namaste White after adding most of it to the mussels. The combination of orange, lemongrass and coriander in the beer along with the brininess of the mussels and aromatic herbs was genius. All right. I may not be a genius but the combination of flavors was genius. I will even go as far as to say my recipe would be welcomed in any 4 star restaurant. The proof is in the pudding. You be the judge and try it out.

Kicked Up Mussels

Ingredients:

2 dozen mussels cleaned

3 plum or tomatoes diced

3 cloves garlic chopped

2 shallots diced

1 jalapeno pepper seeded and diced

1 Namaste White beer

2 tbsp olive oil

1 tbsp parsley

½ tsp thyme

¼ tsp red pepper flakes

pinch of salt

pinch of black pepper

Clean mussels by running them under cold water and gently scrub them if necessary to remove dirt from the shells.  Use a knife to remove the fuzzy beard if present. Arrange mussels in a large skillet. Set aside while sauteing tomatoes.

Place olive oil in a medium sized non-stick skillet over medium high heat. Add garlic shallots, jalapeno pepper and tomatoes. Season with salt, black pepper and thyme. Stir then saute for 2 minutes. Move mussels to heat and pour tomato mixture and beer over mussels. Sprinkle with red pepper flakes and shake to mix tomatoes and mussels. Cover and cook for 3 minutes until mussels pop open. Discard any mussels that do not open. Sprinkle with parsley before serving. Serve with crusty bread to sop up the delicious sauce.

Tip: Cultivated mussels vs. wild mussels. 

If you purchase wild mussels, they may be a little gritty which means your mussels will be crunchy.  To make sure you remove any sand from the mussels dissolve about 1/4 cups of salt and 2 cups of warm in a large pot along with 2 tbsp of flour or cornmeal.  Add the mussels then cover with water.    Soak for 1 – 2 hours.  Drain then rinse the mussels with cold water.  Most mussels you find in the grocery store are cultivated and do not contain a lot of sand or grit so there may not be a need to soak the mussels.  Just clean the shells. To be on the safe side I would soak the mussels as I described.

Follow my blog with Bloglovin

Crostini Delights

img_6195_1

Not too long ago I was watching an episode of the Sandwich King on the Food Network channel and he gave me an idea for a recipe. Granted, his version of a steak crostini was much more high end than mine but I would put my Crostini Delights up against his any day. No Jeff Mauro, that is not a challenge.

img_6207_1

My family is not big on eating beef so making a light dish with a little beef was right up my alley. Crostini Delights can easily be adapted to whatever you like on slices of french bread. Before I made my Crostini Delights for my hubby he only raved about having bruschetta which I layered on thin slices of french bread. Now, he raves about the “Delights”.

img_6217_1

On the Sandwich King, the host flashed fried thin slices of filet mignon and built layers of meat, pesto, rosemary, gorgonzola cheese and sliced cherry tomatoes. Like I said, his version is high end. My version uses deli slices of London broil instead of filet mignon which still has great flavor and is very tender. To make the crostinis my own I paired different ingredients to create a melt in your mouth treat. Put this recipe on the list for your next dinner party as an appetizer and I am sure your guests will be raving about the great taste of the Crostini Delights.

img_6224_1

img_6222_1

Crostini Delights

 Ingredients:

1 thin crusty french bread loaf

½ lb deli sliced London broil

¼ lb sliced provolone cheese

2 Roma tomatoes sliced then cut in half

½ cup gorgonzola cheese

¼ cup BBQ sauce

basil leaves

olive oil for drizzling

Preheat oven to 350 degrees.

Slice entire french bread loaf at an angle to create bite sized pieces of sliced. Drizzle olive oil over each slice of bread. Place on a cookie sheet and bake for 5-8 minutes until bread is lightly browned. Remove from oven.

While bread is baking, heat 1 tbsp of olive oil in a medium frying pan over medium heat. Pour BBQ sauce around the bottom of the pan then add the slices of London broil. Quickly toss the meat in the warm pan until well coated with sauce. Turn off heat.

Once the bread is lightly browned layer each slice with gorgonzola cheese, London broil, a basil leaf, two pieces of tomato then top with a little provolone cheese. Place back in the oven for a few minutes until the provolone cheese melts. Serve immediately.

Follow my blog with Bloglovin

Skillet Pecan Pie

img_6399_1

It’s time to try out a new dessert on my hubby since my youngest is in college. Hubby has let it be known that he enjoys Pecan Pie. That was news to me because he usually raves about my mom’s apple pie and sometimes carrot cake. I learned through some prodding that hubby was first introduced to pecan pie at a restaurant he worked at as a teenager. It was a buffet style restaurant and pies that were not sold were often given to the employees to take home. Sweet Deal! Pun intended.

img_6404_1

Personally, I was never a big fan of pecan pie until now. I usually go for fruity pies like cherry, blueberry or my mom’s sweet potato pie. The one time I tried pecan pie as a kid I thought it was way too sweet. I blamed it on the pie but maybe it was just what the baker liked. Skillet Pecan Pie is not too sweet. Granted it is sweet but your lips will not pucker and your eyes won’t twitch from taking a bite of the pie.

img_6419_1

My Skillet Pecan Pie is similar to how I made my Skillet Apple Pie. The filling is of course different along with part of the process. After baking the pie, I leave it in the oven for an hour to help it set. I would never have known that part of the process if I had not read several pecan pie recipes to figure out exactly how to pull it all together.

img_6439_1

I was pretty pleased with the end result after a few tweaks here and there. Like any other recipe I share it is up to the chef to prepare the dish based on his or her likes and dislikes. I was just glad hubby gave me a thumbs up. Once he settled down with a slice of pie, his cup of Starbucks coffee and a big smile on his face I knew my Skillet Pecan Pie was blog worthy.

img_6583_1

img_6591_1

Skillet Pecan Pie

Ingredients:

1 Pillsbury Pie Crust

4 eggs

1 ½ cups chopped pecan halves

1 cup light brown sugar

½ cup melted butter

¼ cup pecan halves

2 tbsp flour

2 tbsp milk

1 tbsp powdered sugar

1 tsp vanilla

Preheat oven to 350 degrees.

Whisk eggs until foamy then whisk in brown sugar, butter, flour, milk and vanilla until well blended. Stir in chopped pecans and set aside.

Spray a medium sized cast iron skillet with cooking spray.  Mold pie crust into skillet leaving a little over hang. Sprinkle crust with powdered sugar. Pour filling into pie crust. Top with pecan halves then gently fold the extra crust towards the center of the pie. Place on a cookie sheet and place in the oven. Bake for 30 minutes then reduce temperature to 300 degrees and bake 30 minutes more. Crust will be golden brown. Turn oven off and leave the pie in the oven for 1 hour. Serve with ice cream or whipped cream.

Follow my blog with Bloglovin

Pepper Steak

img_6057_1

Today was a non-chicken day since we had just enjoyed a chicken pasta dish and I planned on making chicken again in a couple of days. Only certain folks can eat chicken almost every day but I am not one of them. I do like chicken just not every day. There are times when I think I might grow feathers if I eat one more chicken dish.

img_6066_1

Because it was a non-chicken day and I had run out of ideas I decided to flip through a food magazine to get help with what I could prepare for dinner. Half-way through the magazine I saw a beautiful picture of a Pepper Steak meal and Bingo I knew what we were having for dinner. I had a few red and green peppers that were getting soft and I always have onions on hand. I checked the freezer and I had a package of thinly sliced sirloin petite steaks. One pepper steak dinner coming up!

img_6079_1

Granted, I had not made Pepper Steak in many, many years. I couldn’t even find my original recipe so I had to look up a couple of recipes online. I more or less combined a few of the recipes I found and then added my own twist.

A few tips on how to make a good Pepper Steak.

  1. Be sure to buy thinly sliced steak. Trust me. If you use a thicker slice of steak, the meat will be tough and chewy.

  2. Marinate the steak to make the meat flavorful and tender.

  3. Use ginger in the marinade. The flavor is bold and pairs well with the beef.

img_6107_1

Pepper Steak may become one of my new favorite dishes besides pork chops. I surprised myself with how good this dish was on the first try. I think the next time I prepare the recipe I will add snow peas or pea pods to jazz it up even more. Then again, why mess with a good thing.

img_6116_1

Pepper Steak

Ingredients:

1pkg sirloin petite steak sliced thin. Cut into strips.

4 plum tomatoes cut into chunks

1 red onion cut into chunks

1 lg green pepper cut into chunks

1 lg red pepper cut into chunks

¼ cup beef or chicken stock

Marinade:

¼ cup soy sauce

4 tbsp vegetable oil

2 tbsp sugar

2 tbsp corn starch

½ tbsp Adobo (optional)

½ tsp ground ginger

½ tsp salt

½ tsp black pepper

Mix marinade ingredients in a medium sized bowl. Place steak in marinade and stir to coat meat. Set aside and let stand for 10 – 15 minutes. Reserve any marinade not absorbed by the meat.

Heat vegetable oil in a wok or large skillet over medium high heat. Brown meat in batches. Drain on paper towels and set aside. Once all of the meat is browned, pour off all but 1 tbsp of oil (if necessary, add a little oil). Add onions and peppers to the wok along with seasonings. Stir then cook for 1 – 2 minutes. Add tomatoes, steak, beef stock and any remaining marinade. Stir to mix. Reduce heat to medium and let simmer for 5 – 10minutes stirring occasionally. Serve over rice.

Follow my blog with Bloglovin

White Bean Chicken Soup

img_6018_1

OMGoodness! It is COLD today so what better time to make a big pot of soup. That is exactly what I said to myself on the way to Trader Joe’s to pick up a few items for dinner. I might not have felt so chilled if I had cranked up the heat in the car but that still would not have warmed me on the inside. To make that happen I needed a nice bowl of homemade soup.

img_6029_1

My choice was either chicken noodle soup or a White Bean Chicken soup. I planned to have spaghetti the next day for dinner so chicken noodle soup was out and White Bean Chicken soup was in. Keep in mind I did not have a recipe for White Bean Chicken soup but not having an actual recipe has never stopped me from cooking. So, while strolling the aisles of Trader Joe’s I made up the recipe that would become “the soup”.

img_6034_1

Most soups are pretty easy to make. They are a one pot dish that only needs a little tender love and care and lots of seasoning. Because it was freezing outside I was in the mood for a healthy, hearty soup. I figured the white beans and chicken would make it hearty plus filling with lots of protein while the mirepoix and cabbage would make it healthy. Did I just hear someone say what the heck is mirepoix? Yes, I did. It was my hubby. He asked me this question while I was writing down the recipe when I got home. I was talking out loud to myself trying to remember how to spell mirepoix and hubby asked “What the heck is that?” When I told him it was diced carrots, onions and celery he said “Why don’t you just say that?” My response was I wanted to sound fancy like the chefs on TV. I know. It is always better to keep it simple.

img_6039_1

Simply put, White Bean Chicken Soup is comfort food. Whether it is freezing cold outside or you want a flavorful homemade meal in a bowl, this soup will do the trick.

img_6042_1

White Bean Chicken Soup

 Ingredients:

3 cans cannellini beans rinsed

1pkg sliced pepper chicken

1 container mirepoix (diced onions, celery and carrots)

6 cups low sodium chicken broth

2 cups chopped cabbage

¼ cup heavy cream

1 tbsp salt

1 tbsp olive oil

½ tbsp Adobo

1 tsp thyme

½ tsp garlic powder

1 tsp parsley

1 tsp black pepper

½ tsp lemon pepper

Shred chicken and set aside. Mash ½ cup of white beans (this will help soup to thicken) and set aside with remaining beans.

Heat olive oil in a large pot over medium high heat. Add mirepoix and seasonings to the pot and stir. Allow the vegetables to sweat for 3 – 5 minutes. Pour in chicken broth and add white beans then stir. Reduce heat to medium. Mix a spoonful of broth into the measured heavy cream. Add the mixture to the pot. Stir and let simmer 3 minutes.

Place chicken in the pot and stir. Cook for 20 minutes then add chopped cabbage. Stir to mix in the cabbage. Simmer for an additional 20 minutes until cabbage is softened and cooked through. Serve with crackers or crusty bread.

Follow my blog with Bloglovin