Tag Archives: appetizer

Bruschetta with Roasted Feta Cheese

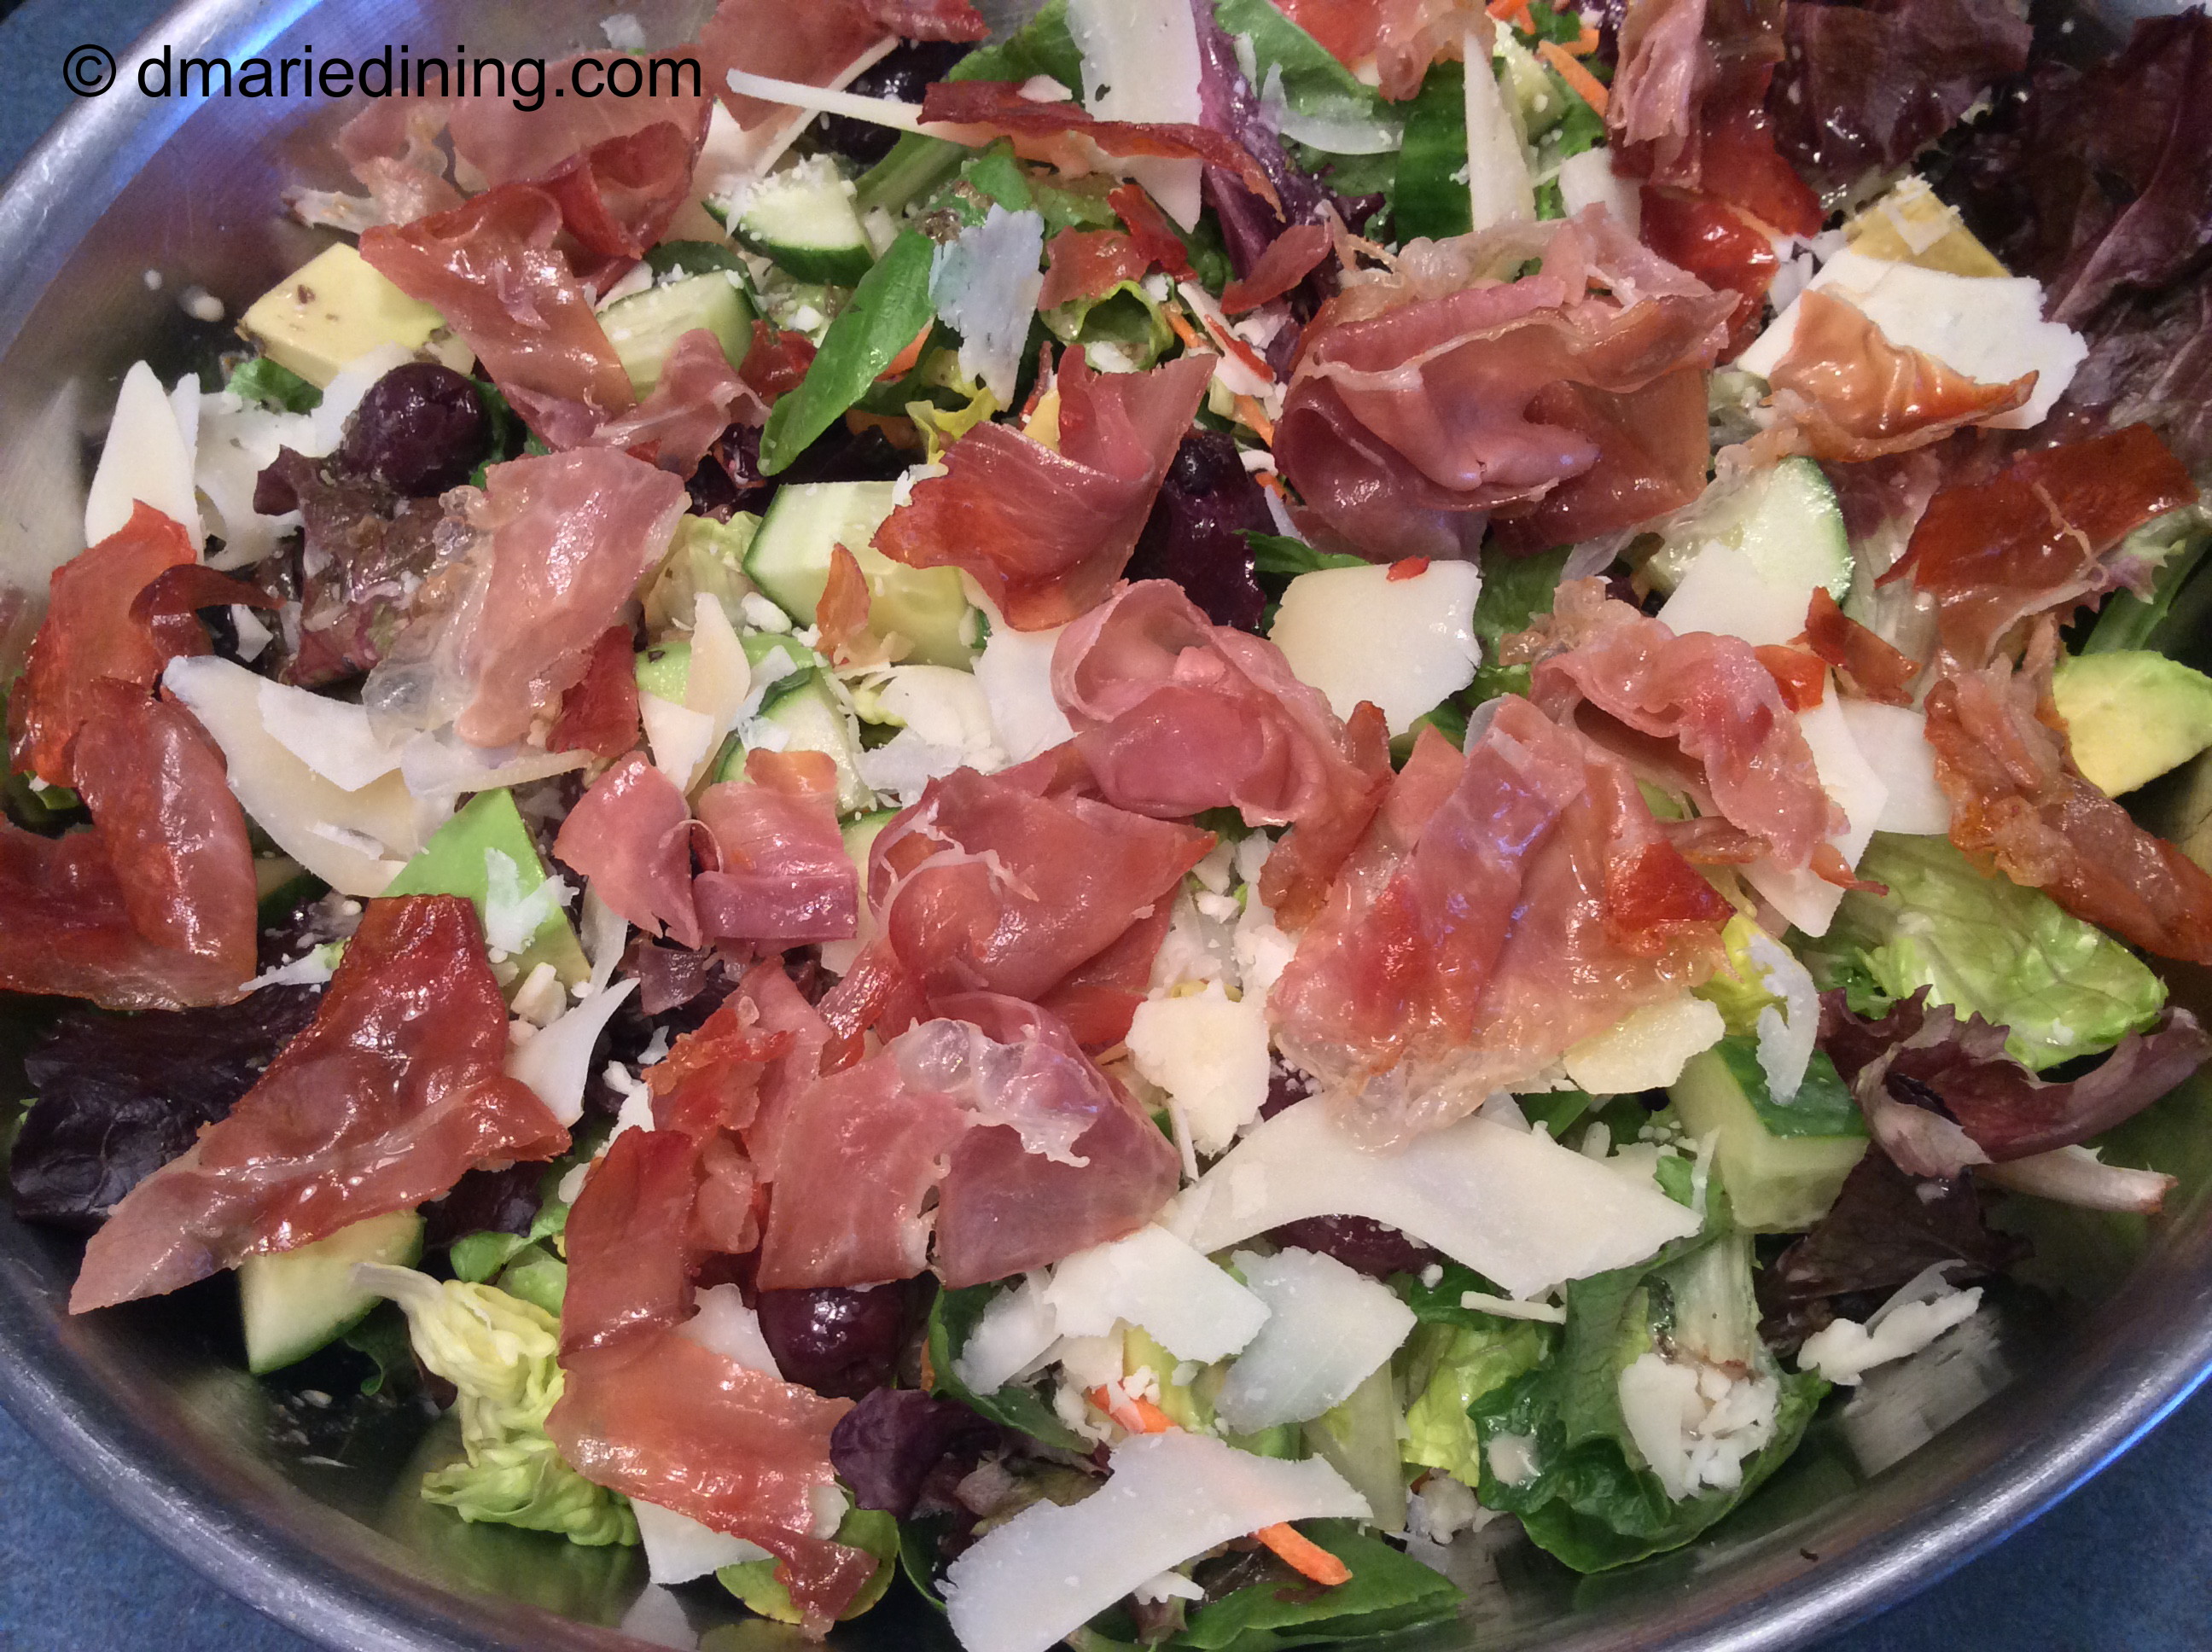
My hubby inspired me to make this recipe. On one of the several occasions I made my Sausage and Pasta with Feta and Tomatoes, he suggested I just serve the roasted feta cheese and tomatoes and let everyone take spoonfuls of it. Of course, his idea did not work with the meal I was preparing at that moment so I tucked his suggestion aside to try sometime later.

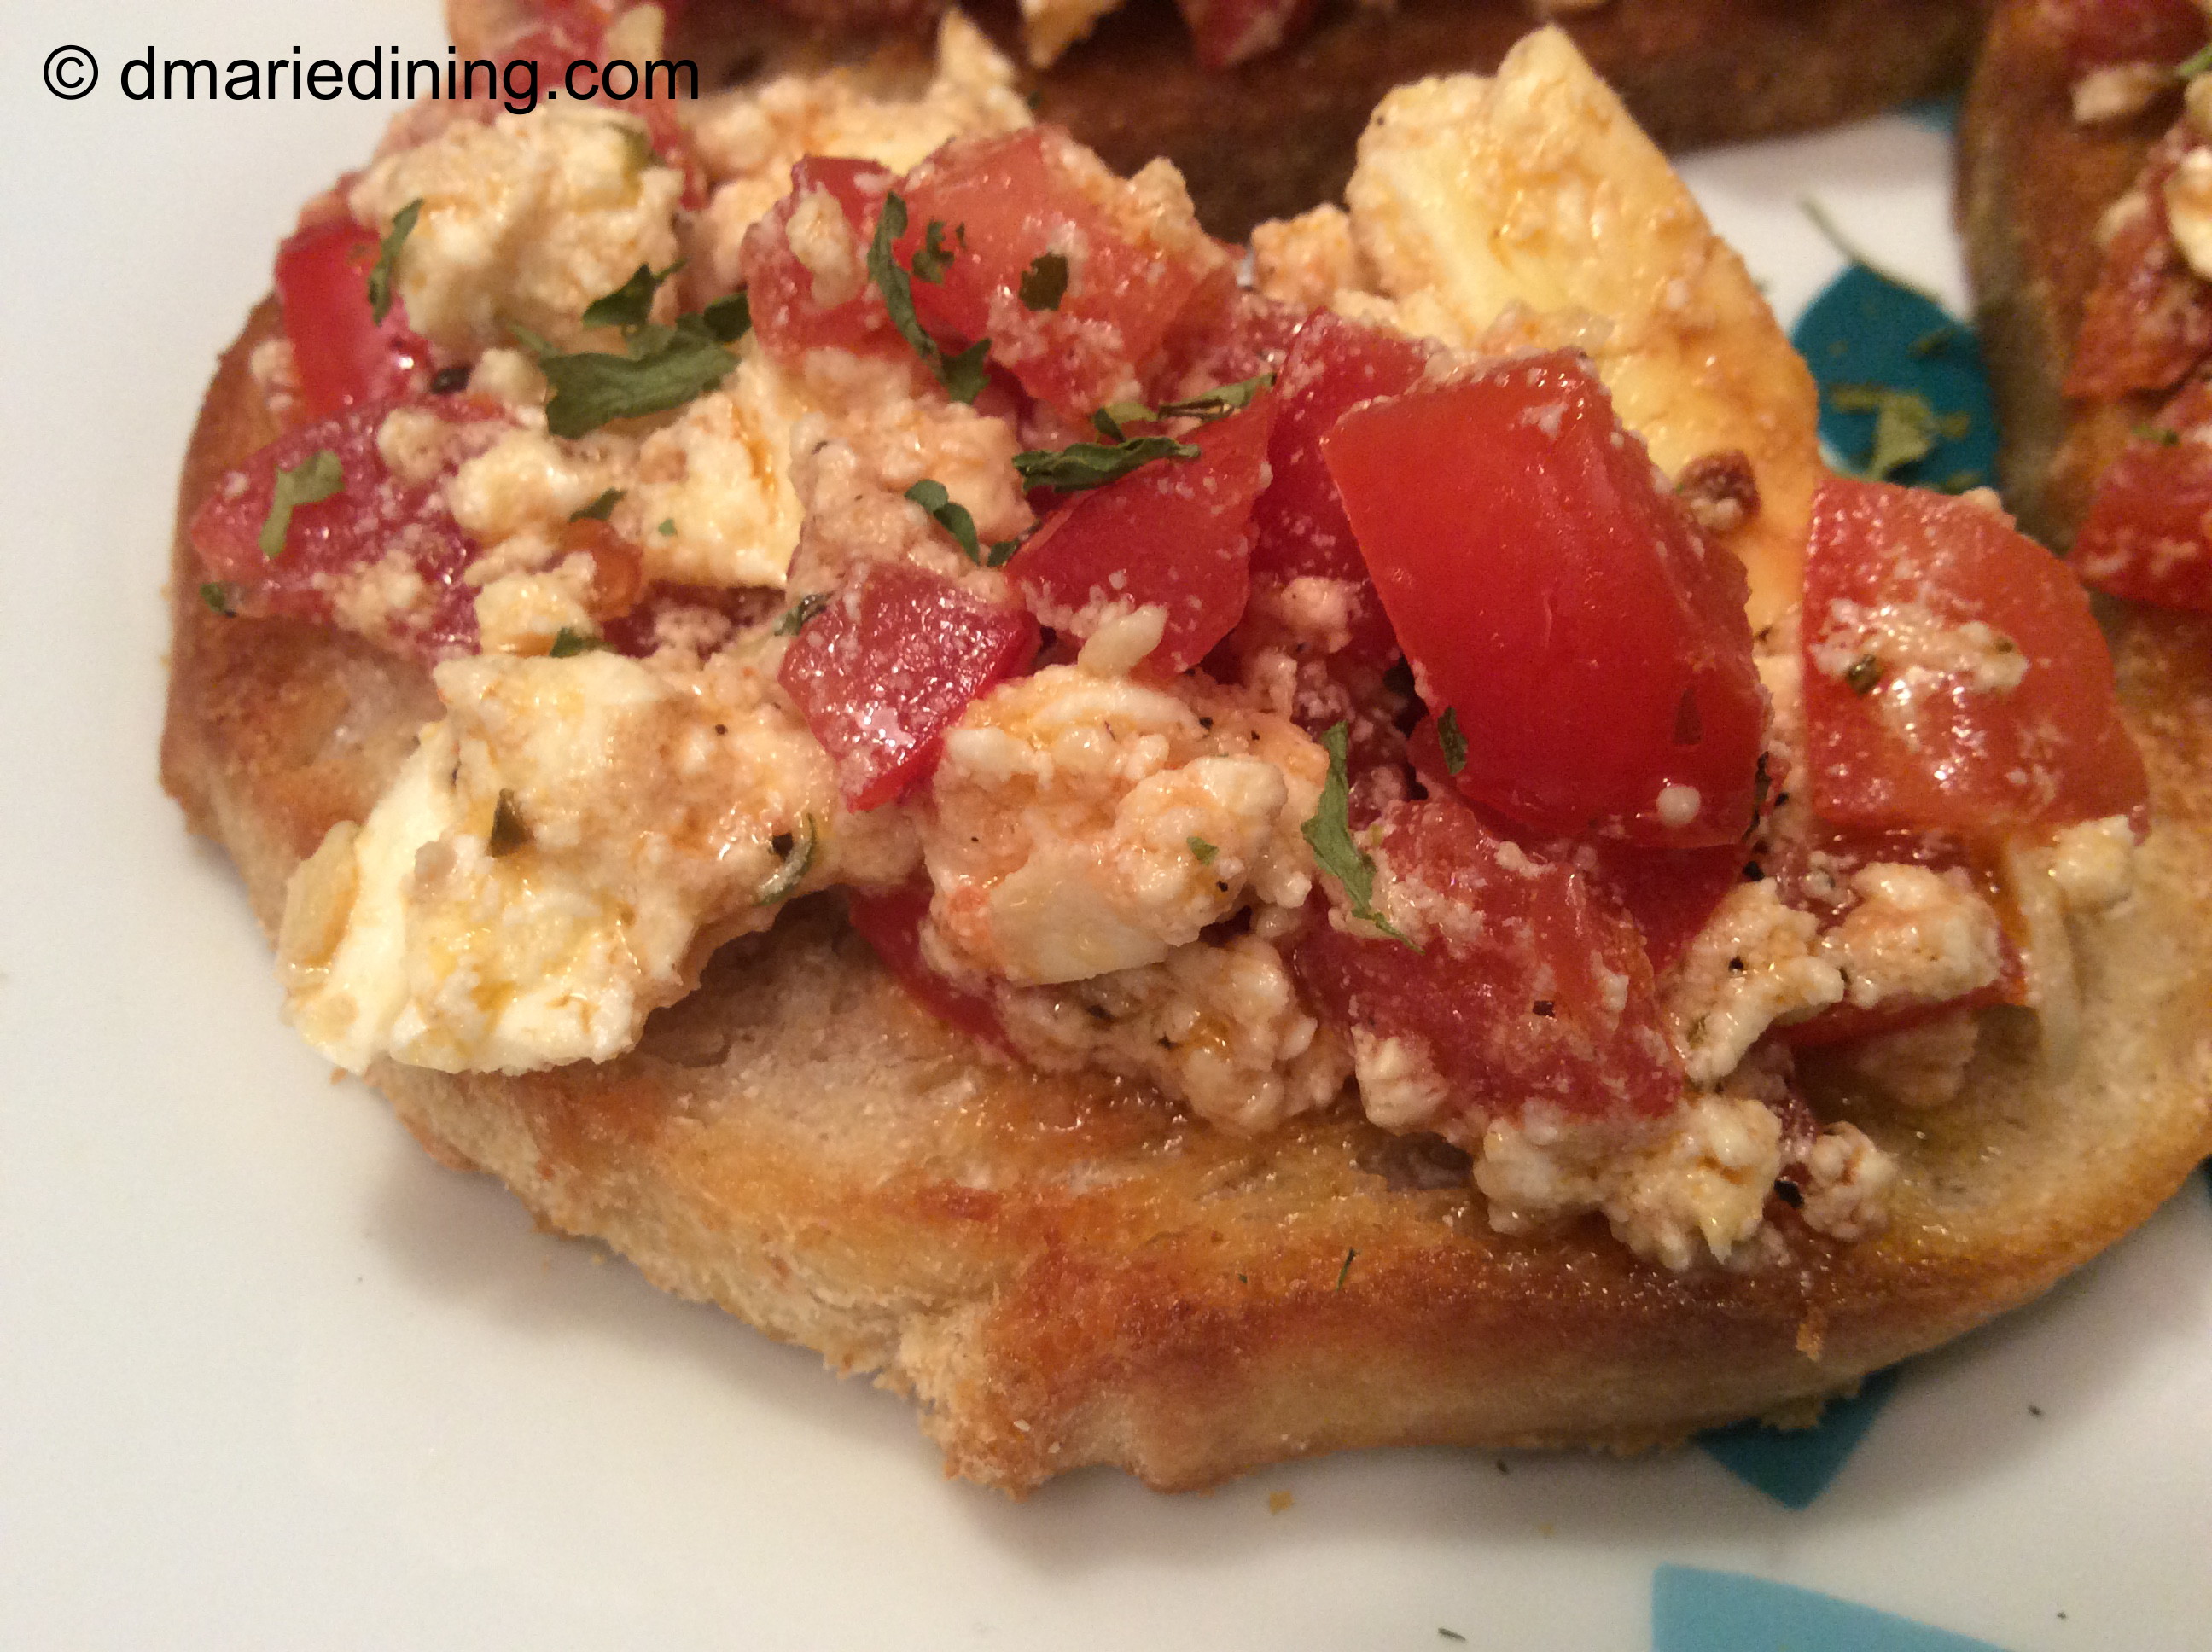
Well, later is now. Bruschetta with Roasted Feta Cheese was adapted from hubby’s idea. Bruschetta is very easy to make and refreshing. It is basically marinated diced tomatoes. A classic Bruschetta has diced tomatoes, garlic, olive oil, basil, salt, pepper and balsamic vinegar. So I took a classic bruschetta and stepped it up by adding roasted garlic and feta cheese. Absolutely delicious!

Hubby didn’t quite give me the side eye when he saw me mixing everything together. But, he did give me a skeptical look. I told him his idea inspired me to create this dish so he was game to try it as an appetizer during our little happy hour.

After gobbling down three, he went looking for more! There were only two left and I give him credit for asking me if I wanted any more. I didn’t so he was quite happy to gobble up the rest. Whenever hubby goes back for seconds I know the recipe is a hit and blog worthy. Thanks Babe for once again inspiring me to try new things!

Bruschetta with Roasted Feta Cheese

Ingredients:

6 – 7 Roma tomatoes

2 cloves of peeled garlic

1 small French baguette sliced

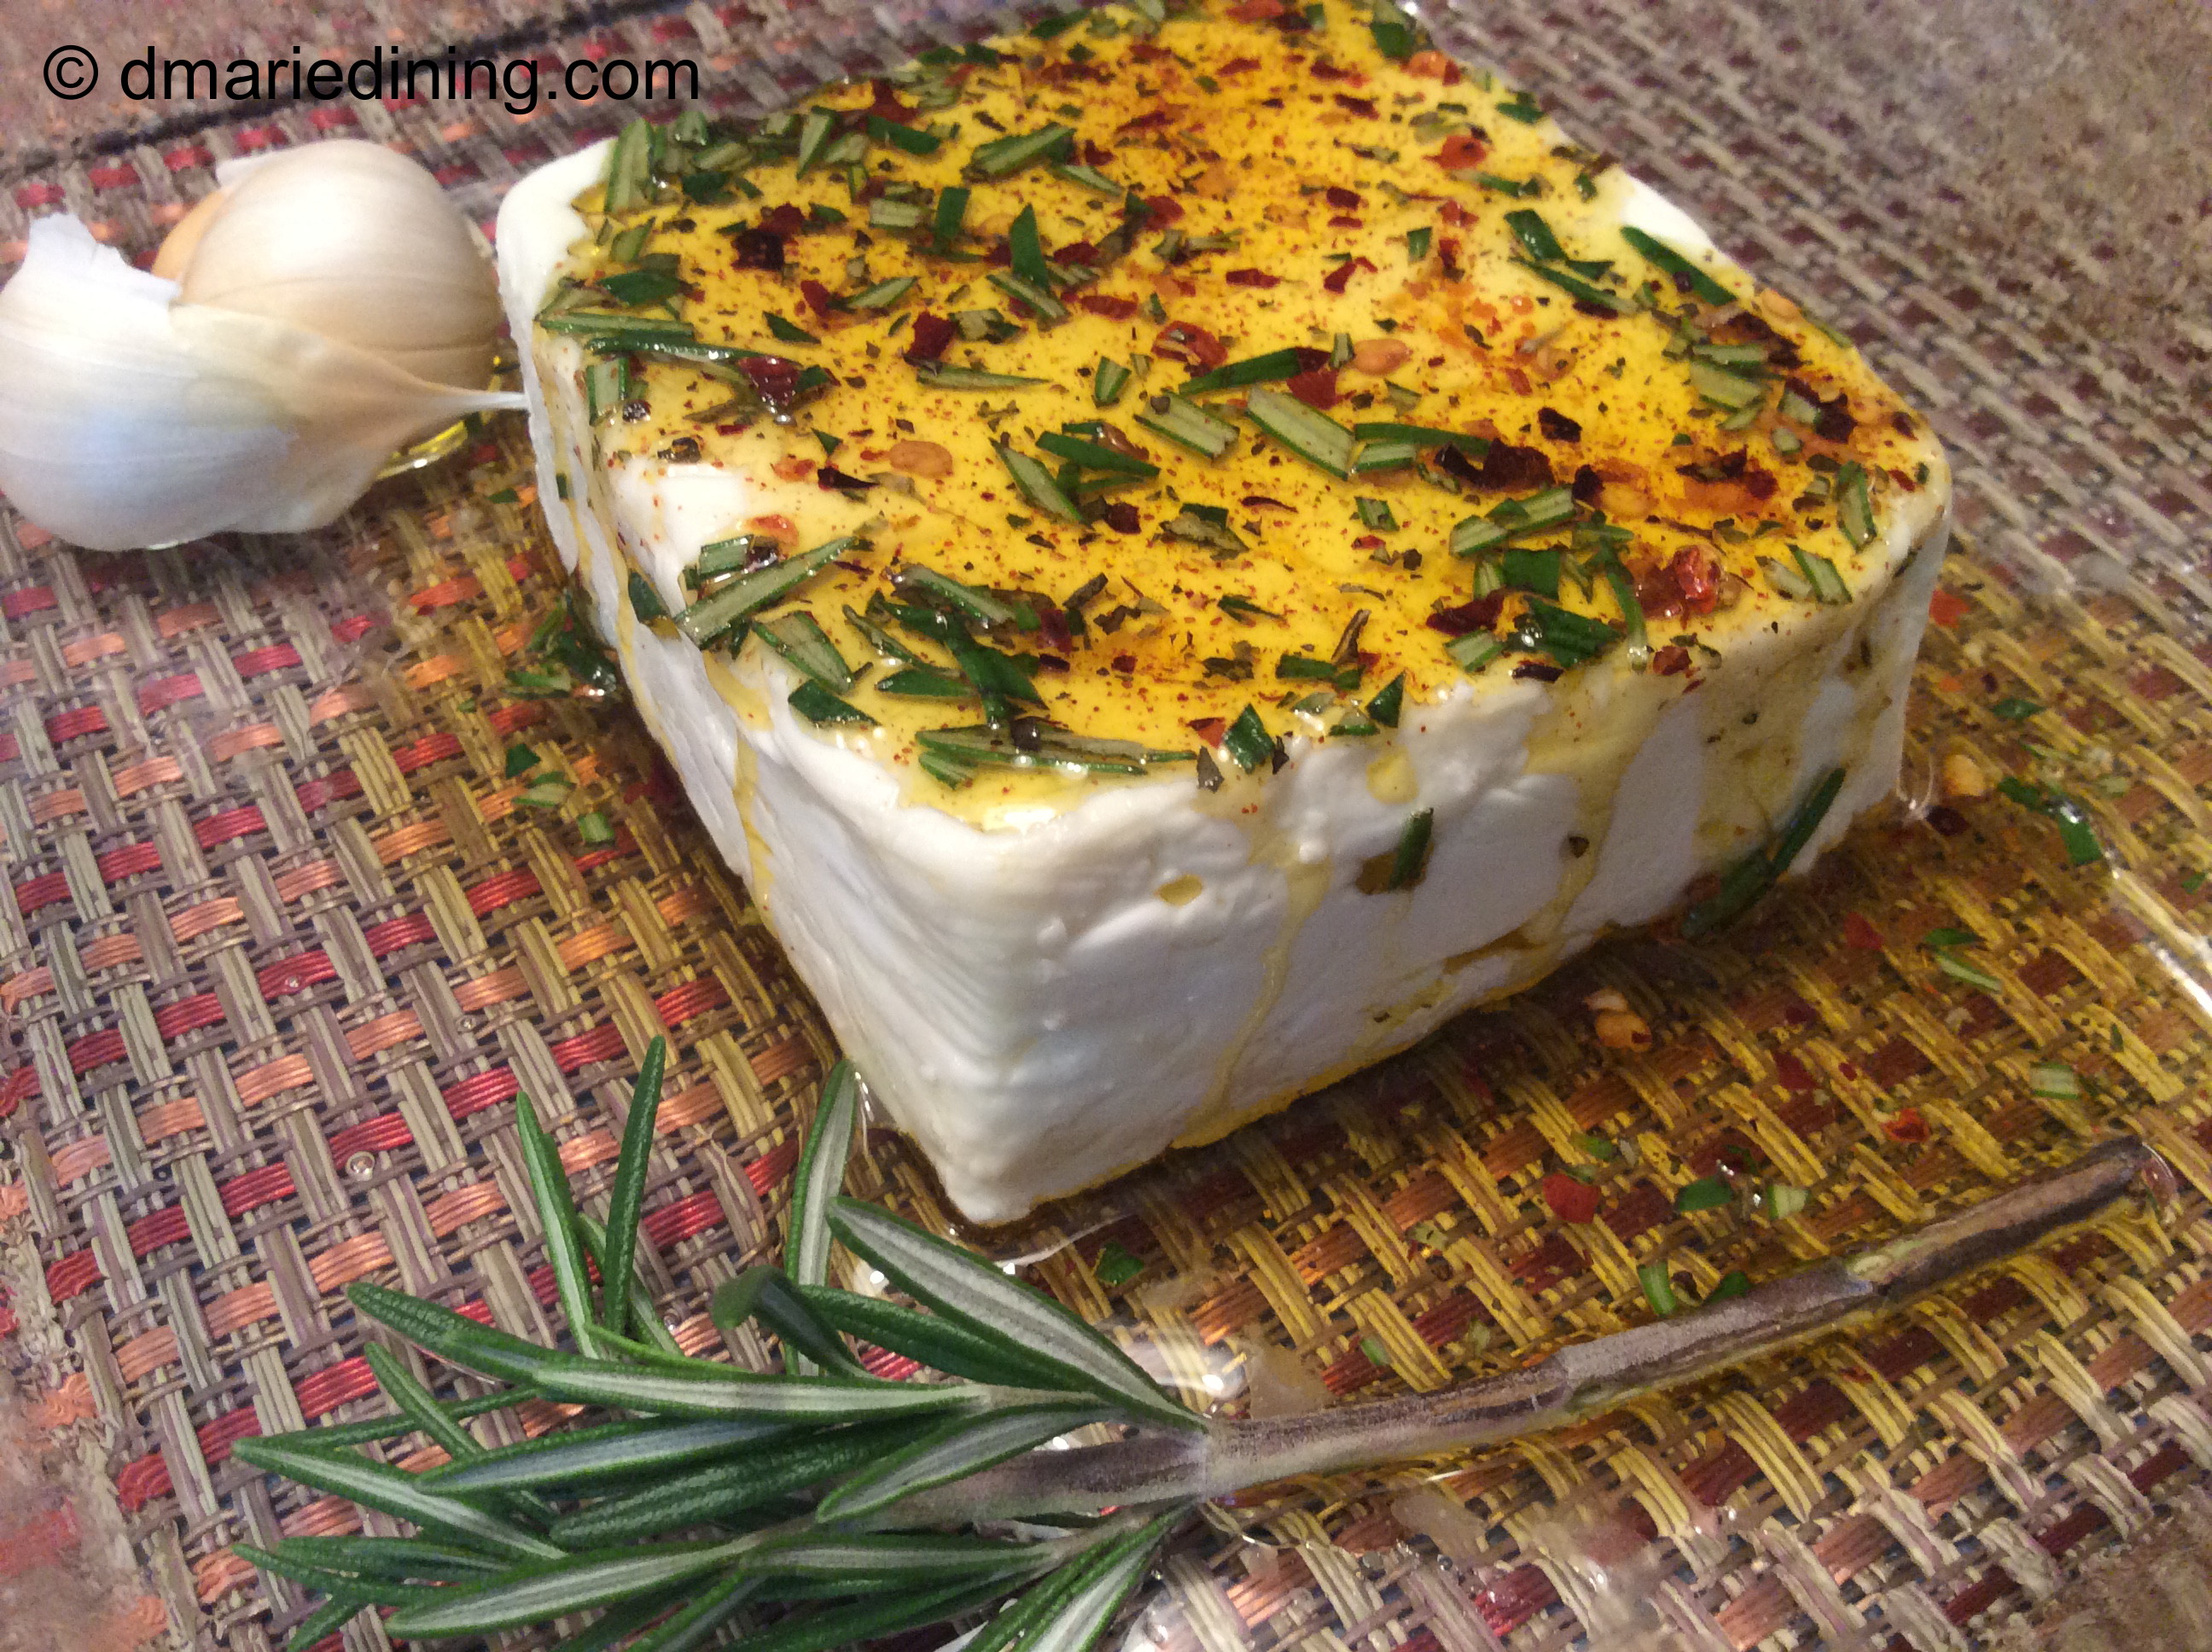
1 block of feta cheese

1 sprig fresh rosemary leaves removed and chopped

¼ cup olive oil + 2 tbsp

2 tbsp grated Parmesan cheese

1 tbsp dried basil

½ tsp Kosher salt

¼ tsp ground black pepper

pinch chipotle seasoning

pinch red pepper flakes

Preheat oven to 375 degrees.

Cut tomatoes in half and remove seeds. Chop tomatoes and place in a large mixing bowl. Add ¼ cup of olive oil, salt, pepper, basil, balsamic glaze and Parmesan cheese. Stir to mix well. Cover with plastic wrap and set aside to marinate the flavors for 30 minutes.

Place block of feta cheese in the center of a small baking dish and place garlic cloves in one corner of the dish. In a small bowl mix together 2 tbsp olive oil, rosemary, red pepper flakes and chipotle seasoning. Drizzle mixture over the feta cheese. Place in the oven and bake for 45 minutes until golden brown. Remove from the oven and smash the garlic. Let the cheese cool slightly.

Turn oven up to 400 degrees. Place sliced bread on a rimmed cookie sheet and brush with a little olive oil. Place cookie sheet into the oven and brown the bread on each side. Remove from the oven.

Combine the cooled feta and garlic with the tomatoes then top each bread slice with a little of the mixture. Serve immediately.

Advertisement

Spinach Stuffed Mushrooms

What can be an easier side dish than Spinach Stuffed Mushrooms? Not too many things. Depending on what you are using to stuff your mushrooms the process can be easy or a little complicated. The process I used for this recipe was extremely easy.

Stuffed mushrooms were one of the my favorite appetizers back in the days when it was safe to sit down in a restaurant and enjoy a full course meal. In the days of Covid-19, my family and I are cautious about social distancing and staying as safe as possible. Although we miss dining out, we are definitely supporting our local restaurants by doing take out a couple of times each week. I enjoy cooking for the family but even I need a break now and then.

So, since I couldn’t have Spinach Stuffed Mushrooms at a restaurant I made my own version at home. Instead of sauteing baby spinach and chopping up onions along with other veggies, I used frozen creamed spinach to reduce my prep time. By adding a few seasonings along with some grated Parmesan cheese I created a quick filling. Viola! I made a lovely Spinach Stuffed Mushroom appetizer or side dish to compliment dinner.

Spinach Stuffed Mushrooms

Ingredients:

12 large mushrooms cleaned (chop stems and reserve)

1 pkg frozen creamed spinach

½ cup Panko bread crumbs

½ cup grated Parmesan cheese

¼ cup shredded mozzarella cheese

½ tsp Kosher salt

¼ tsp ground black pepper

¼ tsp garlic powder

Grape seed oil or olive oil

Pinch of cayenne powder or red pepper flakes (optional)

Preheat oven to 400 degrees.

Thaw creamed spinach in a medium sized bowl. Add salt, ground black pepper, garlic powder, cayenne, ½ of the bread crumbs and cheeses. Stir to mix well.

Rub mushrooms with a little grape seed oil them place in a rectangular baking sheet lined with foil or a casserole dish. Stuff each mushroom with the creamed spinach filling then top with remaining bread crumbs. Drizzle a little grape seed oil over the bread crumbs and sprinkle with paprika then place in oven. Bake for 15 – 20 minutes until the mushrooms are softened and golden brown.

Follow my blog with Bloglovin

Quiche

During warmer weather I shy away from always fixing meals that require me to be around the stove for any length of time. One pot meals and meals that go into the oven are my favorite things to prepare when it is hot.

Quiche is one of those meals you can quickly prepare then stick it in the oven to do its thing while you do something else. Quiche is also versatile because you can use anything you want for the filling whether it is veggies, meat, cheese or a combination of all three. The only thing I haven’t tried in a quiche is pasta. But who knows, that might work too. I’ll let you know if I ever get bold enough to try it.

I have two quiche recipes you can try for my vegetarian friends and meat eaters like me. I encourage you to experiment with the ingredients to make this your own favorite recipe.

P.S. Crab quiche is wonderful too. I’ll write a recipe on that one too sometime soon.

Quiche

Basic Quiche Recipe

Ingredients:

6 extra large eggs

1 ready made pie crust (roll out to fit in pie pan)

½ cup shredded Gruyere cheese

¼ cup shredded sharp cheddar cheese

¼ cup fresh grated Parmesan cheese

¼ cup half and half

1 tbsp butter or olive oil

½ tsp mushroom seasoning (Trader Joe’s)

¼ tsp salt

¼ tsp cracked black pepper

¼ tsp dried parsley

¼ tsp dried thyme

2 dashes of hot sauce (optional)

cooking spray

paprika

Preheat oven to 350 degrees.

Place pie crust in a pie pan sprayed with cooking spray. Gently tap the bottom of the pie crust with a fork to prevent puffing. Set aside.

Beat together eggs, seasonings and half and half until well blended. Fold cheeses into the egg mixture. Sprinkle with a little paprika. Place pie pan on a baking sheet and place in the oven. Bake for 30 to 45 minutes. Test to make sure the quiche is cooked thoroughly by placing a butter knife in the center after 30 minutes. Cook a few minutes more if not completely done. Let the quiche cool for about 5 to 10 minutes then serve with nice soup or salad.

Additional Ideas:

Mushroom Quiche:

Saute 1 package each of baby portobella mushrooms and white button mushrooms in 1 tbsp of butter or olive oil. Place on the bottom of the pie crust then pour egg and cheese mixture over the mushrooms. Bake according to basic the recipe.

Chicken and Broccoli Quiche:

Season one package of cooked diced white meat chicken with a little salt, onion powder and pepper.  Set aside.  Blanche 1 package of broccoli florets in salted water for about 3 minutes. Remove from water and place in a bowl of ice cold water to stop the cooking process. Drain and sprinkle broccoli with a little salt. Place chicken and broccoli in the bottom of the pie crust then pour egg and cheese mixture over the filling. Bake according to the basic recipe.


Follow my blog with Bloglovin

Eggplant with Crispy Parmesan Cheese

A steak, pork chop or chicken might be the star of the show on a plate but all stars need a co-star to be truly successful.

Thinking of new side dishes isn’t always easy. Sometimes it depends on what vegetables are in season or it may be as simple as what is in the refrigerator. On the day I decided to make Eggplant with Crispy Parmesan Cheese I just happened to have an eggplant calling my name and begging to be created into something delicious. I didn’t want to turn it into a casserole or a stew so I settled on baking the eggplant.

I like easy and this recipe is just that… easy. There is not a lot of fuss when all you need to do is slice the eggplant and mix together a cheesy topping. Since my sons are learning how to cook a little more I think I will pass this recipe on to them to impress the women in their lives.

Eggplant with Crispy Parmesan

Ingredients:

1 medium sized eggplant

½ cup shredded fresh Parmesan cheese

½ cup panko bread crumbs

½ tsp dried oregano

¼ tsp red pepper flakes (optional)

¼ tsp garlic powder

¼ tsp smoked paprika

salt

cracked black pepper

olive oil

Preheat oven to 350 degrees.

Mix together Parmesan cheese, panko bread crumbs, oregano, red pepper flakes, smoked paprika and garlic powder in a small bowl. Set aside.

Slice eggplant into ½ inch rings. Drizzle with a little olive oil and sprinkle with salt and cracked black pepper. Top each slice of eggplant with the cheese topping and drizzle with a little more olive oil. Bake for 25 – 30 minutes until eggplant is fully cooked and topping is brown and crispy.


Follow my blog with Bloglovin

Salad with Crispy Prosciutto

My hubby and I have started on a new journey to eat a little healthier than we have in recent months. Because I enjoy cooking and love to build on flavors I used butter, sugar and bacon as a great source of flavor. Fast forward to a few weeks ago which is when our journey began and that all changed.

I really wanted to lose weight and find ways of cutting out the things I knew added loads of calories but tasted so doggone good. I finally got my mind, body and spirit in sync to commit to a different lifestyle of eating. To do this I (we) had to jump in feet first and do it in “cold turkey” fashion. I did my research and found a plan that eliminated my usual fare and replaced it with other flavors that are just as tasty and still doggone good.

One substitute I made on my journey is to use prosciutto instead of bacon as a topping for salads. We eat salads year round and making a BIG SALAD for dinner is our favorite on hot summer days. Rather than crisping up a few slices of bacon and crumbling them over the salad, I now heat up a little Extra Virgin Olive Oil (my new substitute for butter) and crisp up prosciutto. Just chop up those crispy pieces then sprinkle them over a nice salad and you will be in salad heaven.

Okay, I can hear a few critics say wait a minute. Doesn’t prosciutto have more salt than bacon? The answer is yes. Prosciutto is saltier than bacon but has less calories and saturated fat. Of course, like everything else, prosciutto should be eaten in moderation. A few slices won’t hurt you and it will add a nice flavor to your salad without adding extra calories and fat like bacon.

Give it a try and see for yourself that prosciutto can be your new source of flavor.

Follow my blog with Bloglovin

Orange Cauliflower Soup

I love it when a new idea comes together on the first try and is a hit with the family. I just decided to make a cauliflower soup today because I had a head of cauliflower and I needed to make something with it before it was no longer edible. A nice soup came to mind because although we have been having nice warm weather during the day it is a little chilly at night. Besides, I can eat soup any day of the year because I just love soup!

I am calling this one Orange Cauliflower Soup because I used diced red peppers in the soup which made it turn a pale orange color. I was not sure how everyone else would react to the color but I liked it so….. Orange Cauliflower Soup was born. Just making cauliflower soup was not enough. I wanted to add a slight richness to the soup and decided what better way to make it taste rich without a ton of calories than to add a little cheese. I think I have had cheesy cauliflower soup in the past but it was a little too rich for my blood. Adding just a little cheese keeps the calories down, adds thickness to the soup and definitely adds another level of flavor.

Whenever I put together a post I have to set up the food and take pictures of each step of the process. The last step of course is taking a picture of the finished product. After taking a picture of my new creation I figured I would clean up the kitchen so that I could enjoy a bowl of soup without thinking about the slight mess I had made. Well, my youngest son descended upon the kitchen with his girlfriend and immediately wanted to know if I had taken my last picture of the soup. I didn’t think he wanted to eat it (silly me) but he asked if he could taste it. Of course I said sure since I always need a taste tester for my recipes. The first words out of his mouth were “This is what I am going to miss!” That put a smile on my face because he is headed to college in a few months and I know he is going to miss my home cooking. My smile got even bigger when his girlfriend asked if she could try it and again I said sure. She said it was delicious and being the mom that I am I told her to take some home. Seems the soup fairy was on my side today and gave me a hit recipe on the first try. Thanks soup fairy!

Orange Cauliflower Soup

Ingredients:

1 medium head of cauliflower cut into small pieces

1 small onion diced

½ red pepper diced

4 cups chicken broth

1 cup water

1 cup milk

1 cup shredded monterey and/or Colby jack cheese

1 tbsp olive oil

3 tbsp butter

2 tbsp flour

1 tbsp salt

1 tsp black pepper

1 tsp garlic powder

½ tsp parsley

½ tsp basil

½ tsp red pepper flakes

Heat olive oil in a large pot over medium high heat. Add diced onions and red peppers. Saute until slightly browned. Add seasonings and stir. Add cauliflower and stir to mix with onions and peppers. Cook for 2 – 3 minutes. Add chicken broth and water. Stir then bring to a boil. Reduce heat to medium and cover. Let simmer until cauliflower is soft. Using an immersion blender, blend cauliflower until smooth but leave a few florets to create texture. Turn heat down to low.

In a small pan melt butter and add flour. Whisk until flour and butter are blended and form a paste. Add milk and whisk until sauce is thickened. Season with a little season salt and black pepper. Add white sauce to cauliflower and whisk to blend. Stir in cheese. Continue stirring until cheese is well blended into the soup. Taste to see if a little more salt or black pepper is needed.

Enjoy!

Follow my blog with Bloglovin

Lentil and Carrot Ginger Soup

Sometimes you just have to cheat. Not cheat other people or cheat in the sense of doing something wrong. I mean cheat by not making everything from scratch. Making my Lentil and Carrot Ginger Soup was one of those times I decided to cheat. At least, partially. This soup is a combination of dried lentils and a box of carrot and ginger soup.

I am not usually a fan of boxed soups but Trader Joe’s has a nice brand of soups I have used in other recipes upon occasion. I have passed over their Carrot and Ginger soup many times but decided to take a chance on combining it with the lentil soup I make for me and hubby.

Creating soup is about building flavors. Combining the light flavor of lentils with the sweet taste of carrots along with the sharp taste of ginger spells yummy. Being the carnivore that I am, I added diced Pancetta to build even more flavor. My vegetarian brothern can keep it simple and not include meat in this soup. But, if you are not opposed to meat, I think you will enjoy the flavors and texture with the Pancetta. Add some crusty bread on the side of your bowl and you will have a wonderful hearty soup for those chilly or even warm days.

Lentil and Carrot Ginger Soup

Ingredients:

4 cups chicken broth

1 ½ – 2 cups dried yellow lentils (rinsed in cold water)

1 cup shredded carrots

1 cup cubed pancetta (optional)

½ cup diced onions

1 box Carrot Ginger Soup (Trader Joe’s)

1tbsp olive oil

1 tbsp salt

½ tbsp ground black pepper

½ tbsp Adobo seasoning

1 tsp dried parsley

¼ tsp cumin

¼ tsp cayenne pepper (optional)

Place olive oil, pancetta, onions and carrots in a large pot over medium heat. Saute the carrots, onions and pancetta for about 3 – 5 minutes stirring frequently. Add broth, seasonings and lentils to the pot and let simmer for 30 minutes stirring occasionally. Add a little water if the soup gets too thick during the 30 minutes. After 30 minutes stir in the box of carrot and ginger soup. Reduce heat to low and let simmer for an additional 20 minutes.

Serve with crusty bread or croutons.

Follow my blog with Bloglovin

Louisiana Style Soup

During the summer months I often have a taste for gumbo or jambalaya but those dishes can be a little heavy. So, to compensate and satisfy my taste buds, I will make a Louisiana Style Soup in warmer weather. This soup is much lighter than gumbo or jambalaya but it has similar flavors.

Creole food is the soul food of the south mid-west. Creole cooking is a blend of French, Spanish, Caribbean, West African, Portuguese and several other country cuisines. While Cajun dishes originate from a style of cooking by French speaking Acadians that were exiled to Louisiana. (a partial history lesson). Many people think there is no difference between Creole and Cajun foods but there really is a difference. The biggest difference is that Creole cuisines use tomatoes in most dishes while Cajun cuisines do not. Another difference is how each prepares a roux or thickening for dishes like jambalaya. A Creole roux is made with butter and flour while a Cajun roux is made with oil and flour. It may not sound like a big difference but it is when you are talking about flavors.

One more interesting tidbit about Creole vs. Cajun dishes is that Creole cooking is considered “city” food while Cajun cooking is considered “country” food. Hmmm… that may explain why hubby really likes Creole cooking while I enjoy Cajun foods. He is more of a city boy who loves tomatoes while I am a country girl at heart who just loves food.

Louisiana Style Soup

Ingredients:

1 pkg spicy ground sausage

1 cup frozen okra

1 cup frozen baby lima beans

1 cup corn cut off the cob or frozen corn

1 can fire roasted diced tomatoes

2 scallions diced

1 celery stalk diced

1 small green pepper diced

1 small white onion diced

2 cups chicken broth

2 cups water

1 tbsp tomato paste

1 tbsp butter

1 tbsp salt

1 tsp ground black pepper

1 tsp ground ginger

Brown spicy ground sausage in a large pot over medium heat. Remove from pot and drain on paper towels. Add butter to the pan along with green pepper, celery and onion. Season with salt and black pepper then saute for a few minutes until vegetables soften.

Add remaining ingredients to the pot along with sausage. Stir to blend then reduce heat and let simmer for 30 to 45 minutes. Serve with rice or top with garlic croutons.

Follow my blog with Bloglovin

Prawns and Avocado

On a recent trip to Puerto Rico, my hubby and I enjoyed a delicious lunch appetizer called Prawns and Avocado. I was hesitant to order the dish at first because I sometimes have a reaction to shrimp but I decided to give it a try. Boy was I glad I did. The appetizer was so refreshing.

The dices of avocado were fresh and the prawns were soft and sweet. I have to admit it was difficult sharing the appetizer with hubby after I took the first bite. Fortunately for hubby, I love him dearly so I did share two pieces. After we both looked at the empty plate we agreed I should try replicating the appetizer once we got back home. I wasn’t able to get the exact recipe from the chef so I recreated Prawns and Avocado from a photo I took with my phone. Yes, it looked so appetizing and tasted so good I took a picture before we gobbled them all up.

My version of Prawns and Avocado is not quite like the wonderful dish we enjoyed in Puerto Rico but it is pretty darn close. There definitely is a difference between the shrimp I get at the local market but the flavor is similar.

Remembering how the appetizer was described on the menu helped me keep the recipe simple. Prawns (shrimp), avocado, red onion, lime juice and cilantro was all I needed to make this tasty treat pop!

Ahhh…. the memories.

Prawns and Avocado

Ingredients:

½ avocado diced

½ lb medium cooked shrimp cut in half

1 tbsp fresh lime juice

1 tsp fresh cilantro chopped

1 tbsp red onion diced small

1 tbsp olive oil

½ tbsp lemon juice

½ tsp salt

¼ tsp ground black pepper

3 dashes hot sauce

1 baguette or ciabatta bread sliced

Place shrimp in a large bowl. Add salt, pepper, red onion, cilantro, lime juice and hot sauce. Stir to mix. Set aside.

Place avocado in a medium sized bowl along with lemon juice and a pinch of season salt. Mash the avocado until smooth but leave a few chunky pieces. Spread avocado over bread slices. Top with shrimp mixture. Garnish with cilantro if desired.

Follow my blog with Bloglovin

Kicked Up Mussels

The other day I was watching an old episode of the Barefoot Contessa about a seafood salad she was making for a friend and it included mussels. That got me to thinking about an old mussel recipe I had but never really tweaked. Since I needed a new post idea I decided I would work on creating a Kicked Up Mussels recipe.

Both my hubby and I love seafood and besides eating a lot of chicken we eat a lot of fish. Once in a while I will throw together a shrimp or scallop meal if I have the ingredients. That is one of the issues I have in creating new meals during the week. It is too easy to keep using over and over again the same ol’ staples I keep in the pantry. Preparing a special meal takes planning and sometimes calls for an extra trip to the grocery store. Because I work full-time I don’t always have a lot of time to be creative with dinner. However, I have been known to have a burst of creativity now and again if I have not had a tough day at work. The weekends are really the best time for me to test out recipes and take my time to fashion a new recipe or try an old recipe with a new twist.

img_6344_1

Okay, back to the Kicked Up Mussels. I had to search a couple of my old recipe journals to find my mussel recipe and was happy to discover it was a pretty simple one. My original recipe called for beer instead of white wine like most other recipes. I could not remember if this was a good idea or bad idea. But hey, I use beer in a few of my recipes and I have not heard any complaints yet so I guessed it was a good idea. Since I was using beer instead of wine I had to find a nice light beer with a hint of citrus flavors rather than a dark beer which I thought would be heavy. I am not a beer drinker so my apologies to true beer drinkers if I don’t know what I am talking about. I did a little research by perusing the beer isle at a local liquor store with a large variety of beers. I landed on Namaste White which is by Dogfish Head Brewery located in Delaware.

img_6354_1

As a non-beer drinker I must say I enjoyed taking a swig of Namaste White after adding most of it to the mussels. The combination of orange, lemongrass and coriander in the beer along with the brininess of the mussels and aromatic herbs was genius. All right. I may not be a genius but the combination of flavors was genius. I will even go as far as to say my recipe would be welcomed in any 4 star restaurant. The proof is in the pudding. You be the judge and try it out.

Kicked Up Mussels

Ingredients:

2 dozen mussels cleaned

3 plum or tomatoes diced

3 cloves garlic chopped

2 shallots diced

1 jalapeno pepper seeded and diced

1 Namaste White beer

2 tbsp olive oil

1 tbsp parsley

½ tsp thyme

¼ tsp red pepper flakes

pinch of salt

pinch of black pepper

Clean mussels by running them under cold water and gently scrub them if necessary to remove dirt from the shells.  Use a knife to remove the fuzzy beard if present. Arrange mussels in a large skillet. Set aside while sauteing tomatoes.

Place olive oil in a medium sized non-stick skillet over medium high heat. Add garlic shallots, jalapeno pepper and tomatoes. Season with salt, black pepper and thyme. Stir then saute for 2 minutes. Move mussels to heat and pour tomato mixture and beer over mussels. Sprinkle with red pepper flakes and shake to mix tomatoes and mussels. Cover and cook for 3 minutes until mussels pop open. Discard any mussels that do not open. Sprinkle with parsley before serving. Serve with crusty bread to sop up the delicious sauce.

Tip: Cultivated mussels vs. wild mussels. 

If you purchase wild mussels, they may be a little gritty which means your mussels will be crunchy.  To make sure you remove any sand from the mussels dissolve about 1/4 cups of salt and 2 cups of warm in a large pot along with 2 tbsp of flour or cornmeal.  Add the mussels then cover with water.    Soak for 1 – 2 hours.  Drain then rinse the mussels with cold water.  Most mussels you find in the grocery store are cultivated and do not contain a lot of sand or grit so there may not be a need to soak the mussels.  Just clean the shells. To be on the safe side I would soak the mussels as I described.

Follow my blog with Bloglovin