Tag Archives: Chicken

Layered Stuffed Chicken Breasts

Although chicken breasts were one of my favorite pieces of the bird (wings were my next favorite), I found as I got older that chicken breasts can be too big and dry sometimes when you bake them. Over my years of cooking I was able to perfect my baked chicken and have it come out more moist than dry.

As I changed my eating habits I discovered I liked cooking with chicken thighs more than chicken breasts. Still, the breast held a special place in my heart and I would get a hankering for a nice meaty stuffed chicken breast. Recently, I rediscovered thinly sliced chicken breasts at my grocer. The grocer doesn’t always seem to have them on hand so I forget about looking for them. On my last shopping trip I spied a few packages of thinly sliced breasts and grabbed enough to make dinner and to freeze for another meal.

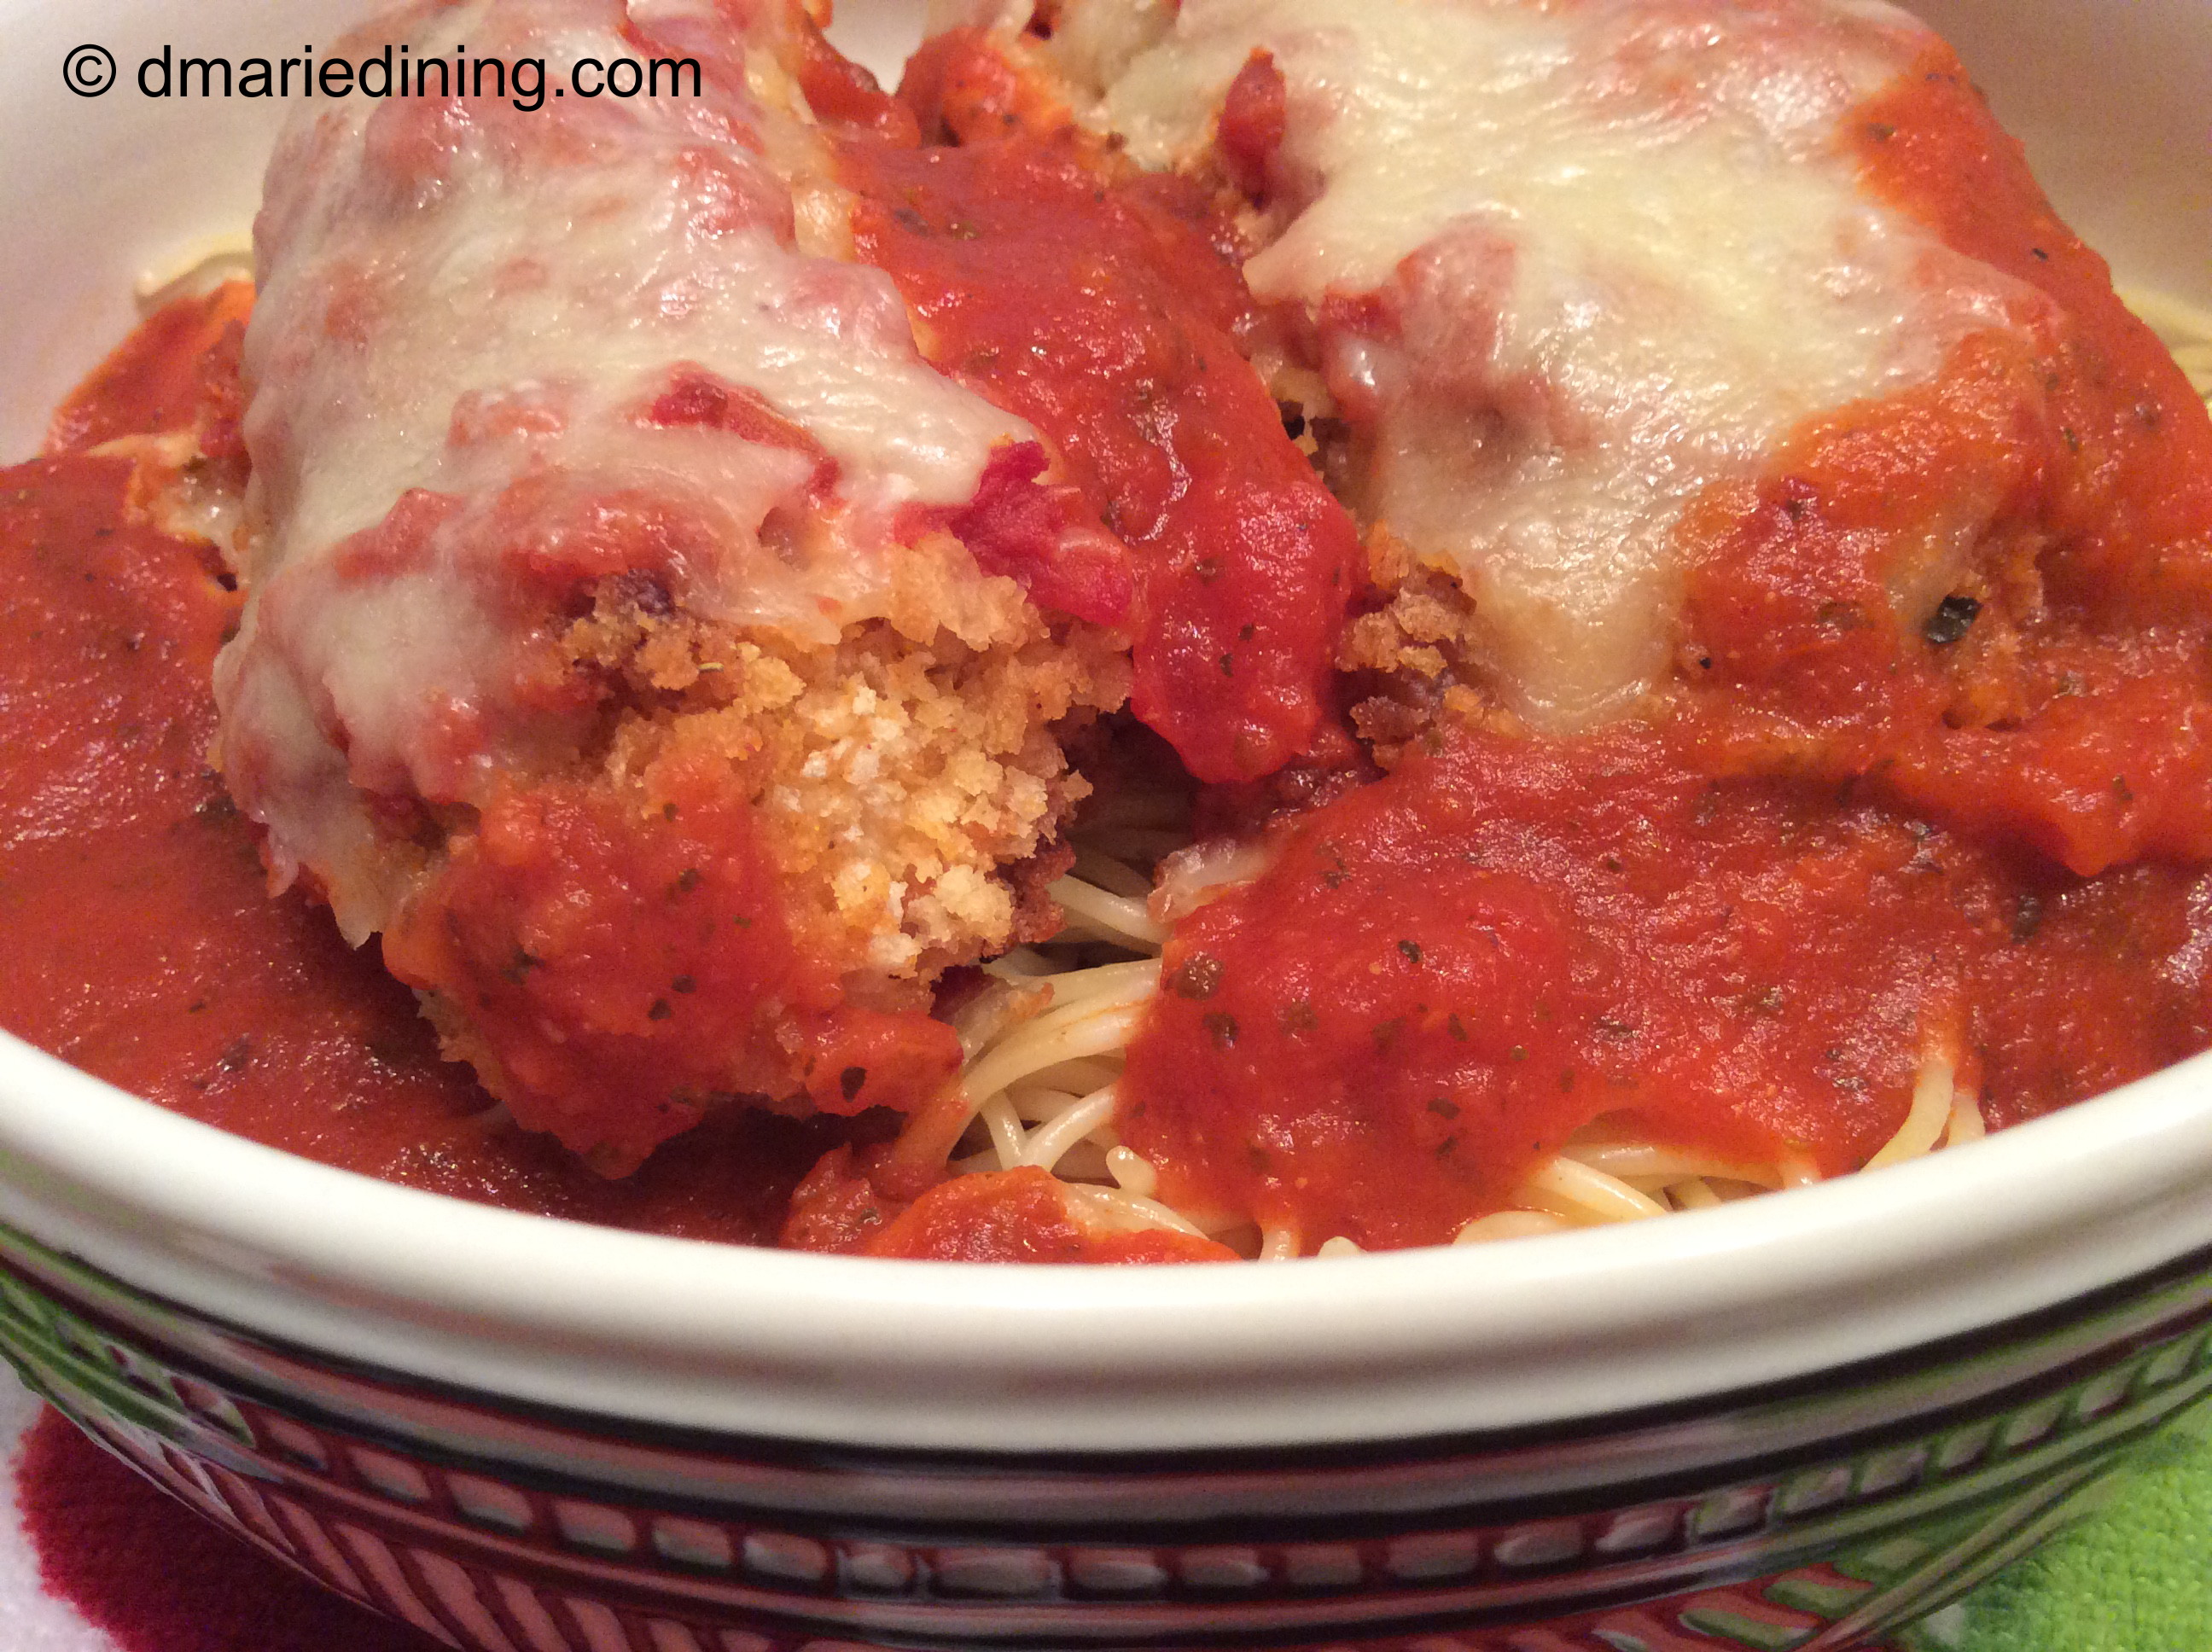
Layered Stuffed Chicken Breasts became a thing in my home when I had a taste for lasagna but did not want to go through the process it takes to make a really good lasagna. I came up with the idea to layer the thinly cut chicken breasts I had in the freezer like I would a lasagna. This recipe fit right in with my new low carbohydrate lifestyle since there was no pasta in sight. I wasn’t sure the fellas in the house would like this dish as much as the pasta layered dishes I have made in the past. However, I was pleasantly surprised that they thought it was a nice change from a heavy lasagna. Just so they had the illusion of having pasta with the Layered Stuffed Chicken Breasts I made some spaghetti squash to go with dinner. In the end, I was able to service a low carb meal everyone enjoyed and I could stick to my new lifestyle of eating.

Don’t worry. There will be plenty of other recipes that include pasta. After all, my family’s still big time pasta eaters.

Layered Stuffed Chicken Breasts

Ingredients:

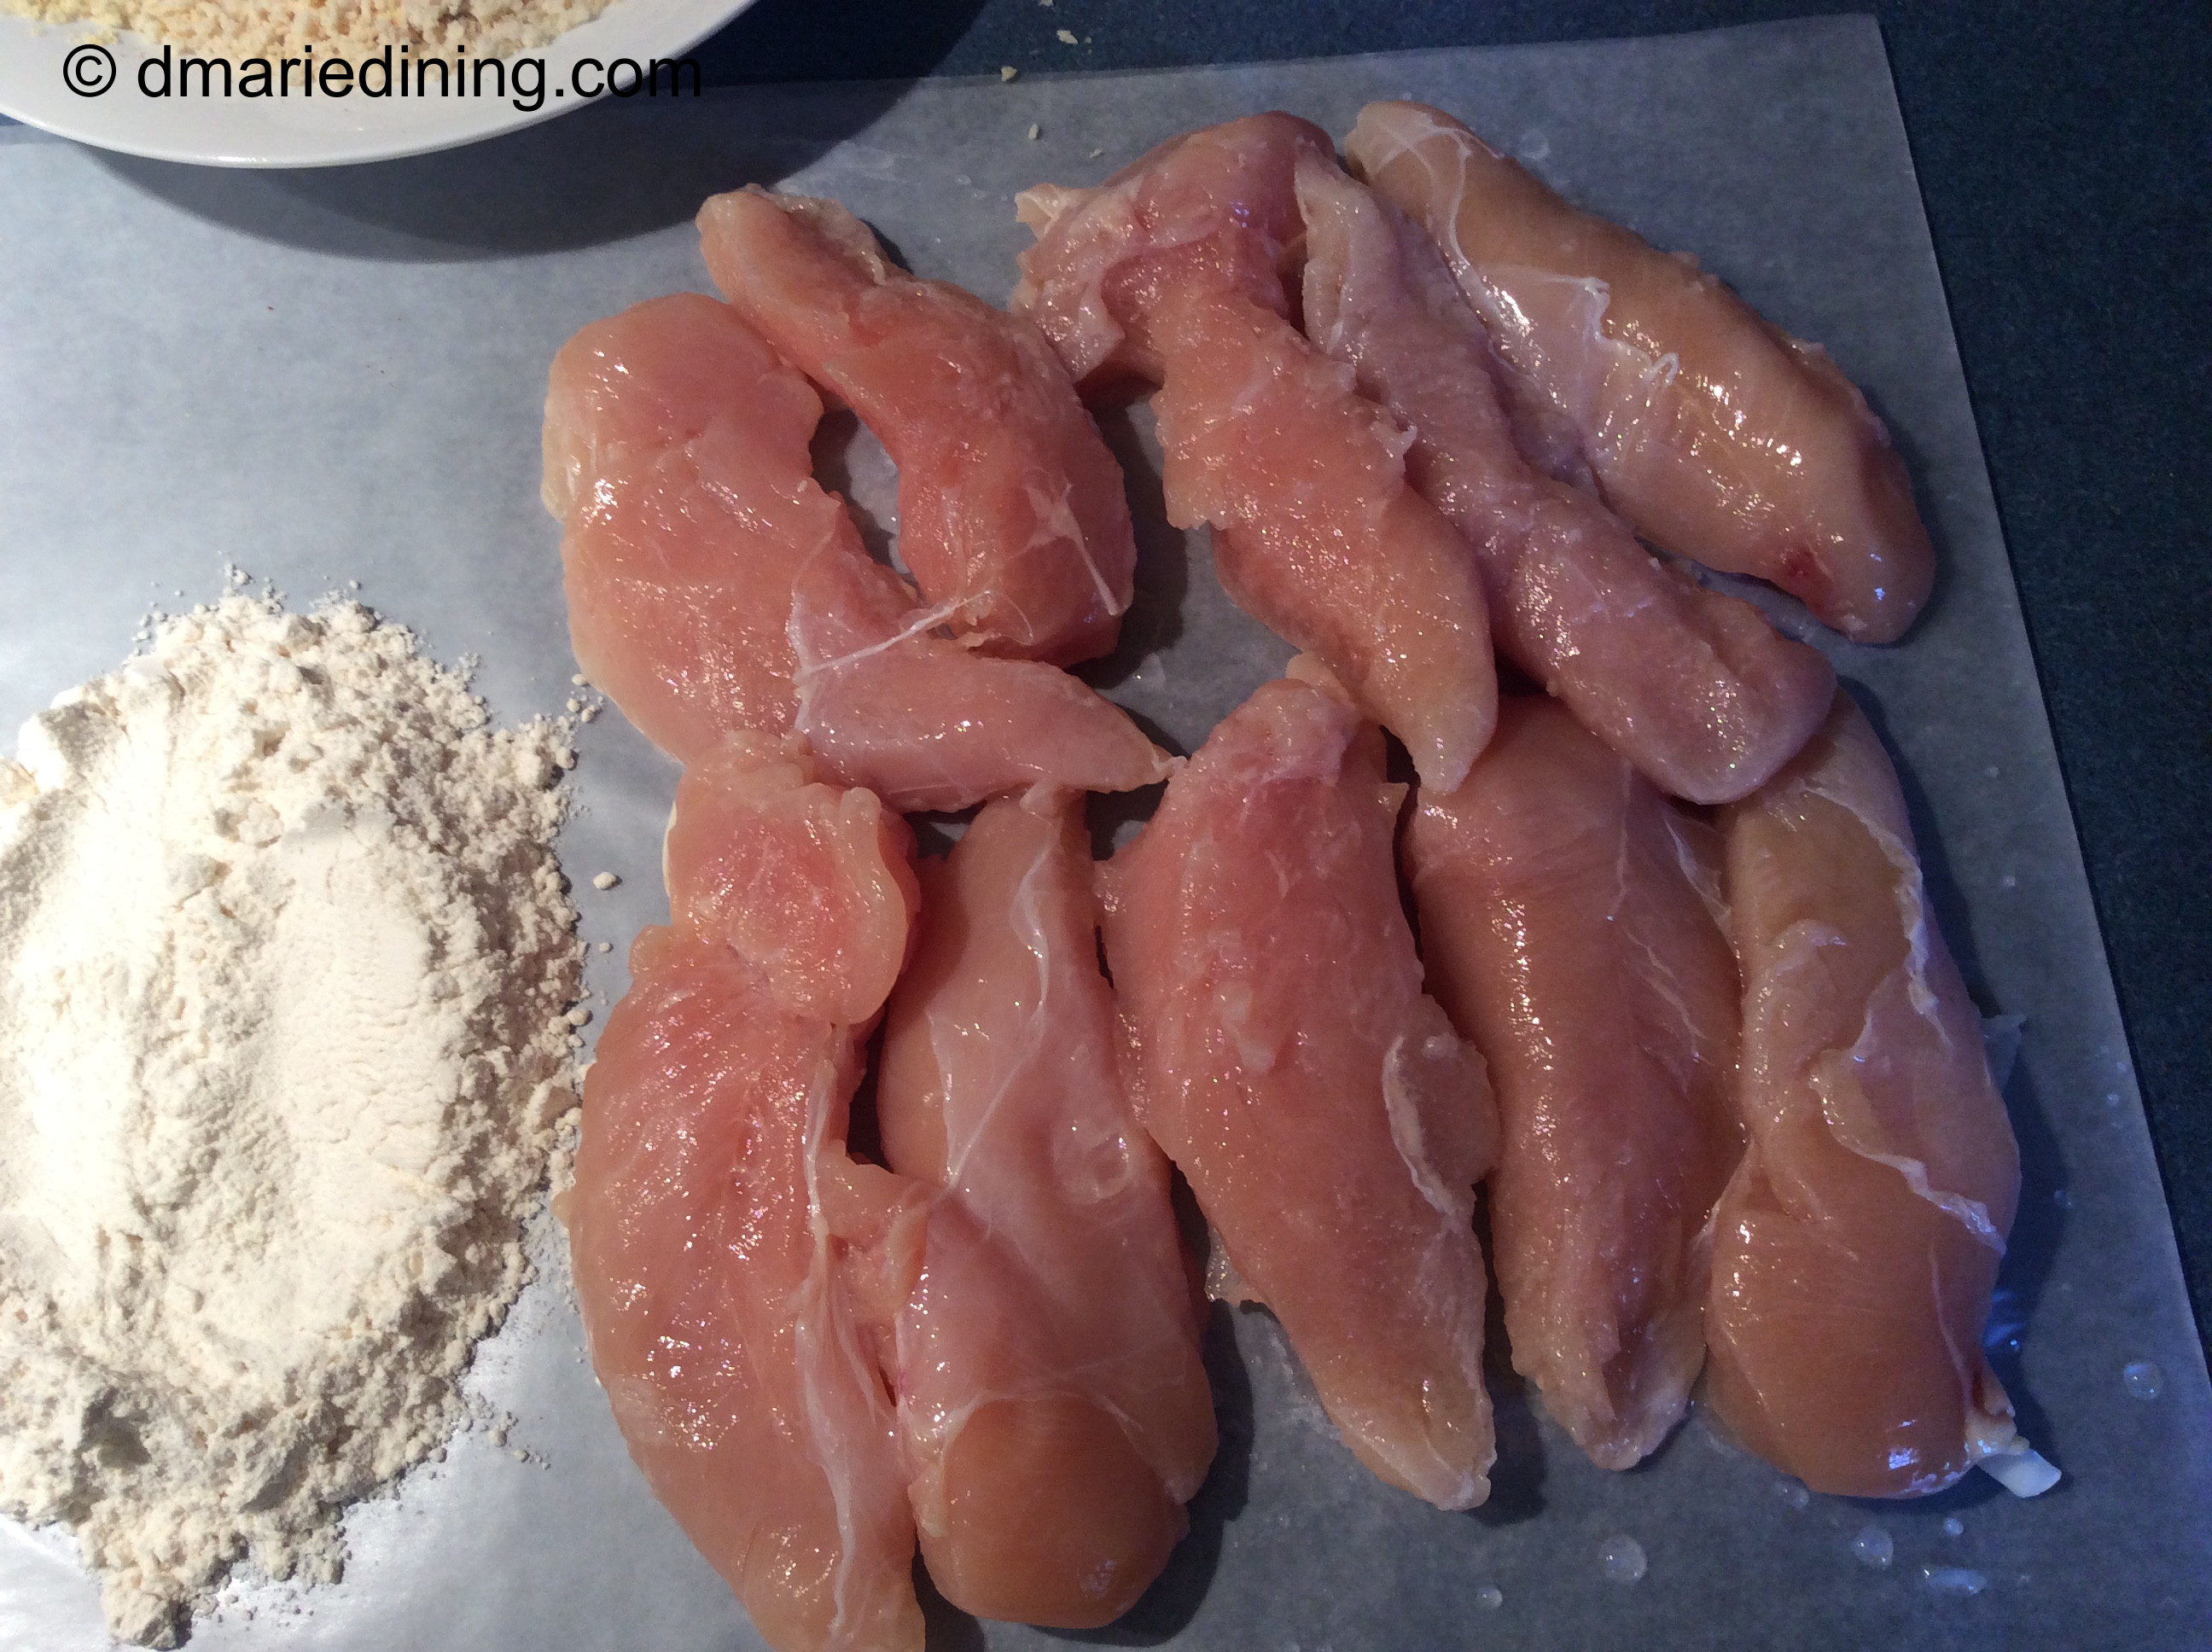
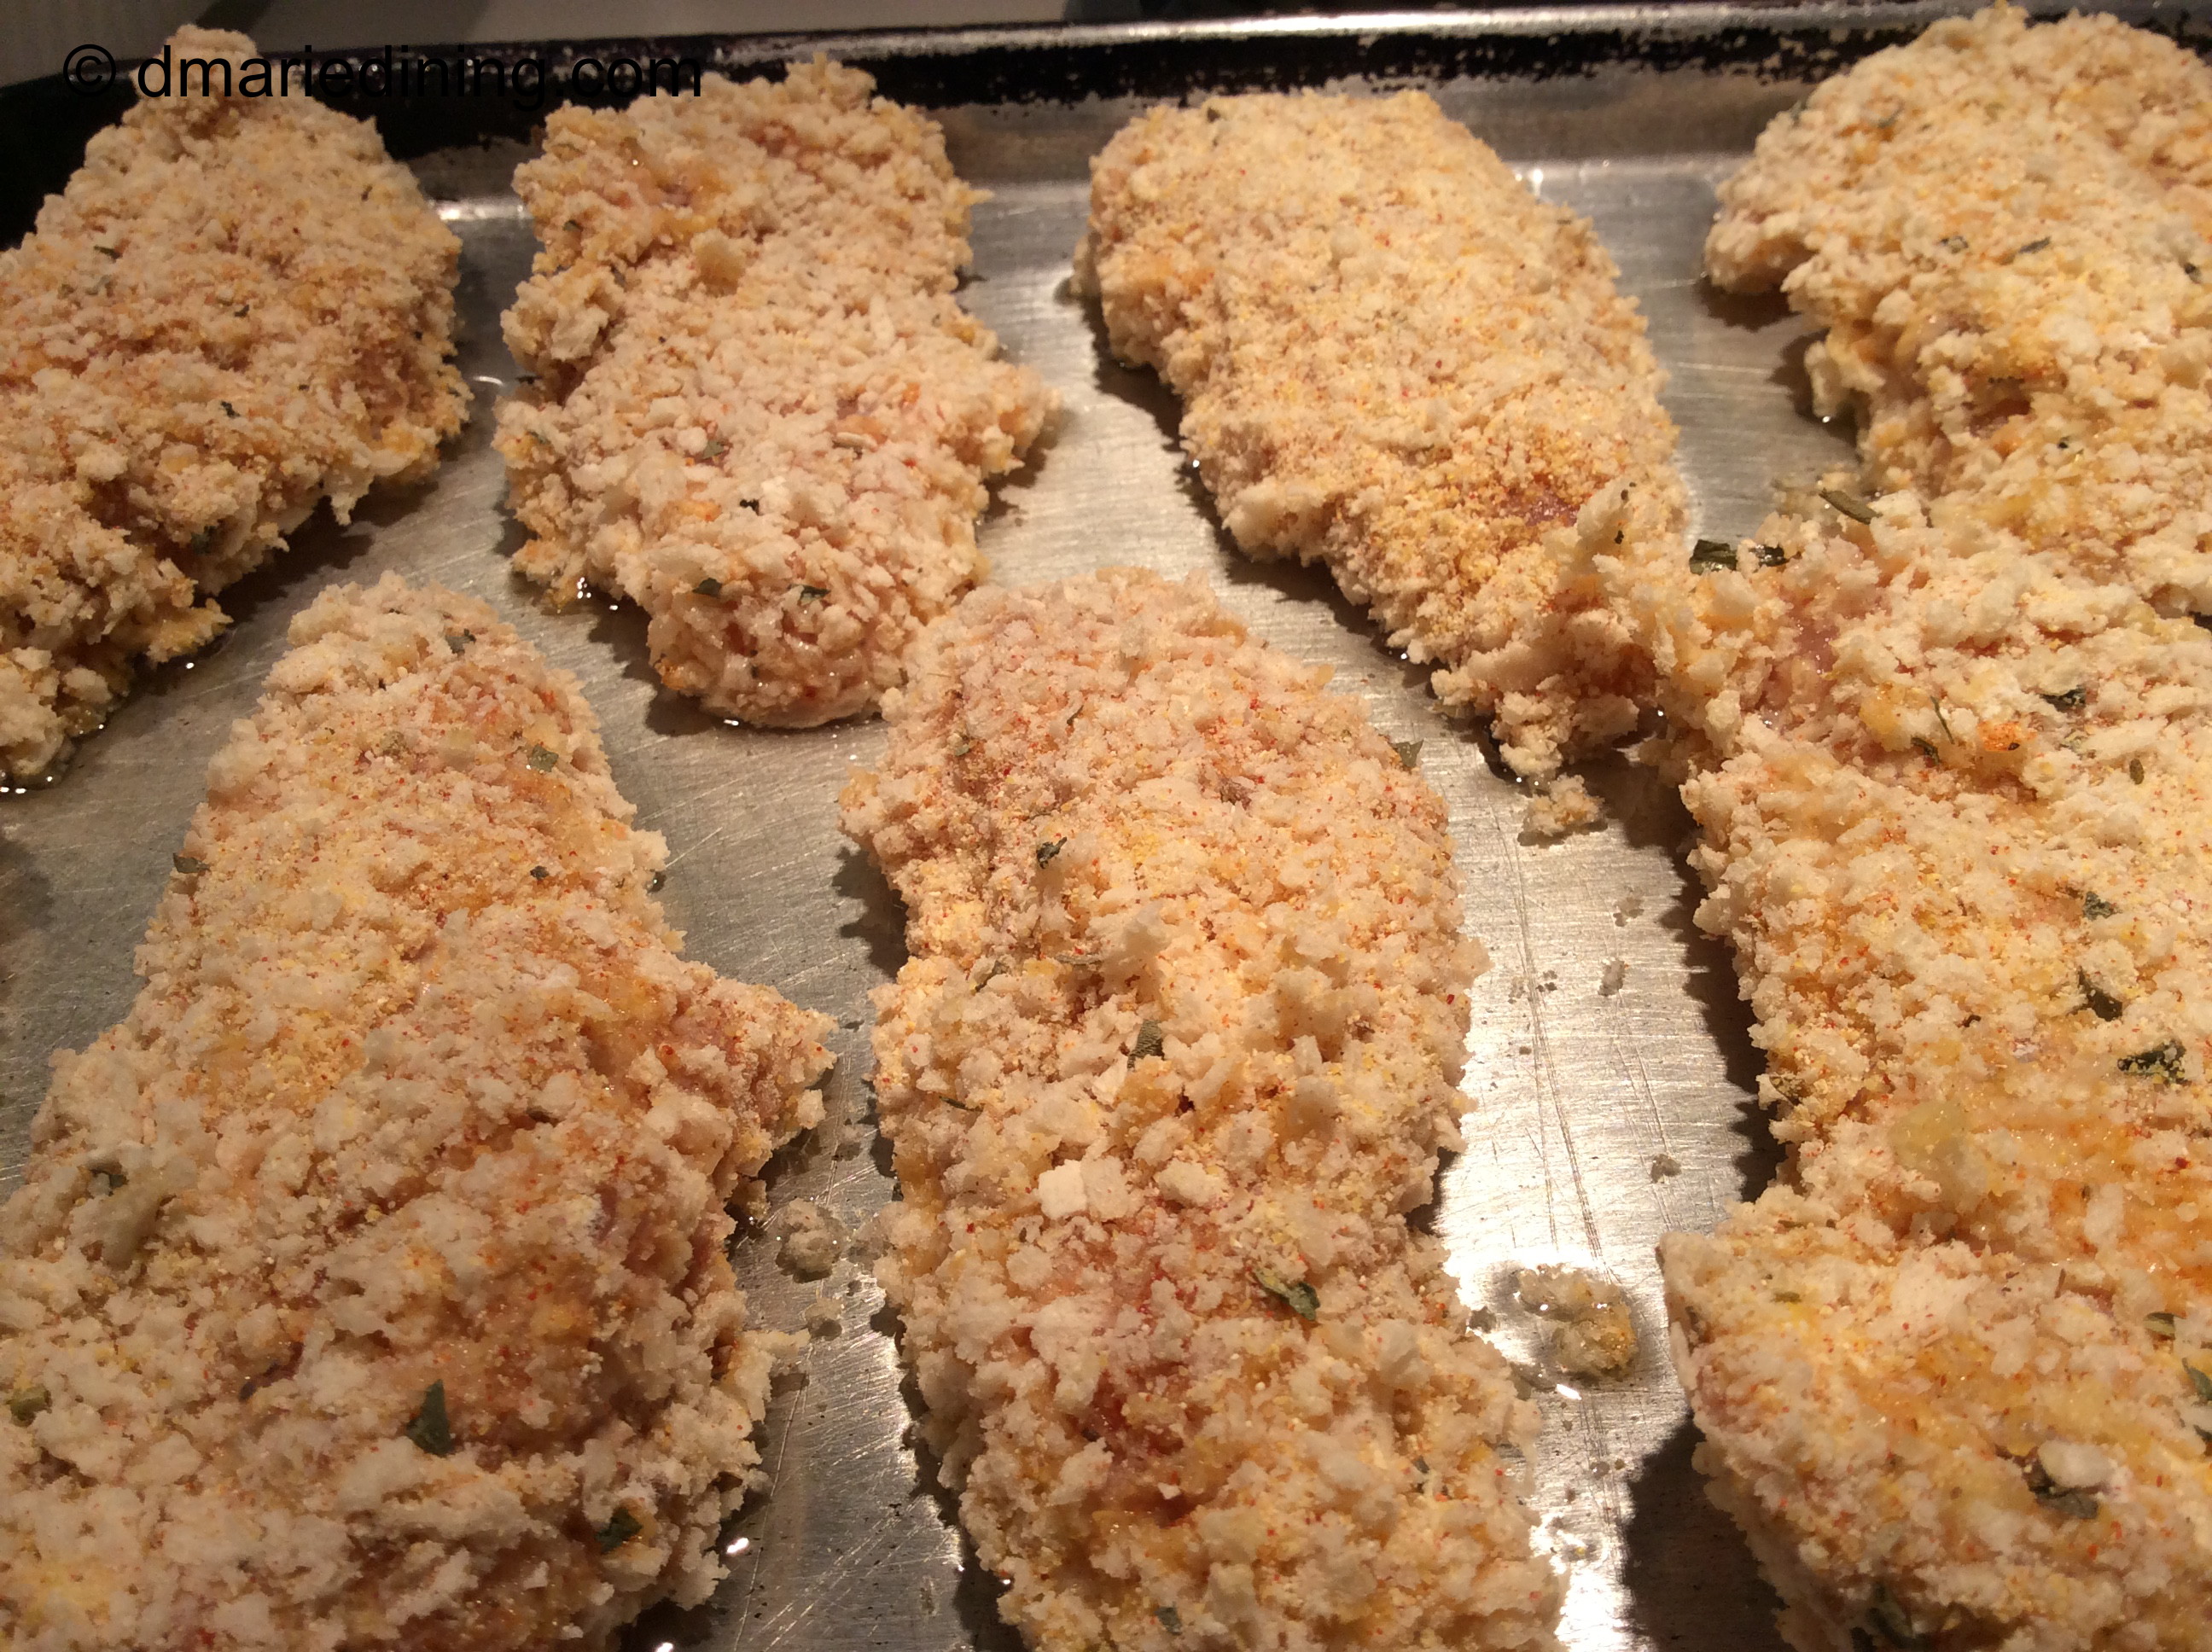
2 packages of thinly sliced chicken breasts

1 package of fresh baby leaf spinach (roughly chopped)

1 brick cream cheese softened

1 ½ cups shredded mozzarella

1 cup fresh salsa (hot or mild)

1 cup marinara sauce

½ cup grated fresh Parmesan cheese divided

1 tbsp salt

½ tbsp ground black pepper

1 tsp onion powder

1 tsp garlic powder

½ tsp dried basil

½ tsp dried oregano

½ tsp red pepper flakes (optional)

cooking spray

Preheat oven to 350 degrees.

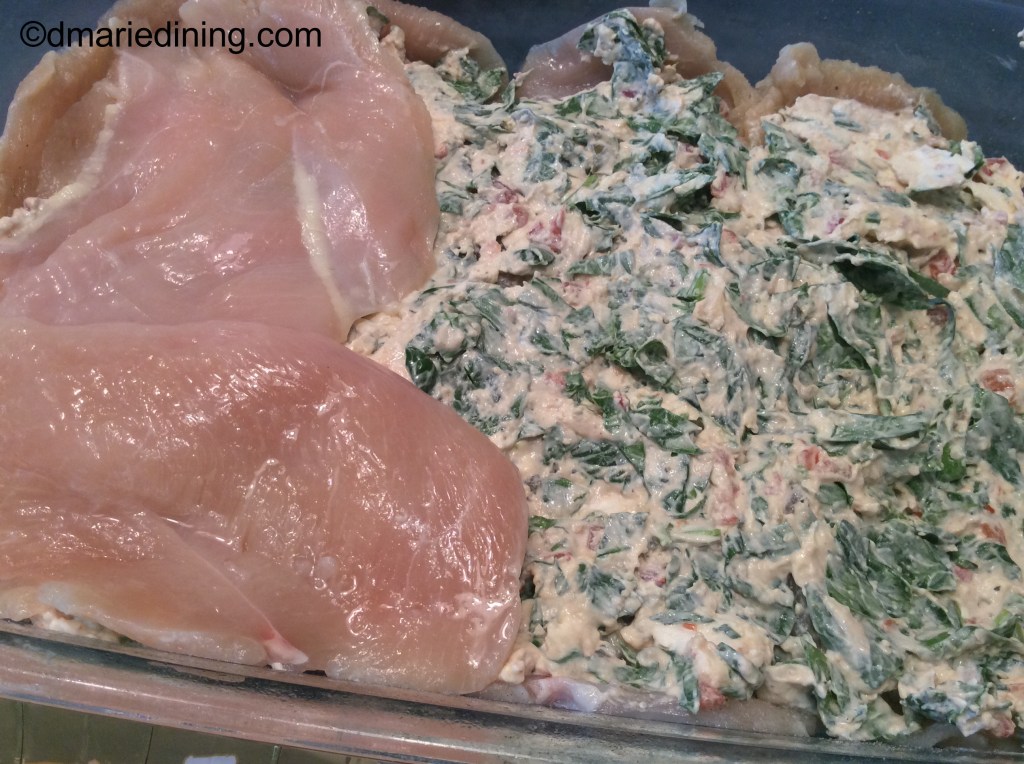
Combine the cream cheese, salsa, spinach and ½ of the grated Parmesan cheese in a large bowl until well blended. Set aside.

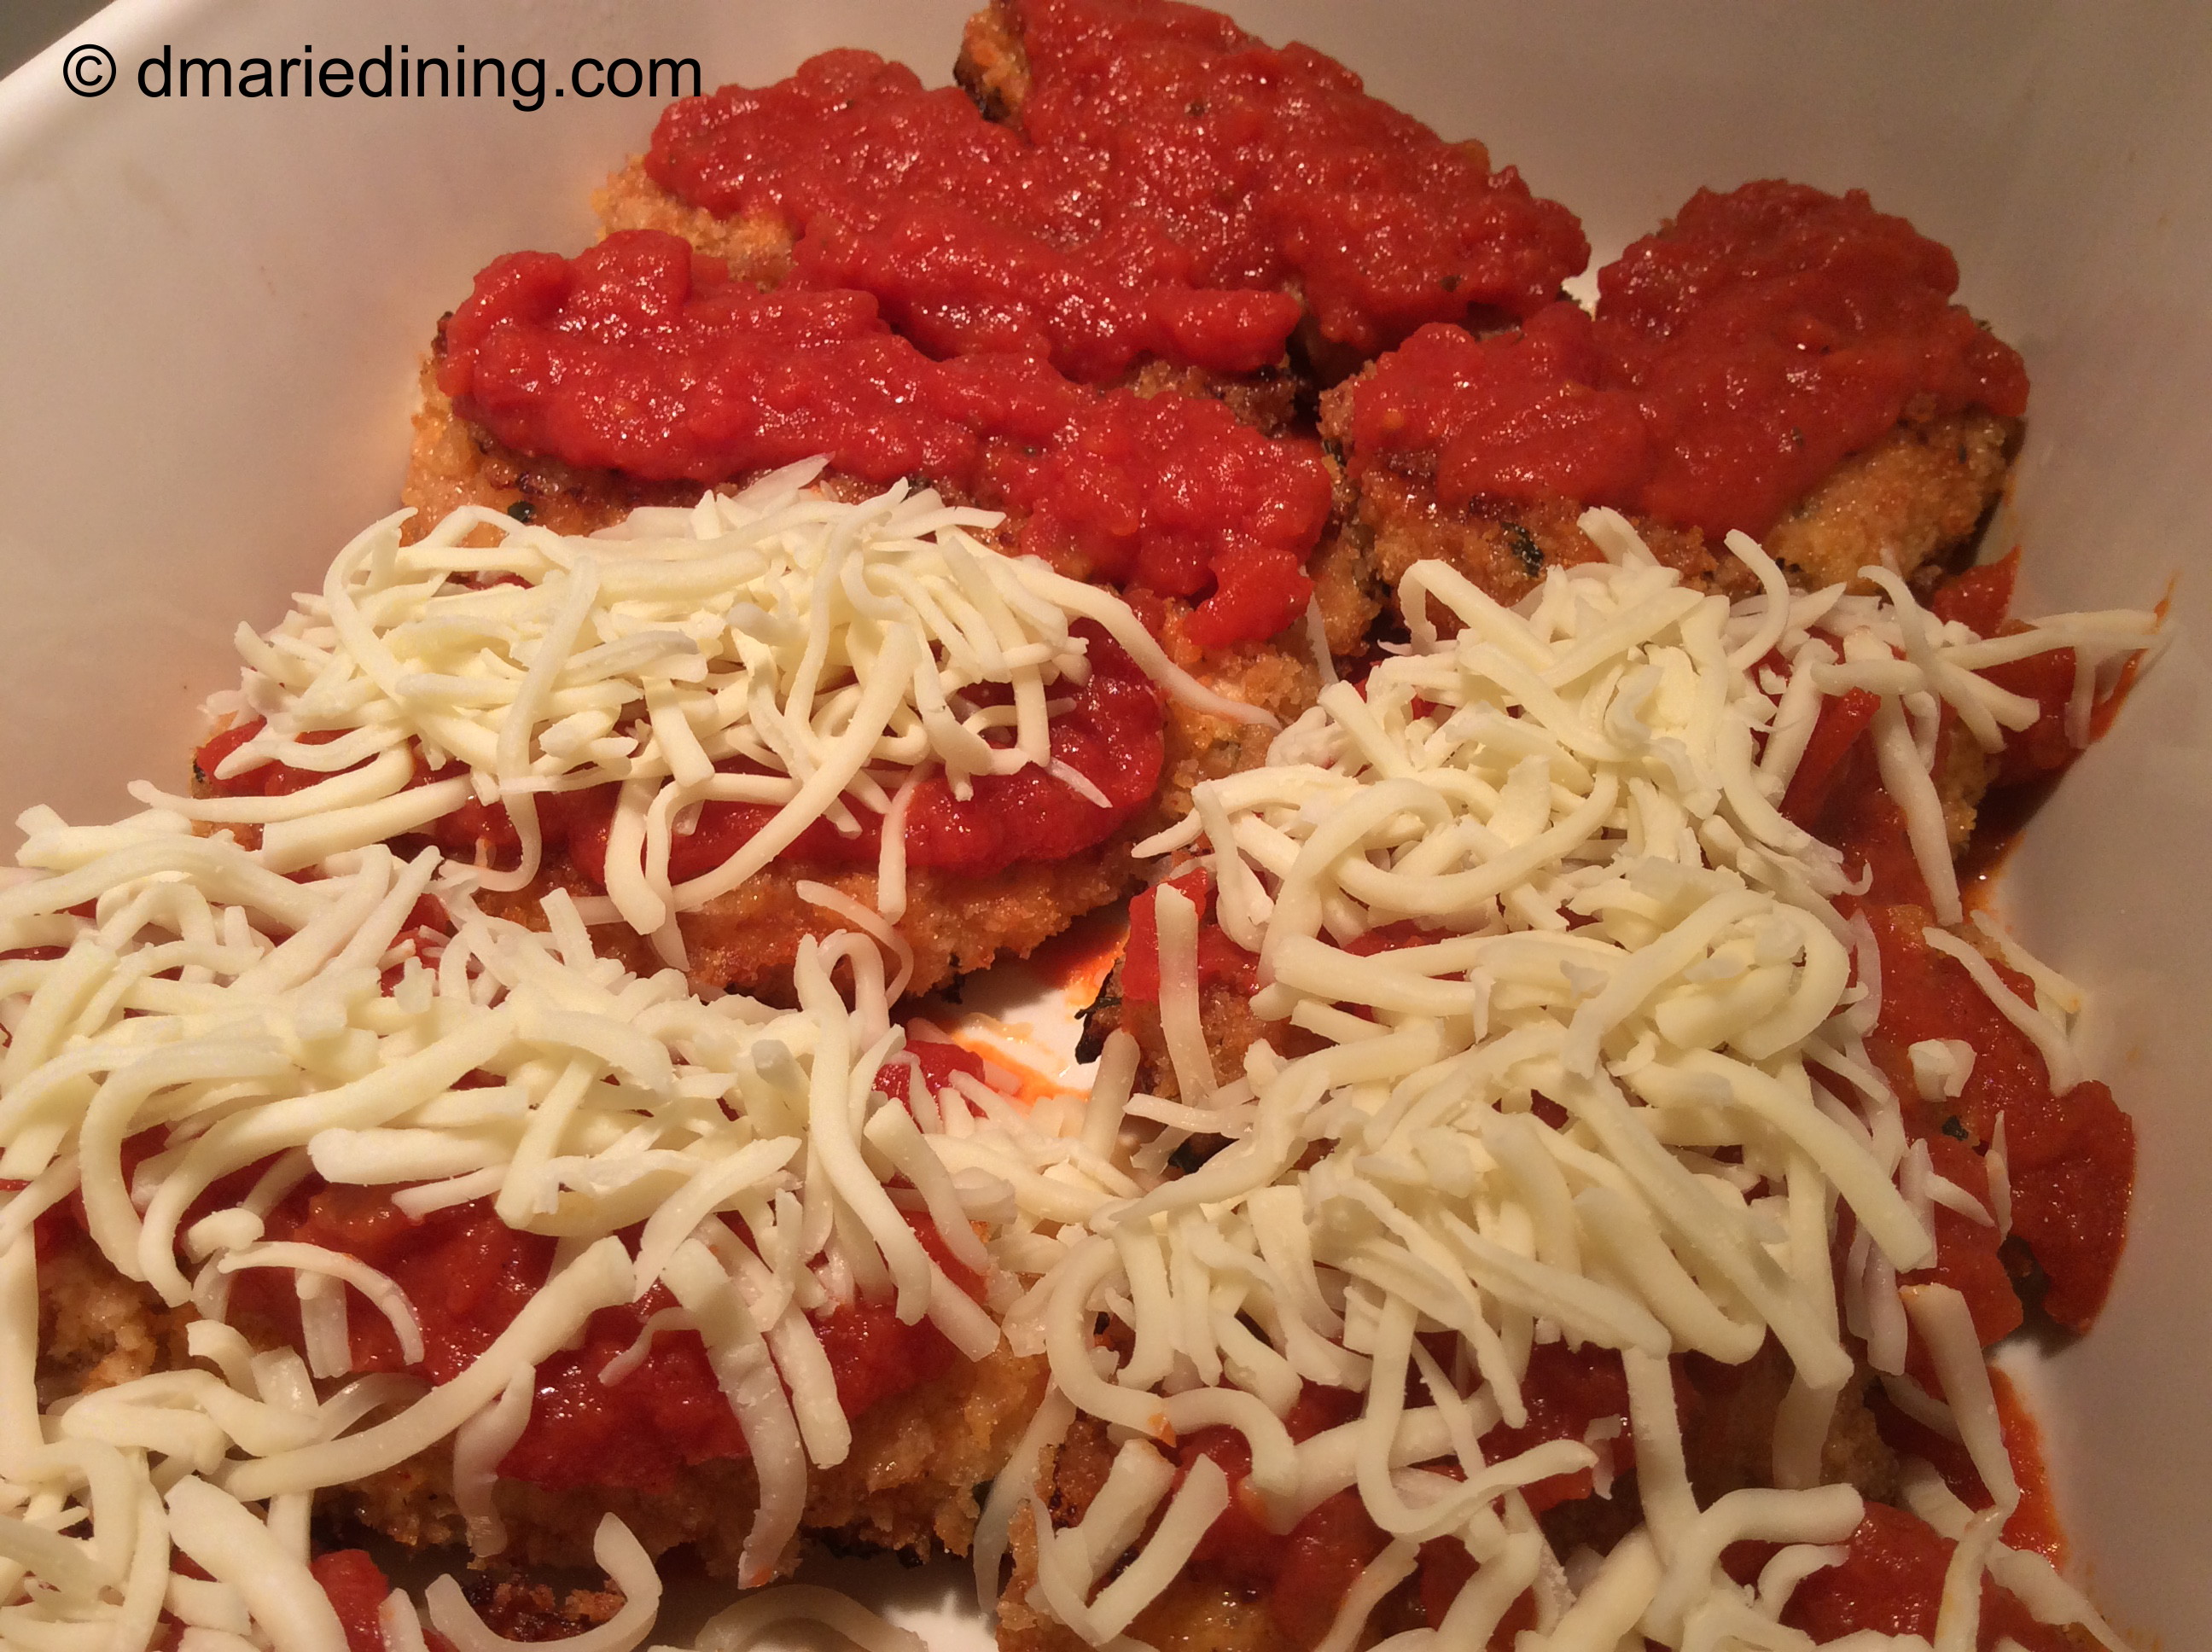
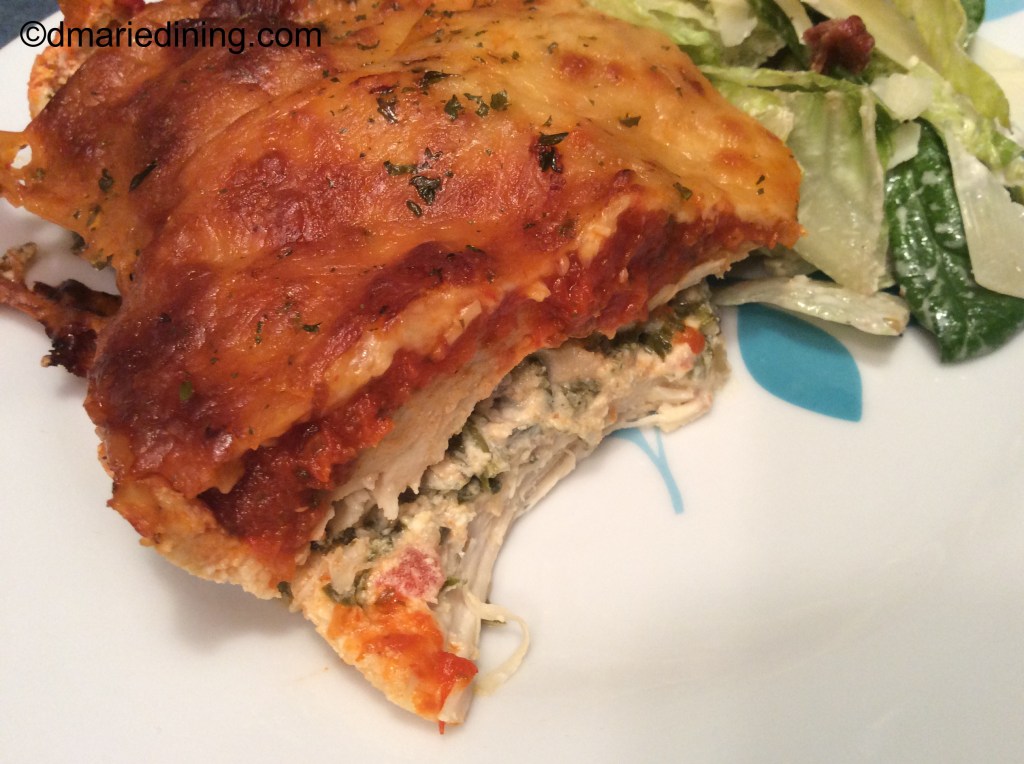
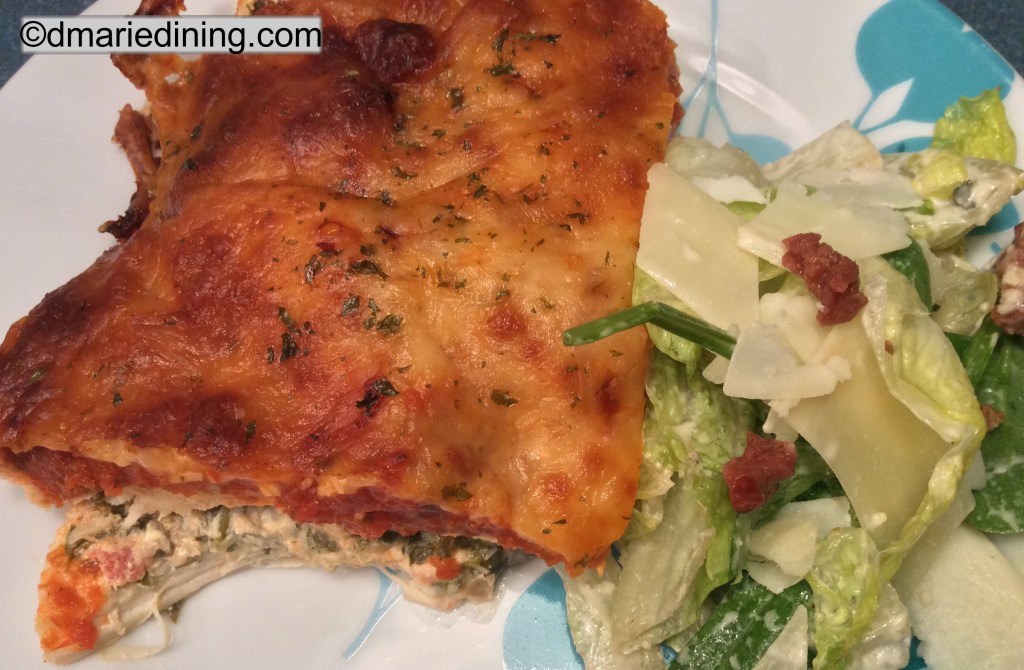
Spray a long casserole dish with cooking spray. Spread a little marinara sauce on the bottom of the dish. Layer one package of the chicken breasts over the sauce. Season with some of the salt, black pepper, red pepper flakes, garlic and onion powder. Spread the spinach and cream cheese mixture over the chicken then layer the other package of thinly sliced chicken breasts over the cream cheese and spinach. Season the top layer of chicken with the remaining seasonings. Pour the rest of the marinara sauce over the chicken then sprinkle the mozzarella cheese and remaining Parmesan cheese over the sauce. Bake for 30 to 45 minutes until the chicken is completely cooked through and the cheese has melted.

Serve with spaghetti squash, pasta or a nice mixed green salad.

Drunken Chicken and Rice

Anytime someone uses the word “drunken” in a recipe you know it involves alcohol. Fortunately, the alcohol usually burns off and you are left with the wonderful flavor alcohol brings to the recipe. My Drunken Chicken and Rice recipe was inspired by a recipe I saw on “Pati’s Mexican Table”.

I was watching her show while trying to come up with an idea for dinner and noticed she was making a dish with chicken thighs which I happen to have had on hand in the refrigerator. I planned to make curried chicken the next day so I had picked up the boneless chicken thighs at the grocers that morning. But, after watching Pati I figured why not try her recipe instead since I had most of the same ingredients and could substitute a few of my own.

The end result was a pan full of deliciousness. My son T looked at me after taking one bite and said, “Your putting this on your blog – right?” while hubby was digging in for his second bowl. Of course both of them added a little more heat to their portions but there was just enough heat for my tender taste buds. As a side dish, I made Poblano peppers stuffed with a blend of Mexican cheeses. I actually chopped up my Poblano pepper and stirred it into my bowl of Drunken Chicken and Rice. Absolutely Wonderful! The Poblano was an excellent accompaniment to the chicken and rice.

I would definitely recommend this recipe for a quick one pan meal. The less fuss and clean up the better in my book.

Drunken Chicken and Rice

Ingredients:

6 – 8 boneless skinless chicken thighs cubed

2 garlic cloves chopped

1 small can of green chiles

½ white onion diced

½ yellow pepper diced

½ red pepper diced

3 cups chicken broth

2 cups white long grain rice

1 cup frozen peas

1 cup beer (your choice)

½ cup diced fresh tomatoes

4 tbsp vegetable oil

1 tbsp Kosher salt

½ tbsp seasoned salt

½ tbsp ground black pepper

1 tsp onion powder

½ tsp smoked paprika

½ tsp red pepper flakes (optional)

½ tsp Chile lime seasoning (optional)

Rinse rice in cold water and set aside.

Place chicken in a large bowl and season with salt, pepper, onion powder, smoked paprika and red pepper flakes. Stir to coat chicken with seasonings. Set aside.

Heat vegetable oil in a large skillet over medium heat Add chicken to the hot skillet and spread it out. Brown chicken on both sides then remove from the skillet and place in a bowl. Set aside.

Add a little more oil to the skillet then add the rice. Stir the rice to coat it with the oil and let cook for about 1 – 2 minutes. Stir occasionally. Move the rice to the edges of the skillet to create a well in the center of the skillet. Add onions, peppers, tomatoes, green chiles, garlic, cumin and Chile lime seasoning. Stir the veggies and cook about 2 – 3 minutes until they begin to soften. Mix veggies and rice together then add beer. Stir then let simmer for 1 – 2 minutes. Add chicken broth, cooked chicken and peas to the skillet. Stir to mix well then cover and cook about 15 – 20 minutes until the liquid is absorbed and the rice is cooked through. Taste for seasoning and add a little more salt or other seasonings if necessary.

Side Dish Ideas:

  • Poblano Peppers stuffed with a blend of Mexican cheeses
  • Wilted Buttered Spinach

Follow my blog with Bloglovin

Double Dip Fried Chicken

Okay, who besides my vegan friends does not like good ol’ home cooked fried chicken? I don’t see any hands so I am guessing just about everyone likes fried chicken. Of course, fried chicken is not something you should have often and if you want to make it seem a little healthy it is better to oven fry the chicken. Less grease. Less hassle. But, when you have a taste for some good extra crispy fried chicken you should try my Double Dip Fried Chicken. Yes, I said double dip. You will be surprised just how crispy, flavorful and tender the chicken will be.

This recipe is a twist on a recipe I saw on a restaurant cooking show. I would never have thought to double dip my chicken before frying to make it real crispy. I always wondered how some chefs were able to make their chicken crispy enough to make a crunching sound without the chicken being dry. Now, I know.

The key to tenderness is marinating the chicken in seasoned buttermilk for a few hours. Usually, after the chicken had marinated I would toss the buttermilk. Oh no, not any more. That buttermilk is golden. Once the chicken is coated with a flour mixture I dip it back into the buttermilk then coat it again with more of the flour mixture. The buttermilk helps to keep the chicken tender and the extra coating creates a wonderful crispiness to the chicken.

Next time you get a taste for some good ol’ extra crispy fried chicken grab some buttermilk, seasoned flour and try out my Double Dip Fried Chicken. I think you will like it.

Double Dip Fried Chicken

Ingredients:

4 – 8 cleaned chicken thighs

4 cups vegetable oil

2 cups flour

1 1/2 cups buttermilk

1 tbsp salt

1 tbsp ground black pepper

1 tbsp smoked paprika

½ tbsp Chile lime seasoning (Trader Joe’s optional)

½ tbsp onion powder

½ tbsp Adobo (optional)

½ tbsp seasoned salt

¼ tsp cayenne pepper

Season the chicken on both sides with salt, ½ tbsp ground black pepper, Chile lime seasoning and smoked paprika. Place chicken in an air tight container then pour buttermilk over the chicken to cover it. Place container in the refrigerator for 2 – 4 hours or overnight.

When it is frying time, heat vegetable oil in a large dutch oven over medium high heat. Temperature should register at 360 degrees. To test the oil the old fashion way, put a small drop of water in the oil and stand back. If it starts popping the oil is ready.

While oil is heating up take the chicken out of the refrigerator and let it come to room temperature. Add flour, ½ tsp ground black pepper, seasoned salt, onion powder and Adobo to a large bowl and combine until well mixed.

Shake off excess buttermilk from a chicken thigh then place it in the flour mixture and coat both sides. Shake off excess flour and dip the floured chicken back into the buttermilk marinate. Again, shake off the excess buttermilk then place it back into the flour mixture. Shake off excess flour and place on a wire rack. Repeat steps with each piece of chicken.

Add 4 – 5 pieces of chicken to the hot oil and fry until golden brown and cooked through. Drain on a layer of paper towels. Repeat steps until all of the pieces are cooked. Serve with your favorite side dishes.

Chicken, Yellow Beets and Pasta

Yellow Beets. Until I decided to create a new chicken and pasta dish I had not seen nor had I tasted yellow beets. During one of my treks to Trader Joe’s I spotted the yellow beets after I saw another customer pick up a package in the vegetable aisle and it looked different from other vegetables. Of course, it could also have been the posted sign saying “New Try Me” that caught my eye.

To be specific, the package contained roasted yellow beets. Immediately, I started thinking about what kind of dish I could possibly make with roasted yellow beets. Since I planned to make chicken and pasta with the lemon chicken I had already thrown into the cart, I figured why not add the roasted yellow beets for more flavor and a pop of color. To add even more color I picked up a package of snap peas to liven up the dish.

I knew from the beginning it was going to be a little tricky to get my youngest son to eat beets. He professes not to like them but it could be because when I made beet salad and the dish turned pink. I thought the dish looked pretty but he thought it looked unappealing at least to his eyes. Even when I just served seasoned plain beets, T would scrunch up his face and gently remove them from his plate. Like I sometimes say, we often eat with our eyes.

Mixing up the yellow beets with the chicken and snap peas was distracting enough that T didn’t really mention the yellow looking thing in the dish. By the time I told him what it was he couldn’t make a face because he had eaten half the food on his plate. I guess blending in the yellow beets is like when my girlfriend added prunes to a cake and didn’t tell me until I had gobbled it up and said how moist and delicious it tasted. I don’t care for prunes but since the cake was good what can I say.

The next time you want to jazz up one of your chicken dishes try adding roasted yellow beets. It can be our little secret.

Chicken, Yellow Beets and Pasta

Ingredients:

1 box vermicelli pasta

1 pkg roasted yellow beets cut into ½ inch pieces

1 pkg fresh snap peas

1 pkg cooked lemon or grilled chicken

2 – 3 plum tomatoes cubed

2 scallions sliced

½ cup half and half milk

½ cup chicken broth

¼ cup grated Parmesan cheese

3 tbsp butter

1 tbsp Adobo

1 tbsp flour

1 tbsp salt

½ tsp ground black pepper

½ tsp olive oil

½ tsp dried oregano

½ tsp dried parsley

½ tsp dried cilantro

Prepare per package instructions and reserve ½ cup of pasta water. Melt 2 tbsp of butter in a large skillet along with olive oil over medium high heat. Add snap peas, salt and black pepper then stir to mix. Saute for 1 – 2 minutes then remove from skillet and place in a small bowl and set aside.

Place skillet back on the stove. Add 1 tbsp of butter to the skillet and let it melt. Add flour to the skillet and stir until smooth. Pour in milk and broth then whisk until the sauce is smooth. Add Parmesan cheese and remaining seasonings. Stir to combine. Add chicken, yellow beets, snap peas and scallions (reserve 1 tbsp of scallions). Gently stir to mix all ingredients. Add pasta water to thin out the sauce if necessary. Reduce heat to medium and let simmer for 5 minutes. Serve over pasta.

Follow my blog with Bloglovin

Chicken and Cabbage Stew

One pot dishes are good for both hubby and me. Good for me because I don’t have to fuss with a lot of different pots, pans and utensils. It’s good for hubby because he usually washes dishes since I cook so less clean up for him.

When I think about it, that is how my mom and dad operated in the kitchen. My mom is an excellent chef and since she did most of the cooking my dad would wash the dishes. Like my hubby, my dad could fix breakfast but that was about it for him. I can’t complain about hubby’s lack of culinary skills because besides washing dishes hubby vacuums and will wash clothes if I don’t get to them first. My in-laws did a great job raising two sons that are productive and aren’t afraid to help around the house. God Bless my dad and in-laws. I miss them everyday.

Okay, back to my Chicken and Cabbage Stew. This is a relatively quick meal and as previously stated the beauty of it is using only one pot. The one constant in our house is chicken. Yes, I sometimes go on and on about eating so much chicken but you really cannot beat it for the price and the health benefits compared to red meats. Adding a few light vegetables to the pot just enhances the nutritional value and cuts down on calories as well as fat.

Aside from the flavors of the Chicken and Cabbage Stew I liked the colors of the dish. The bright red of the peppers. The pop of orange from the carrots and turmeric broth. Plus, the contrast of green between the cooked green peppers and sprinkle of green onions on top. Eating with your eyes is just as important as enjoying the mixed flavors of any dish.

Chicken and Cabbage Stew

Ingredients:

4 – 6 drumsticks or boneless chicken thighs

2 celery stalks diced

1 green onion diced

1 small green pepper diced

1 small red pepper diced

1 small Napa cabbage shredded

1 bag baby carrots

2 cups chicken stock or broth

3 tbsp grape seed oil or olive oil

2 tbsp tomato paste

2 tbsp salt

1 tbsp seasoned salt

1 tbsp ground black pepper

1 tbsp turmeric

1 tsp onion powder

1 tsp cumin

½ tsp red pepper flakes (optional)

½ tsp dried parsley

Heat oil in a large dutch oven over medium heat. Season chicken with 1 tbsp salt, seasoned salt and ground black pepper. Brown chicken then remove from dutch oven and place on a plate to cool slightly. Remove meat from drumsticks and chop or cube chicken thighs. Set aside.

Reduce heat to medium and add onions (except for green onions), peppers and celery to the pot. Season with remaining salt, onion powder, cumin, dried parsley and red pepper flakes. Stir for 1 minute or until vegetables begin to soften. Add tomato paste and turmeric. Stir to blend with vegetables. Add chicken with juices along with chicken stock and carrots to the dutch oven. Let simmer for 10 – 15 minutes then add shredded Napa cabbage. Stir and continue to cook for an additional 20 minutes until the cabbage is cooked and tender.

Serve over rice and sprinkle with green onion.


Follow my blog with Bloglovin

Baked Chicken with a Mango Chutney Glaze

Truth be told… baked chicken is not very exciting on its own. Yeah, you can add a few seasonings besides salt and black pepper to make it taste good. Plus, sometimes you can kick it up a notch by adding BBQ sauce. But…..

Nothing against BBQ sauce. It is always on hand when I am tired of fixing plain baked chicken. But, today I decided to make Baked Chicken with a Mango Chutney Glaze. I have been thinking about this simple recipe for awhile. The problem was I always forgot to look for chutney sauce when I went to the grocery store. It may have helped if I had put it on the shopping list and then actually looked at the list on my trips to the grocery store. Yes, I do make a list but I don’t always check it while I am shopping. Okay, moving on.

Fortunately, on a recent grocery store run I spotted a jar of mango chutney at Trader Joe’s while perusing jars of different sauces and new spices. Chutney is one of those things you have to try to know if you will really like it. There are so many varieties of chutneys it can be hard to choose which one will compliment a dish. My research showed that chutneys are a staple in Indian cultures. Often it is used as a side relish or condiment and helps bring balance to a dish. Most chutneys are a combination of vegetables, fruits, herbs, vinegar, sugar and spices. However, some chutneys are just fruits or vegetables or even minty.  I thought the chutney would be delicious if used as a glaze on baked chicken .

Spicy, sweet or minty, there is surely a chutney you will find to satisfy your tastes. For my baked chicken I added cayenne to the mango chutney sauce to spice it up a bit more. The hot spice and the sweetness of the mango helped to balance each other out to create a really flavorful dish. If you have never considered adding chutney to an old time favorite chicken dish, give it a try and see just how non-boring your chicken will taste.

Baked Chicken with Mango Chutney Glaze

Ingredients:

4 – 6 chicken drumsticks or chicken thighs

1 small onion sliced

1 jar mango chutney

4 tbsp butter

2 tbsp water

1 tbsp grape seed oil or olive oil

1 tbsp Adobo

1 tbsp salt

1 tsp ground black pepper

1 tsp cayenne (optional)

smoked paprika

cooking spray

Preheat oven to 350 degrees. Melt butter together with grape seed oil in a small pot and set aside.

Spray a baking dish with cooking spray. Layer the backing dish with sliced onions and place chicken over the onions skin side down. Sprinkle chicken with half of the seasonings except for the cayenne then flip and sprinkle then season the skin side of the chicken. Pour melted butter over the chicken. Place in the preheat oven and bake for 1 hour.

While the chicken is baking place chutney in a bowl and add water and cayenne seasoning. Mix until the mango chutney is loose but has a thick soup consistency. Add more water if necessary.

After an hour of baking remove the chicken and spoon the mango chutney over the chicken. Place the chicken back in the oven and bake for another 45 minutes to 1 hour until the chicken is thoroughly cooked and nicely browned.

Serve with your favorite side dishes.

Follow my blog with Bloglovin

Quiche

During warmer weather I shy away from always fixing meals that require me to be around the stove for any length of time. One pot meals and meals that go into the oven are my favorite things to prepare when it is hot.

Quiche is one of those meals you can quickly prepare then stick it in the oven to do its thing while you do something else. Quiche is also versatile because you can use anything you want for the filling whether it is veggies, meat, cheese or a combination of all three. The only thing I haven’t tried in a quiche is pasta. But who knows, that might work too. I’ll let you know if I ever get bold enough to try it.

I have two quiche recipes you can try for my vegetarian friends and meat eaters like me. I encourage you to experiment with the ingredients to make this your own favorite recipe.

P.S. Crab quiche is wonderful too. I’ll write a recipe on that one too sometime soon.

Quiche

Basic Quiche Recipe

Ingredients:

6 extra large eggs

1 ready made pie crust (roll out to fit in pie pan)

½ cup shredded Gruyere cheese

¼ cup shredded sharp cheddar cheese

¼ cup fresh grated Parmesan cheese

¼ cup half and half

1 tbsp butter or olive oil

½ tsp mushroom seasoning (Trader Joe’s)

¼ tsp salt

¼ tsp cracked black pepper

¼ tsp dried parsley

¼ tsp dried thyme

2 dashes of hot sauce (optional)

cooking spray

paprika

Preheat oven to 350 degrees.

Place pie crust in a pie pan sprayed with cooking spray. Gently tap the bottom of the pie crust with a fork to prevent puffing. Set aside.

Beat together eggs, seasonings and half and half until well blended. Fold cheeses into the egg mixture. Sprinkle with a little paprika. Place pie pan on a baking sheet and place in the oven. Bake for 30 to 45 minutes. Test to make sure the quiche is cooked thoroughly by placing a butter knife in the center after 30 minutes. Cook a few minutes more if not completely done. Let the quiche cool for about 5 to 10 minutes then serve with nice soup or salad.

Additional Ideas:

Mushroom Quiche:

Saute 1 package each of baby portobella mushrooms and white button mushrooms in 1 tbsp of butter or olive oil. Place on the bottom of the pie crust then pour egg and cheese mixture over the mushrooms. Bake according to basic the recipe.

Chicken and Broccoli Quiche:

Season one package of cooked diced white meat chicken with a little salt, onion powder and pepper.  Set aside.  Blanche 1 package of broccoli florets in salted water for about 3 minutes. Remove from water and place in a bowl of ice cold water to stop the cooking process. Drain and sprinkle broccoli with a little salt. Place chicken and broccoli in the bottom of the pie crust then pour egg and cheese mixture over the filling. Bake according to the basic recipe.


Follow my blog with Bloglovin

Parmesan Chicken Fingers

One of my youngest son’s favorite meals is Parmesan chicken. He likes chicken and he loves pasta. Put the two together and he is extremely happy with dinner. I also enjoy Parmesan chicken (light on the pasta) but sometimes a big fat chicken breast is too much for me. Okay, I will admit I go for the chicken breast first when I eat fried chicken but that is a different kind of meal.

I decided to alter my recipe for Parmesan chicken by substituting chicken fingers for a full chicken breast. Thus, Parmesan Chicken Fingers was born. Using the chicken fingers allows everyone to choose exactly the right portion of meat for their appetites rather than filling their plates with a large single chicken breast.

To add an extra layer of crispiness to the chicken fingers I mixed in a little ground cornmeal with the panko bread crumbs for the coating. I wasn’t sure I could pull this one off with my taste testers but the guys loved it. Sometimes you just have to sneak in something new to a recipe and then sit back and wait for the reactions. I got the idea to add fine ground cornmeal from one of the many cooking shows I like to watch. I think the chef was making fried chicken (yeah, I went back to talking about fried chicken) and added cornmeal to the coating to add an extra layer of crunch. It looked so good on the plate I figured it would be good on my Parmesan Chicken Fingers too.

Bottom-line …. it worked! Such an easy recipe and thankfully a tasty one too.

Parmesan Chicken Fingers

Ingredients:

2 packages chicken fingers

2 eggs

1 jar spaghetti sauce

1 cup shredded mozzarella cheese

½ cup panko bread crumbs

½ cup flour + 1 tbsp

½ cup frying olive oil or vegetable oil

¼ cup finely ground cornmeal

¼ cup grated Parmesan cheese

2 tbsp milk

1 tbsp flour

1 tbsp salt

½ tbsp ground black pepper

½ tsp red pepper flakes (optional)

Preheat oven to 350 degrees.

Season chicken fingers with salt and pepper. Place ½ cup flour on a plate and set aside. Beat eggs with milk and set aside.

Mix panko bread crumbs, cornmeal, 1 tbsp flour, grated Parmesan cheese and red pepper flakes in a bowl.

Dredge chicken in flour (shake off excess) then dip in egg mixture. Roll in bread crumbs and place on a cookie sheet to rest.

Heat oil in a no stick frying pan over medium heat. Test the oil to see if it is hot by place the thick end of a chopstick in the center of the pan. It you see rapid bubbles then the oil is hot (Thanks for the tip Mama Noi). Fry the chicken in batches until lightly golden brown. Drain on a paper towel.

Place chicken in a casserole dish and drizzle with spaghetti sauce and top with mozzarella cheese. Bake for 15 – 20 minutes until cheese is melted and golden. Serve with pasta.

P.S. For the grand kids I make Parmesan Chicken Fingers with a honey mustard or BBQ dipping sauce.

Follow my blog with Bloglovin

Chicken Stir Fry

Stir fry dishes are one of the easiest things to make for dinner on a busy night or any night. My version of Chicken Stir Fry was developed over time as I played with different flavors and levels of heat. I had to find a happy medium for the family as my taste buds like low to medium heat and the rest of the family like burn your mouth levels of heat. Since I wanted to enjoy the dish along with the family I went with medium heat with a side of hot chili oil for the everyone else to add to their bowls of stir fry.

If you don’t have a wok, I would suggest investing in one because you can make a variety of dishes in this one tool wonder. Woks are easy to clean and can take a lot of heat. Of course, if you don’t have a wok or don’t want to invest in one, you can stick to using a large skillet for creating your stir fry dishes.

The key to making a flavorful stir fry is in the marinade. The longer you marinade the chicken or any other meat, the more intense the flavor becomes. At a minimum marinade your meat for 30 minutes and if you can plan ahead, marinade it overnight. Overnight marinading also helps to tenderize the meat (just a few useful tips).

From start to finish I can have dinner ready in an hour for the hungry crew on Chicken Stir Fry night. Talk about Healthy, Quick and Easy! I love it.

Chicken Stir Fry

Ingredients:

2 – 3 chicken breasts cut into thin strips

1 package snow peas

1 small green pepper large dice

1 small broccoli crown cut into florets

1 small onion diced

1 cup shredded carrots

½ cup chicken broth

½ cup crispy chow mein noodles

1 small can water chestnuts drained

3 tbsp hoisin sauce

3 tbsp oyster sauce

2 tbsp Thai style sweet and spicy sauce

2 tbsp garlic chopped

2 tbsp soy sauce

2 tbsp olive oil

1 tbsp corn sauce

1 tsp minced ginger

1 tsp black pepper

½ tsp red chili flakes (optional)

Marinade:

Place chicken in a medium sized bowl. Mix together Thai style sweet and spicy chili sauce, 1 tbsp garlic, ginger, soy sauce and corn starch in a separate bowl. Pour mixture over chicken and massage into the meat. Cover with plastic wrap and marinade in the refrigerator for at least 30 minutes or overnight.

To cook stir fry:

Heat oil in wok or large skillet over medium high heat. Add chicken and stir until chicken is no longer pink but not totally cooked through. Remove chicken and place in a bowl. Set aside. Add a little more oil to the wok if necessary then add carrots, snow peas, onions and broccoli. Cook for 2 – 3 minutes stirring constantly until vegetables begin to soften. Add chicken broth, water chestnuts and chicken to the vegetables along with the sauces and red chili flakes. Stir and cook an additional 3 – 5 minutes until chicken is fully cooked through. Serve in bowls over rice, ramen or udon noodles. Top with crispy chow mein noodles.

Follow my blog with Bloglovin

Honey Dijon Baked Chicken

If you have used Gazebo Room Greek Salad Dressing and Marinade as a marinade for chicken you won’t be surprised at how tasty their Honey Dijon Vinaigrette works as a marinade too. This new Gazebo Room product lives up to their signature Greek salad dressing. I was inspired to use this dressing as a marinade because I enjoy the taste of honey and mustard. I don’t usually tell on myself but I must say the flavors were so good on the chicken that I wanted to take my time and pick every morsel of meat off the bone. Of course, I added other seasonings to the chicken but the flavors from the dressing were prominent.

I tried this recipe while my youngest son was home from college. He declared he was trying to eat healthier and didn’t want to eat red meat. Since he was game I was game for giving up pork chops and ribs for a while. This meant I had to add even more chicken and fish to our diets. No one would miss the steaks we ate a few times a year. Now my biggest problem was coming up with even more ways to prepare chicken so it would not be boring. T is not a fan of baked chicken but I had run out of ideas for my usual chicken recipe rotation. So, I took the chance of marinating chicken legs in the Gazebo Room dressing then baking them. Hence, my Honey Dijon Baked Chicken recipe. I figured the Honey Dijon Vinaigrette would kick the flavors up a notch and he would not notice the chicken was baked. I was right! T never mentioned or grumbled that we were having baked chicken. All I heard was the smacking of lips and saw naked chicken bones on his plate.

Chalk one up for Gazebo Room and chalk one up for me!

Honey Dijon Baked Chicken

Ingredients:

6 – 8 chicken legs and thighs

½ cup Gazebo Room Honey Dijon Vinaigrette

½ stick butter

½ medium onion sliced thin

1 tbsp salt

1 tsp olive oil

½ tsp ground black pepper

½ poultry seasoning

½ tsp turmeric

½ tsp cayenne pepper

Preheat oven to 350 degrees when ready to bake.

Place chicken in a large bowl and sprinkle seasonings over chicken. Pour dressing over chicken and toss to coat. Place chicken into a plastic bag then place in the refrigerator for a couple of hours. Remove from bag and add single layer to a baking dish. Melt butter and pour over chicken. Place in the oven and bake for 1 hour until chicken is browned and cooked all the way through.

Follow my blog with Bloglovin