Tag Archives: food photography

Italian Sausages, Peppers and Zucchini

The other day I went to a local apple orchard to pick up some delicious seasonal apple cider and spotted some cute marbled zucchini in the general store. I’m not sure if they are called marbled zucchini but they looked like they were marbled and much smaller than regular zucchini.

Anyway, I picked up a few along with some red, yellow and green peppers. I wasn’t sure what I was going to do with the veggies at the time but it all came together when I decided to make a quick Sunday meal. The result was a dish made of hot and sweet Italian sausage, sliced peppers, crushed tomatoes and my cute little zucchini sliced thin.

This was another one pot dish that I served over pasta with grilled Naan bread on the side. Talk about yummy. Not to brag, but I was impressed with how quickly the meal came together and how wonderful the mixed flavors tasted. I didn’t even have to ask hubby if this recipe was blog worthy. The first bite let me know it was definitely going on the blog!

Italian Sausages, Peppers and Zucchini

Ingredients:

1 pkg hot Italian Sausage casing removed and cut into large bite sized pieces

1 pkg sweet Italian Sausage casing removed cut into large bite sized pieces

5-6 fresh basil leaves torn

2 small zucchini sliced thin

1 small red onion peeled and sliced

1 red bell pepper seeded and sliced

1 green bell pepper seeded and sliced

1 yellow bell pepper seeded and sliced

1 lg can crushed tomatoes

½ cup water

2 tbsp grape seed oil

2 tbsp extra virgin olive oil

1 tbsp Worcestershire sauce

1 tbsp dried oregano

1 tbsp salt

½ tbsp ground black pepper

½ tbsp Adobo seasoning

Place oils in a large skillet or dutch oven and heat over medium high heat. Add sausages and brown on both sides then remove and place on a plate. Add peppers and onions to the skillet and season with salt, ground black pepper, oregano, Adobo and Worcestershire sauce. Stir then reduce heat to medium. Cook for 2 minutes then add zucchini, basil leaves, crushed tomatoes and water. Stir to mix then add sausages and juices to the skillet. Stir to blend all the ingredients then cover and let simmer for 20 – 25 minutes. Serve over pasta or rice.
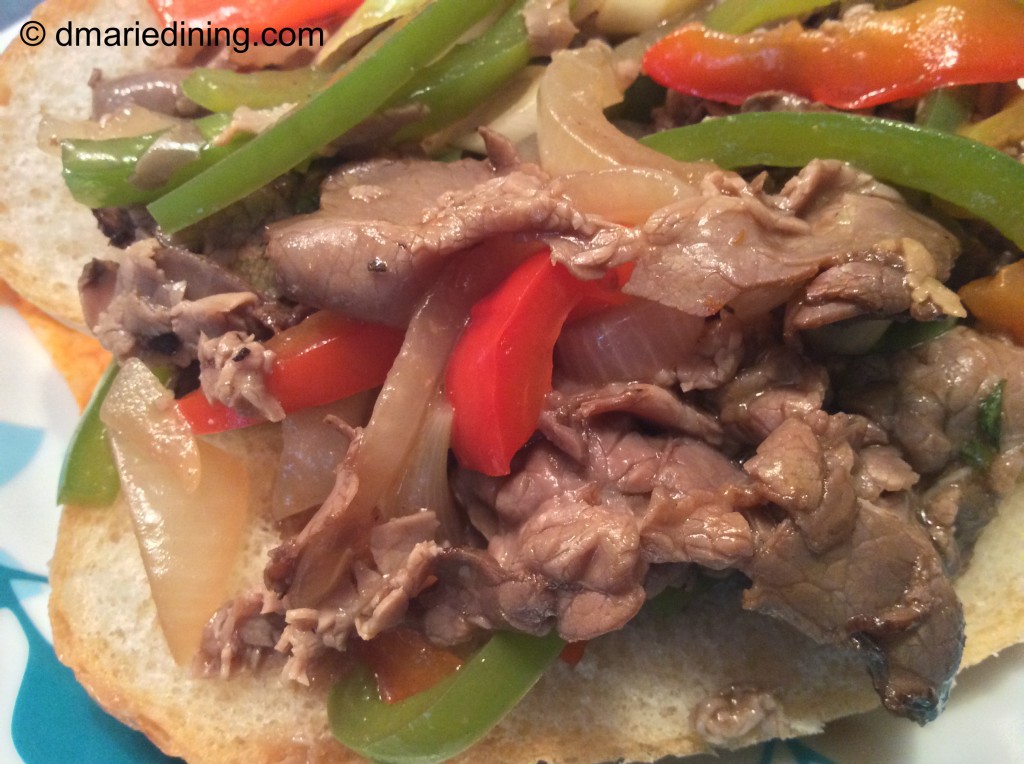
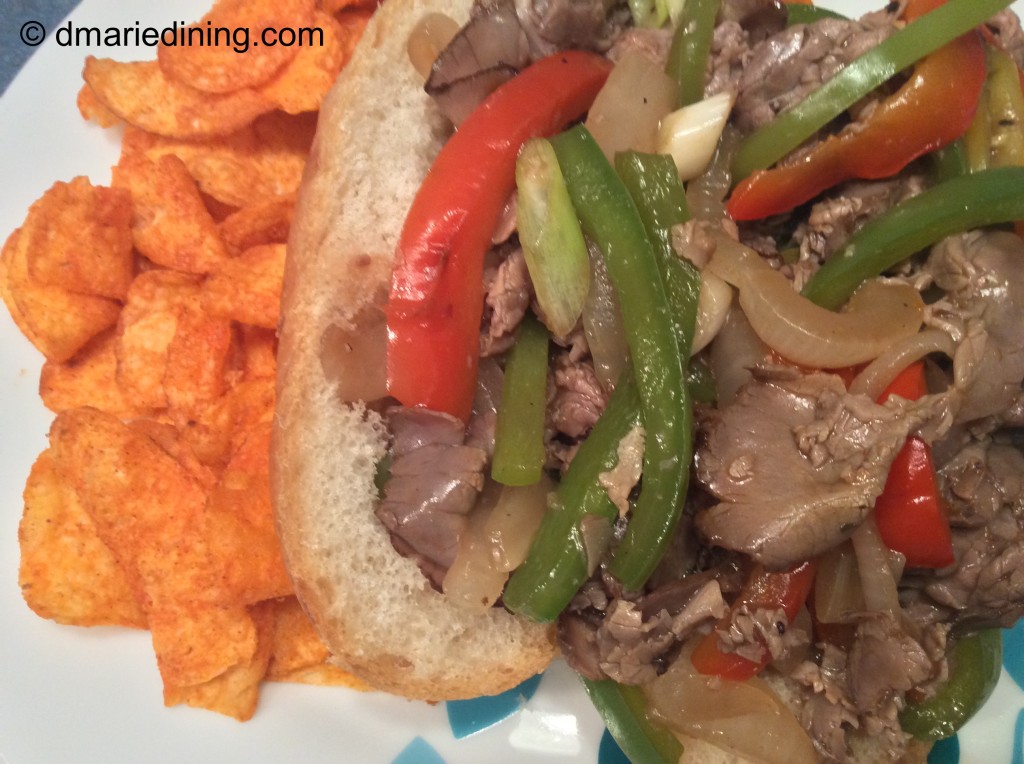
Easy Pepper Steak Sandwiches

Because my family is not big on eating a lot of beef we only have steaks about twice each month. Sometimes even twice per month is too much for steak but I still like to fix some type of beef just to break up the menu from having chicken dinners. That is where London Broil comes in. Deli sliced London Broil to be exact.

Back when date night meant reservations at an upscale restaurant, hubby would take me to one of my favorite places called Harry’s Savoy Grill which is known for Delicious (with a capital D) steaks. Harry’s is where I fell in like with London Broil steaks. Their steaks are so tender you can practically cut it with your fork. Plus, Harry’s is the only restaurant where I will order my steak medium rare as I am not one to eat anything at a rare temperature. I make my exception with London Broil.

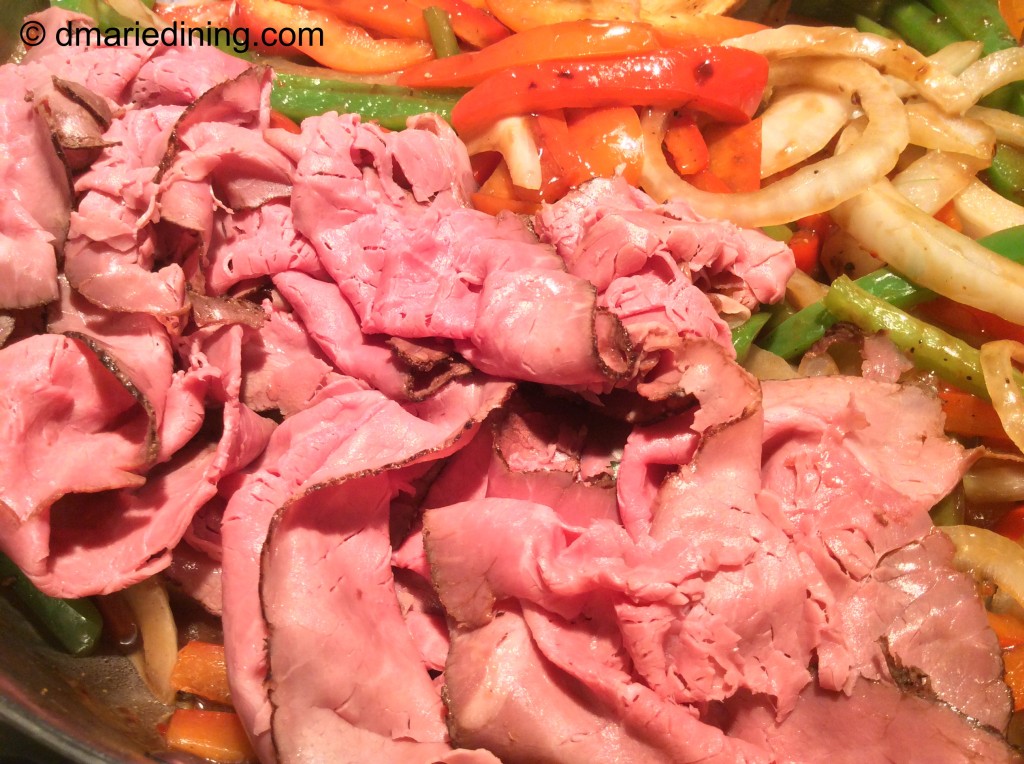
Now date night is more causal and we tend to do take out for dinner so we can sit on the porch or watch a movie. Of course, that hasn’t stopped me from enjoying London Broil. Because I have not figured out a way to make flank steak really tender, I decided to use deli sliced London Broil for an Easy Pepper Steak Sandwich. Instead of spending time marinating slices of flank steak I use thinly sliced London Broil since the meat is already tender. I just simmer the meat in a light sauce with sauteed onions and peppers to make the sandwiches more flavorful and Delicious with a capital D!

If you are true beef eater, check out this recipe for an alternative to a heavy steak or burger. I think you just might like it.

Easy Pepper Steak Sandwiches

Ingredients:

1 – 1 ½ lbs London Broil deli slices

1 medium onion sliced

1 small green pepper sliced

1 small red pepper sliced

1 garlic clove minced

½ cup chicken or beef broth

3 tbsp soy sauce

2 tbsp olive oil or grape seed oil

1 tbsp minced fresh ginger

1 tbsp cornstarch

½ tsp Kosher salt

¼ tsp ground black pepper

pinch of red pepper flakes (optional)

Place soy sauce, ginger, cornstarch and garlic in a small bowl and stir to mix well. Set aside.

Add olive oil to a large skillet and heat over medium high heat. Add peppers and onions to the skillet. Season veggies with salt, ground black pepper and red pepper flakes. Stir and let cook for approximately 3 – 5 minutes until the veggies slightly soften.

Stir in broth and soy sauce mixture to the skillet and reduce heat to medium low. Add in the deli slices of London Broil. Gently turn the meat to make sure both sides are coated with gravy. Let simmer for 1 – 2 minutes. Serve on a hoagie roll or your favorite sandwich roll.

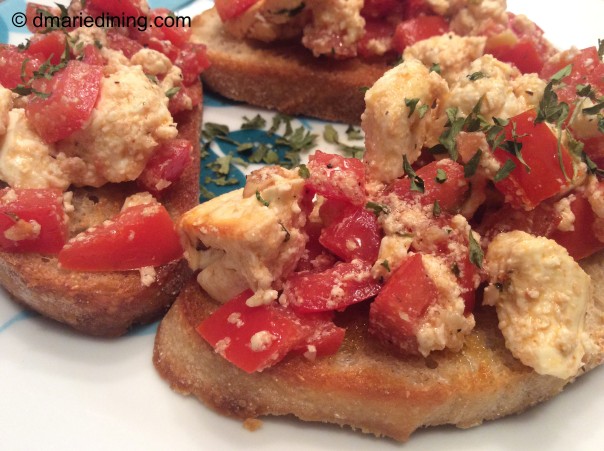
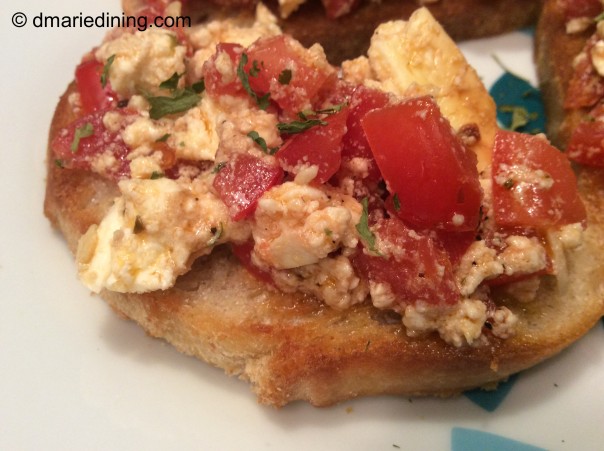
Bruschetta with Roasted Feta Cheese

My hubby inspired me to make this recipe. On one of the several occasions I made my Sausage and Pasta with Feta and Tomatoes, he suggested I just serve the roasted feta cheese and tomatoes and let everyone take spoonfuls of it. Of course, his idea did not work with the meal I was preparing at that moment so I tucked his suggestion aside to try sometime later.

Well, later is now. Bruschetta with Roasted Feta Cheese was adapted from hubby’s idea. Bruschetta is very easy to make and refreshing. It is basically marinated diced tomatoes. A classic Bruschetta has diced tomatoes, garlic, olive oil, basil, salt, pepper and balsamic vinegar. So I took a classic bruschetta and stepped it up by adding roasted garlic and feta cheese. Absolutely delicious!

Hubby didn’t quite give me the side eye when he saw me mixing everything together. But, he did give me a skeptical look. I told him his idea inspired me to create this dish so he was game to try it as an appetizer during our little happy hour.

After gobbling down three, he went looking for more! There were only two left and I give him credit for asking me if I wanted any more. I didn’t so he was quite happy to gobble up the rest. Whenever hubby goes back for seconds I know the recipe is a hit and blog worthy. Thanks Babe for once again inspiring me to try new things!

Bruschetta with Roasted Feta Cheese

Ingredients:

6 – 7 Roma tomatoes

2 cloves of peeled garlic

1 small French baguette sliced

1 block of feta cheese

1 sprig fresh rosemary leaves removed and chopped

¼ cup olive oil + 2 tbsp

2 tbsp grated Parmesan cheese

1 tbsp dried basil

½ tsp Kosher salt

¼ tsp ground black pepper

pinch chipotle seasoning

pinch red pepper flakes

Preheat oven to 375 degrees.

Cut tomatoes in half and remove seeds. Chop tomatoes and place in a large mixing bowl. Add ¼ cup of olive oil, salt, pepper, basil, balsamic glaze and Parmesan cheese. Stir to mix well. Cover with plastic wrap and set aside to marinate the flavors for 30 minutes.

Place block of feta cheese in the center of a small baking dish and place garlic cloves in one corner of the dish. In a small bowl mix together 2 tbsp olive oil, rosemary, red pepper flakes and chipotle seasoning. Drizzle mixture over the feta cheese. Place in the oven and bake for 45 minutes until golden brown. Remove from the oven and smash the garlic. Let the cheese cool slightly.

Turn oven up to 400 degrees. Place sliced bread on a rimmed cookie sheet and brush with a little olive oil. Place cookie sheet into the oven and brown the bread on each side. Remove from the oven.

Combine the cooled feta and garlic with the tomatoes then top each bread slice with a little of the mixture. Serve immediately.

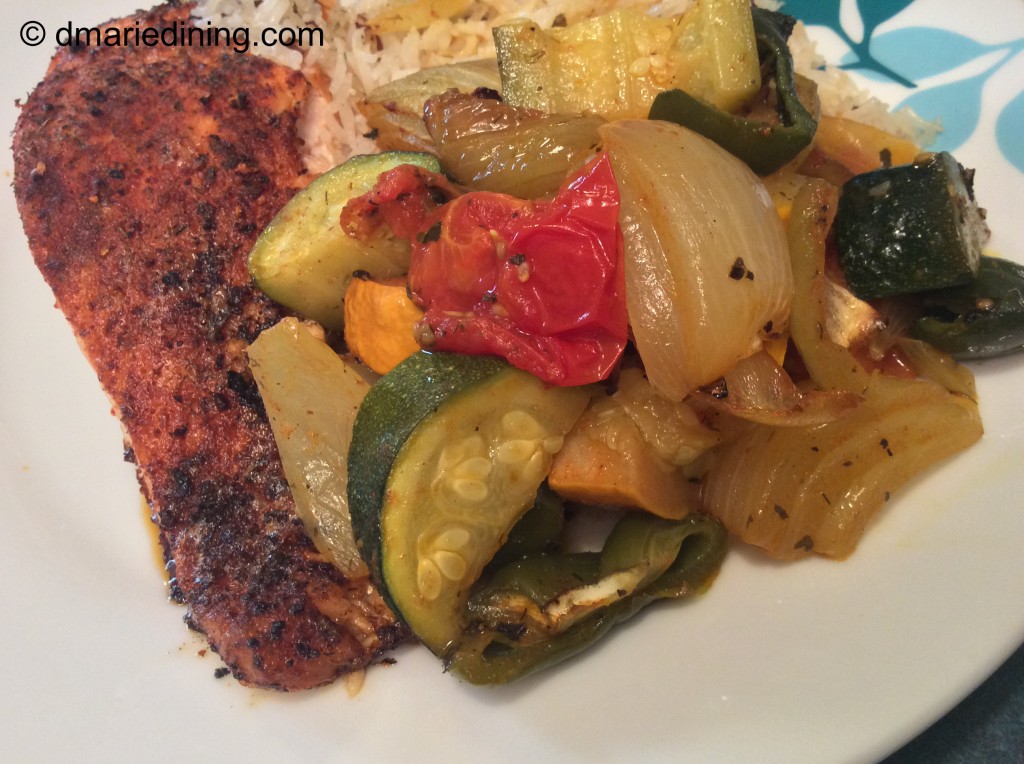
Roasted Zucchini, Yellow Squash and Other Veggies

I have learned over time that the best way to bring out the natural flavors of vegetables is to roast them. Whether it is to create a delicious soup, add to a favorite recipe or to just have a medley of veggies, roasting is the way to go.

This past summer proved to be a veggie delight for me and hubby. Between the tomatoes and peppers we grew on our porch and the beautiful vegetables we bought from local farmers we were in veggie heaven.

To pack a lot of flavor into one vegetable side dish I roasted zucchini, yellow squash, tomatoes, onions and peppers together. The prep time was quick and the end result was fantastic. Also, using a sheet pan to roast the vegetables kept clean up time down to a minimum.

Next time you want to have a flavor packed side dish or just a bowl of good veggies, try roasting a bunch of your favorite vegetables together for a Healthy, Quick and Easy recipe.

Roasted Zucchini, Yellow Squash and Other Veggies

Ingredients:

1 lg zucchini quartered

1 lg yellow squash quartered

1 pkg Campari tomatoes cut in half

1 lg onion cut into wedges

1 small jalapeno pepper sliced thin

1 medium green pepper diced

2 tbsp extra virgin olive oil

1 tbsp dried oregano

1 tbsp dried basil

1 tbsp salt

1 tsp ground black pepper

1 tsp smoked paprika

¼ tsp cayenne pepper (optional)

Cooking spray

Preheat oven to 400 degrees.

Spray a rimmed sheet pan with cooking spray then add the vegetables to the pan. Sprinkle with all of the seasonings then drizzle with extra virgin olive oil. Toss to mix and coat the vegetables. Place in the oven and bake for 30 to 40 minutes until the vegetables are soft and cooked to your desired tenderness. Serve with your favorite meat or over rice as a vegetarian meal.

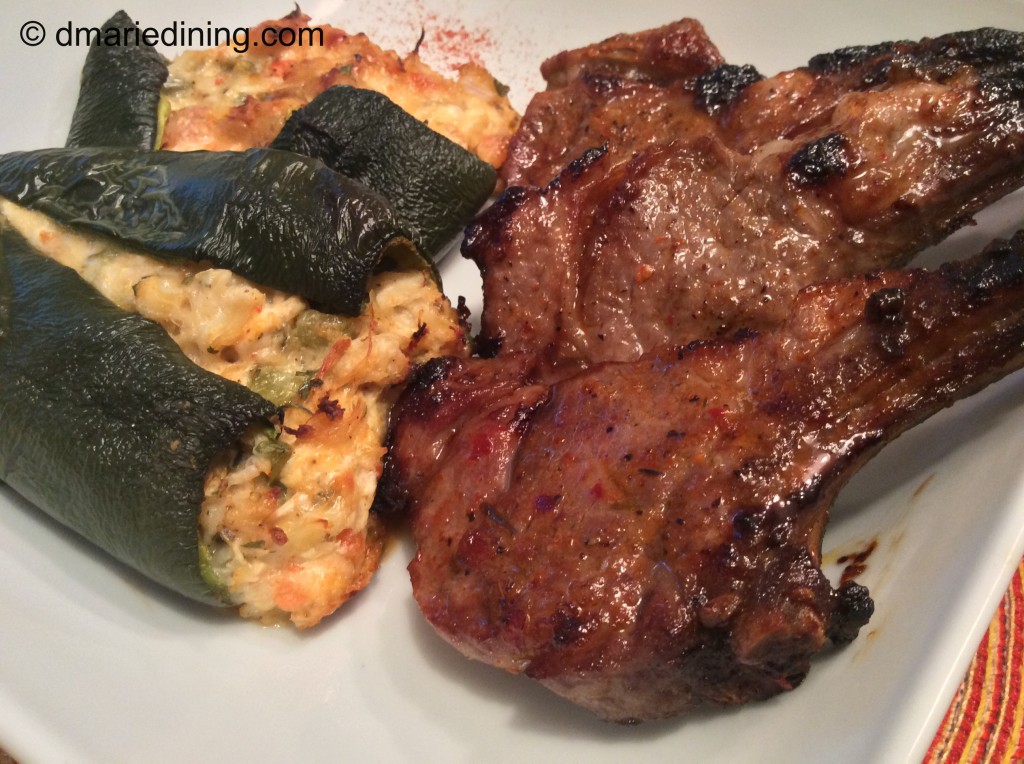
Crab Stuffed Poblano Peppers

Stuffed poblano peppers has become one of my favorite side dishes because they go well with any main course. Plus, you can stuff the peppers with just about anything. Rice, cous cous, tomatoes or even crab meat.

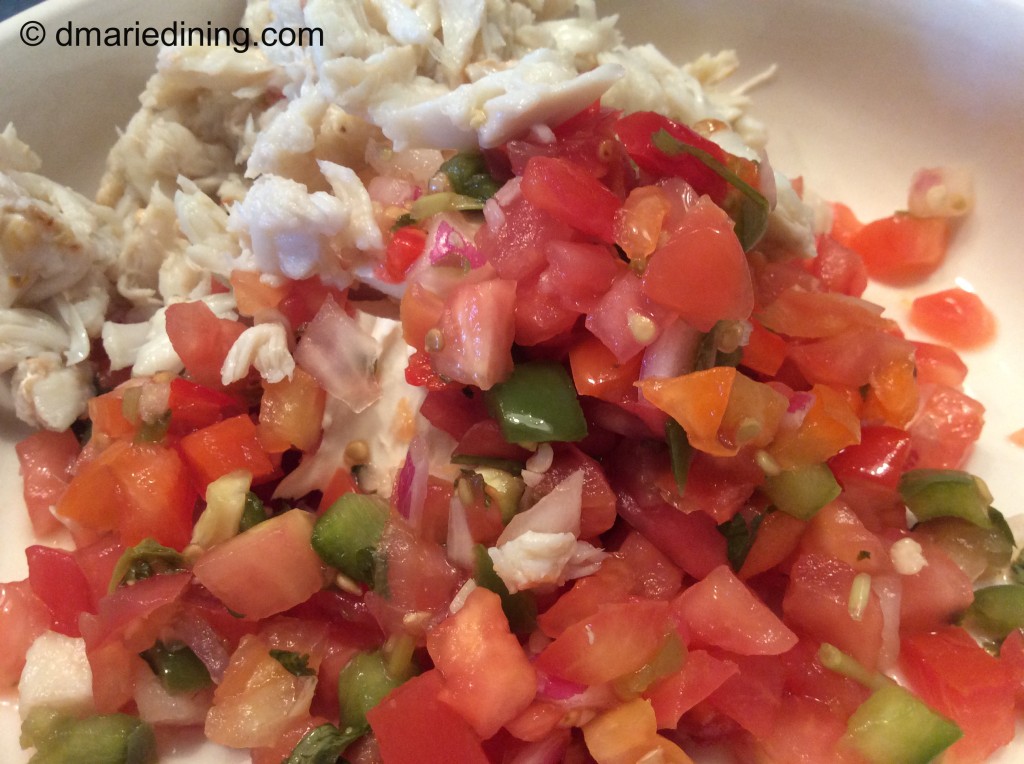
The last time I decided to stuff some poblano peppers I made Crab Stuffed Poblano Peppers. This recipe was created because I had crab meat on hand and fresh salsa I did not want to go to waste and a few poblano peppers hanging around. My original thought for the crab meat was to make crab imperial (I’ll post that recipe one day) but I decided I wanted a lighter meal on this particular day. Stuffing the peppers with crab meat seemed like the perfect side dish to our lollipop lamb and I was right.

The combination of the crab meat, fresh salsa and cheese tasted great with just a hint of spiciness. If you want more heat don’t remove the rib of the poblano peppers and leave some seeds. As most folks know that is where most of the heat comes from for any hot pepper.

Although I paired the stuffed peppers with lollipop lamb chops, they would also go with a nice Big Salad. Check out the link for a great salad recipe.

Crab Stuffed Poblano Peppers

Ingredients:

4 poblano peppers (seeds and ribs removed)

1 small container of lump crab meat

½ cup fresh hot or mild salsa

¼ cup shredded Queso or Mexican Cheese

½ tsp salt

¼ tsp ground black pepper

Juice from ½ a fresh lemon

Cooking spray

Preheat oven to 400 degrees.

Slit the top of each poblano pepper half way lengthwise. Set aside.

Combine the crab meat, fresh salsa and seasonings in a large bowl. Add the cheese to the bowl and stir to blend well. Stuff each pepper with a few spoonfuls of the crab mixture. Do not over stuff.

Spray a rimmed baking sheet with cooking spray then lay the peppers on the baking sheet. Bake for 45 minutes or until the peppers are softened and the cheese is golden brown.

Jazzed Up Dirty Rice

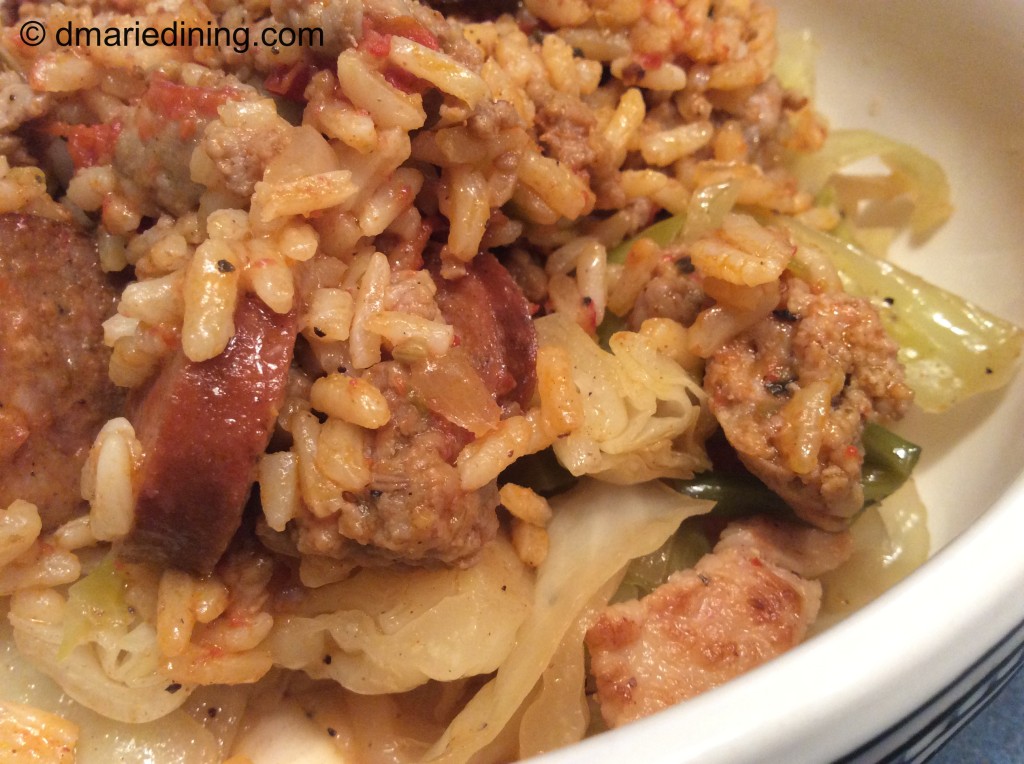
If you’re looking for a Dirty Rice recipe that is strictly made from scratch, this is not the recipe for you. This recipe is a combination of an old recipe from many moons ago and my new friend Zatarain’s. Of course, the recipe can be adjusted to exclude the help of Zatarain’s but why not cut a few corners whenever you can for an easier recipe.

Like I said earlier, I used to make dirty rice many moons ago when I was single. Rice dishes are a great way to stretch a budget when you are low on funds (young single life) or if you are just learning how to cook on your own. In my case it was both when I initially moved away from home. I knew how to cook but not really on my own plus buying my own groceries. I am more of a potatoes kind of gal but making dirty rice, rice casseroles or fried rice allowed me to have multiple meals for lunch and dinner.

My Jazzed Up Dirty Rice is a recipe I will definitely share with my youngest son as he is on his own now and learning how to cook for himself. Jazzing up the recipe meant using Italian sausage, roasted red peppers, Chile peppers, Cajun sausage and a few red pepper flakes to bring on the heat.

Pulling everything together is quite easy and since you basically only use a few pans for cooking your clean up time is less than usual. Give this recipe a try and I am sure you won’t be disappointed.

Jazzed Up Dirty Rice

Ingredients:

1 box Family Size Zatarain’s Dirty Rice

1 lb Campari tomatoes (quartered)

1 package fresh Italian sausage (casting removed)

1 package Zartarain’s Cajun Smoked Sausage sliced

1 small can green Chiles

1 small onion diced

2 cups chicken broth (low sodium)

1 ½ cups water

1 tbsp olive oil

1 tbsp Worcestershire sauce

1 tsp dried oregano

1 tsp seasoned salt

¼ tsp salt

¼ tsp red pepper flakes

Preheat oven to 400 degrees.

Place tomatoes in a small casserole dish. Season with ¼ tsp salt and oregano. Drizzle olive oil over the tomatoes then stir to coat with seasonings and olive oil. Place tomatoes in the oven for 45 minutes. Set aside when done roasting.

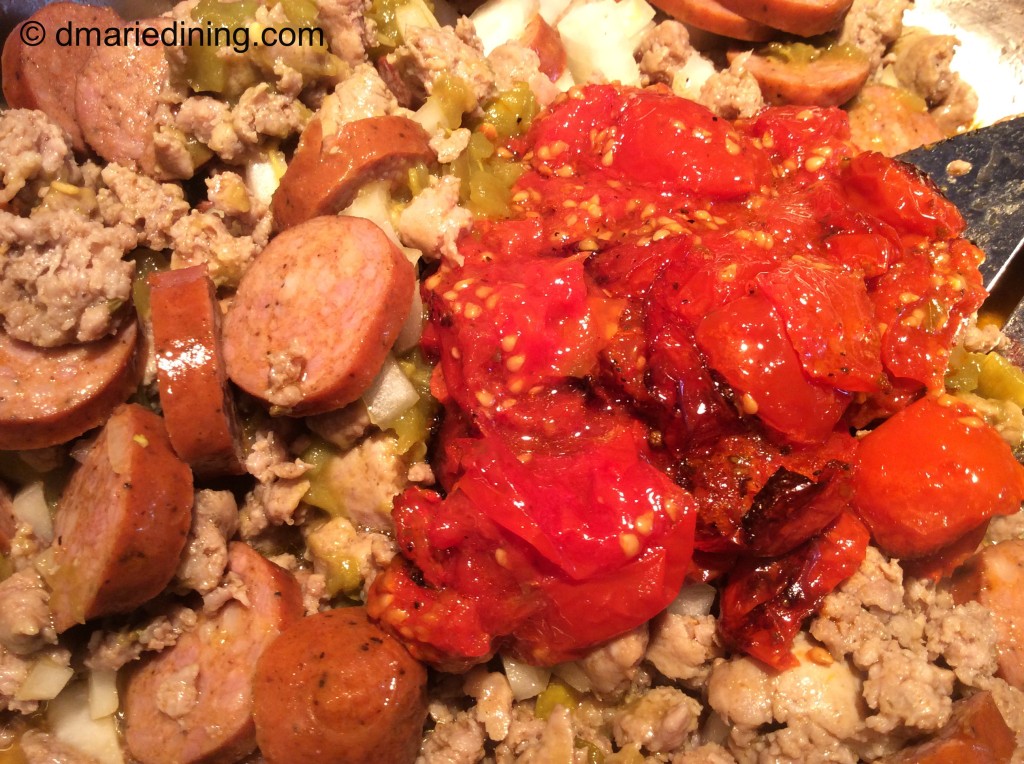
While the tomatoes are roasting brown the Italian sausage in a large skillet over medium high heat. Add sliced smoked sausage and onions to the Italian sausage and stir. Cook for 2 – 3 minutes then add the green Chiles. Cook another few minutes then stir in the roasted tomatoes and remaining seasonings. Create a well in the middle of the pan then add the box of Zatarain’s Dirty Rice. Gently mix the rice with the sausages and tomatoes then stir in water and chicken broth to blend. Reduce heat to medium and cover. Simmer for 25 – 30 minutes until the rice is tender stirring occasionally. If necessary, add a little more liquid half way through the cooking process if the rice seems hard or too dry.

Serve with cabbage, a green mixed salad or sliced tomatoes.

Layered Stuffed Chicken Breasts

Although chicken breasts were one of my favorite pieces of the bird (wings were my next favorite), I found as I got older that chicken breasts can be too big and dry sometimes when you bake them. Over my years of cooking I was able to perfect my baked chicken and have it come out more moist than dry.

As I changed my eating habits I discovered I liked cooking with chicken thighs more than chicken breasts. Still, the breast held a special place in my heart and I would get a hankering for a nice meaty stuffed chicken breast. Recently, I rediscovered thinly sliced chicken breasts at my grocer. The grocer doesn’t always seem to have them on hand so I forget about looking for them. On my last shopping trip I spied a few packages of thinly sliced breasts and grabbed enough to make dinner and to freeze for another meal.

Layered Stuffed Chicken Breasts became a thing in my home when I had a taste for lasagna but did not want to go through the process it takes to make a really good lasagna. I came up with the idea to layer the thinly cut chicken breasts I had in the freezer like I would a lasagna. This recipe fit right in with my new low carbohydrate lifestyle since there was no pasta in sight. I wasn’t sure the fellas in the house would like this dish as much as the pasta layered dishes I have made in the past. However, I was pleasantly surprised that they thought it was a nice change from a heavy lasagna. Just so they had the illusion of having pasta with the Layered Stuffed Chicken Breasts I made some spaghetti squash to go with dinner. In the end, I was able to service a low carb meal everyone enjoyed and I could stick to my new lifestyle of eating.

Don’t worry. There will be plenty of other recipes that include pasta. After all, my family’s still big time pasta eaters.

Layered Stuffed Chicken Breasts

Ingredients:

2 packages of thinly sliced chicken breasts

1 package of fresh baby leaf spinach (roughly chopped)

1 brick cream cheese softened

1 ½ cups shredded mozzarella

1 cup fresh salsa (hot or mild)

1 cup marinara sauce

½ cup grated fresh Parmesan cheese divided

1 tbsp salt

½ tbsp ground black pepper

1 tsp onion powder

1 tsp garlic powder

½ tsp dried basil

½ tsp dried oregano

½ tsp red pepper flakes (optional)

cooking spray

Preheat oven to 350 degrees.

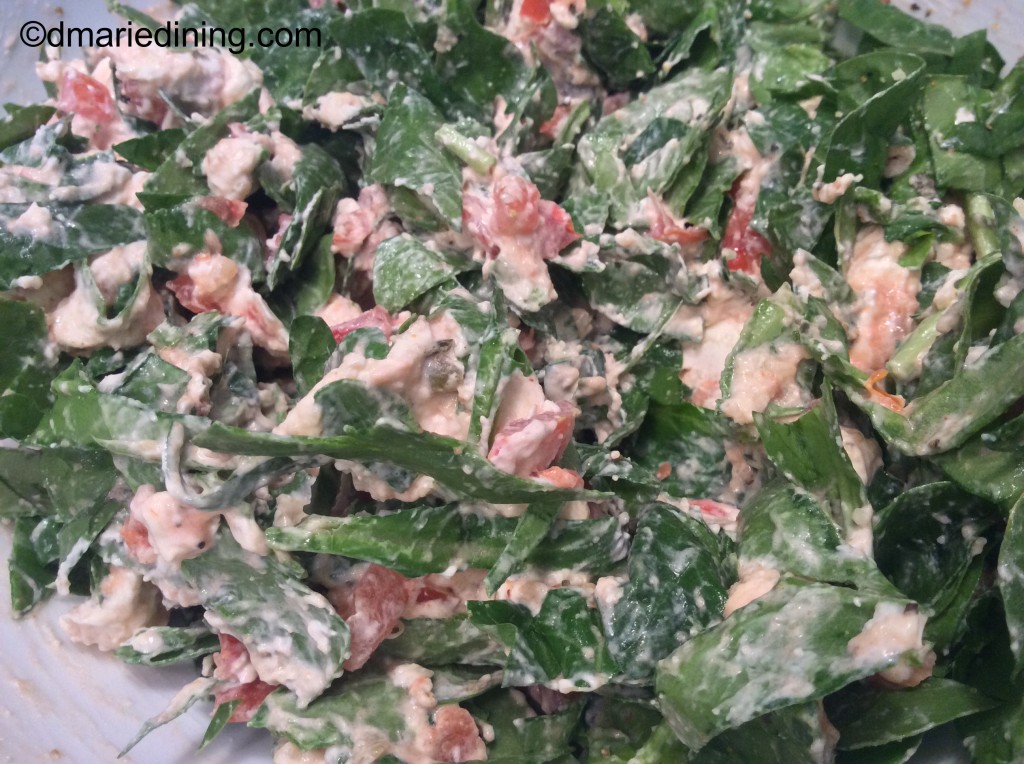
Combine the cream cheese, salsa, spinach and ½ of the grated Parmesan cheese in a large bowl until well blended. Set aside.

Spray a long casserole dish with cooking spray. Spread a little marinara sauce on the bottom of the dish. Layer one package of the chicken breasts over the sauce. Season with some of the salt, black pepper, red pepper flakes, garlic and onion powder. Spread the spinach and cream cheese mixture over the chicken then layer the other package of thinly sliced chicken breasts over the cream cheese and spinach. Season the top layer of chicken with the remaining seasonings. Pour the rest of the marinara sauce over the chicken then sprinkle the mozzarella cheese and remaining Parmesan cheese over the sauce. Bake for 30 to 45 minutes until the chicken is completely cooked through and the cheese has melted.

Serve with spaghetti squash, pasta or a nice mixed green salad.

Drunken Chicken and Rice

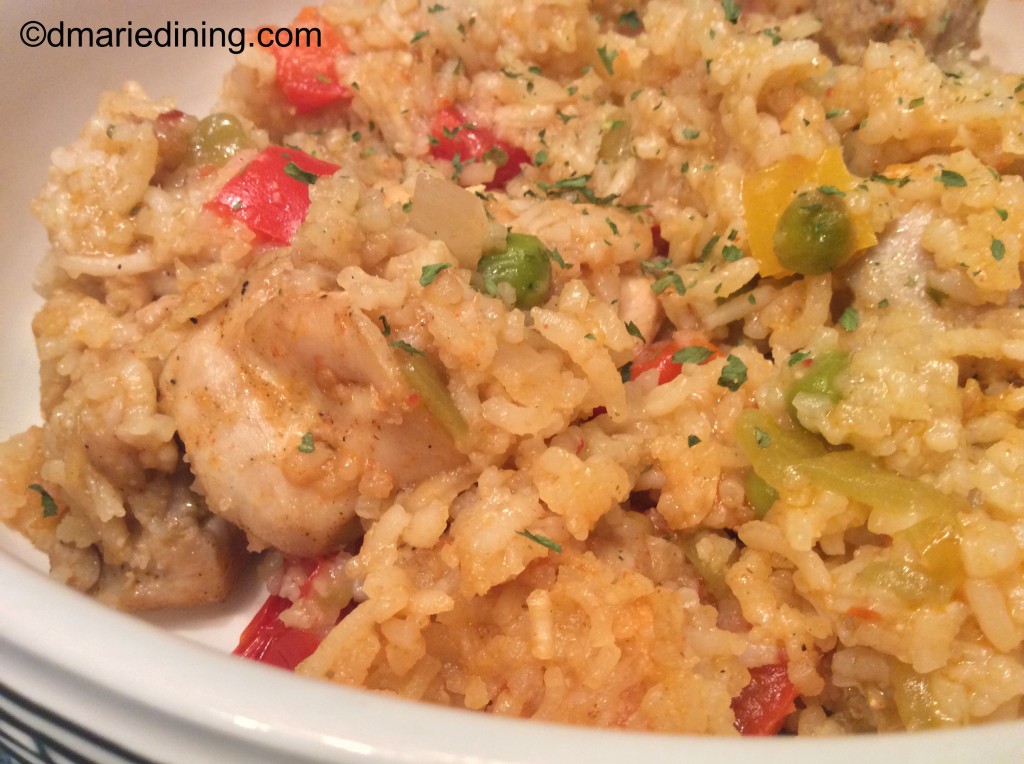
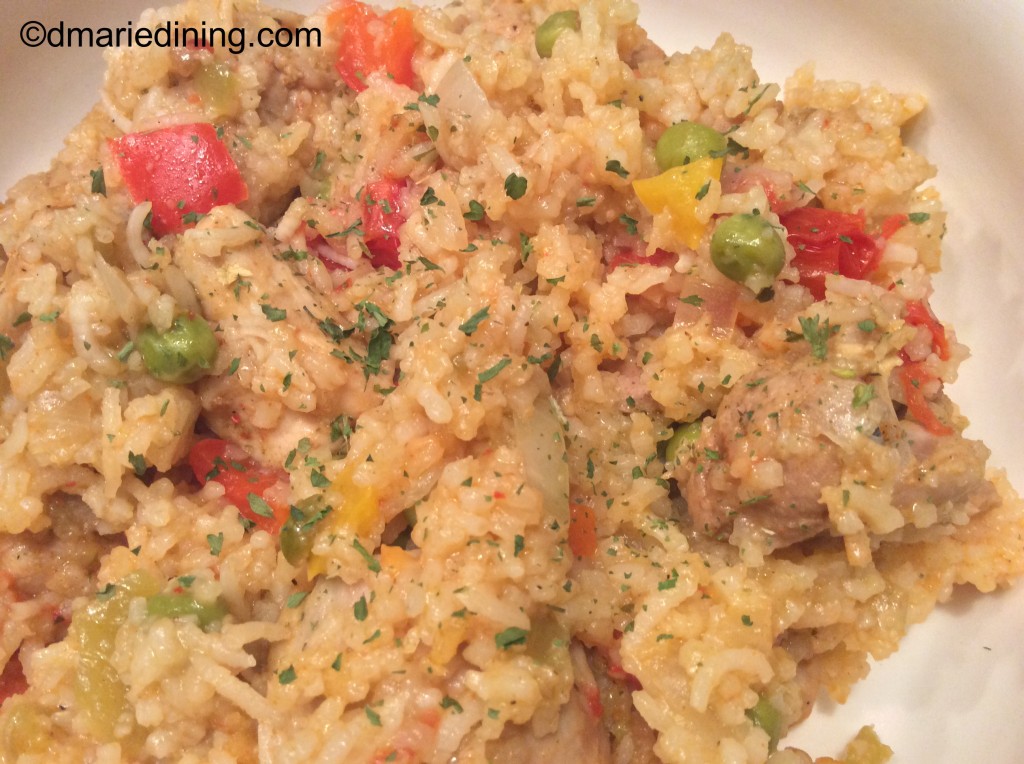
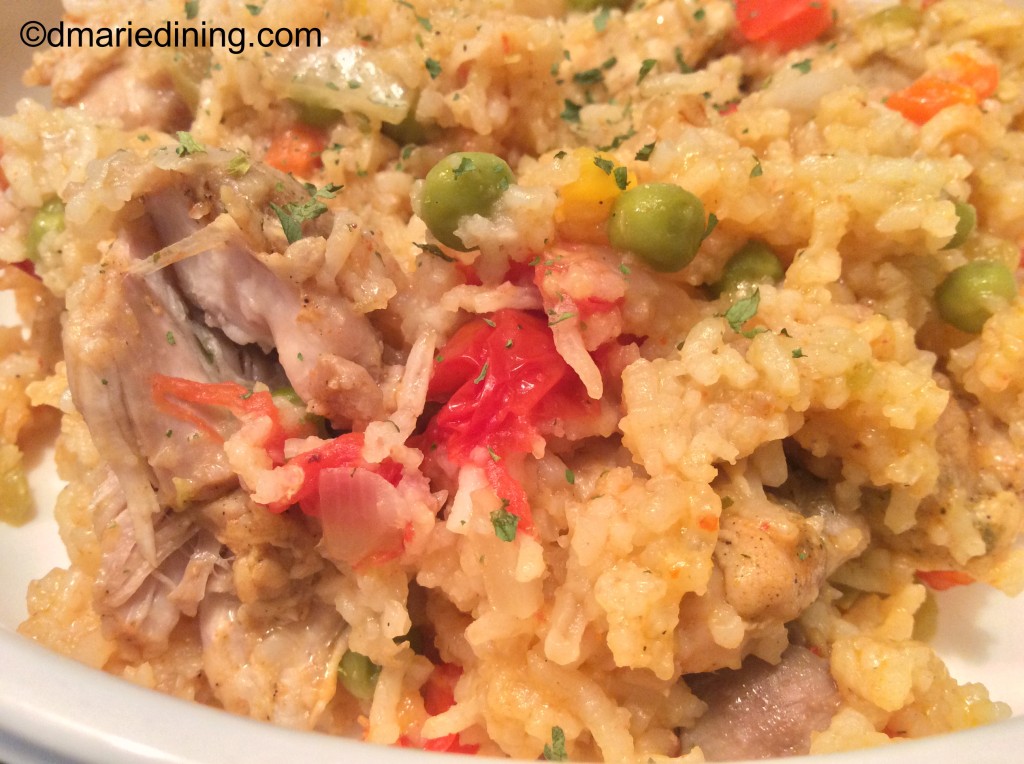
Anytime someone uses the word “drunken” in a recipe you know it involves alcohol. Fortunately, the alcohol usually burns off and you are left with the wonderful flavor alcohol brings to the recipe. My Drunken Chicken and Rice recipe was inspired by a recipe I saw on “Pati’s Mexican Table”.

I was watching her show while trying to come up with an idea for dinner and noticed she was making a dish with chicken thighs which I happen to have had on hand in the refrigerator. I planned to make curried chicken the next day so I had picked up the boneless chicken thighs at the grocers that morning. But, after watching Pati I figured why not try her recipe instead since I had most of the same ingredients and could substitute a few of my own.

The end result was a pan full of deliciousness. My son T looked at me after taking one bite and said, “Your putting this on your blog – right?” while hubby was digging in for his second bowl. Of course both of them added a little more heat to their portions but there was just enough heat for my tender taste buds. As a side dish, I made Poblano peppers stuffed with a blend of Mexican cheeses. I actually chopped up my Poblano pepper and stirred it into my bowl of Drunken Chicken and Rice. Absolutely Wonderful! The Poblano was an excellent accompaniment to the chicken and rice.

I would definitely recommend this recipe for a quick one pan meal. The less fuss and clean up the better in my book.

Drunken Chicken and Rice

Ingredients:

6 – 8 boneless skinless chicken thighs cubed

2 garlic cloves chopped

1 small can of green chiles

½ white onion diced

½ yellow pepper diced

½ red pepper diced

3 cups chicken broth

2 cups white long grain rice

1 cup frozen peas

1 cup beer (your choice)

½ cup diced fresh tomatoes

4 tbsp vegetable oil

1 tbsp Kosher salt

½ tbsp seasoned salt

½ tbsp ground black pepper

1 tsp onion powder

½ tsp smoked paprika

½ tsp red pepper flakes (optional)

½ tsp Chile lime seasoning (optional)

Rinse rice in cold water and set aside.

Place chicken in a large bowl and season with salt, pepper, onion powder, smoked paprika and red pepper flakes. Stir to coat chicken with seasonings. Set aside.

Heat vegetable oil in a large skillet over medium heat Add chicken to the hot skillet and spread it out. Brown chicken on both sides then remove from the skillet and place in a bowl. Set aside.

Add a little more oil to the skillet then add the rice. Stir the rice to coat it with the oil and let cook for about 1 – 2 minutes. Stir occasionally. Move the rice to the edges of the skillet to create a well in the center of the skillet. Add onions, peppers, tomatoes, green chiles, garlic, cumin and Chile lime seasoning. Stir the veggies and cook about 2 – 3 minutes until they begin to soften. Mix veggies and rice together then add beer. Stir then let simmer for 1 – 2 minutes. Add chicken broth, cooked chicken and peas to the skillet. Stir to mix well then cover and cook about 15 – 20 minutes until the liquid is absorbed and the rice is cooked through. Taste for seasoning and add a little more salt or other seasonings if necessary.

Side Dish Ideas:

  • Poblano Peppers stuffed with a blend of Mexican cheeses
  • Wilted Buttered Spinach

Follow my blog with Bloglovin

Double Dip Fried Chicken

Okay, who besides my vegan friends does not like good ol’ home cooked fried chicken? I don’t see any hands so I am guessing just about everyone likes fried chicken. Of course, fried chicken is not something you should have often and if you want to make it seem a little healthy it is better to oven fry the chicken. Less grease. Less hassle. But, when you have a taste for some good extra crispy fried chicken you should try my Double Dip Fried Chicken. Yes, I said double dip. You will be surprised just how crispy, flavorful and tender the chicken will be.

This recipe is a twist on a recipe I saw on a restaurant cooking show. I would never have thought to double dip my chicken before frying to make it real crispy. I always wondered how some chefs were able to make their chicken crispy enough to make a crunching sound without the chicken being dry. Now, I know.

The key to tenderness is marinating the chicken in seasoned buttermilk for a few hours. Usually, after the chicken had marinated I would toss the buttermilk. Oh no, not any more. That buttermilk is golden. Once the chicken is coated with a flour mixture I dip it back into the buttermilk then coat it again with more of the flour mixture. The buttermilk helps to keep the chicken tender and the extra coating creates a wonderful crispiness to the chicken.

Next time you get a taste for some good ol’ extra crispy fried chicken grab some buttermilk, seasoned flour and try out my Double Dip Fried Chicken. I think you will like it.

Double Dip Fried Chicken

Ingredients:

4 – 8 cleaned chicken thighs

4 cups vegetable oil

2 cups flour

1 1/2 cups buttermilk

1 tbsp salt

1 tbsp ground black pepper

1 tbsp smoked paprika

½ tbsp Chile lime seasoning (Trader Joe’s optional)

½ tbsp onion powder

½ tbsp Adobo (optional)

½ tbsp seasoned salt

¼ tsp cayenne pepper

Season the chicken on both sides with salt, ½ tbsp ground black pepper, Chile lime seasoning and smoked paprika. Place chicken in an air tight container then pour buttermilk over the chicken to cover it. Place container in the refrigerator for 2 – 4 hours or overnight.

When it is frying time, heat vegetable oil in a large dutch oven over medium high heat. Temperature should register at 360 degrees. To test the oil the old fashion way, put a small drop of water in the oil and stand back. If it starts popping the oil is ready.

While oil is heating up take the chicken out of the refrigerator and let it come to room temperature. Add flour, ½ tsp ground black pepper, seasoned salt, onion powder and Adobo to a large bowl and combine until well mixed.

Shake off excess buttermilk from a chicken thigh then place it in the flour mixture and coat both sides. Shake off excess flour and dip the floured chicken back into the buttermilk marinate. Again, shake off the excess buttermilk then place it back into the flour mixture. Shake off excess flour and place on a wire rack. Repeat steps with each piece of chicken.

Add 4 – 5 pieces of chicken to the hot oil and fry until golden brown and cooked through. Drain on a layer of paper towels. Repeat steps until all of the pieces are cooked. Serve with your favorite side dishes.

Lentil and Carrot Ginger Soup

Sometimes you just have to cheat. Not cheat other people or cheat in the sense of doing something wrong. I mean cheat by not making everything from scratch. Making my Lentil and Carrot Ginger Soup was one of those times I decided to cheat. At least, partially. This soup is a combination of dried lentils and a box of carrot and ginger soup.

I am not usually a fan of boxed soups but Trader Joe’s has a nice brand of soups I have used in other recipes upon occasion. I have passed over their Carrot and Ginger soup many times but decided to take a chance on combining it with the lentil soup I make for me and hubby.

Creating soup is about building flavors. Combining the light flavor of lentils with the sweet taste of carrots along with the sharp taste of ginger spells yummy. Being the carnivore that I am, I added diced Pancetta to build even more flavor. My vegetarian brothern can keep it simple and not include meat in this soup. But, if you are not opposed to meat, I think you will enjoy the flavors and texture with the Pancetta. Add some crusty bread on the side of your bowl and you will have a wonderful hearty soup for those chilly or even warm days.

Lentil and Carrot Ginger Soup

Ingredients:

4 cups chicken broth

1 ½ – 2 cups dried yellow lentils (rinsed in cold water)

1 cup shredded carrots

1 cup cubed pancetta (optional)

½ cup diced onions

1 box Carrot Ginger Soup (Trader Joe’s)

1tbsp olive oil

1 tbsp salt

½ tbsp ground black pepper

½ tbsp Adobo seasoning

1 tsp dried parsley

¼ tsp cumin

¼ tsp cayenne pepper (optional)

Place olive oil, pancetta, onions and carrots in a large pot over medium heat. Saute the carrots, onions and pancetta for about 3 – 5 minutes stirring frequently. Add broth, seasonings and lentils to the pot and let simmer for 30 minutes stirring occasionally. Add a little water if the soup gets too thick during the 30 minutes. After 30 minutes stir in the box of carrot and ginger soup. Reduce heat to low and let simmer for an additional 20 minutes.

Serve with crusty bread or croutons.

Follow my blog with Bloglovin