Tag Archives: seafood

Crab Stuffed Poblano Peppers

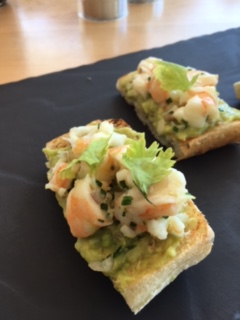
Stuffed poblano peppers has become one of my favorite side dishes because they go well with any main course. Plus, you can stuff the peppers with just about anything. Rice, cous cous, tomatoes or even crab meat.

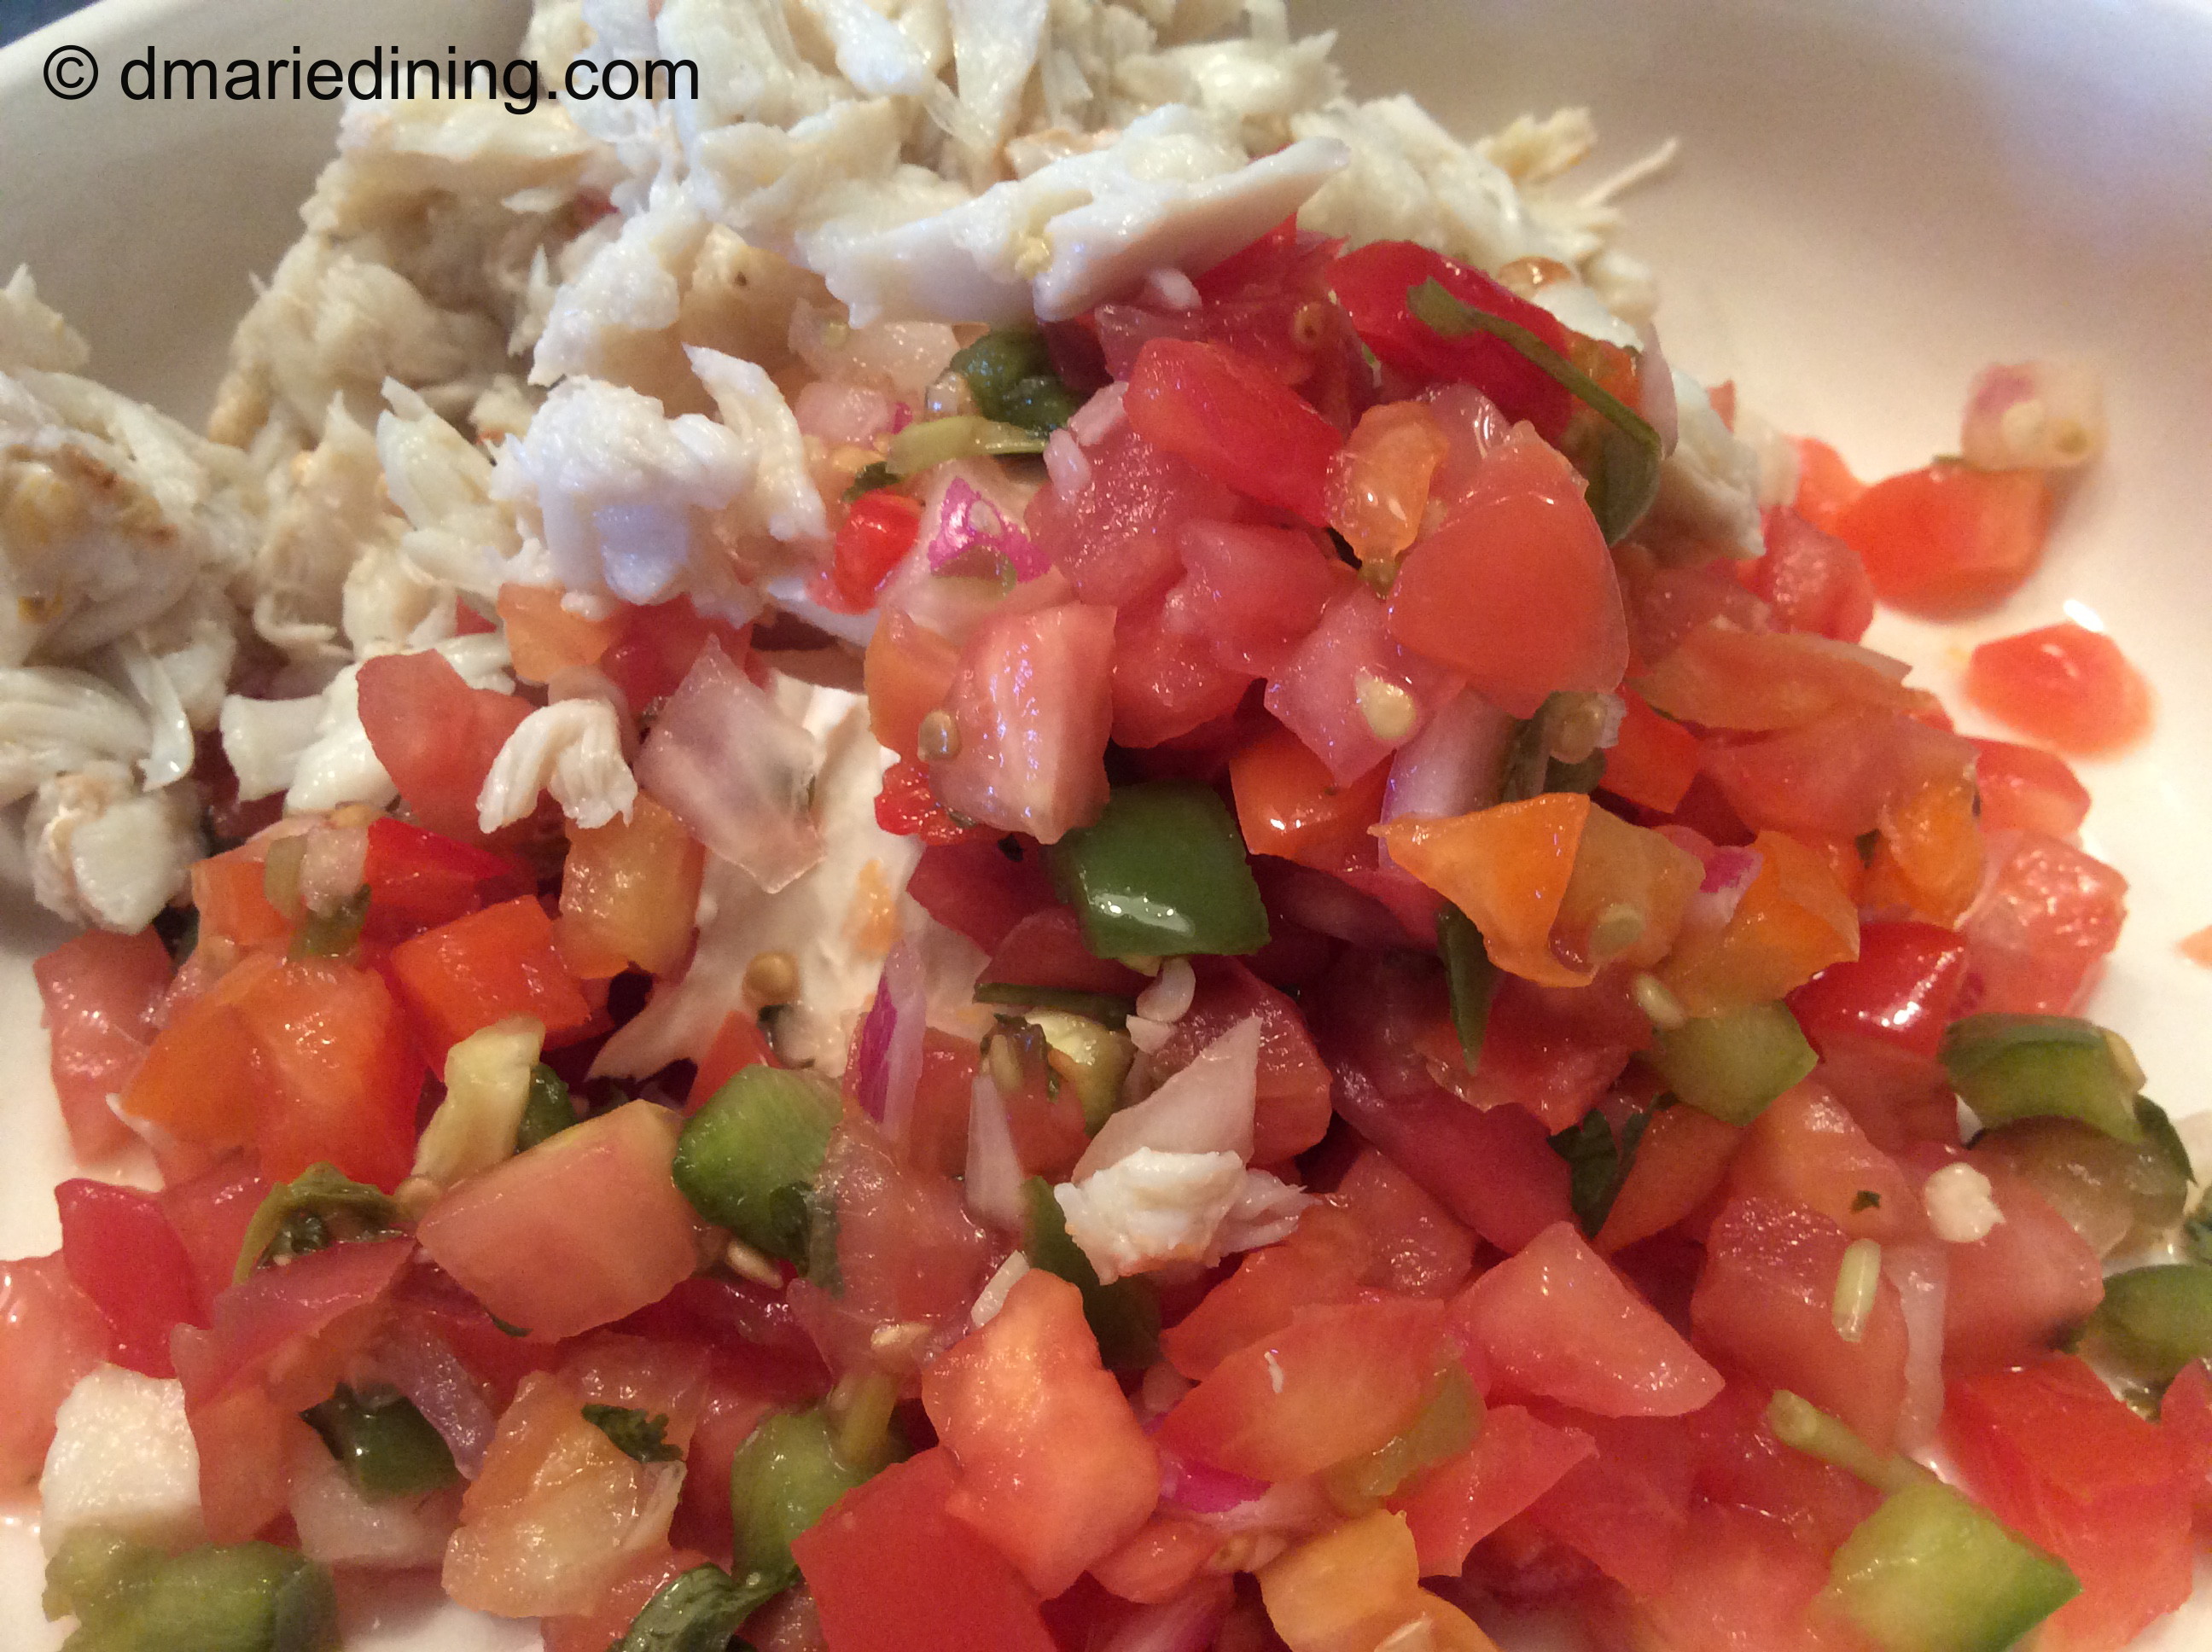
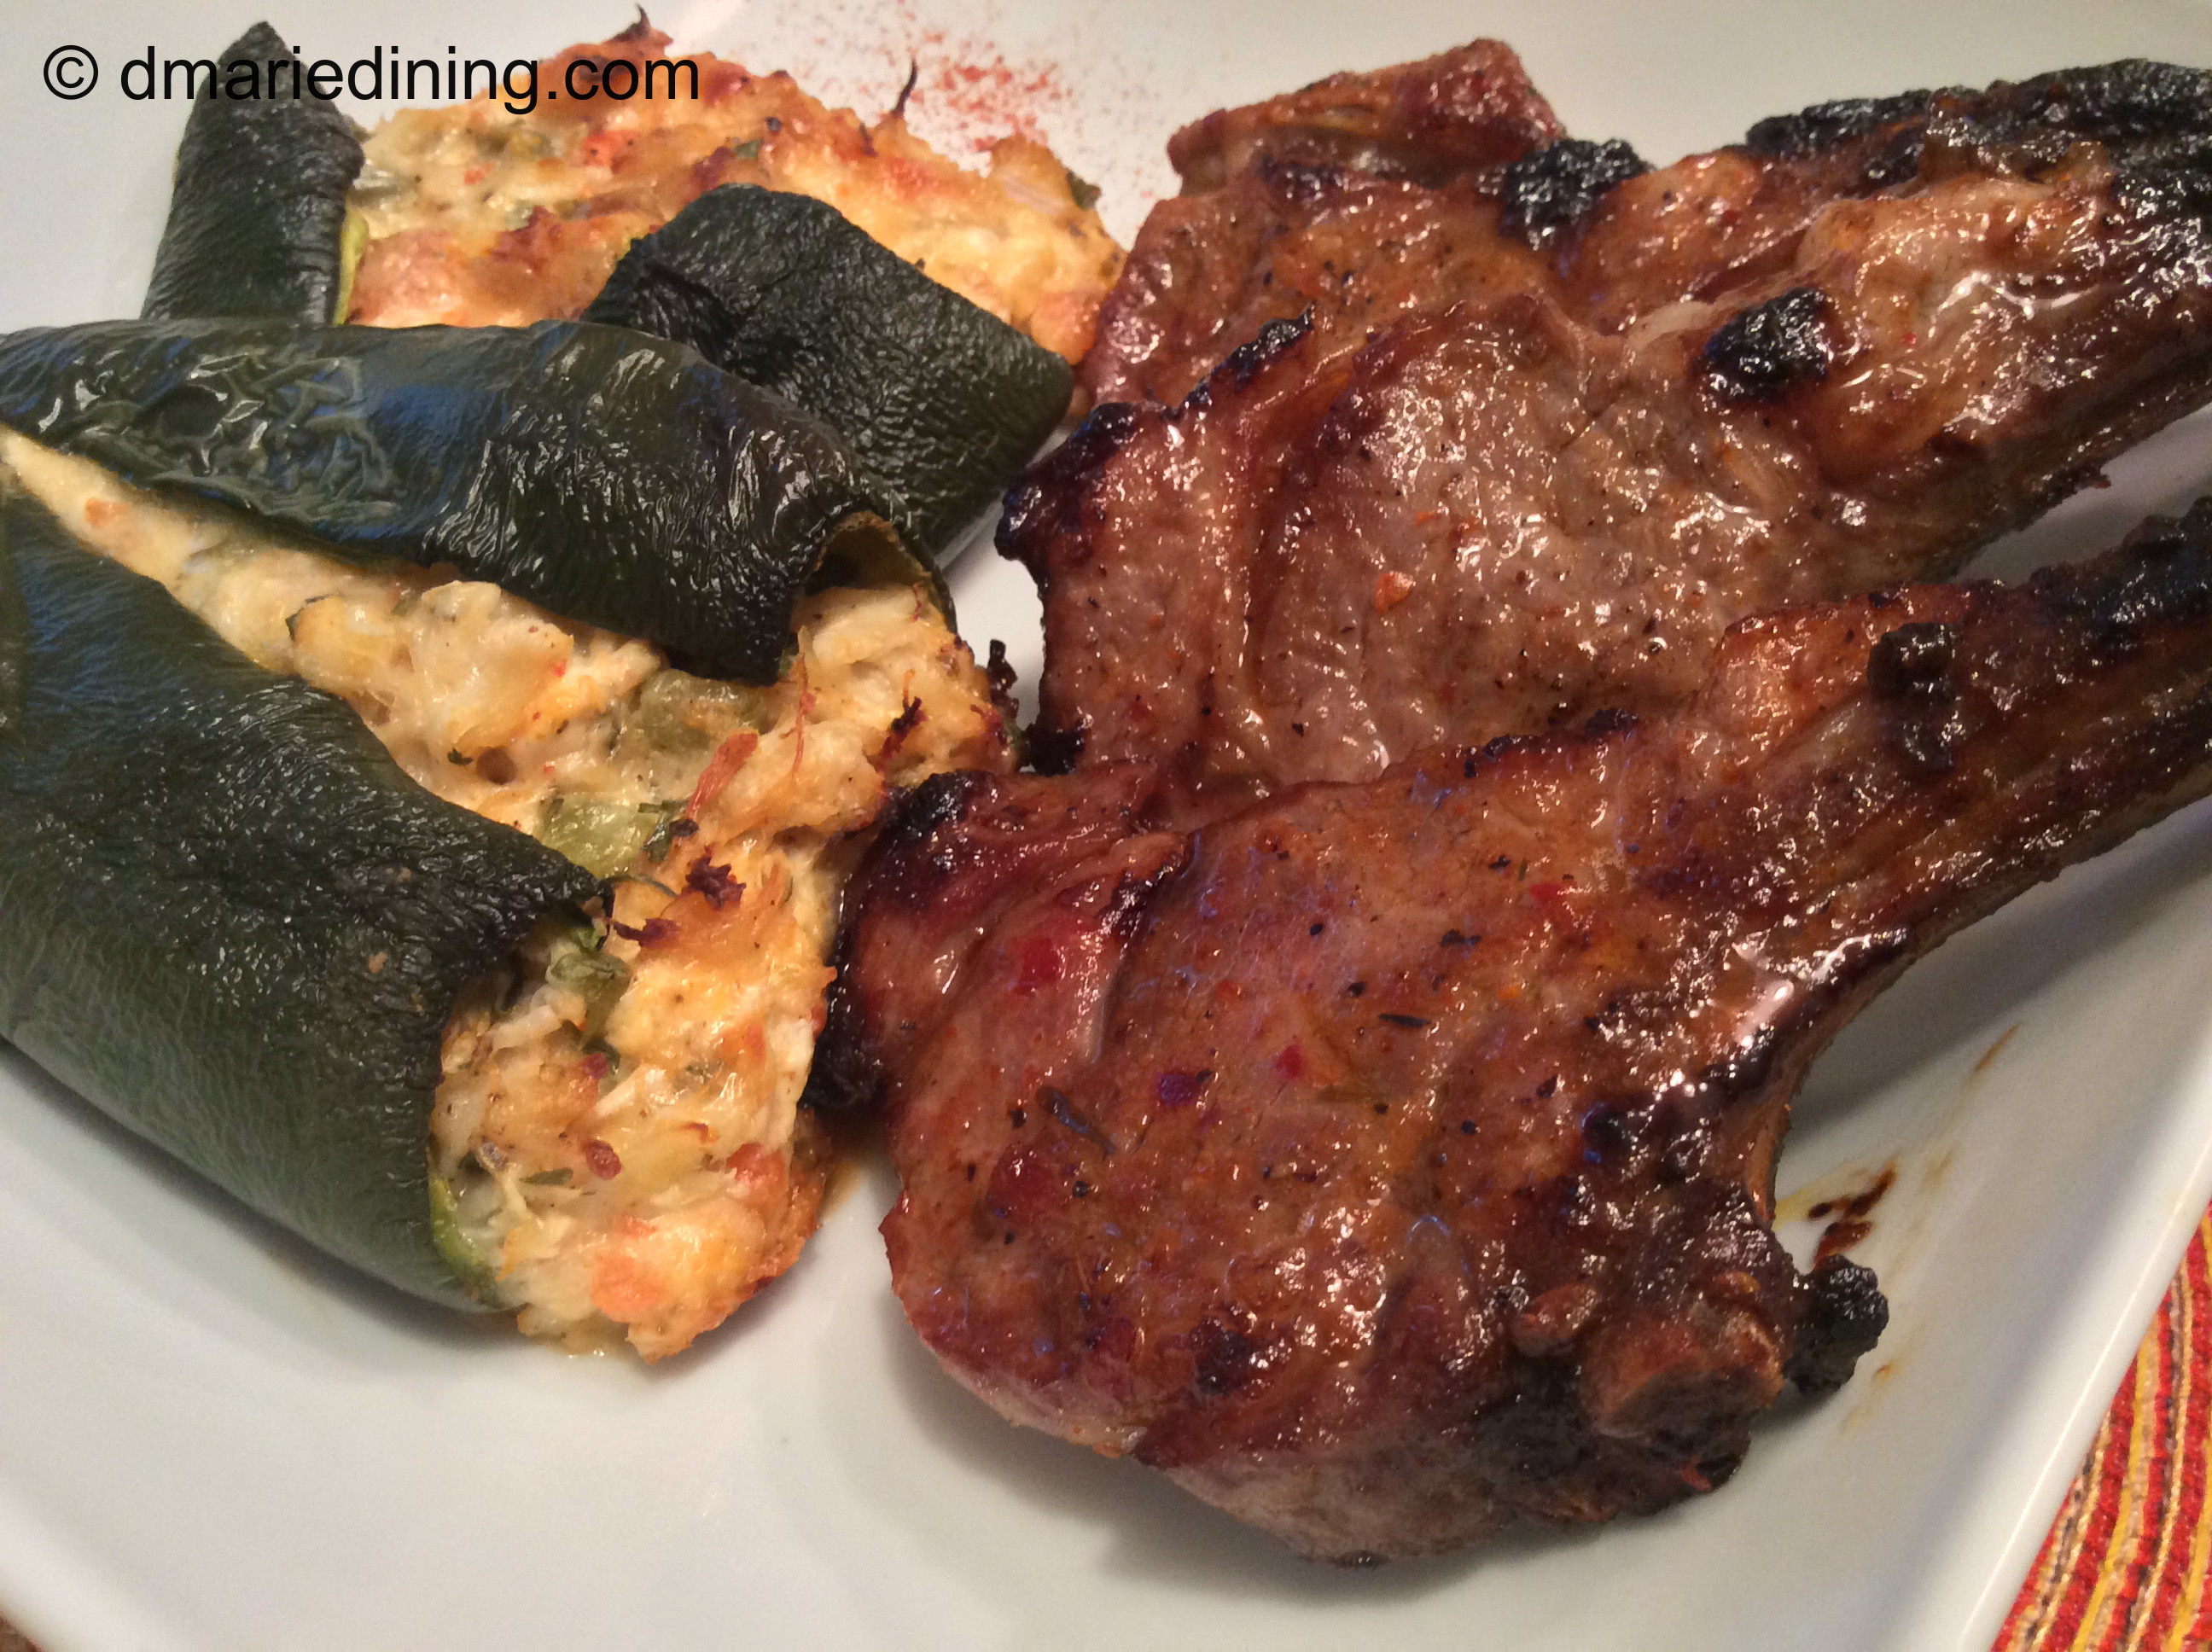
The last time I decided to stuff some poblano peppers I made Crab Stuffed Poblano Peppers. This recipe was created because I had crab meat on hand and fresh salsa I did not want to go to waste and a few poblano peppers hanging around. My original thought for the crab meat was to make crab imperial (I’ll post that recipe one day) but I decided I wanted a lighter meal on this particular day. Stuffing the peppers with crab meat seemed like the perfect side dish to our lollipop lamb and I was right.

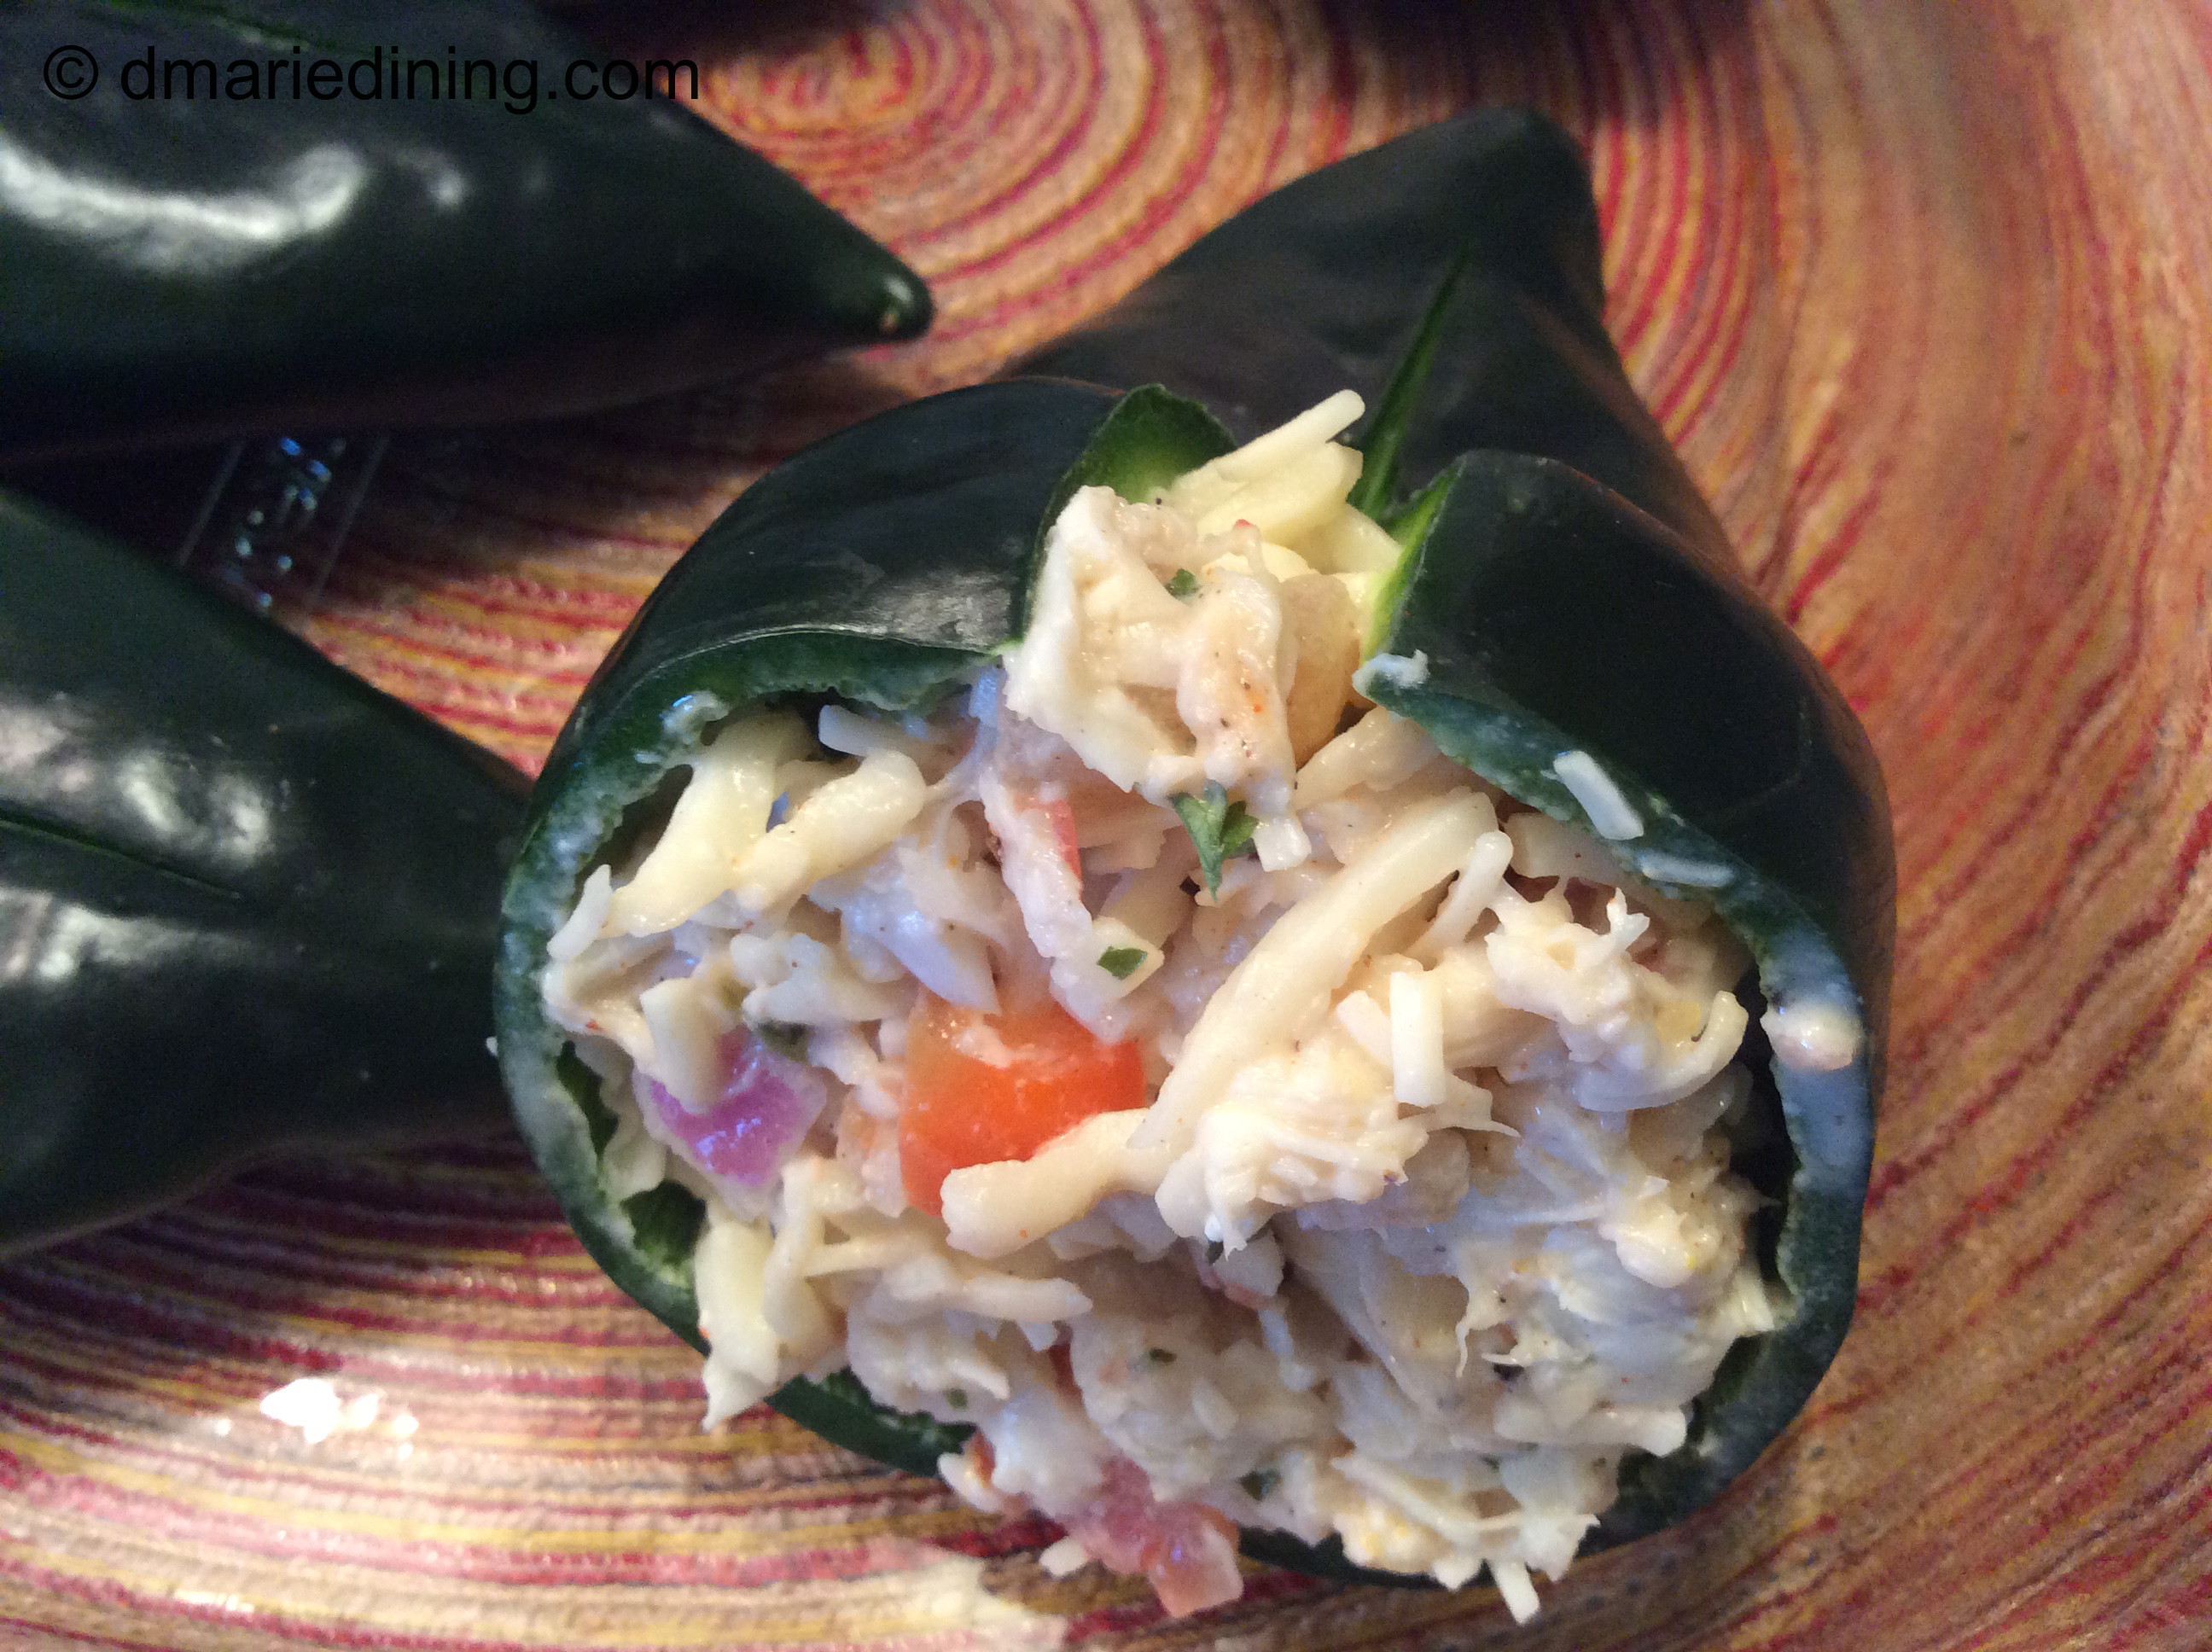
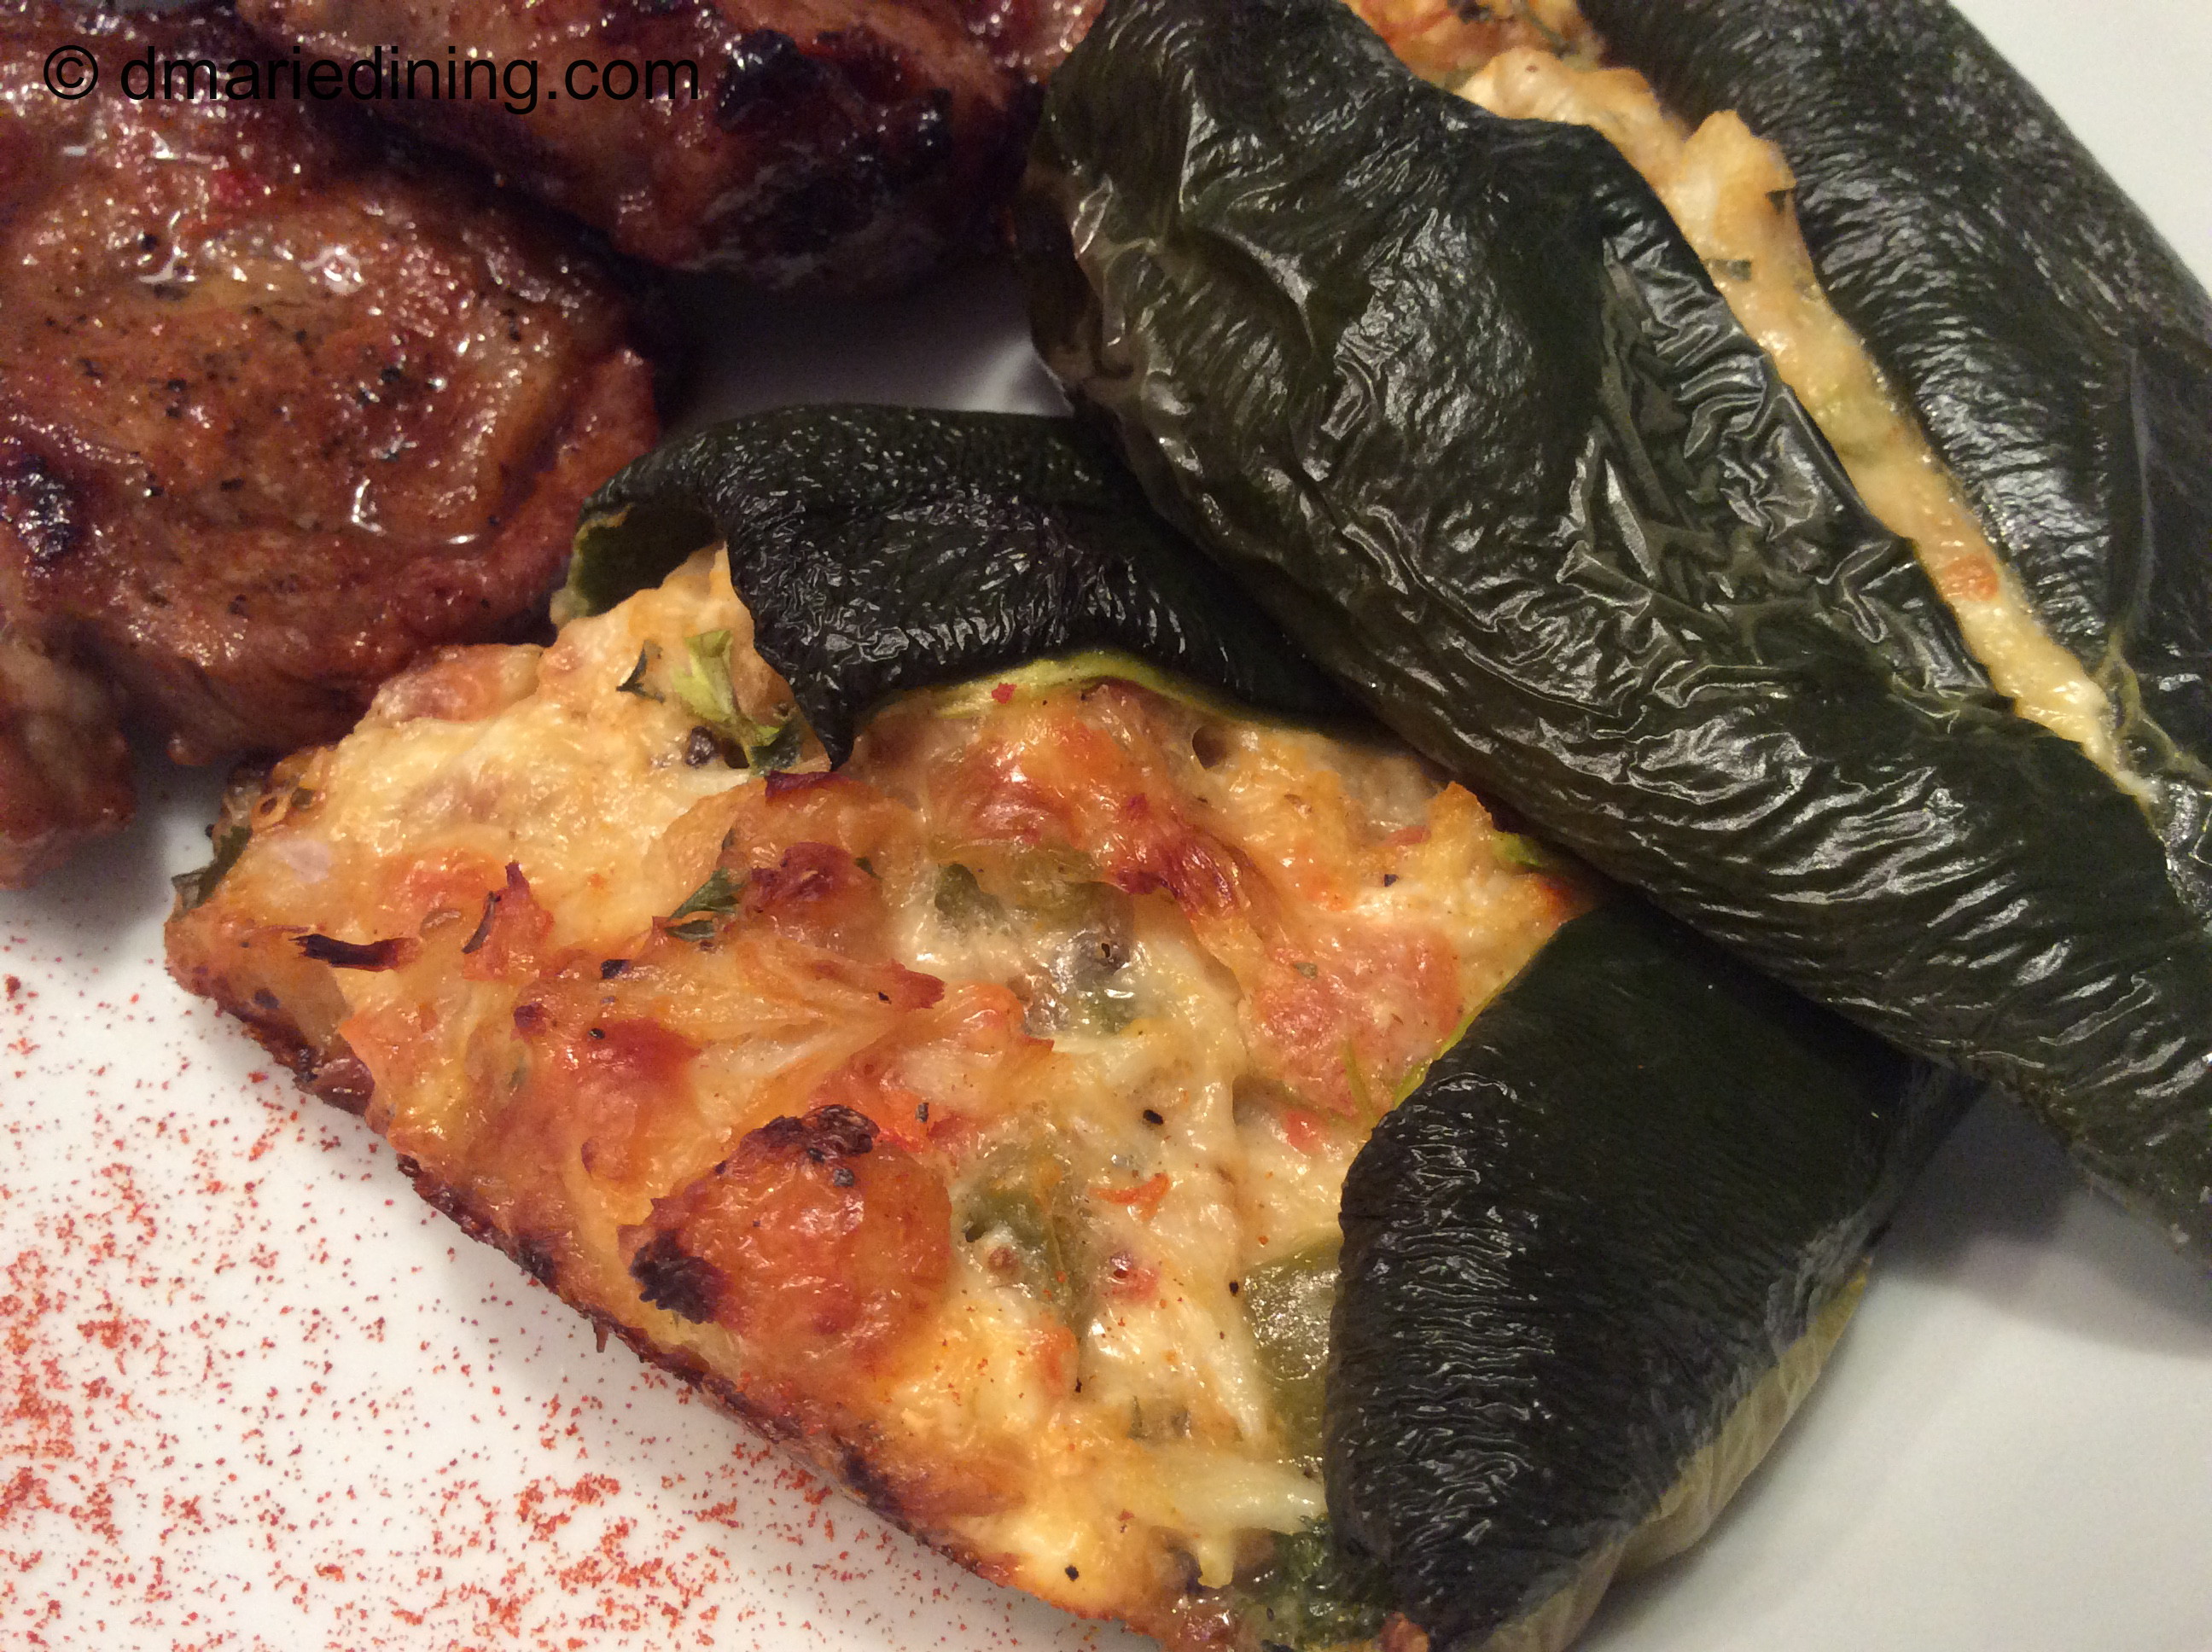
The combination of the crab meat, fresh salsa and cheese tasted great with just a hint of spiciness. If you want more heat don’t remove the rib of the poblano peppers and leave some seeds. As most folks know that is where most of the heat comes from for any hot pepper.

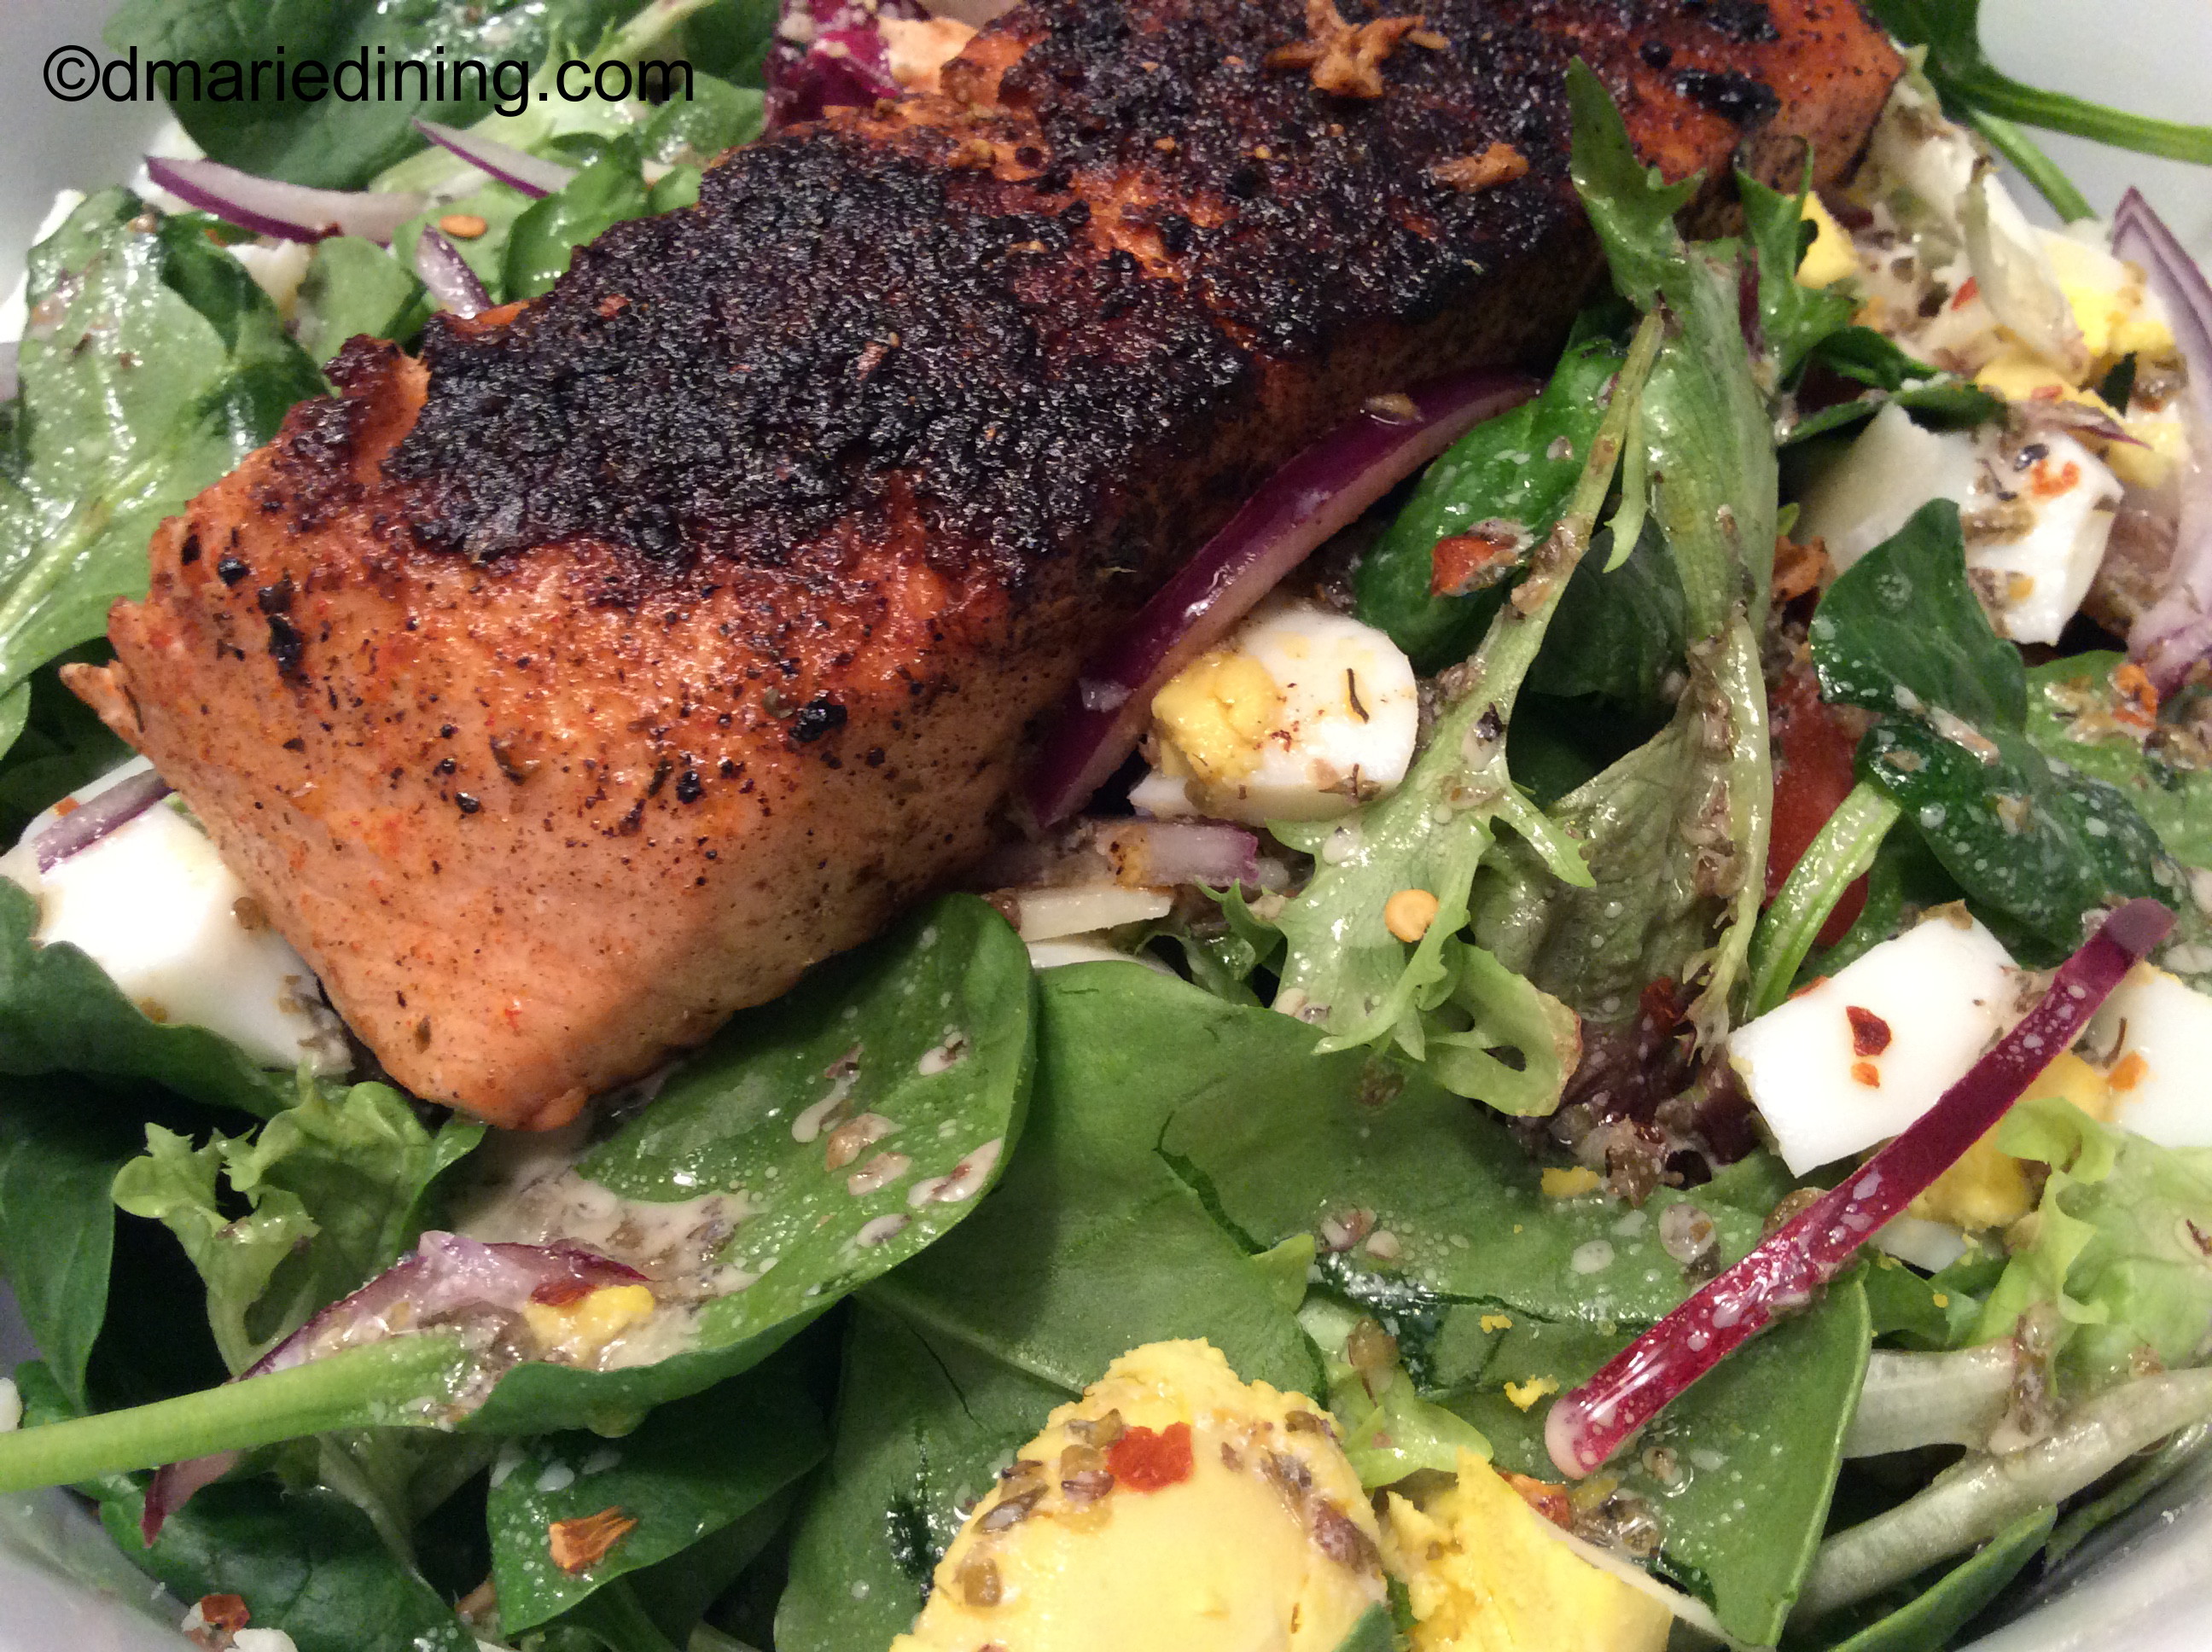
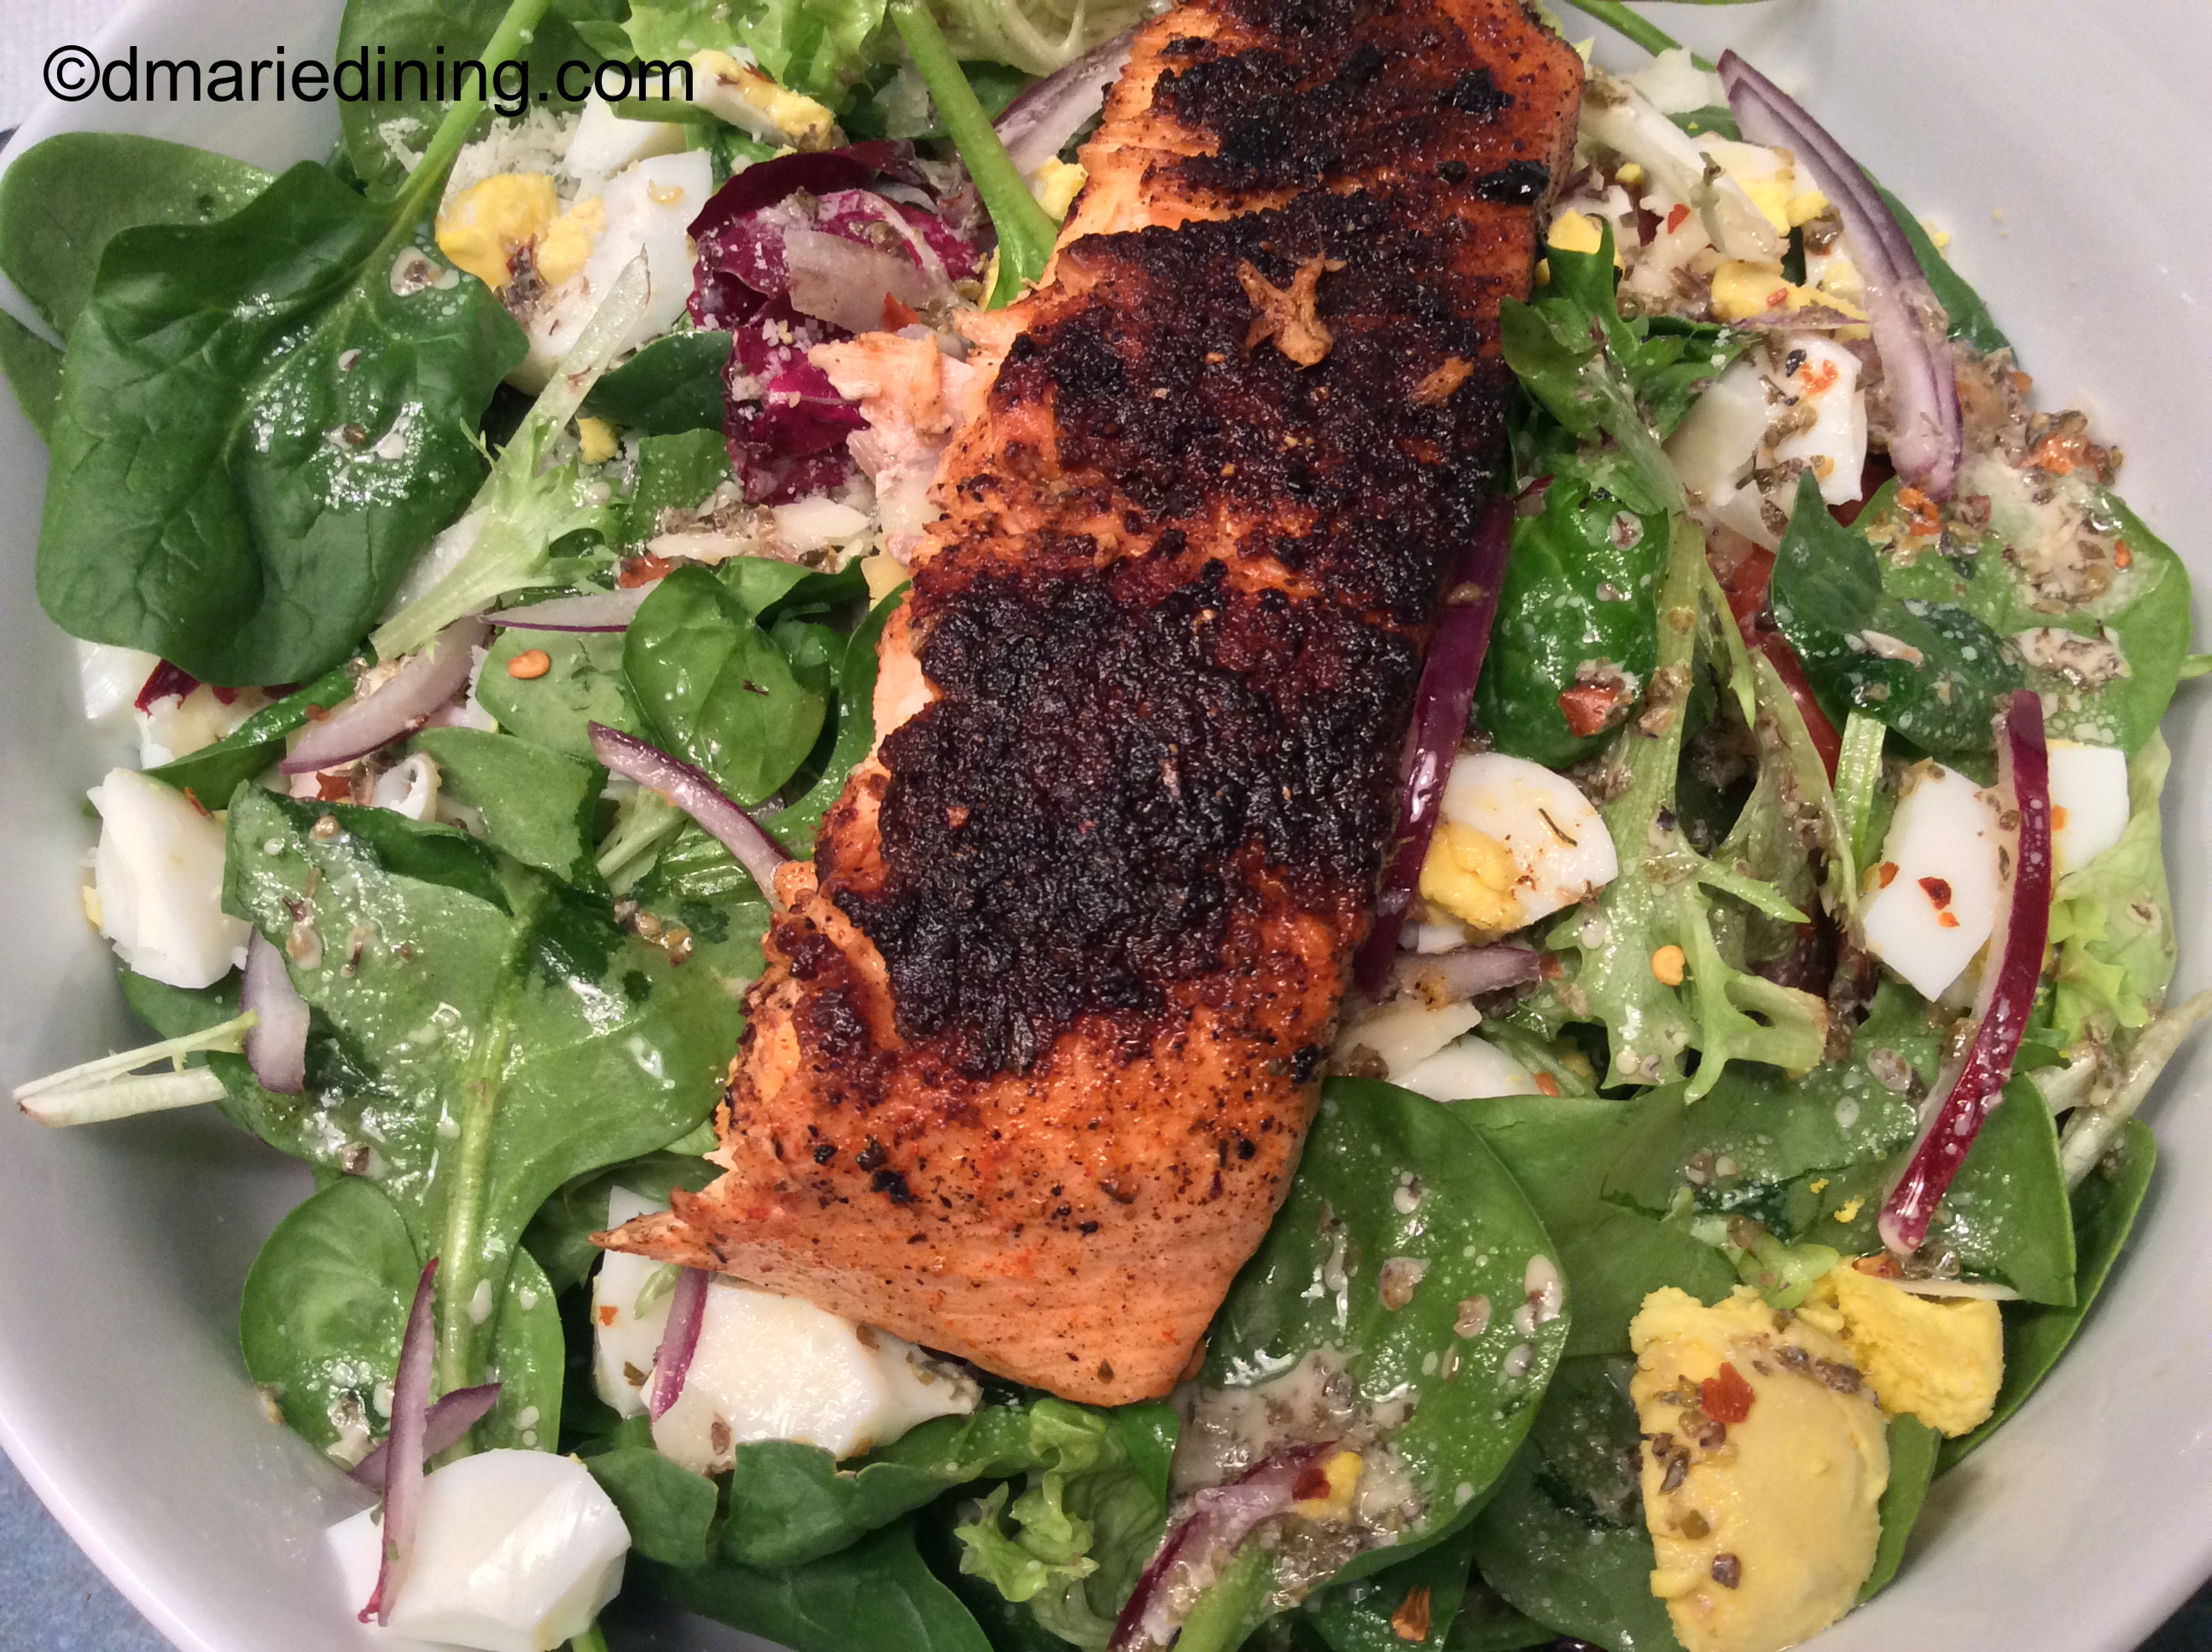
Although I paired the stuffed peppers with lollipop lamb chops, they would also go with a nice Big Salad. Check out the link for a great salad recipe.

Crab Stuffed Poblano Peppers

Ingredients:

4 poblano peppers (seeds and ribs removed)

1 small container of lump crab meat

½ cup fresh hot or mild salsa

¼ cup shredded Queso or Mexican Cheese

½ tsp salt

¼ tsp ground black pepper

Juice from ½ a fresh lemon

Cooking spray

Preheat oven to 400 degrees.

Slit the top of each poblano pepper half way lengthwise. Set aside.

Combine the crab meat, fresh salsa and seasonings in a large bowl. Add the cheese to the bowl and stir to blend well. Stuff each pepper with a few spoonfuls of the crab mixture. Do not over stuff.

Spray a rimmed baking sheet with cooking spray then lay the peppers on the baking sheet. Bake for 45 minutes or until the peppers are softened and the cheese is golden brown.

Advertisement

Thai Curry Salmon Bowl

On the days I want to prepare a light simple meal I will usually turn to fish or specifically salmon. Salmon is my favorite fish and is very versatile and easy to make.

Today, I did not want to make Blackened Salmon Salad or Teriyaki Salmon. Instead, I wanted to test whether or not salmon would hold up in a Thai curry sauce. I have created curried fish recipes in the past but with slightly different flavors and seasonings. For my Thai Curry Salmon Bowl I used red Thai curry paste I found at the grocery store rather than adding curry powder to the dish. In my humble opinion, the red Thai curry paste had less of a bite than curry seasonings but still had intense flavor. An added bonus was that the house did not smell like curry the next day. I love curry but the seasoning when cooked lingers in the air for quite a while.

“Bowls” are very popular right now and I think eating from a bowl helps to limit portion sizes. Whatever you can fit into a bowl is all you need to eat unless you are starving or the meal is do delicious you just have to go for seconds.

My Thai Curry Salmon Bowl was ultra delicious per both hubby and me. If it had not been so filling on the first round, I would have gone for seconds. Yum!

Thai Curry Salmon Bowl

Ingredients:

1 – 2 salmon fillets cut into thick chunks

3-4 Shishito peppers diced

1 can lite coconut milk

1 can diced tomatoes

1 small jar red Thai Curry Paste

2 tbsp Kosher salt

2 tbsp ground black pepper

2 tbsp grape seed oil

1 tbsp lemon zest

1 tbsp ginger paste or diced fresh ginger

1 tsp onion powder

1 tsp chili lime seasoning (optional)

Place salmon chunks on wax paper and season with lemon juice, 1 tbsp Kosher salt and 1 tbsp ground black pepper.

Heat a large skillet over medium heat and add grape seed oil. Let oil heat for about 1 minute then add Thai Curry Paste, ginger paste and garlic. Stir to blend and continue to stir for 1 minute. Add tomatoes, Shishito peppers and lemon zest. Stir to mix. Sprinkle mixture with remaining salt, pepper, onion powder and chili lime seasoning and stir to blend. Slowly pour in coconut milk while constantly stirring. Turn hit down to medium low. Place salmon in the sauce and spoon some sauce over the salmon. Cover and let simmer for 15 to 20 minutes until salmon is cooked all the way through. While simmering spoon sauce over salmon periodically. Serve over a bowl of rice.

Optional Additions:

Sea Scallops

Steamed Cabbage

Roasted Asparagus

Sauteed Mixed Peppers


Follow my blog with Bloglovin

Blackened Salmon Salad

Salmon is my go to meal whenever we go out to eat and there is nothing that truly peaks my interest on the menu. Salad is one of my family’s favorite foods so put salmon and salad together and you have one of my top 10 meals. Blacken the salmon and you can forget about it!

The reason I am bragging about my Blackened Salmon Salad is because once hubby tasted it he said “Babe, you must have done something different with the salmon”. I braced myself because I wasn’t sure if the next sentence would be good or bad so I just stared at him. The next sentence was “because you’ve never fixed salmon like this and it is delicious. Let’s have more of this!”.

It has taken me a minute to learn how to make a really good blackened salmon fillet. Hubby didn’t realize I have tried making blackened salmon in the past but never quite got the seasonings right. Plus, I didn’t pair it with a great salad. I know most folks might say how hard can it be to make salad. My answer is not hard but not every salad tastes the same or is wonderful. Each salad is different depending on the combination of ingredients. Basic ice berg lettuce, hot house tomatoes and cucumber salads are for bland palates. Mixed greens, plum tomatoes, various cheeses, avocado and spices create a more exciting and flavorful salad. Mixed greens are also more nutritious than ice berg lettuce which is really just green water. If you have a choice, choose mixed greens, baby leaf spinach or even romaine lettuce for your salads.

Bottom-line… The blackened salmon will be the center piece of your meal and will keep folks asking for more.

Blackened Salmon Salad

Ingredients:

2 – 4 salmon fillets

6slices bacon cooked crisp and crumbled

2 – 3 boiled eggs chopped

1 ripe avocado sliced thin (squeeze juice from ½ a lime over avocado)

1 large plum tomato sliced thin

1 package mixed greens

¼ cup shaved fresh Parmesan cheese

¼ cup sliced red onion

¼ cup water

2 tbsp butter

2 tbsp olive oil

salt

lemon pepper

paprika

Cajun seasoning

Gazebo Room Greek Salad Dressing and Marinade

cilantro (optional)

red pepper flakes (optional)

seasoned croutons (optional)

Heat frying pan over medium high heat. Add butter and olive oil. Rinse salmon and pat dry. Season salmon with a little salt, lemon pepper, cilantro, Cajun seasoning and paprika. Once butter begins to brown slightly add salmon skin side up. Sprinkle skin with a little salt, lemon pepper, and paprika. Cook for 5 minutes until fillet begins to darken but does not burn (gently lift salmon to check color after 3 minutes). Flip the salmon fillet and cook for another 5 minutes until the skin begins to crisp up then add water and cover with a lid. Turn down heat to medium low and cook and additional 2 – 3 minutes.

Remove from heat and let salmon rest while building the salad.

Salad:

Place mixed greens in a large bowl. Add eggs, bacon, tomato and cheese. Toss with salad dressing. For each salad bowl lay slices of avocado over the salad then place a salmon fillet in the middle of the salad. Sprinkle with red pepper flakes.


Follow my blog with Bloglovin

Prawns and Avocado

On a recent trip to Puerto Rico, my hubby and I enjoyed a delicious lunch appetizer called Prawns and Avocado. I was hesitant to order the dish at first because I sometimes have a reaction to shrimp but I decided to give it a try. Boy was I glad I did. The appetizer was so refreshing.

The dices of avocado were fresh and the prawns were soft and sweet. I have to admit it was difficult sharing the appetizer with hubby after I took the first bite. Fortunately for hubby, I love him dearly so I did share two pieces. After we both looked at the empty plate we agreed I should try replicating the appetizer once we got back home. I wasn’t able to get the exact recipe from the chef so I recreated Prawns and Avocado from a photo I took with my phone. Yes, it looked so appetizing and tasted so good I took a picture before we gobbled them all up.

My version of Prawns and Avocado is not quite like the wonderful dish we enjoyed in Puerto Rico but it is pretty darn close. There definitely is a difference between the shrimp I get at the local market but the flavor is similar.

Remembering how the appetizer was described on the menu helped me keep the recipe simple. Prawns (shrimp), avocado, red onion, lime juice and cilantro was all I needed to make this tasty treat pop!

Ahhh…. the memories.

Prawns and Avocado

Ingredients:

½ avocado diced

½ lb medium cooked shrimp cut in half

1 tbsp fresh lime juice

1 tsp fresh cilantro chopped

1 tbsp red onion diced small

1 tbsp olive oil

½ tbsp lemon juice

½ tsp salt

¼ tsp ground black pepper

3 dashes hot sauce

1 baguette or ciabatta bread sliced

Place shrimp in a large bowl. Add salt, pepper, red onion, cilantro, lime juice and hot sauce. Stir to mix. Set aside.

Place avocado in a medium sized bowl along with lemon juice and a pinch of season salt. Mash the avocado until smooth but leave a few chunky pieces. Spread avocado over bread slices. Top with shrimp mixture. Garnish with cilantro if desired.

Follow my blog with Bloglovin

Lobster Pasta

Sweet, sweet lobster meat! I have yet to meet anyone that has tried lobster and does not fall in love with it. Unless you are allergic to shellfish, I think that once you try lobster you are hooked. Whether you dip it in melted butter and lemon juice or create a Lobster Pasta I know you will enjoy a meal made with lobster.

Okay, I can hear the rumblings already about how expensive lobster can be. That is true. Lobsters can be expensive which is why I am always on the look out for lobster tail sales. Most of the meat is in the tail anyway so who needs the whole lobster. I would only buy a whole lobster if it were on sale and if I wanted to make a flavorful seafood stock with the shell. Lobster tails, of course, can still be pricey depending on the size but much less expensive than a whole lobster. If you find lobster tails on sale, pick up a few and freeze what you don’t need to use for a recipe. They really do freeze well.

Now back to my Lobster Pasta. I started out thinking about making a lobster pasta salad but got side tracked and landed on making Lobster Pasta. Maybe because I have seen so many Olive Garden commercials lately showing creamy pasta dishes with splashes of seafood. Or, it could be the fact that my family loves pasta and it is the easiest way for me to get them to try out new recipes. Since they love seafood and they love pasta I just put the two together.

I probably shouldn’t tell this story but I don’t think hubby will know. When hubby and I first got married I thought I would make a special lobster anniversary dinner. I found a couple of nice sized whole lobsters on sale at the fishmonger and although I had never cooked a live lobster I was game to try. I wasn’t sure if they would make noise like crabs do when you put them in hot water but since they had little rubber bands on the claws I figured they wouldn’t be too wild in the pot. I was able to cook the lobster without any trouble and made a beautiful salad, another side dish and a lemon butter dipping sauce. I placed the whole lobster on a plate with the rest of the meal to create a delightful presentation to hubby. Because it was our anniversary I decided to take dinner to hubby with a big smile on face. As soon as he saw the lobster on the plate he had a little freakout. The beady eyes, the long antenna and big head was too much for him. Hubby said there was no way he could eat the lobster looking at all of that. So, I had to take the lobster into the kitchen and broke it down to a tail and two claws. Needless to say, this is another reason why I only buy lobster tails and not whole lobsters. I don’t want to freak out hubby!

Lobster Pasta

Ingredients:

4 cooked lobster tails sliced

2 plum tomatoes cut into cubes

1 box vermicelli pasta

4 cups water

1 cup broccoli florets

1 cup seafood stock or chicken stock

2 tbsp butter

2 tbsp flour

1 tbsp lemon zest

1 tbsp sour cream

2 tsp salt

1 tsp ground black pepper

1 tsp chopped parsley

juice of ½ lemon

Prepare pasta according to package. Toss with a little olive oil and set aside.

Bring 4 cups of water to a boil with 1 tsp of salt. Add broccoli florets to boiling water for 3 minutes. Remove broccoli from boiling water and plunge into ice cold water (okay to add ice to the water) for 2 – 3 minutes. Drain and set aside.

Melt butter in a large no-stick skillet and add flour. Whisk until smooth then add stock. Continue to whisk until sauce begins to thicken. Add sour cream and whisk until blended. Add pasta, lobster, broccoli and remaining ingredients. Gently toss until lobster and broccoli are well incorporated with the pasta. Service with crusty garlic bread.

Salmon Patties

Back in the days when I was living with my parents we ate a lot of fish. Mostly, it was fish we caught during the year because my folks loved to fish on their days off. During the summer, when I was out of school, we would drive down state or over the state line to one of their favorite fishing holes. Perch, trout, catfish and something my mom called butter fish were usually the catch of the day. My parents loved to go deep sea fishing which required taking a chartered boat out for the day. I was too chicken to go on the boat so I would stay home and hope they caught a few flounder that day.

Thinking about those days and eating lots of fish reminded me that one of my favorite meals was salmon croquettes. At least that is what my mom called them. Not quite like chicken croquettes but more like a crab cake made with salmon. The salmon was delicious although I thought it was weird eating soft fish bones. Yeah, my mom used canned salmon like most folks back then. Don’t get me wrong. I have nothing against canned salmon. I made my first Salmon Patties (as I call them) using canned salmon. I never thought about using fresh cooked salmon for my mom’s version of salmon croquettes.

As I have developed my cooking chops and expanded my creativity, I decided fresh salmon was better than canned salmon. Of course, if I am in the mood for Salmon Patties and fresh salmon fillets are not available, bring on the canned salmon. Yup, I still keep a can in my pantry.

Remember, fresh is always best! However, whether you use fresh or canned salmon I can almost guarantee you will enjoy this very simple but flavorful dish.

Salmon Patties

Ingredients:

3 baked salmon fillets

5 dashes hot sauce

1 egg

1 scallion diced

½ cup vegetable oil

¼ cup panko bread crumbs

1 tbsp half and half

½ tsp brown mustard

½ tsp dried dill

½ tsp salt

¼ tsp ground black pepper

¼ tsp old bay seasoning

Lightly beat egg with half and half then set aside.

Heat vegetable oil in a large skillet over medium high heat.

Place salmon in a large bowl and flake with a fork. Add bread crumbs, scallions, seasonings and egg mixture. Mix together well then form into patties. Place no more than 4 patties in the skillet to prefer crowding. Brown on both sides until golden then remove from skillet and drain on paper towels. Serve with Seafood Sauce shown below.

Seafood Sauce:

3 tbsp sour cream

2 tbsp fresh hot salsa

¼ tsp dried dill

¼ tsp Adobo

¼ old bay seasoning

pinch seasoned salt

pinch of black pepper

Mix well. Chill for at least 30 minutes.


Follow my blog with Bloglovin

Kicked Up Mussels

The other day I was watching an old episode of the Barefoot Contessa about a seafood salad she was making for a friend and it included mussels. That got me to thinking about an old mussel recipe I had but never really tweaked. Since I needed a new post idea I decided I would work on creating a Kicked Up Mussels recipe.

Both my hubby and I love seafood and besides eating a lot of chicken we eat a lot of fish. Once in a while I will throw together a shrimp or scallop meal if I have the ingredients. That is one of the issues I have in creating new meals during the week. It is too easy to keep using over and over again the same ol’ staples I keep in the pantry. Preparing a special meal takes planning and sometimes calls for an extra trip to the grocery store. Because I work full-time I don’t always have a lot of time to be creative with dinner. However, I have been known to have a burst of creativity now and again if I have not had a tough day at work. The weekends are really the best time for me to test out recipes and take my time to fashion a new recipe or try an old recipe with a new twist.

img_6344_1

Okay, back to the Kicked Up Mussels. I had to search a couple of my old recipe journals to find my mussel recipe and was happy to discover it was a pretty simple one. My original recipe called for beer instead of white wine like most other recipes. I could not remember if this was a good idea or bad idea. But hey, I use beer in a few of my recipes and I have not heard any complaints yet so I guessed it was a good idea. Since I was using beer instead of wine I had to find a nice light beer with a hint of citrus flavors rather than a dark beer which I thought would be heavy. I am not a beer drinker so my apologies to true beer drinkers if I don’t know what I am talking about. I did a little research by perusing the beer isle at a local liquor store with a large variety of beers. I landed on Namaste White which is by Dogfish Head Brewery located in Delaware.

img_6354_1

As a non-beer drinker I must say I enjoyed taking a swig of Namaste White after adding most of it to the mussels. The combination of orange, lemongrass and coriander in the beer along with the brininess of the mussels and aromatic herbs was genius. All right. I may not be a genius but the combination of flavors was genius. I will even go as far as to say my recipe would be welcomed in any 4 star restaurant. The proof is in the pudding. You be the judge and try it out.

Kicked Up Mussels

Ingredients:

2 dozen mussels cleaned

3 plum or tomatoes diced

3 cloves garlic chopped

2 shallots diced

1 jalapeno pepper seeded and diced

1 Namaste White beer

2 tbsp olive oil

1 tbsp parsley

½ tsp thyme

¼ tsp red pepper flakes

pinch of salt

pinch of black pepper

Clean mussels by running them under cold water and gently scrub them if necessary to remove dirt from the shells.  Use a knife to remove the fuzzy beard if present. Arrange mussels in a large skillet. Set aside while sauteing tomatoes.

Place olive oil in a medium sized non-stick skillet over medium high heat. Add garlic shallots, jalapeno pepper and tomatoes. Season with salt, black pepper and thyme. Stir then saute for 2 minutes. Move mussels to heat and pour tomato mixture and beer over mussels. Sprinkle with red pepper flakes and shake to mix tomatoes and mussels. Cover and cook for 3 minutes until mussels pop open. Discard any mussels that do not open. Sprinkle with parsley before serving. Serve with crusty bread to sop up the delicious sauce.

Tip: Cultivated mussels vs. wild mussels. 

If you purchase wild mussels, they may be a little gritty which means your mussels will be crunchy.  To make sure you remove any sand from the mussels dissolve about 1/4 cups of salt and 2 cups of warm in a large pot along with 2 tbsp of flour or cornmeal.  Add the mussels then cover with water.    Soak for 1 – 2 hours.  Drain then rinse the mussels with cold water.  Most mussels you find in the grocery store are cultivated and do not contain a lot of sand or grit so there may not be a need to soak the mussels.  Just clean the shells. To be on the safe side I would soak the mussels as I described.

Follow my blog with Bloglovin

Stuffed Flounder

Fish Sale! I was at the grocery store looking for something to prepare for dinner and passed by the seafood counter when something caught my eye. Low and behold, they were having a fish sale. One of my favorite types of fish (Cod) was $3.00 less than usual. They also had another one of my favorites on sale – flounder. The flounder looked nice and fresh so I bought four fillets to make Stuffed Flounder for dinner.

The reason I decided to make Stuffed Flounder was so I could use the rest of the cornbread stuffing we had the night before. Now, that our youngest son is in college I actually have leftovers. I don’t like wasting food so I try to find different ways to “re-purpose” the leftovers. Making a spinach and cornbread stuffing for the flounder seemed like a great idea.

Guess what? It was a great idea and hubby was happy with a full belly after he cleaned his plate. This was definitely one of my Health, Quick and Easy meals. The flounder was light and healthy. The stuffing was quick to make and putting the two together was easy. What could be better than that!?!

Stuffed Flounder

Ingredients:

4 flounder fillets

1 pkg baby leaf spinach leaves

1egg

1 ½ cups cornbread stuffing

3 tbsp butter

1 tbsp water

1 tsp dried dill

black pepper

paprika

salt

juice from ½ lemon

Preheat oven to 350 degrees.

Melt 1 tbsp butter in a medium sized skillet over medium heat. Add spinach and water. Sprinkle with salt and black pepper to taste. Cook until spinach is wilted stirring occasionally.

Place cornbread in a bowl and add spinach with juice. Beat egg and add to cornbread and spinach mixture. Mix well then set aside.

Season fish with salt and black pepper. Place two fish fillets on a rimmed cookie sheet or in a long casserole dish sprayed with cooking spray. Spoon stuffing onto each fillet. Top with remaining fish fillets then sprinkle with paprika. Place 1 tbsp of butter on each fish fillet. Bake fish for 10 to 15 minutes until fish is cooked through but not dry.

Follow my blog with Bloglovin

Salmon with Roasted Tomatoes, Fennel and Pasta

Salmon is probably my favorite fish next to cod. Cod is my go to fish for frying because it is tender and flaky. Salmon tastes great when it is broiled or baked and dripping with butter and lemon. To compliment salmon I like to add a side dish of vegetables and pasta. On some occasions I like to combine everything into a single dish.

My Salmon with Roasted Tomatoes, Fennel and Pasta is one of those dishes that can be combined into a single dish. Beautiful curls of pasta topped with a tenderly broiled salmon fillet and a cascade of roasted tomatoes and fennel can only make your mouth water when you look at your plate of deliciousness. Okay, Seriously! This is a beautiful dish that tastes wonderful. The type of salmon used in the recipe will change the taste of the dish so use whatever your taste buds like. I am not a fan of sockeye salmon which has a deep reddish orange color and a strong flavor. I prefer Coho or Atlantic salmon which is lighter in color and has a much milder flavor than sockeye. No matter which type of salmon you choose you are sure to get a ton of Omega-3s.

Roasting tomatoes brings out the natural sweetness of the tomatoes. Fennel is aromatic and has a sweet licorice flavor. Cooked fennel has a milder flavor than raw fennel so it goes well with the salmon and tomatoes without overpowering the dish.

So, if you are looking for a nice healthy flavorful dish to impress your family and friends try out my Salmon with Roasted Tomatoes, Fennel and Pasta. You cannot go wrong with this one.

Salmon with Roasted Tomatoes, Fennel and Pasta

Ingredients:

2 – 3 salmon fillets

6 -8 plum tomatoes cut into wedges

1 small bulb of fennel

1 shallot sliced

1 pkg campanelle pasta

¼ cup reserved pasta water

¼ cup shaved parmesan cheese

6 tbsp butter

2 tbsp olive oil

1 tsp salt

1 tsp black pepper

½ tsp dill

paprika

Preheat 425 degrees.

Prepare pasta according to package reserving ¼ cup of the pasta water. Set aside.


Place tomatoes, fennel and shallots on a rimmed cookies sheet. Drizzle with olive oil then sprinkle with salt and black pepper. Toss to coat veggies with olive oil and seasonings. Place in oven and roast for 25 to 30 minutes.

Prepare salmon by placing on a rimmed baking sheet. Season with salt, black pepper and dill. Place 2 tbsp of butter on each fillet. Place in oven with tomatoes and fennel. Cook for 20 minutes. Set aside to rest while tomatoes and fennel finish cooking.

Remove tomatoes and fennel from the oven and pour pasta water over veggies. Spoon pasta onto a plate. Add a salmon fillet then spoon roasted tomatoes and fennel over the salmon. Garnish with shaved parmesan cheese.

Follow my blog with Bloglovin

Shrimp with Crab Grits

IMG_2766_1

I recently went to a fantastic restaurant in Maryland with my daughter and youngest son. We were doing an overnight visit with baby girl so I treated us all to dinner. The restaurant was eclectic with modern tables, a small library of books to purchase, great artwork, a stage for poetry readings and wonderful service. The crowd was diverse and so was the food.

IMG_2744_1

I was amazed at the variety of dishes on the small menu which had a basic organic theme but offered foods anyone could enjoy. I decided to try a shrimp dish that was layered over crab grits and smothered in a light sauce with crisp veggies. After the first bite I knew I would have to try and re-create this dish when I got home.

IMG_2774_1

What I created does not taste exactly like the wonderful dish in Maryland but it comes pretty close. The key was to make sure each layer of flavor complimented the next. The grits were nice and creamy with the subtle hint of crab. The veggies were crisp and naturally sweet. The shrimp added their own layer of flavor along with an underlying level of spicy heat just enough to make your taste buds tingle. Although I used jumbo shrimp for the recipe, I think scallops or a nice grilled fillet of salmon or cod would be enjoyable too.

IMG_2798_1

Shrimp with Crab Grits

Ingredients:
1 lb lump crab meat shelled
2 shallots diced
2 cloves garlic sliced
1 tomato seeded diced
1 cup coarsely ground grits
1 cup thin asparagus chopped
2 cups water
¼ cup heavy cream
½ cup half and half
2 tbsp butter
2 tbsp olive oil
1 tsp fresh parsley
1 tsp salt
1 tsp black pepper
juice from ½ lemon
Bring water and 1 teaspoon of salt to a boil. Stir in half and half then add grits and reduce to medium heat. Cook until thick and tender approximately 15 to 20 minutes. Add cheese and stir until melted and well blended. Gently stir in crab and try not to break up the lumps of meat. Set aside and keep warm. Add a little milk if needed to thin out grits.

In a medium pan melt 1 tbsp butter with 1 tbsp olive oil. When heated add shrimp and sprinkle with salt, pepper and lemon juice. Cook until shrimp are pink and remove from heat. Set aside.

In a large pan saute shallots in olive oil and 1 tbsp butter until slightly browned. Stir in garlic then add asparagus, tomatoes, parsley and seasonings. Let simmer for 3 minutes then remove from heat.

Place grits into a bowl then spoon veggie mixture over the grits. Top with shrimp and sprinkle a little fresh parsley over the top. Yummy!

Follow my blog with Bloglovin