Category Archives: Meat/ Poultry

Chicken Stir Fry

Stir fry dishes are one of the easiest things to make for dinner on a busy night or any night. My version of Chicken Stir Fry was developed over time as I played with different flavors and levels of heat. I had to find a happy medium for the family as my taste buds like low to medium heat and the rest of the family like burn your mouth levels of heat. Since I wanted to enjoy the dish along with the family I went with medium heat with a side of hot chili oil for the everyone else to add to their bowls of stir fry.

If you don’t have a wok, I would suggest investing in one because you can make a variety of dishes in this one tool wonder. Woks are easy to clean and can take a lot of heat. Of course, if you don’t have a wok or don’t want to invest in one, you can stick to using a large skillet for creating your stir fry dishes.

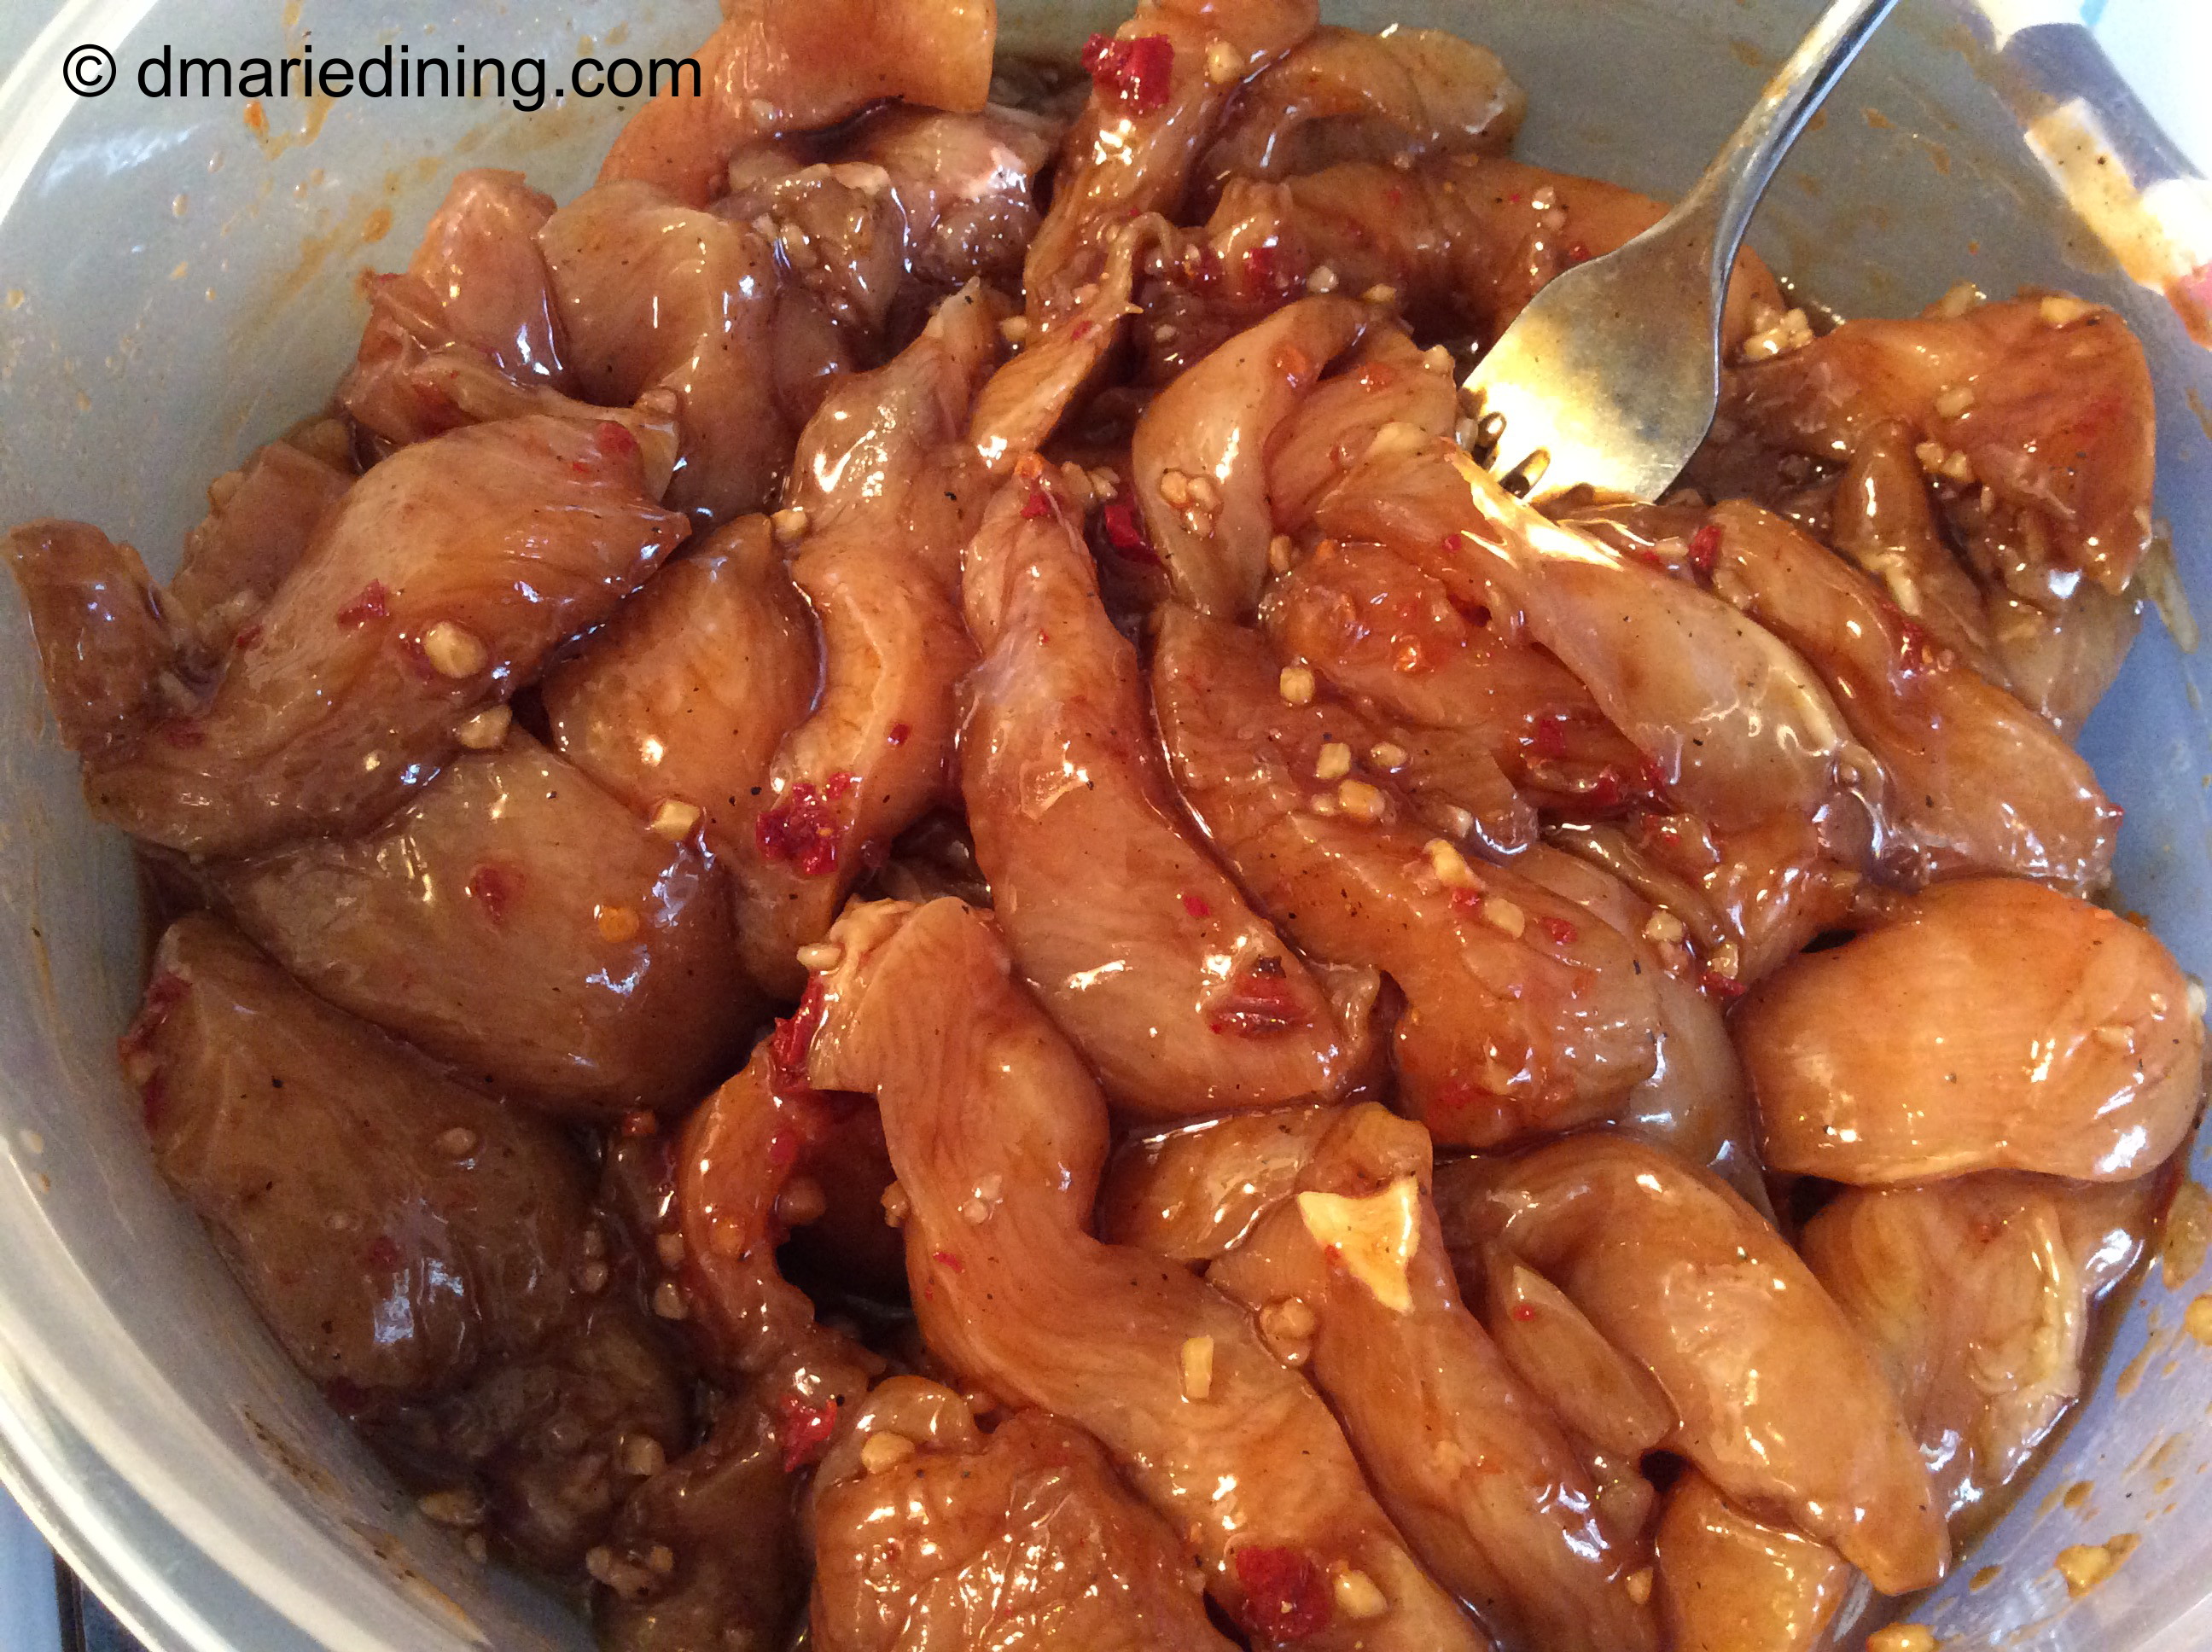
The key to making a flavorful stir fry is in the marinade. The longer you marinade the chicken or any other meat, the more intense the flavor becomes. At a minimum marinade your meat for 30 minutes and if you can plan ahead, marinade it overnight. Overnight marinading also helps to tenderize the meat (just a few useful tips).

From start to finish I can have dinner ready in an hour for the hungry crew on Chicken Stir Fry night. Talk about Healthy, Quick and Easy! I love it.

Chicken Stir Fry

Ingredients:

2 – 3 chicken breasts cut into thin strips
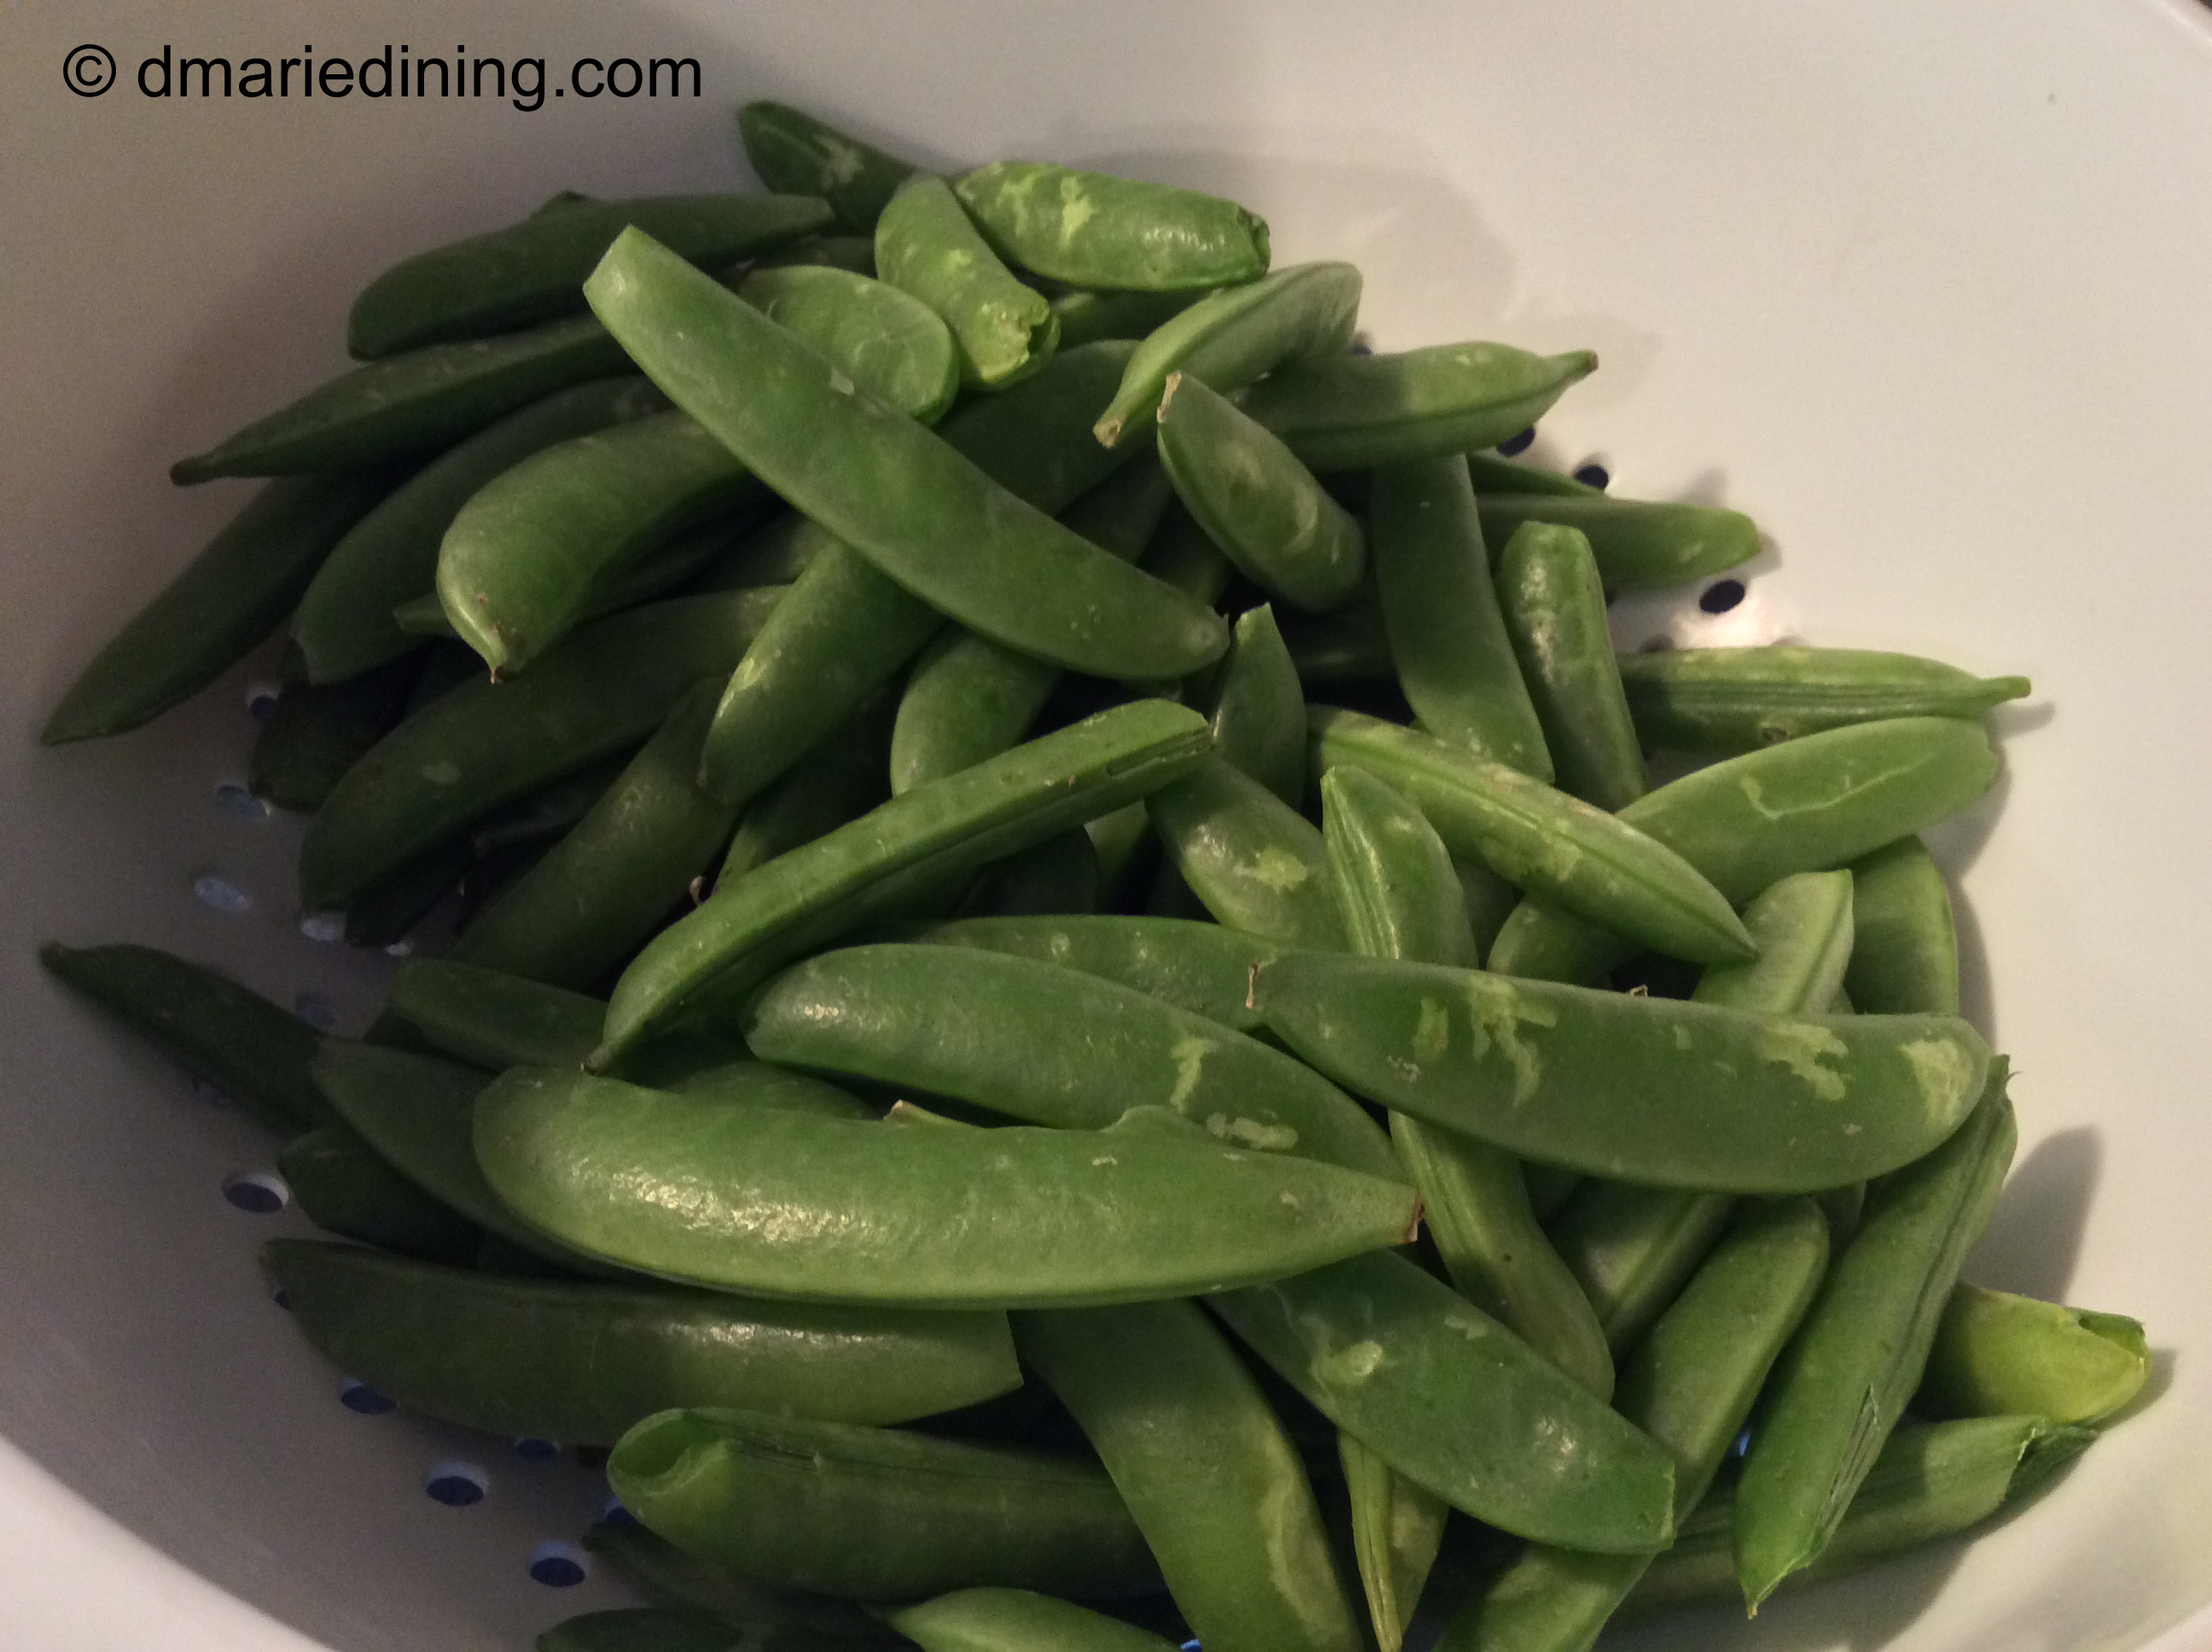
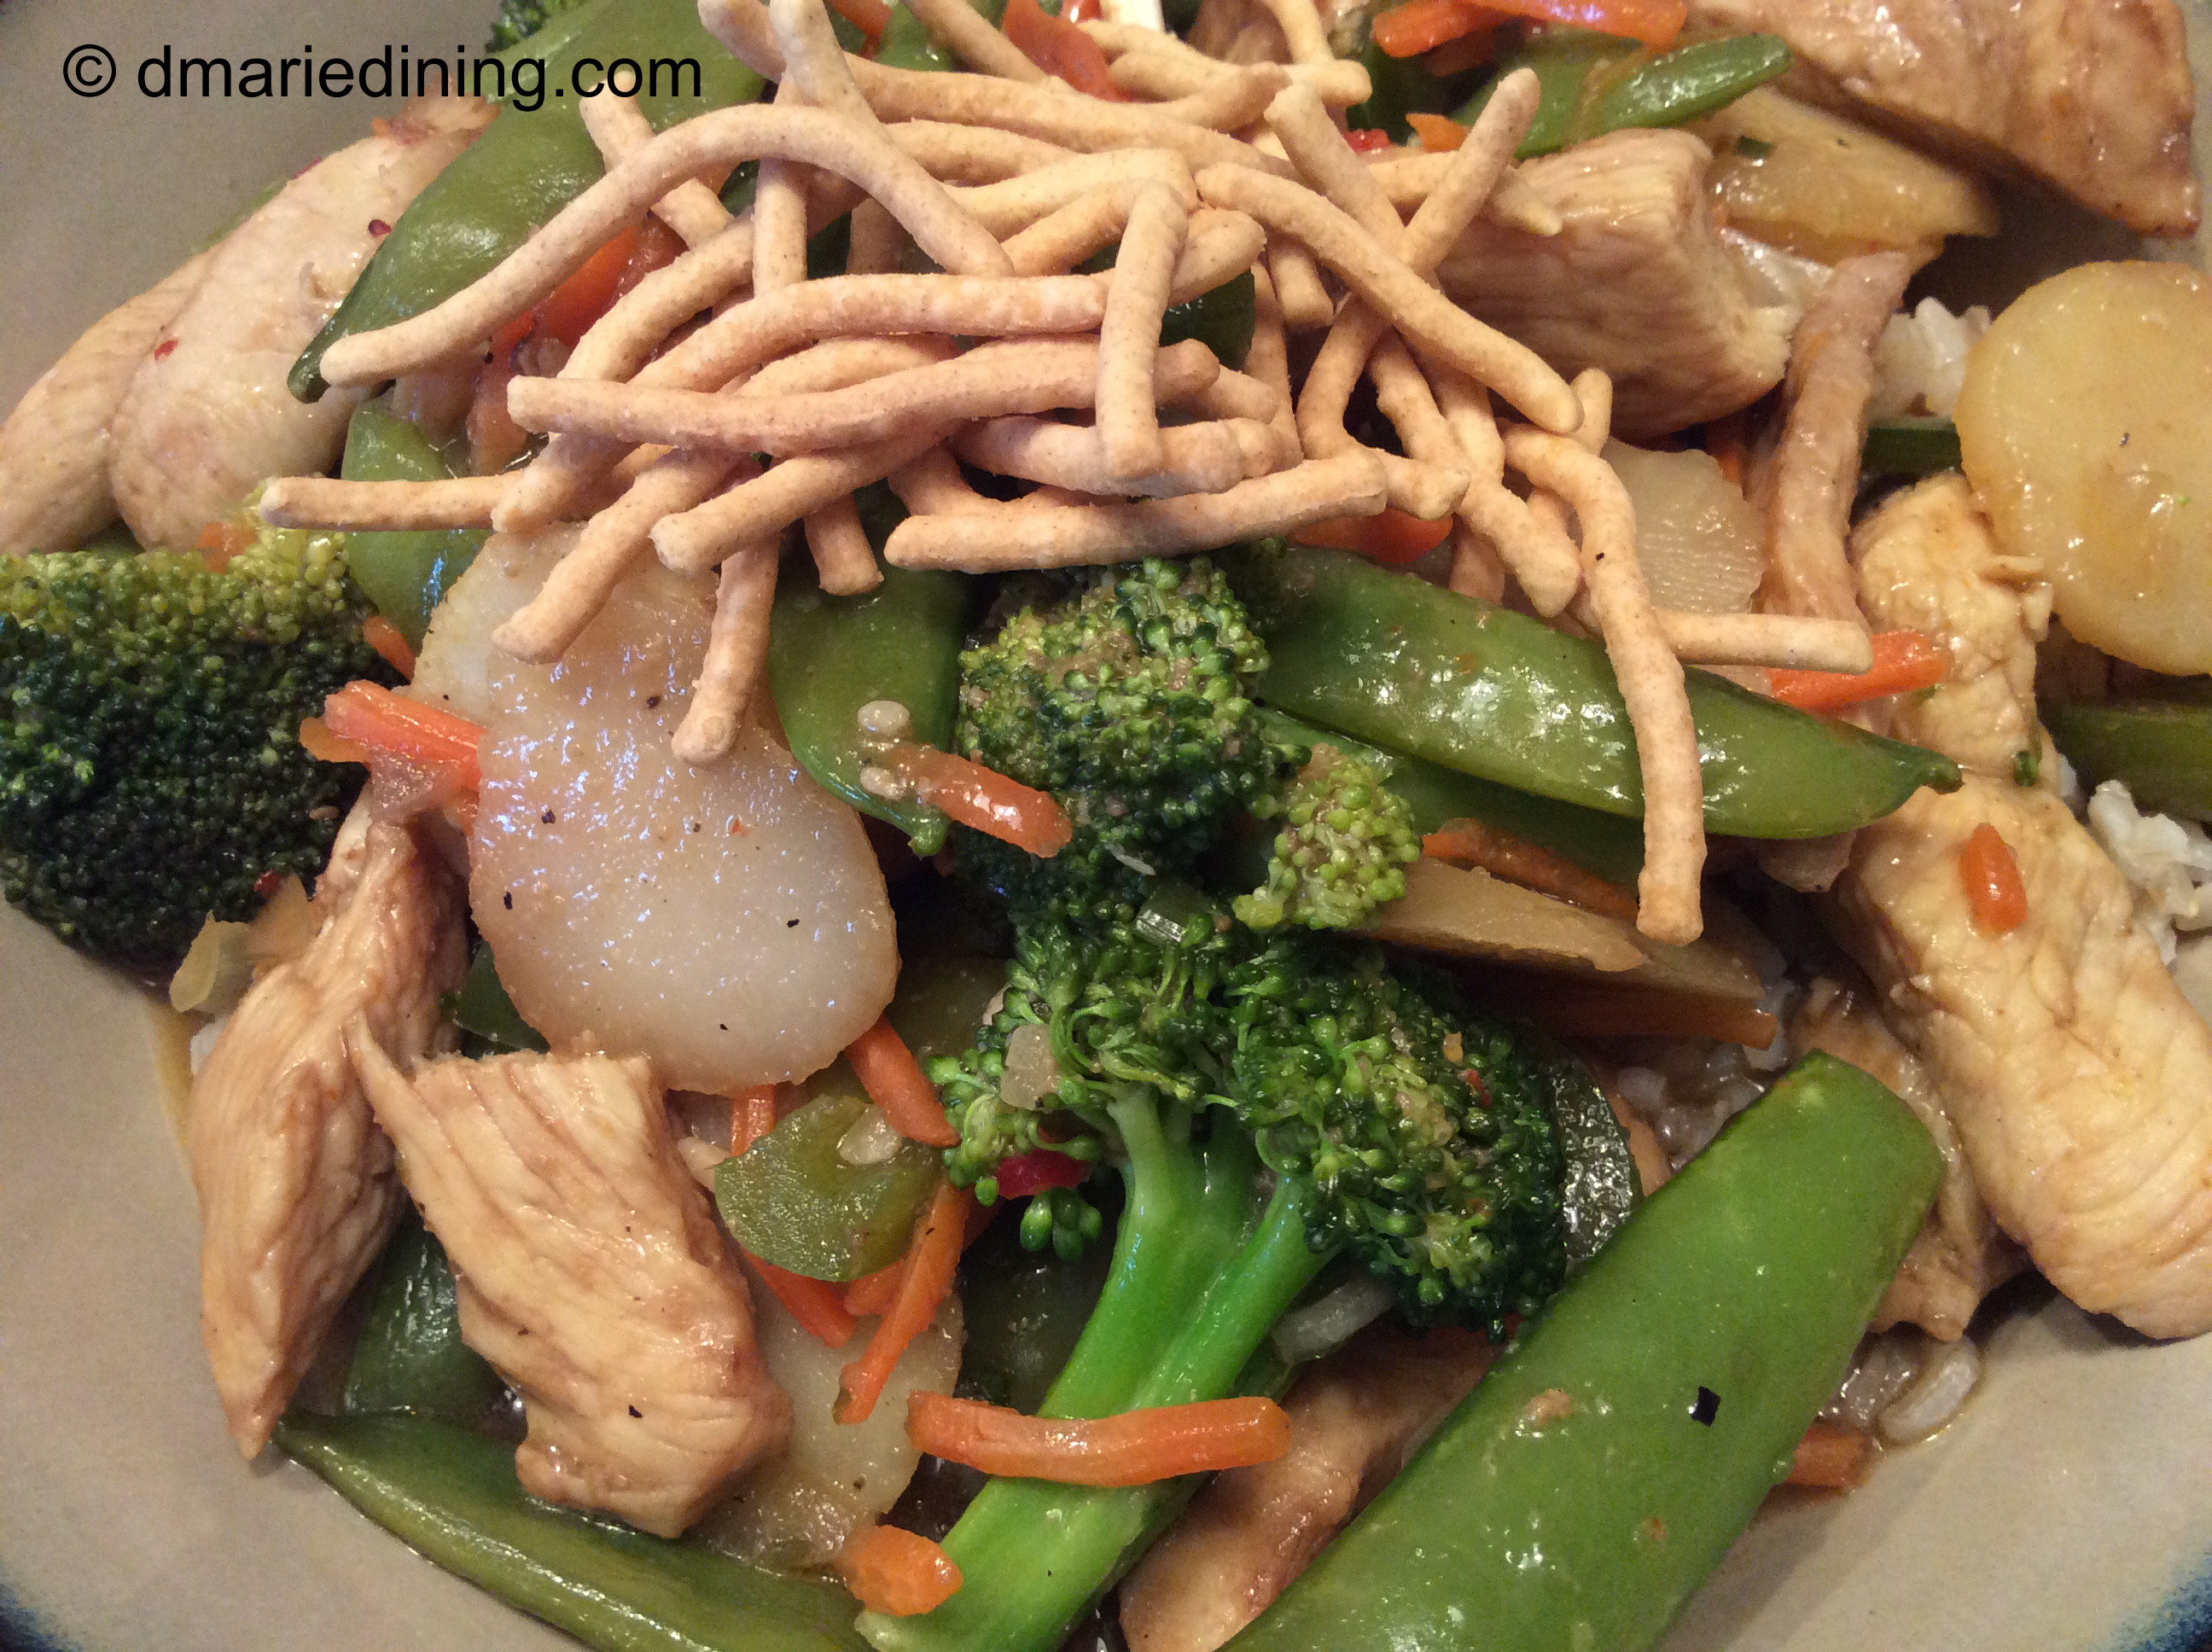
1 package snow peas

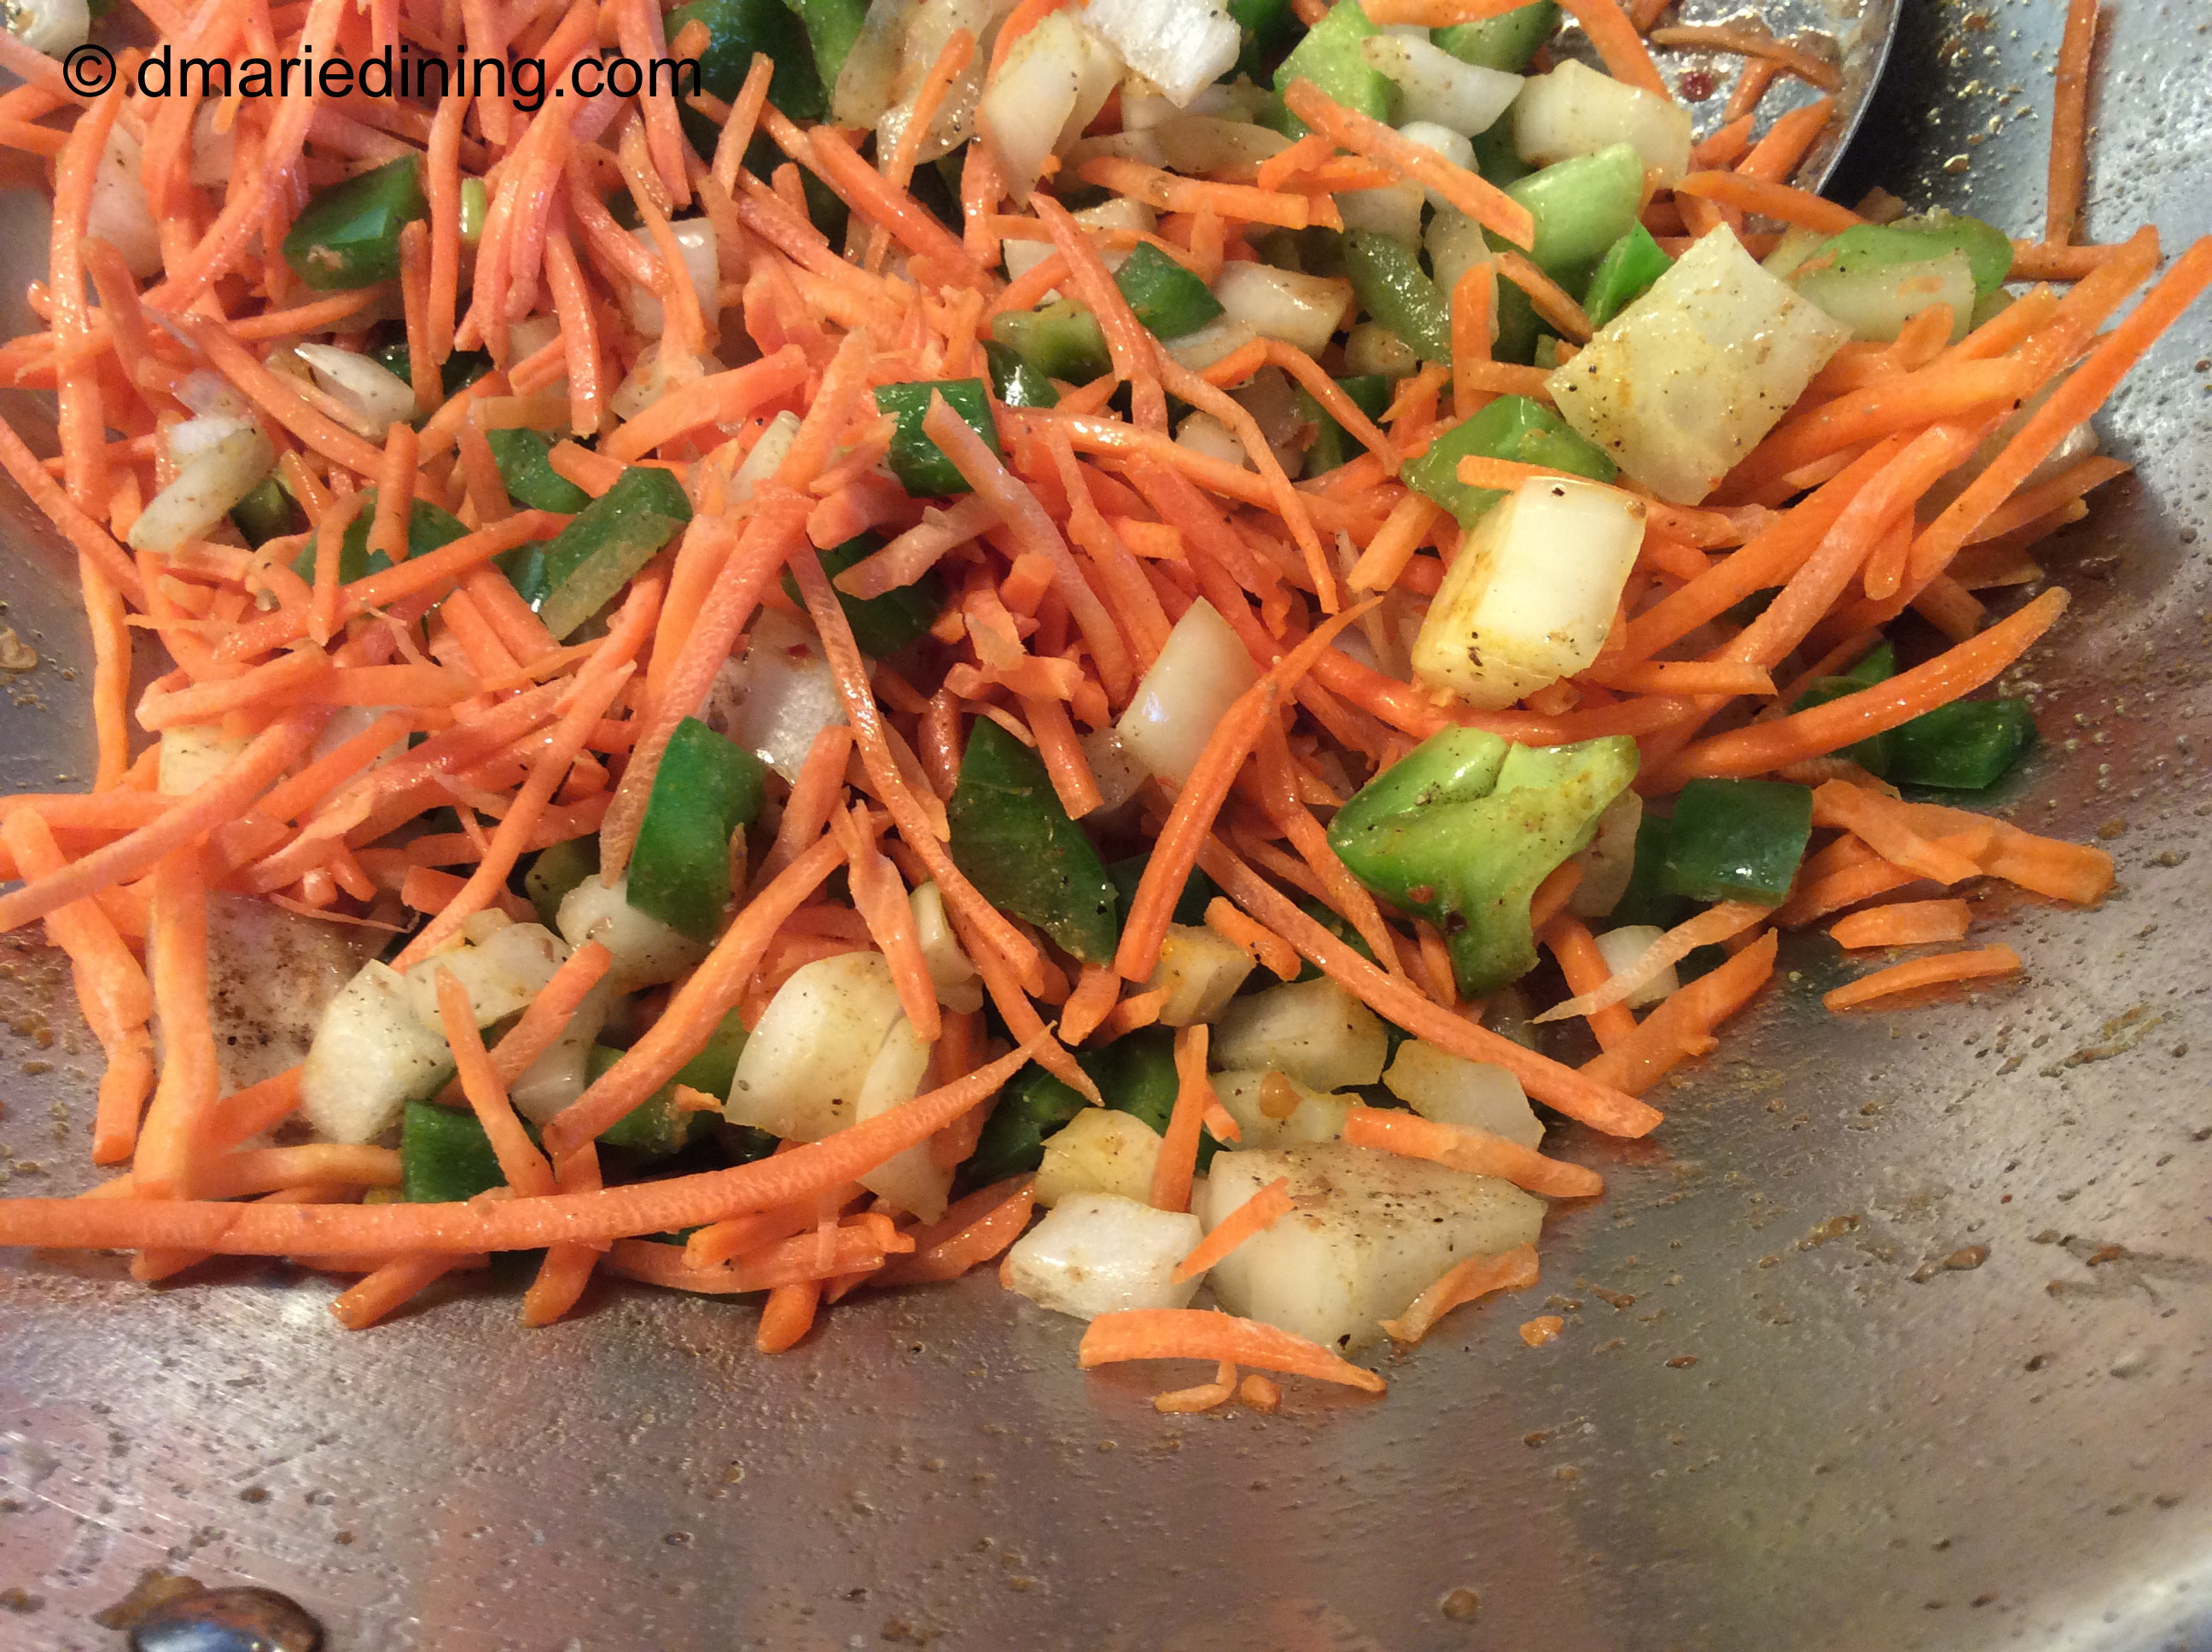
1 small green pepper large dice

1 small broccoli crown cut into florets

1 small onion diced

1 cup shredded carrots

½ cup chicken broth

½ cup crispy chow mein noodles

1 small can water chestnuts drained

3 tbsp hoisin sauce

3 tbsp oyster sauce

2 tbsp Thai style sweet and spicy sauce

2 tbsp garlic chopped

2 tbsp soy sauce

2 tbsp olive oil

1 tbsp corn sauce

1 tsp minced ginger

1 tsp black pepper

½ tsp red chili flakes (optional)

Marinade:

Place chicken in a medium sized bowl. Mix together Thai style sweet and spicy chili sauce, 1 tbsp garlic, ginger, soy sauce and corn starch in a separate bowl. Pour mixture over chicken and massage into the meat. Cover with plastic wrap and marinade in the refrigerator for at least 30 minutes or overnight.

To cook stir fry:

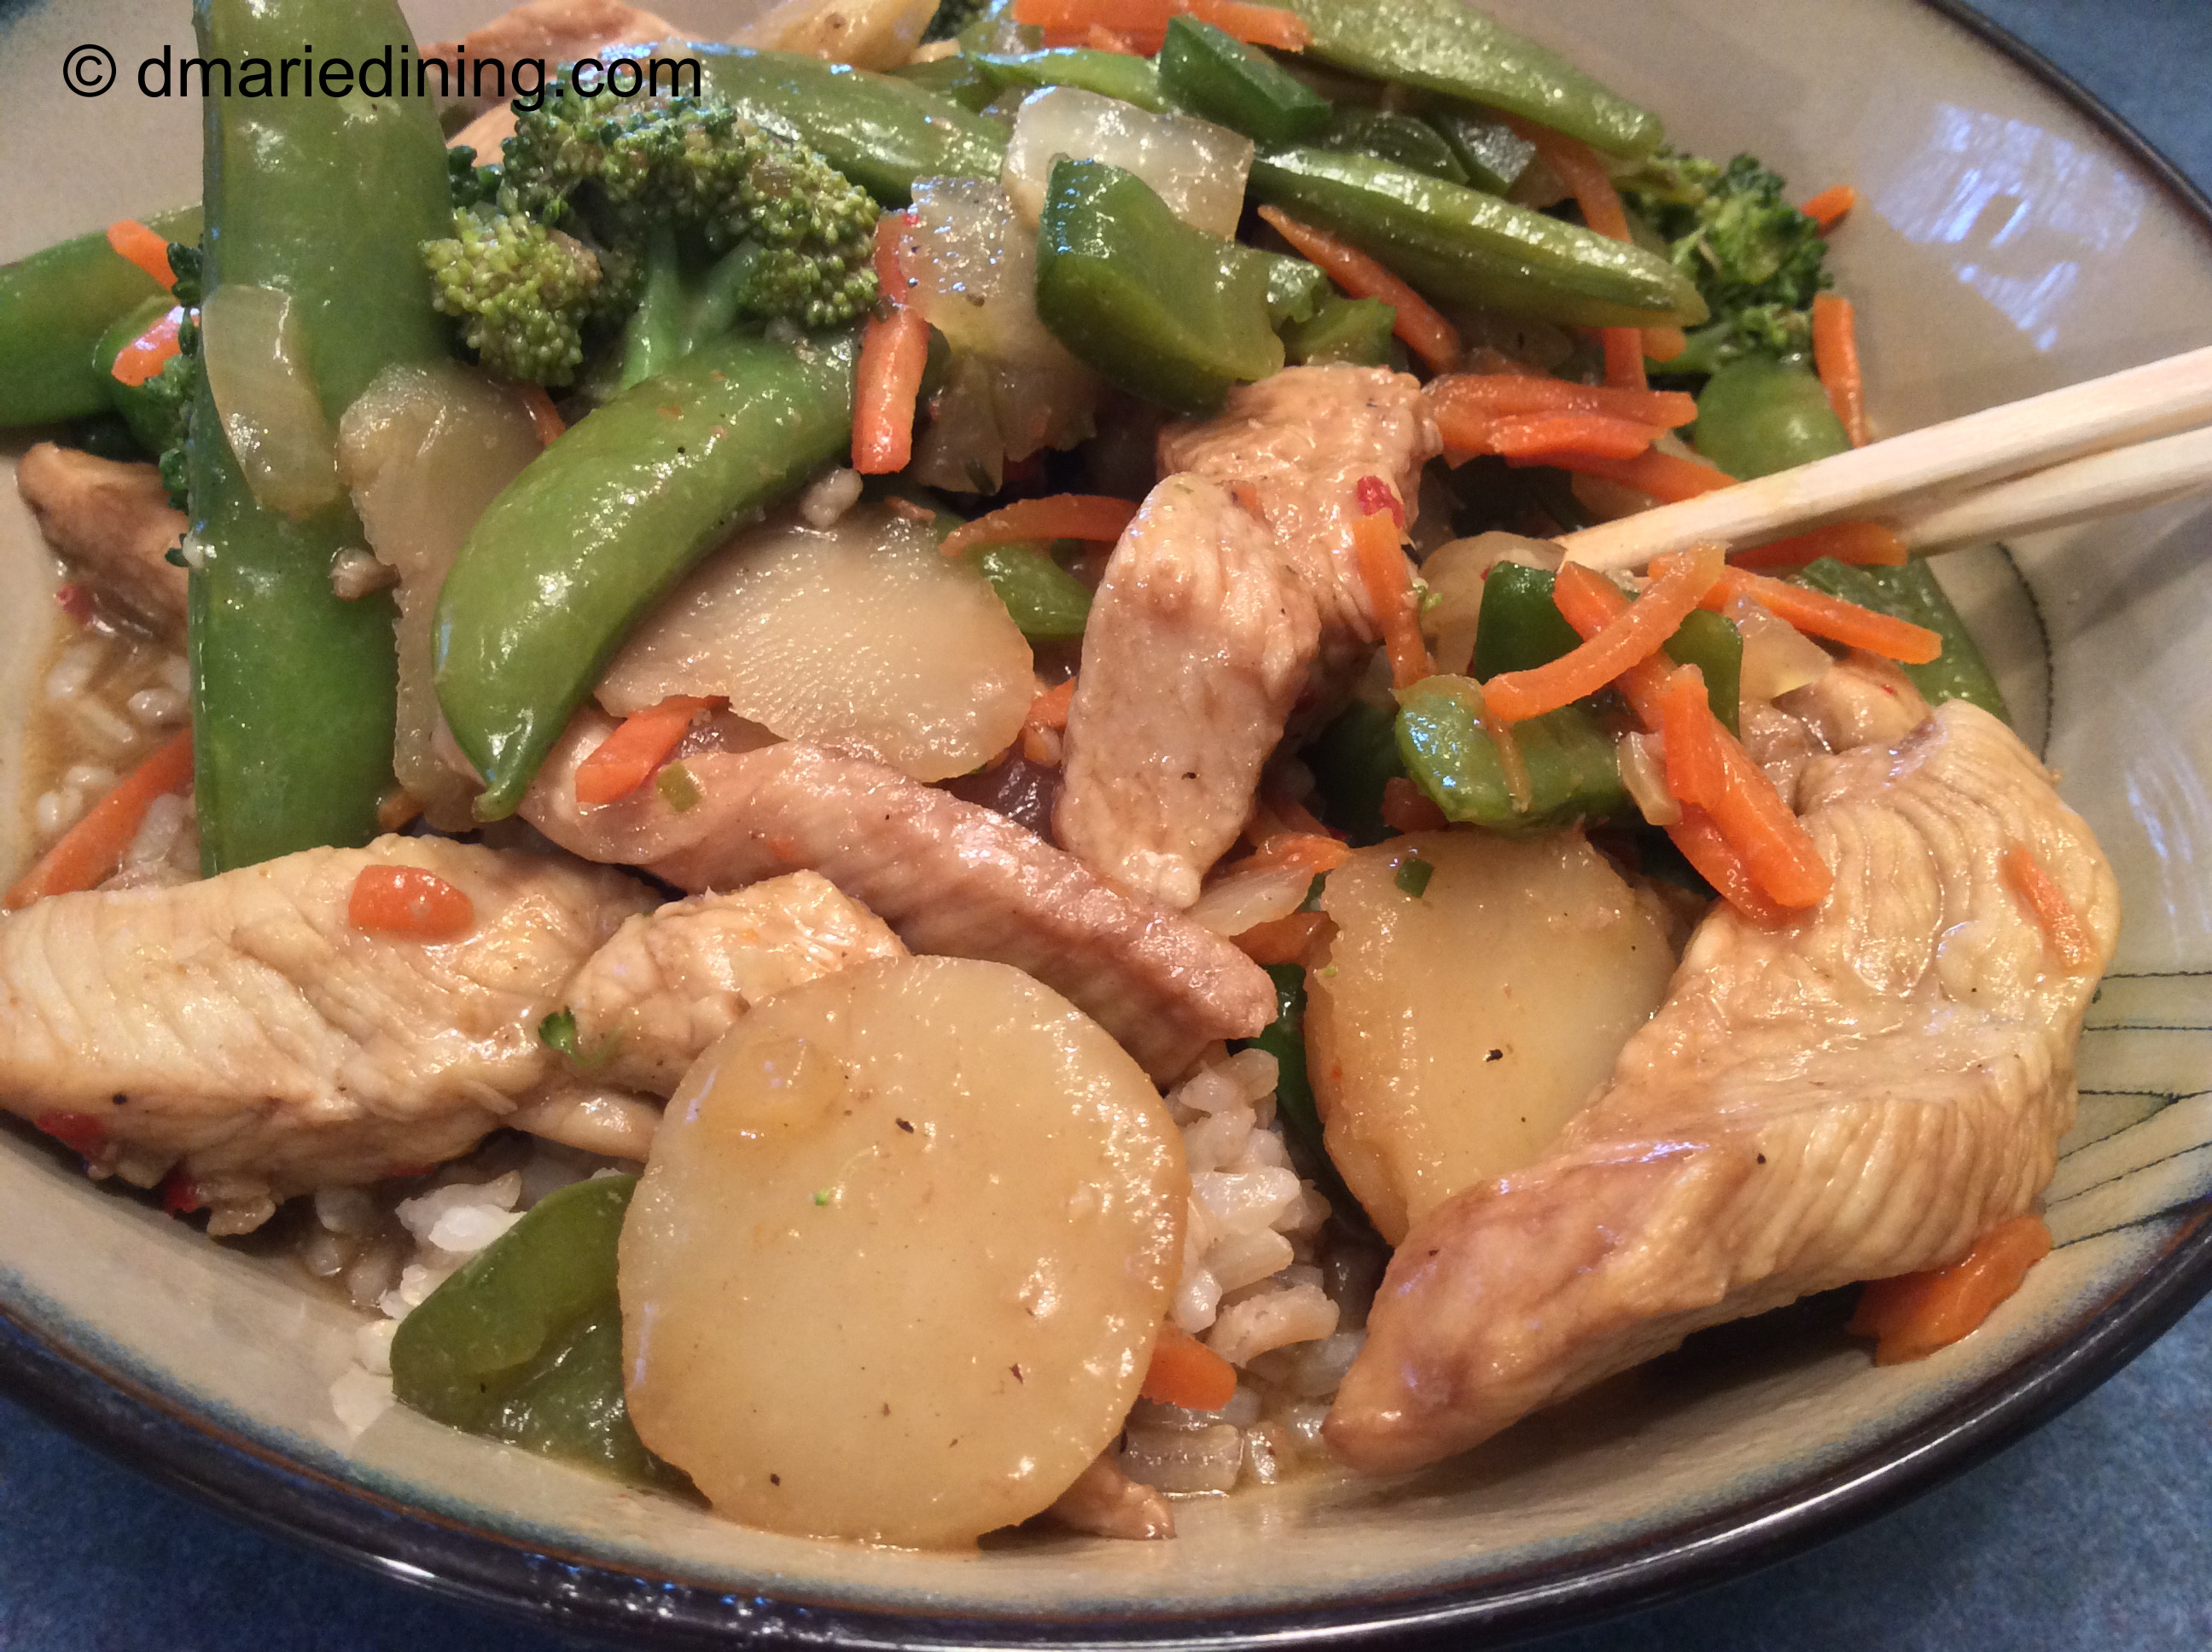
Heat oil in wok or large skillet over medium high heat. Add chicken and stir until chicken is no longer pink but not totally cooked through. Remove chicken and place in a bowl. Set aside. Add a little more oil to the wok if necessary then add carrots, snow peas, onions and broccoli. Cook for 2 – 3 minutes stirring constantly until vegetables begin to soften. Add chicken broth, water chestnuts and chicken to the vegetables along with the sauces and red chili flakes. Stir and cook an additional 3 – 5 minutes until chicken is fully cooked through. Serve in bowls over rice, ramen or udon noodles. Top with crispy chow mein noodles.

Follow my blog with Bloglovin

Teriyaki Baby Back Ribs

Ribs, ribs and more ribs. Okay, so you may be wondering how many rib recipes can there possibly be in the world. Well, the short answer is a lot! Granted, my family does not eat ribs often but when we do I like to try different sauces instead of using bbq sauce all of the time.

Teriyaki Back Back Ribs are a new favorite flavor whenever we get tired of traditional bbq and don’t feel like firing up the grill. Ribs can taste great whether you char them on the grill or bake them in the oven. One is just less time consuming to prepare. Baking ribs means you can do minimal work up front then stick them in the oven to bake low and slow. After that you can move on to doing something else productive like blogging.

If you like Asian flavors, you will enjoy Teriyaki Baby Back Ribs. P. F. Chang has become my  favorite teriyaki sauce because of the subtle hint of garlic, the slight tang of ginger and the sweetness of brown sugar. I use it as a marinade, glaze for pork, chicken or salmon and for a teriyaki brown rice side dish I recently made.

Whatever brand of teriyaki sauce you decide to use you cannot go wrong making a rack of ribs with a teriyaki twist.

Teriyaki Baby Back Ribs

Ingredients:

1 rack pork baby back ribs sliced
1 bottle P.F. Chang Teriyaki sauce
1 small onion sliced
1 cup water
2 tbsp vegetable oil
1 tbsp worcestershire sauce
1 tbsp salt
1 tsp ground black pepper
1 tsp smoked paprika
1 tsp garlic powder
1 tsp onion powder

Preheat oven to 325 degrees.

Season ribs with seasonings. Heat vegetable oil over medium high heat in a non stick frying pan. Brown ribs on all sides. Place ribs and onions in dutch oven. Add water then pour teriyaki sauce over the ribs. Cover and back for 1 ½ – 2 hours until ribs are tender and cooked through.

Follow my blog with Bloglovin

Salad with Crispy Prosciutto

My hubby and I have started on a new journey to eat a little healthier than we have in recent months. Because I enjoy cooking and love to build on flavors I used butter, sugar and bacon as a great source of flavor. Fast forward to a few weeks ago which is when our journey began and that all changed.

I really wanted to lose weight and find ways of cutting out the things I knew added loads of calories but tasted so doggone good. I finally got my mind, body and spirit in sync to commit to a different lifestyle of eating. To do this I (we) had to jump in feet first and do it in “cold turkey” fashion. I did my research and found a plan that eliminated my usual fare and replaced it with other flavors that are just as tasty and still doggone good.

One substitute I made on my journey is to use prosciutto instead of bacon as a topping for salads. We eat salads year round and making a BIG SALAD for dinner is our favorite on hot summer days. Rather than crisping up a few slices of bacon and crumbling them over the salad, I now heat up a little Extra Virgin Olive Oil (my new substitute for butter) and crisp up prosciutto. Just chop up those crispy pieces then sprinkle them over a nice salad and you will be in salad heaven.

Okay, I can hear a few critics say wait a minute. Doesn’t prosciutto have more salt than bacon? The answer is yes. Prosciutto is saltier than bacon but has less calories and saturated fat. Of course, like everything else, prosciutto should be eaten in moderation. A few slices won’t hurt you and it will add a nice flavor to your salad without adding extra calories and fat like bacon.

Give it a try and see for yourself that prosciutto can be your new source of flavor.

Follow my blog with Bloglovin

Turkish Lamb Neckbones

Neck bones are a Southern delicacy. There are beef neck bones, pork neck bones and as I recently discovered, lamb neck bones. Beef and pork neck bone recipes are pretty basic. I smother them in onions with a lot of good seasonings and chicken broth. Then I use the strained neck bone broth to flavor some white rice. Add some collard greens or steamed cabbage and you have heaven on a plate.

Lamb Neck Bones are not really Southern or at least not in my mind. When I picked up a couple of packs of lamb neck bones my mind landed on creating a Greek or Turkish recipe. Hence, my Turkish Lamb Neck Bones.

I wish I could say I have experience in making Turkish cuisines but I don’t. So, to make my job easy I bought a package of Turkish marinade to help my recipe along. The marinade was fragrant with the scent of cumin, garlic and tomatoes. These seasonings were deeply infused into the lamb which made it extra flavorful and the meat was very tender from the marinade.

My Turkish Lamb Neck Bones may not have been southern but they were still heaven on a plate. If you ever run across lamb neck bones or feel bold enough to ask you butcher if he has any, you should try this recipe. You will be pleasantly surprised at how delicious it is and how easy it is to make.

Turkish Lamb Neck Bones

Ingredients:

2 pkgs lamb neck bones

4 carrots peeled and cut into large slices

½ large onion peeled and sliced

½ lemon cut into quarters

½ jalapeno pepper sliced

1 pkg Turkish marinade

1 cup chicken broth

1 cup water

1 tbsp salt

½ tbsp ground black pepper

½ tsp onion powder

¼ tsp cayenne

Wash lamb neck bones. Place neck bones in a large bowl and season with salt, black pepper, onion powder and cayenne pepper. Toss to coat with seasoning. Pour marinade over the lamb then place meat in a large plastic zip lock bag and lock. Massage the marinade into the meat. Place in the refrigerator overnight or at least 4 hours. Remove from the plastic bag and place in a large pot with water, chicken broth, marinade, onion slices, lemon and jalapeno peppers. Cook lamb over medium heat for 1 ½ hours. Stir occasionally and add more liquid if necessary.

Preheat oven to 325 degrees.

Remove lamb neck bones from pot and place in a large casserole dish. Top with carrot slices and cover. Cook for 20 – 25 minutes until the carrots are tender. Serve with steamed cabbage or sauteed sweet potatoes.

Follow my blog with Bloglovin

Mustard Baby Back Ribs

Growing up with southern influences while living in the northeast region has been quite interesting to me. I embrace my southern roots but not all of the delicacies enjoyed by my southern brethren. For instance, my mom is a true southern chef and would prepare things like pig feet, chitterlings, pork ribs, muskrat, fried chicken livers or chicken gizzards smothered in onions and gravy with rice. Don’t ask about the muskrat which is really called musk rabbit. It smelled good but is one food I refused to eat. I preferred cereal or lunch meat sandwiches on muskrat dinner night.

Although I ate the other dishes growing up, I can say the thought of eating pig feet, chitterlings or chicken livers makes my stomach churn a little and my head ache. Back then you ate whatever was served (except muskrat) just because your mama made it. Now, I have total control over what I eat and it does not include anything that makes me frown when I look at it. The one thing I do like that my mom prepared in my younger days is ribs!

Mustard Baby Back Ribs is a slight twist on the ribs my mom made for every family BBQ. Everyone loved my mom’s ribs because they were smoky and tender plus she made her own BBQ sauce which had a tangy mustard and vinegar flavor. Once you tasted her sauce you were hooked. Even my neighbors started asking if Mrs. T could make them a batch of sauce after they tasted it at one of our backyard BBQs.

Okay, back to the Mustard Baby Back Ribs. A few weeks ago, I had a taste for baby back ribs but I did not have any of my mom’s sauce on hand so I had to think outside of the box to get the flavors I wanted. I decided to place the ribs in a mustard marinade to mimic the nice tangy flavor of my mom’s BBQ sauce. I think my idea worked beautifully and by the number of clean bones left on the family’s plates they thought it was a good idea too.

Mustard Baby Back Ribs

Ingredients:

2 packages baby back ribs

½ onion sliced thin

4 tbsp spicy brown mustard

1 ½ tbsp salt

1 tbsp Worcestershire sauce

½ tbsp black ground pepper

½ tbsp lemon pepper

½ tbsp chili powder

1 tsp onion powder

1 tsp garlic powder

Place baby back ribs in a large bowl. Add seasonings, Worcestershire sauce and mustard. Mix thoroughly to coat ribs with seasonings and mustard. Place in a plastic zip lock bag and refrigerate for 2 hours.

Preheat oven to 325 degrees.

Spray cooking spray on the bottom of a baking dish then line it with foil. Spray foil with cooking spray then spread sliced onions on the bottom of the baking dish. Season with a little salt. Remove ribs from plastic bag and place in a single layer over the onions. Bake uncovered for 30 minutes then cover with foil and bake another 30 minutes. Remove the ribs from the oven and top with your favorite BBQ sauce. Place ribs back into the oven uncovered and bake an additional 30 minutes.

Follow my blog with Bloglovin

Honey Dijon Baked Chicken

If you have used Gazebo Room Greek Salad Dressing and Marinade as a marinade for chicken you won’t be surprised at how tasty their Honey Dijon Vinaigrette works as a marinade too. This new Gazebo Room product lives up to their signature Greek salad dressing. I was inspired to use this dressing as a marinade because I enjoy the taste of honey and mustard. I don’t usually tell on myself but I must say the flavors were so good on the chicken that I wanted to take my time and pick every morsel of meat off the bone. Of course, I added other seasonings to the chicken but the flavors from the dressing were prominent.

I tried this recipe while my youngest son was home from college. He declared he was trying to eat healthier and didn’t want to eat red meat. Since he was game I was game for giving up pork chops and ribs for a while. This meant I had to add even more chicken and fish to our diets. No one would miss the steaks we ate a few times a year. Now my biggest problem was coming up with even more ways to prepare chicken so it would not be boring. T is not a fan of baked chicken but I had run out of ideas for my usual chicken recipe rotation. So, I took the chance of marinating chicken legs in the Gazebo Room dressing then baking them. Hence, my Honey Dijon Baked Chicken recipe. I figured the Honey Dijon Vinaigrette would kick the flavors up a notch and he would not notice the chicken was baked. I was right! T never mentioned or grumbled that we were having baked chicken. All I heard was the smacking of lips and saw naked chicken bones on his plate.

Chalk one up for Gazebo Room and chalk one up for me!

Honey Dijon Baked Chicken

Ingredients:

6 – 8 chicken legs and thighs

½ cup Gazebo Room Honey Dijon Vinaigrette

½ stick butter

½ medium onion sliced thin

1 tbsp salt

1 tsp olive oil

½ tsp ground black pepper

½ poultry seasoning

½ tsp turmeric

½ tsp cayenne pepper

Preheat oven to 350 degrees when ready to bake.

Place chicken in a large bowl and sprinkle seasonings over chicken. Pour dressing over chicken and toss to coat. Place chicken into a plastic bag then place in the refrigerator for a couple of hours. Remove from bag and add single layer to a baking dish. Melt butter and pour over chicken. Place in the oven and bake for 1 hour until chicken is browned and cooked all the way through.

Follow my blog with Bloglovin

Spicy Taco Chicken Bowl

The “new” craze right now is creating recipes and putting the dish in bowls. At first, I wasn’t really into the bowl idea but it didn’t take long for me to realize I kinda liked the idea. Placing breakfast, lunch or dinner in a bowl helped to cut down on the amount of food we actually ate. I put less in a bowl compared to  how much I put on a plate.

One of my first bowl adventures was my Asian Bowl with Lollipop Lamb Chops. Not to brag too much but that recipe was a big hit with hubby. Now, he has another favorite. My Spicy Taco Chicken Bowl. This recipe was a little spicy with various textures and flavors that complimented each other. Although there are several components to the recipe, I think it is a very simple dish. Shredded spicy taco flavored chicken, crispy yellow rice, seasoned black beans and a mix of avocado and tomatoes. The hardest thing about this recipe is the wait time. Yeah, this one isn’t quick to make only because the chicken has to bake. While the chicken bakes about an hour all of the other pieces can easily be pulled together.

Even I couldn’t complain about having chicken again. Plus, I didn’t take the easy way out and make wingettes. Instead, I opted for chicken legs because they are meaty and you don’t have to take a long time to clean them like chicken thighs. Granted, I think chicken thigh meat is sweeter than chicken leg meat but it takes work to get thighs ready for cooking. Maybe the next time I make a Spicy Taco Chicken Bowl I’ll build in extra time and try it with chicken thighs. Whichever chicken part you choose (legs vs. thighs), I am confident you will enjoy my Spicy Taco Chicken Bowl. Healthy, Easy and Delicious!

Spicy Taco Chicken Bowl

Ingredients:

6 – 8 chicken legs washed

2 plum tomatoes diced

2 scallions diced

2 slices bacon diced

1 can black beans rinsed

1 avocado diced

1 pkg hot and spicy taco seasoning

½ stick butter melted

1 ½ cup water

1 ½ cup chicken broth

1 ½ cups white rice

1 ½ tbsp salt

1 tbsp fresh lemon juice

½ tbsp ground black pepper

1 tsp turmeric

1 tsp cilantro

½ tsp dried parsley

½ tsp onion powder

½ tsp Chile powder

Preheat oven to 350 degrees.

Place chicken in a large bowl. Season with 1 tbsp salt, black pepper, Chile powder and all but 1 tsp hot and spicy taco seasoning. Add melted butter and mix until chicken is well coated. Spray a baking dish with cooking spray then place chicken in one layer in the baking dish. Bake for 1 hour until the chicken is tender and cooked through. Remove from the oven and let cool for about 10 minutes then pull meat off the bone into chunks. Place chicken in a medium size skillet with ¼ chicken stock and remaining taco seasoning. Stir and let simmer for 5 minutes.

While chicken is cooking prepare the following:

Rice:

Rinse rice with cold water to remove some of the starch. Place in a microwaveable casserole dish with a pinch salt, turmeric, water and chicken broth. Place in microwave uncovered for 21 minutes until cooked. Remove from microwave and fluff up rice with a fork. Let cool for about 10 – 15 minutes. While rice is cooling cook bacon in a large skillet until crisp over medium high heat. Remove from skillet and drain on paper towels. Reduce heat to medium high and add rice and scallions to the bacon grease breaking up any clumps of rice. Let rice crisp up for about 3 minutes then stir and flip to crisp up the other side. Cook for an additional 3 minutes then toss in bacon and mix in thoroughly. Cook another 2 minutes then remove from heat.

Prepare Tomato and Avocado:

Place diced tomatoes and avocado in a medium sized bowl. Season with a little salt, ground black pepper, parsley and lemon juice. Gently toss with a spoon. Cover and set aside in the refrigerator.

Black Beans:

Place black beans in a small pot and add a little chicken broth. Season with salt, pepper, cilantro and onion powder. Cook over medium heat for 3 – 5 minutes stirring occasionally. Remove from heat.

Bowl Setup:

Place crispy yellow rice in the bottom of an individual bowl. Add chicken to one side of the bowl then add the black beans along with tomato and avocado mix. Enjoy!

Follow my blog with Bloglovin

Asian Bowl with Lollipop Lamb Chops

Recently, I received a wonderful surprise in the mail. New bottles of Gazebo Room Salad Dressing and Marinade. I immediately started thinking about the kinds of recipes I could create that incorporated the dressings. I didn’t want to just use them as a dressing on top of one of my regular salads. I wanted something new and exciting!

Bingo! I finally decided to make an Asian Bowl with Lollipop Lamb Chops. I topped the Asian bowl with Gazebo Room Asian Vinaigrette Salad Dressing and Marinade. Yes, that is a mouthful to say and a delicious mouthful to taste. If you like tangy salad dressings, I think you will like this Asian dressing. I just would not put a lot of this dressing on a salad. A little goes a long way with this dressing because it is so flavorful.

Now back to my Asian Bowl with Lollipop Lamb Chops. In my mind, this is a very simple dish to make and the Asian bowl is both colorful and nutritious. I kept it simple by combining just a few veggies, thin lo mein noodles and of course the lamb chops. I have to admit I developed this recipe based on the lamb chops. As I usually do on the weekends, I was perusing the meat aisle looking for something other than chicken. Remember, I have nothing against chicken. We just eat it often so I try to break up the week with another meat if possible so that we don’t grow feathers. I spied a lone package of lollipop lamb chops among the packages of bigger lamb chops and grabbed them before anyone else could. It is rare for me to find these little jewels so I was quite happy with this trip to the grocery store.

When I pulled the recipe together I wasn’t totally convinced hubby would be on board since I had never prepared a “bowl”. I wasn’t even sure he had heard of an Asian bowl but he surprised me and said “Sure, go for it”, which meant he was on board. Hubby did come into the kitchen a couple of times to see what I was doing and guided me on how he wanted me to “create” his bowl. Yeah, let’s just call him my assistant on this recipe. Anyway, we both enjoyed the final product. Hubby really enjoyed it because he ate the whole thing. Normally, he leaves a little food on his plate but not this time. All I saw were two chopsticks and lamb chop bones sitting at the bottom of his bowl. That is what I call a successful dish!

Asian Bowl with Lollipop Lamb Chops

Ingredients:

2 Roma tomatoes diced

2 scallions sliced

2 bunches romaine lettuce shredded or small Napa cabbage shredded

1 package (6 – 8) lollipop lamb chops

1 package thin lo mein noodles

1 small can water chestnuts drained

1 cup snow peas

1 cup shredded carrots

¼ cup crispy rice noodles

¼ cup Gazebo Room Asian Vinaigrette Salad Dressing and Marinade

2 tbsp olive oil

1 tbsp minced fresh ginger

1 tbsp Worcestershire sauce

1 tbsp salt

½ tbsp black pepper

paprika

Season lamb chops with Worcestershire sauce, salt, black pepper and paprika. Set aside.

Heat olive oil in a medium sized frying pan over medium high heat. Brown lamb chops on both sides approximately 3 – 5 minutes on each side. Remove from pan and place on paper towels to drain.

Add snow peas, carrots and scallions to frying pan and saute until slightly softened but still has some crispness. Remove from the pan and set aside.

Build Salad:

Place lettuce in the bottom of the bowl. Arrange veggies around the bowl. Add lo mein noodles, water chestnuts and diced tomatoes. Place three lamb chops on one side of the bowl. Drizzle with dressing then sprinkle with rice noodles.

Enjoy!


Follow my blog with Bloglovin

Coq Au Vin

My first experience of tasting French food was on a business trip to Massachusetts. I don’t remember the name of the restaurant but I do remember the escargot one of my co-workers ordered and insisted I try. It was garlicky and a little rubbery but totally delicious. It was my first and last attempt at eating snails and although I enjoyed the taste, I did not like the texture. At this point, I could not tell you if that is the way snails are suppose to be when you cook them or if my experience was an exception. Like I said, the flavors were good but the snail did not make my mouth happy.

Fortunately, that experience did not turn me against French food. My next experience was much, much better. There are not many ways you can mess up a chicken so I ordered Coq Au Win at a nice little bistro hubby and I happened upon on one of our vacations. Now, we all know chicken can get a bit boring when you have it over and over again. Fried, baked, boiled. Ugh! Chicken can be so much more than fried, baked or boiled. Chicken can be dressed up as a stew with amazing flavors combined with mushrooms, onions and carrots. Yes, carrots. Coq Au Vin traditionally has potatoes instead of carrots. However, I chose to add carrots because I wanted to serve my Coq Au Vin with mashed potatoes. The gravy from the stew drizzled over the mashed potatoes was a delectable combination.

One more thing I changed in my recipe was the use of white wine instead of red wine. I like white wine better than red wine so I figured why not substitute the two wines. Some may say it’s not really Coq Au Vin if you don’t use red wine but don’t listen to them. Remember, make every recipe your own.

Ingredients:

4 chicken thighs bone-in (remove excess fat)

4 large carrots peeled and sliced thick

3 slices bacon

2 green onions sliced

2 pkgs sliced cremini mushrooms

½ white onion thinly sliced

1 cup chicken broth

½ cup white wine or red wine

2 tsp butter

2 tsp flour

1 tsp thyme

salt and pepper

Preheat oven to 350 degrees.

Wash chicken and pat dry. Season chicken with salt and pepper then set aside.

In a large oven proof skillet or dutch oven, fry 3 slices of bacon over medium high heat until crisp and fat is rendered. Remove bacon and leave drippings in the skillet. Add chicken to the skillet and brown on both sides. Place chicken on a plate and set aside.

Lower heat to medium then add mushrooms and white onions. Saute until slightly browned for approximately 7 – 10 minutes stirring frequently. Stir in flour and butter and cook for 1 minute. Again, stirring frequently. Add wine and stir to mix. Bring to a low boil and scrap brown bits from the bottom of the skillet. Add thyme and a little more salt and pepper. Let simmer for 5 minutes. Stir in broth then add carrots and chicken back to the pan along with drippings. Simmer for another 3 minutes. Cover skillet and place in oven for 30 to 45 minutes. Baste after 20 minutes. Enjoy with mashed potatoes, rice or wide noodles.

Follow my blog with Bloglovin

Chicken and Gnocchi Stew

Since my #1 food tester is in college now (yes, hubby is my #2 taste tester) I sometimes have to rely on myself to eat leftovers. Even though I don’t mind eating leftovers for lunch or sometimes breakfast, there are times I have to make them more exciting in order to eat them. That is why I came up with Chicken and Gnocchi Stew. I had a leftover roasted chicken that needed a little tender love and care so it was perfect for a new recipe.

Using an already roasted chicken meant my prep time was cut in half which made pulling the rest of the recipe together easy. Chicken and Gnocchi Stew is mostly a different take on chicken and dumplings. Instead of nice big fat dumplings, there a little plump pillows of potato gnocchi. Gnocchi are right up my alley because I love potatoes. Adding gnocchi also eliminated the need to include potatoes in the stew. It was like a two for one deal!

I put Chicken and Gnocchi Stew in the comfort food category. It is packed with vegetables and protein along a little of the other stuff we shouldn’t eat too often. Fortunately, the best ingredient in comfort foods like this one is love.  Corny but true.

Chicken and Gnocchi Stew

Ingredients:

1 roasted chicken skin and bones removed then shred meat or

2 chicken breasts

2 chicken thighs

3 carrots peeled and sliced

2 stalks celery sliced

1 pkg gnocchi

1 pkg frozen peas

½ onion diced

½ onion sliced

1 can cream of chicken soup

3 cups chicken stock

2 tbsp salt

1 tsp black pepper

½ tsp dried parsley

Prepare gnocchi per package instructions. Drain and set aside.

If using chicken breasts and chicken thighs, cook in 4 cups water with 1 tbsp salt for 25 – 30 minutes. Remove chicken from pot and let cool then remove skin and bones. Cut into bite-size pieces.

Pour chicken stock into a large pot. Add carrots, celery, peas and onions along with remaining salt, pepper and parsley. Cook over medium heat for 15 minutes. Whisk in cream of chicken soup. Add chicken and gnocchi cook for 15 minutes more. Serve with or over biscuits. Tastes even better the second day.

Follow my blog with Bloglovin