Category Archives: Main Course

Mommys’ Pork Chop Sandwich

Yimg_5509_1
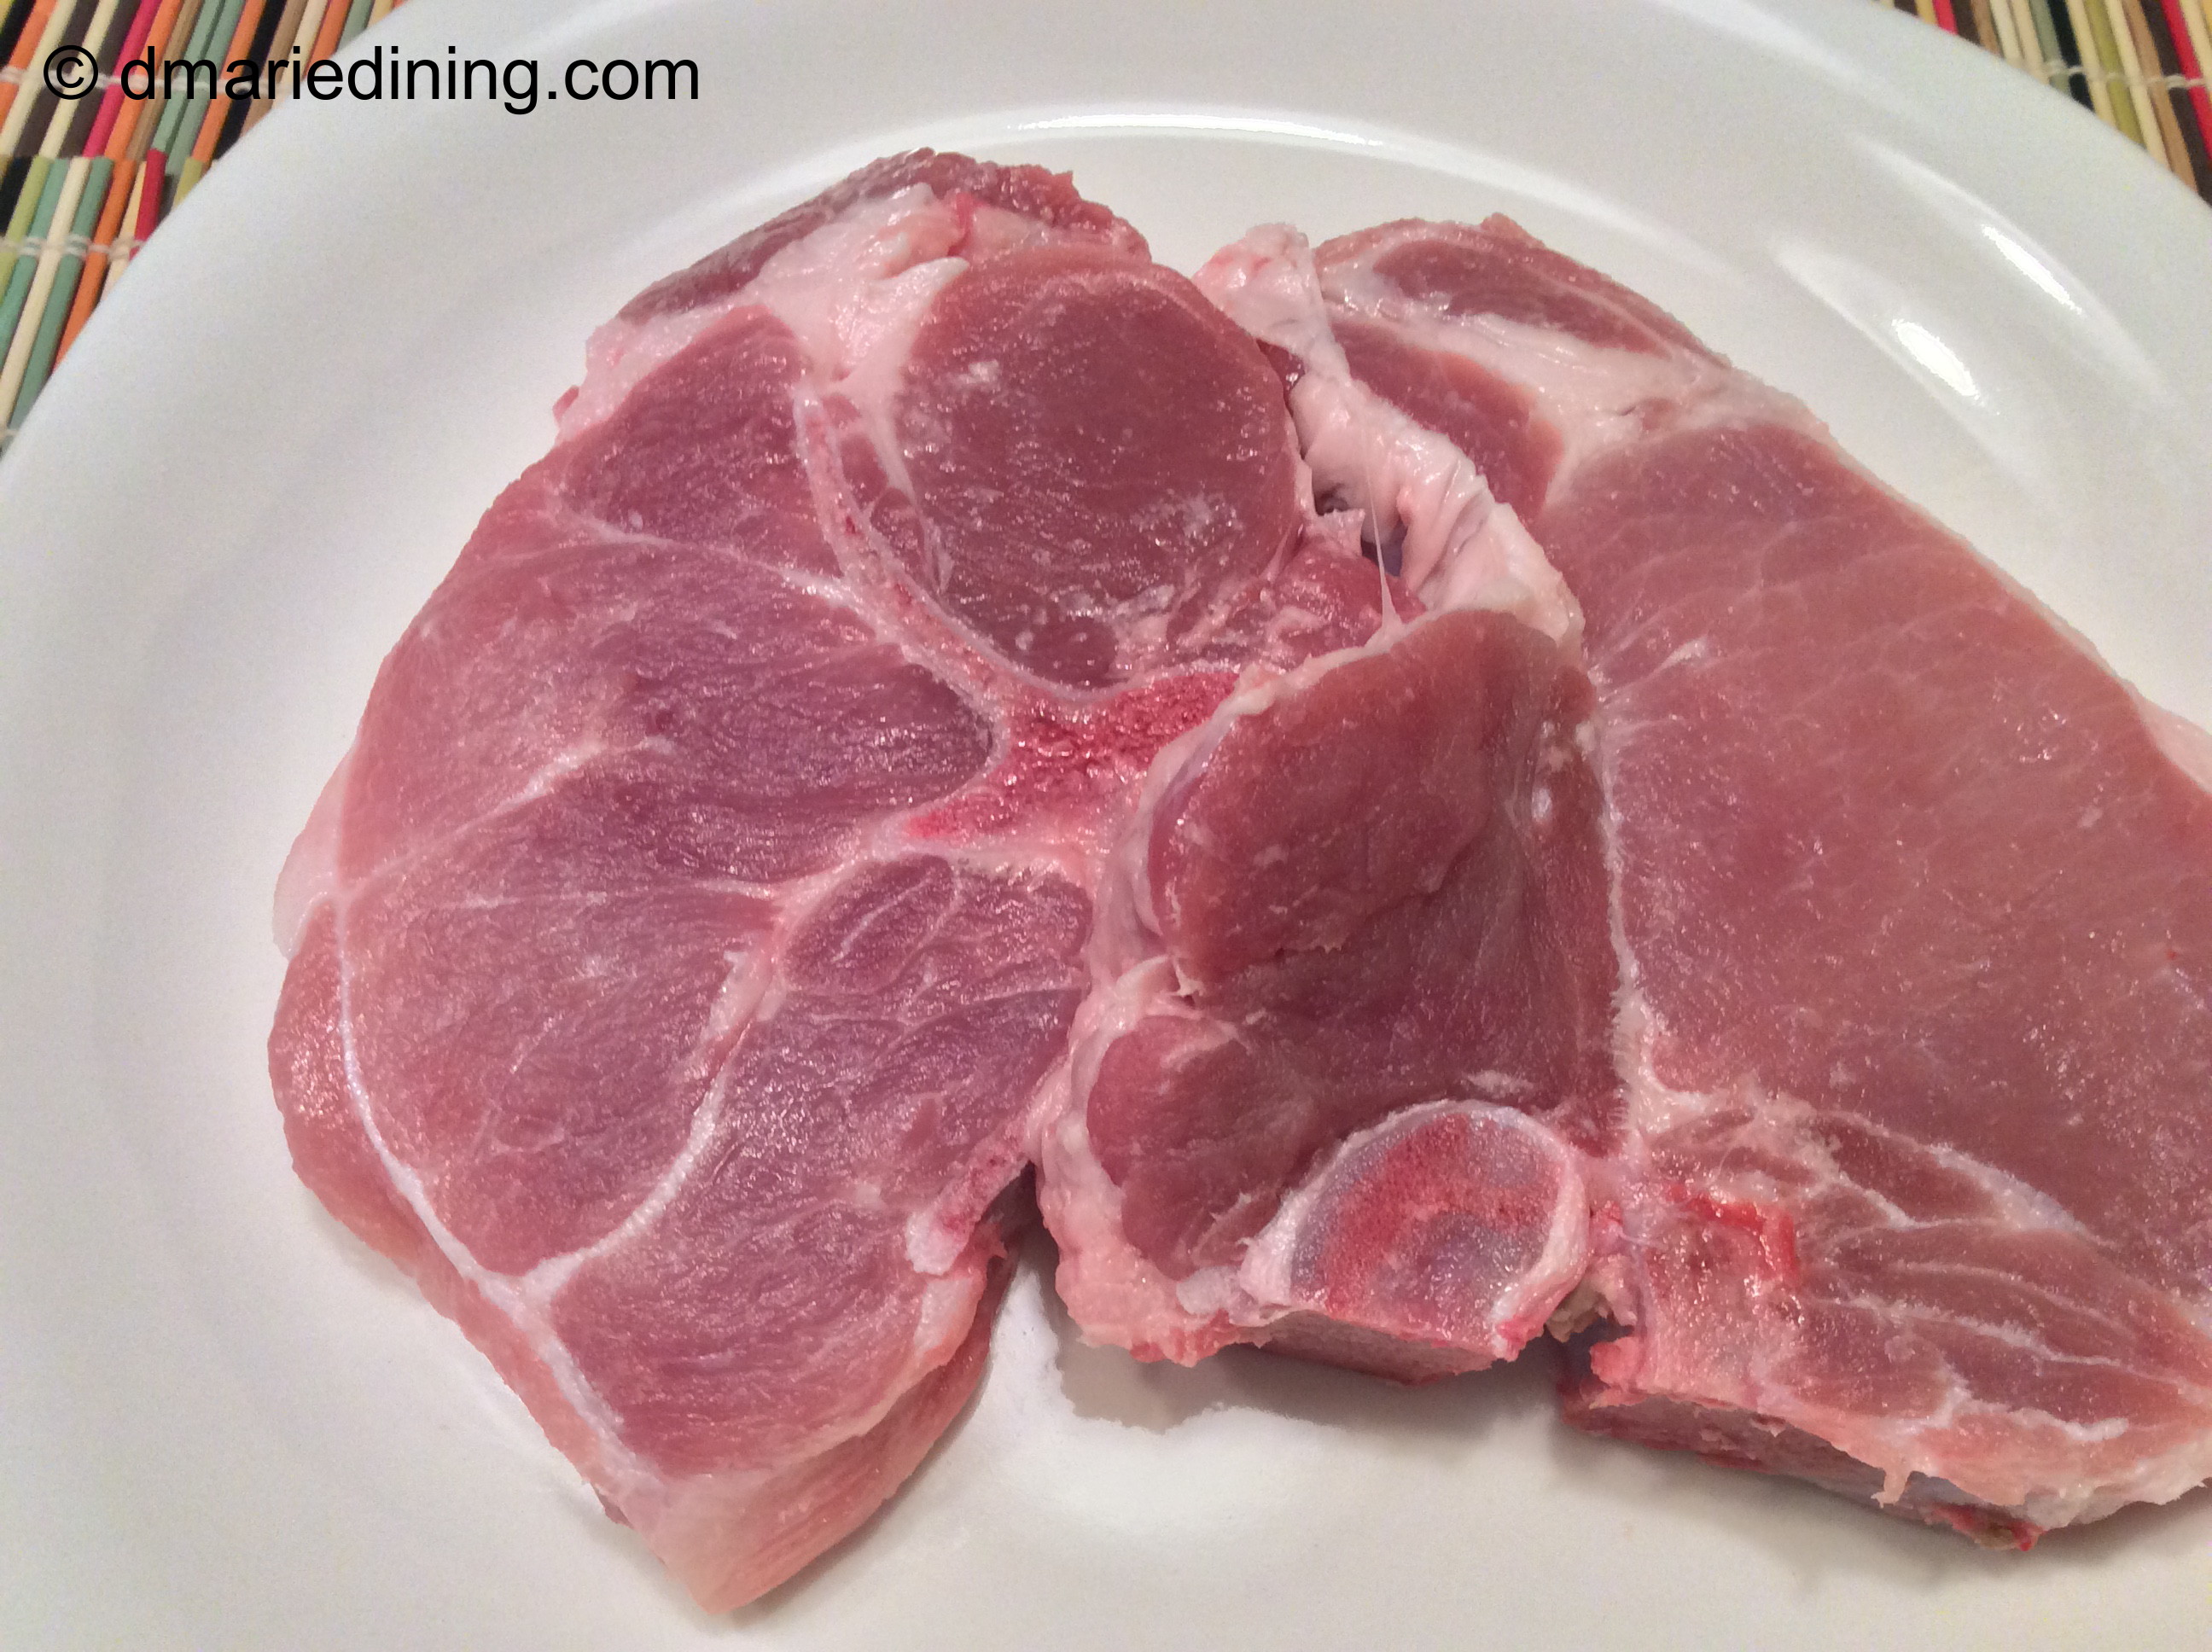
Yes, I am over the age of 30 and I still call my mother “Mommy”. What can I say? I never made the transition from Mommy to mom and I could not see myself calling her mother. Mother seems much too formal to me but I don’t knock anyone that calls their mother – mother. Actually, a couple of my aunts called my maternal grandmother “Mother”. The rest of us called her Ma Dear. However, mother seemed to fit coming from my aunties.

img_5535_1

Okay, I digressed. Mommy’s Pork Chop Sandwich jumped into my head the other day when I was trying to come up with something for dinner other than chicken or beef. We had already had both during the week along with fish so I had to make a decision on which one would get a second turn for the week. Truth be told I love pork chops. The problem was that my hubby is not big on pork unless it’s bacon. So tentatively, I decided to make pork chop sandwiches like my mom did back in the day.  I wasn’t sure he would go for it. To my surprise, when hubby asked what were we having for dinner and I said Mommy’s Pork Chop Sandwich he only said what time do we eat. Now, I am not sure if he was just really hungry or was in the mood for pork. Either way, I was happy.

img_5537_1

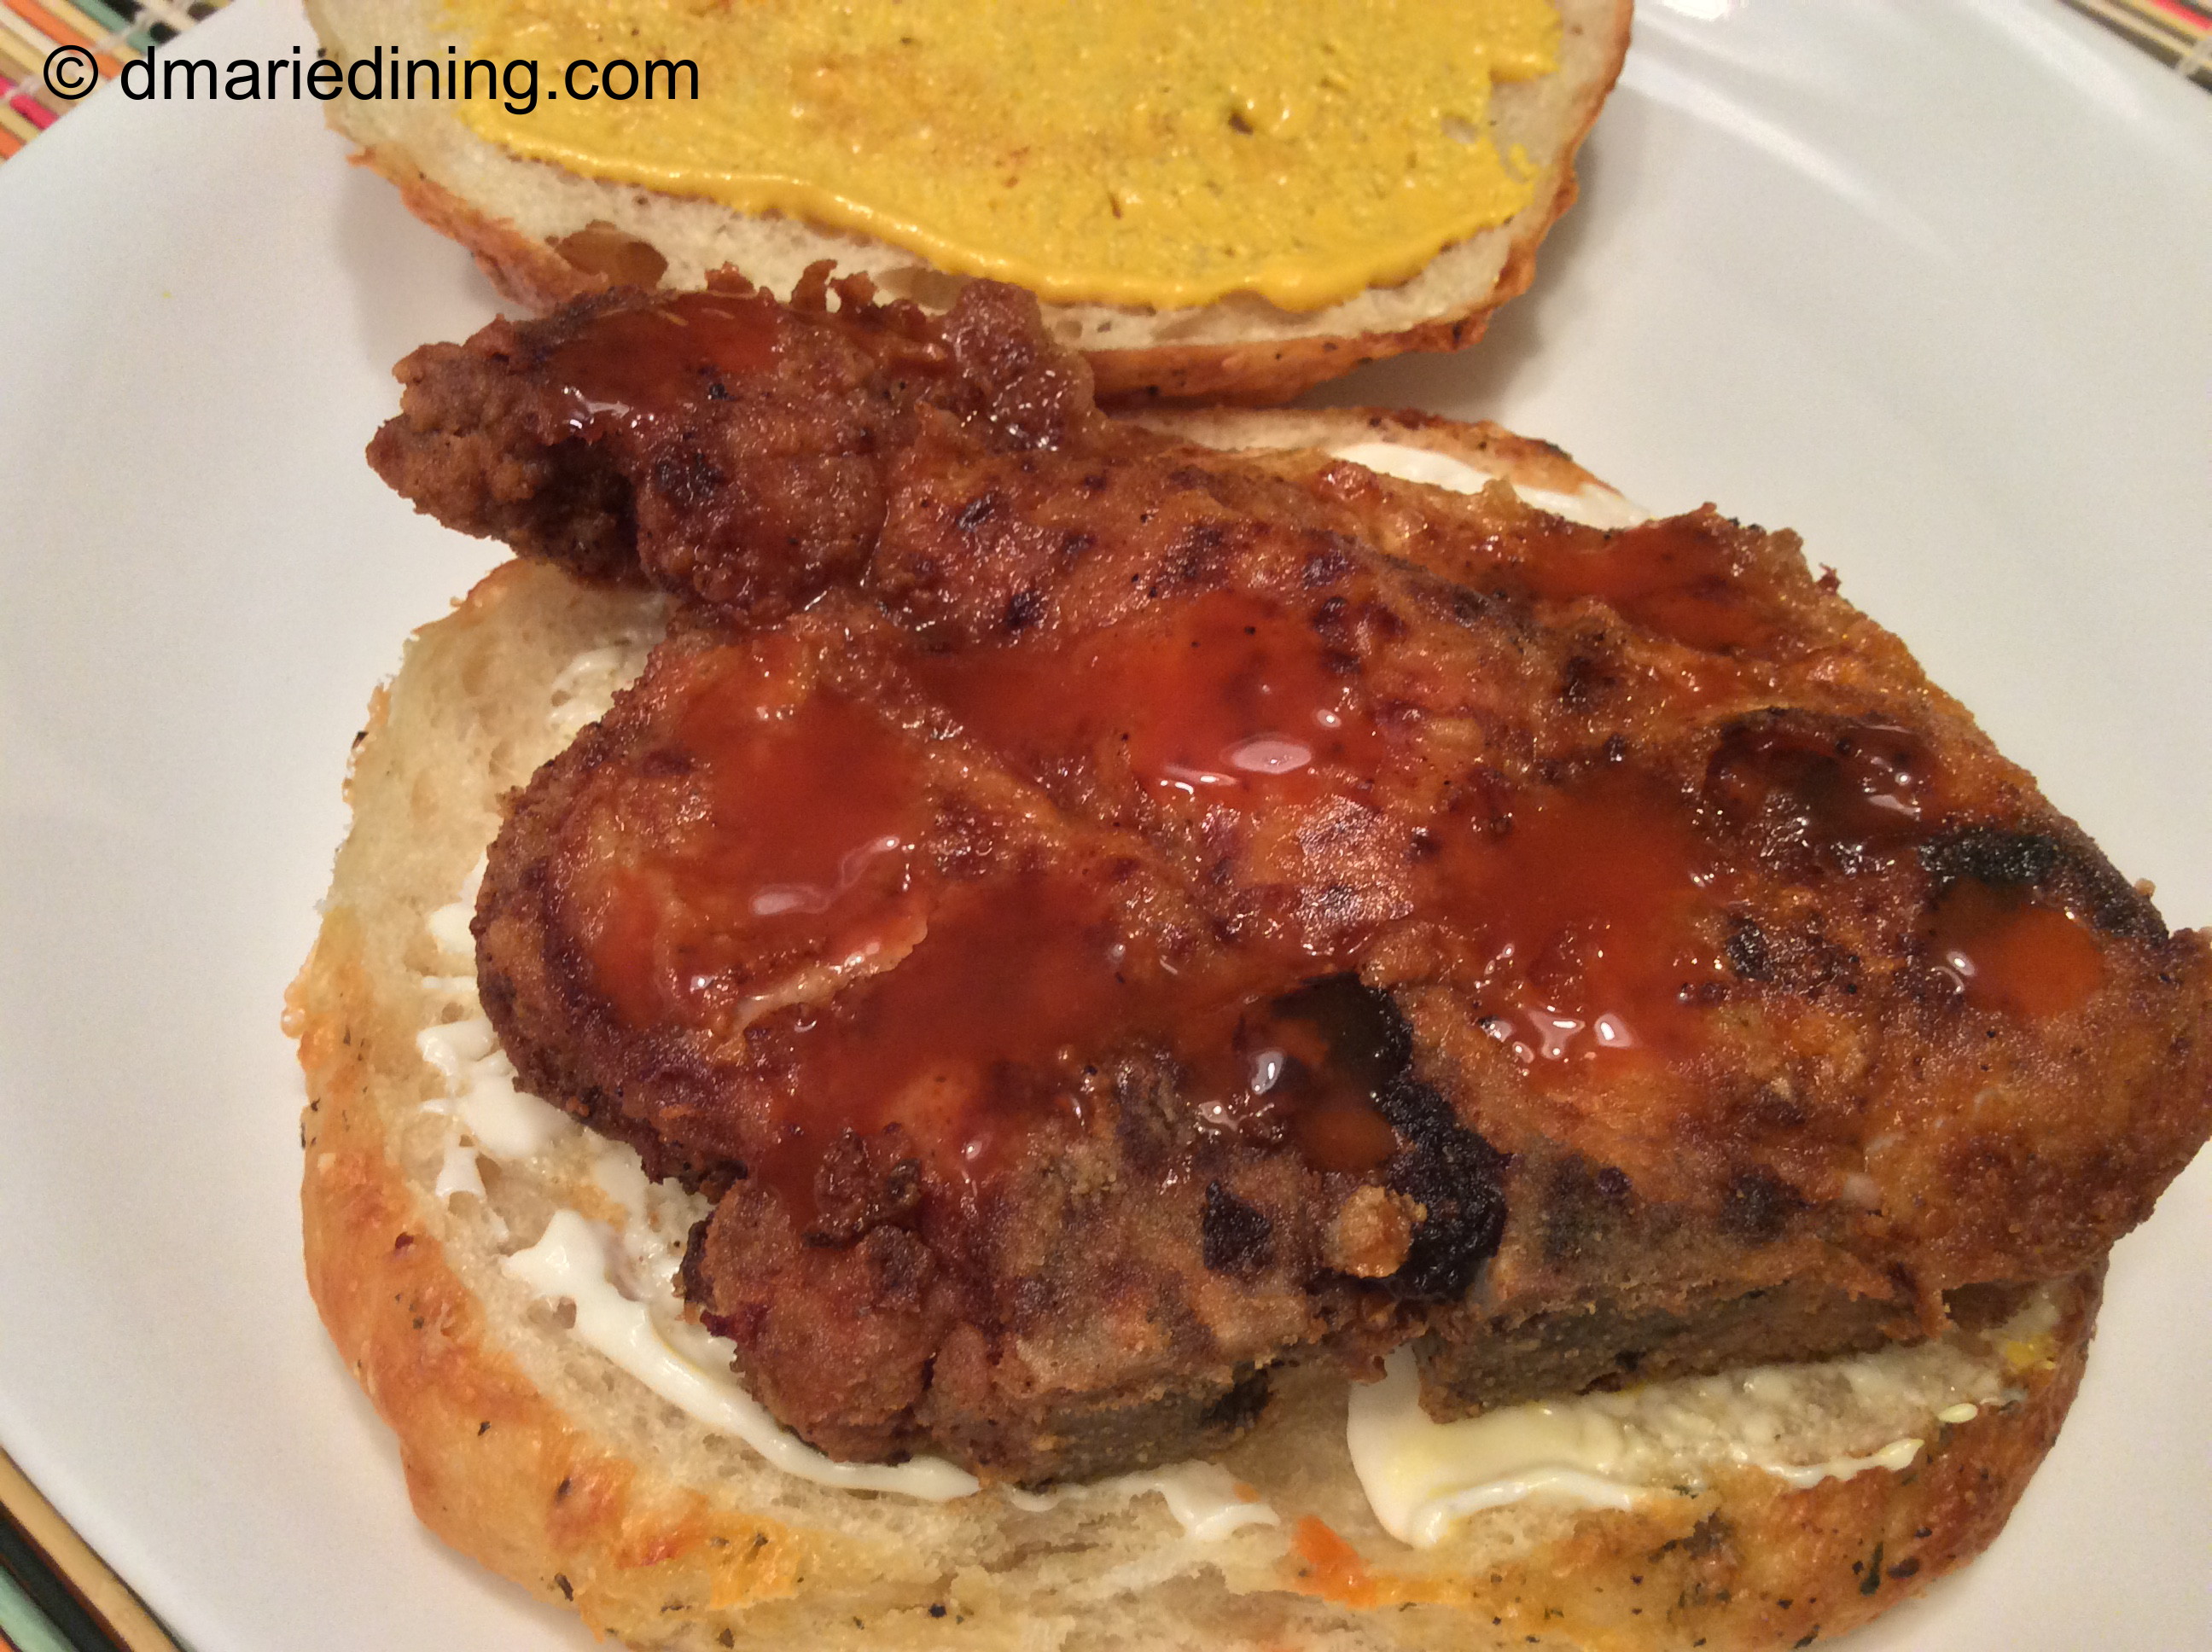
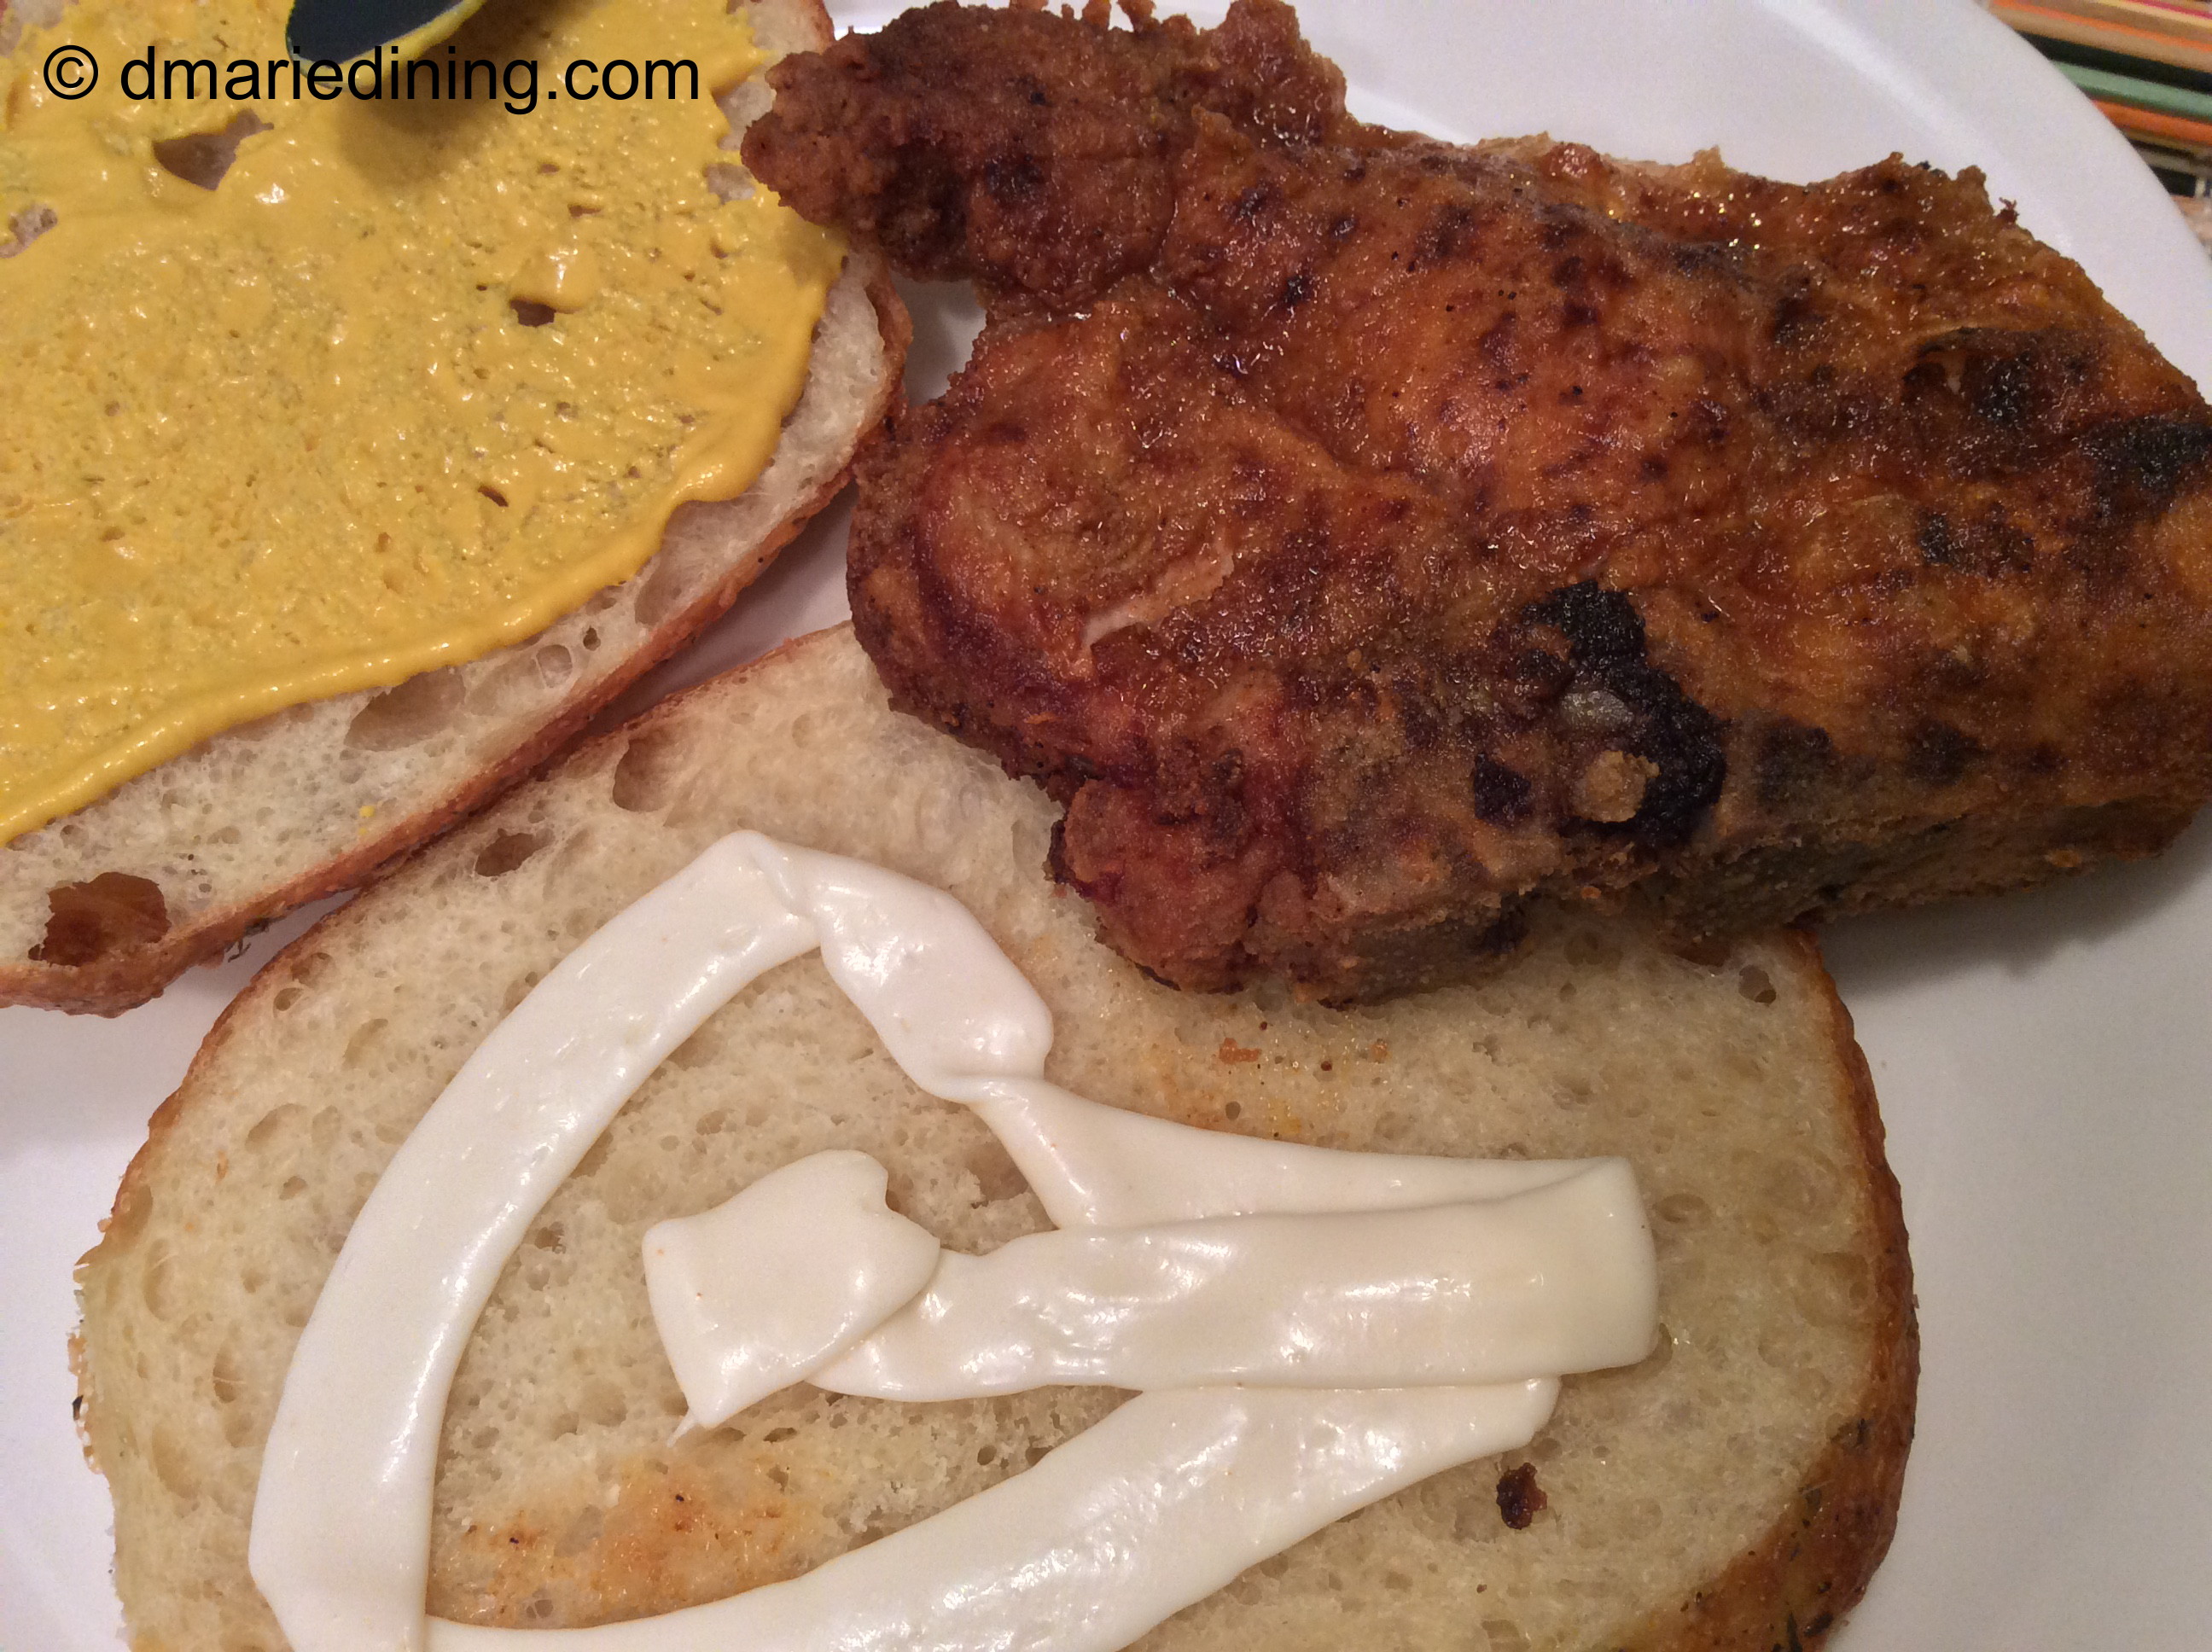
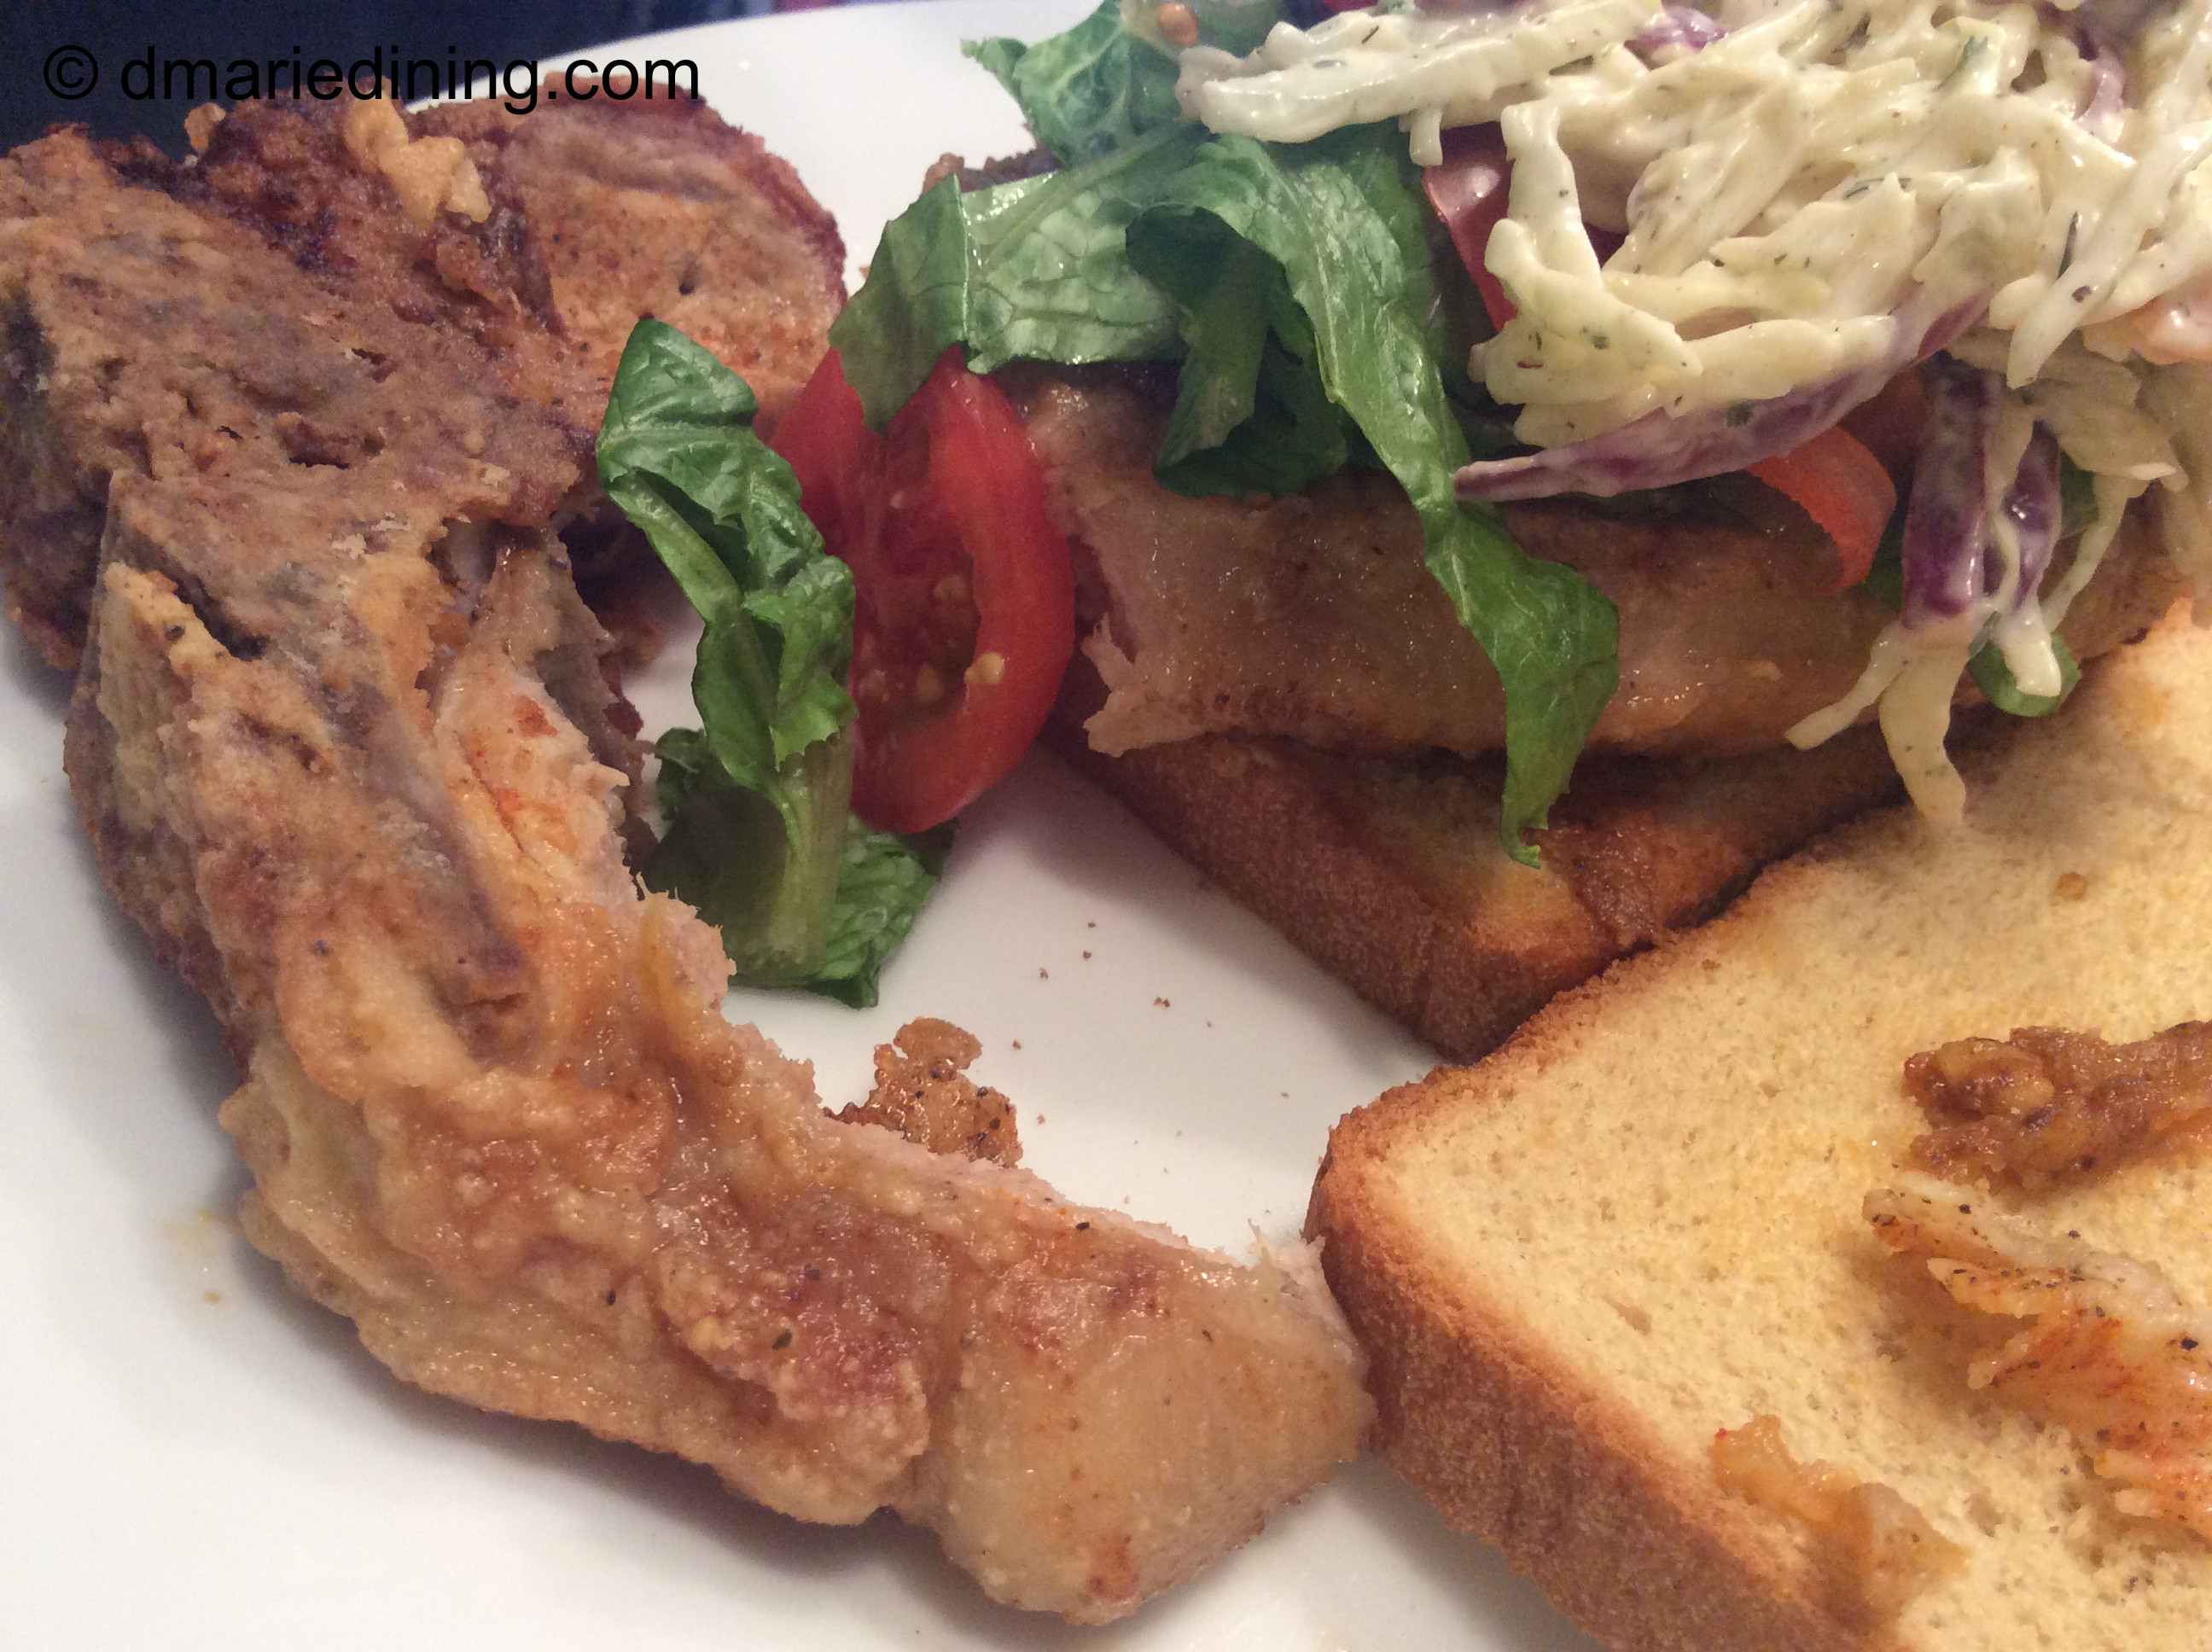
Mommy’s Pork Chop Sandwich is fairly straightforward. Two slices of bread. Mustard. Hot sauce and on occasion a little mayo. This basic combination of flavors tastes wonderful – at least to me.

img_5340_1

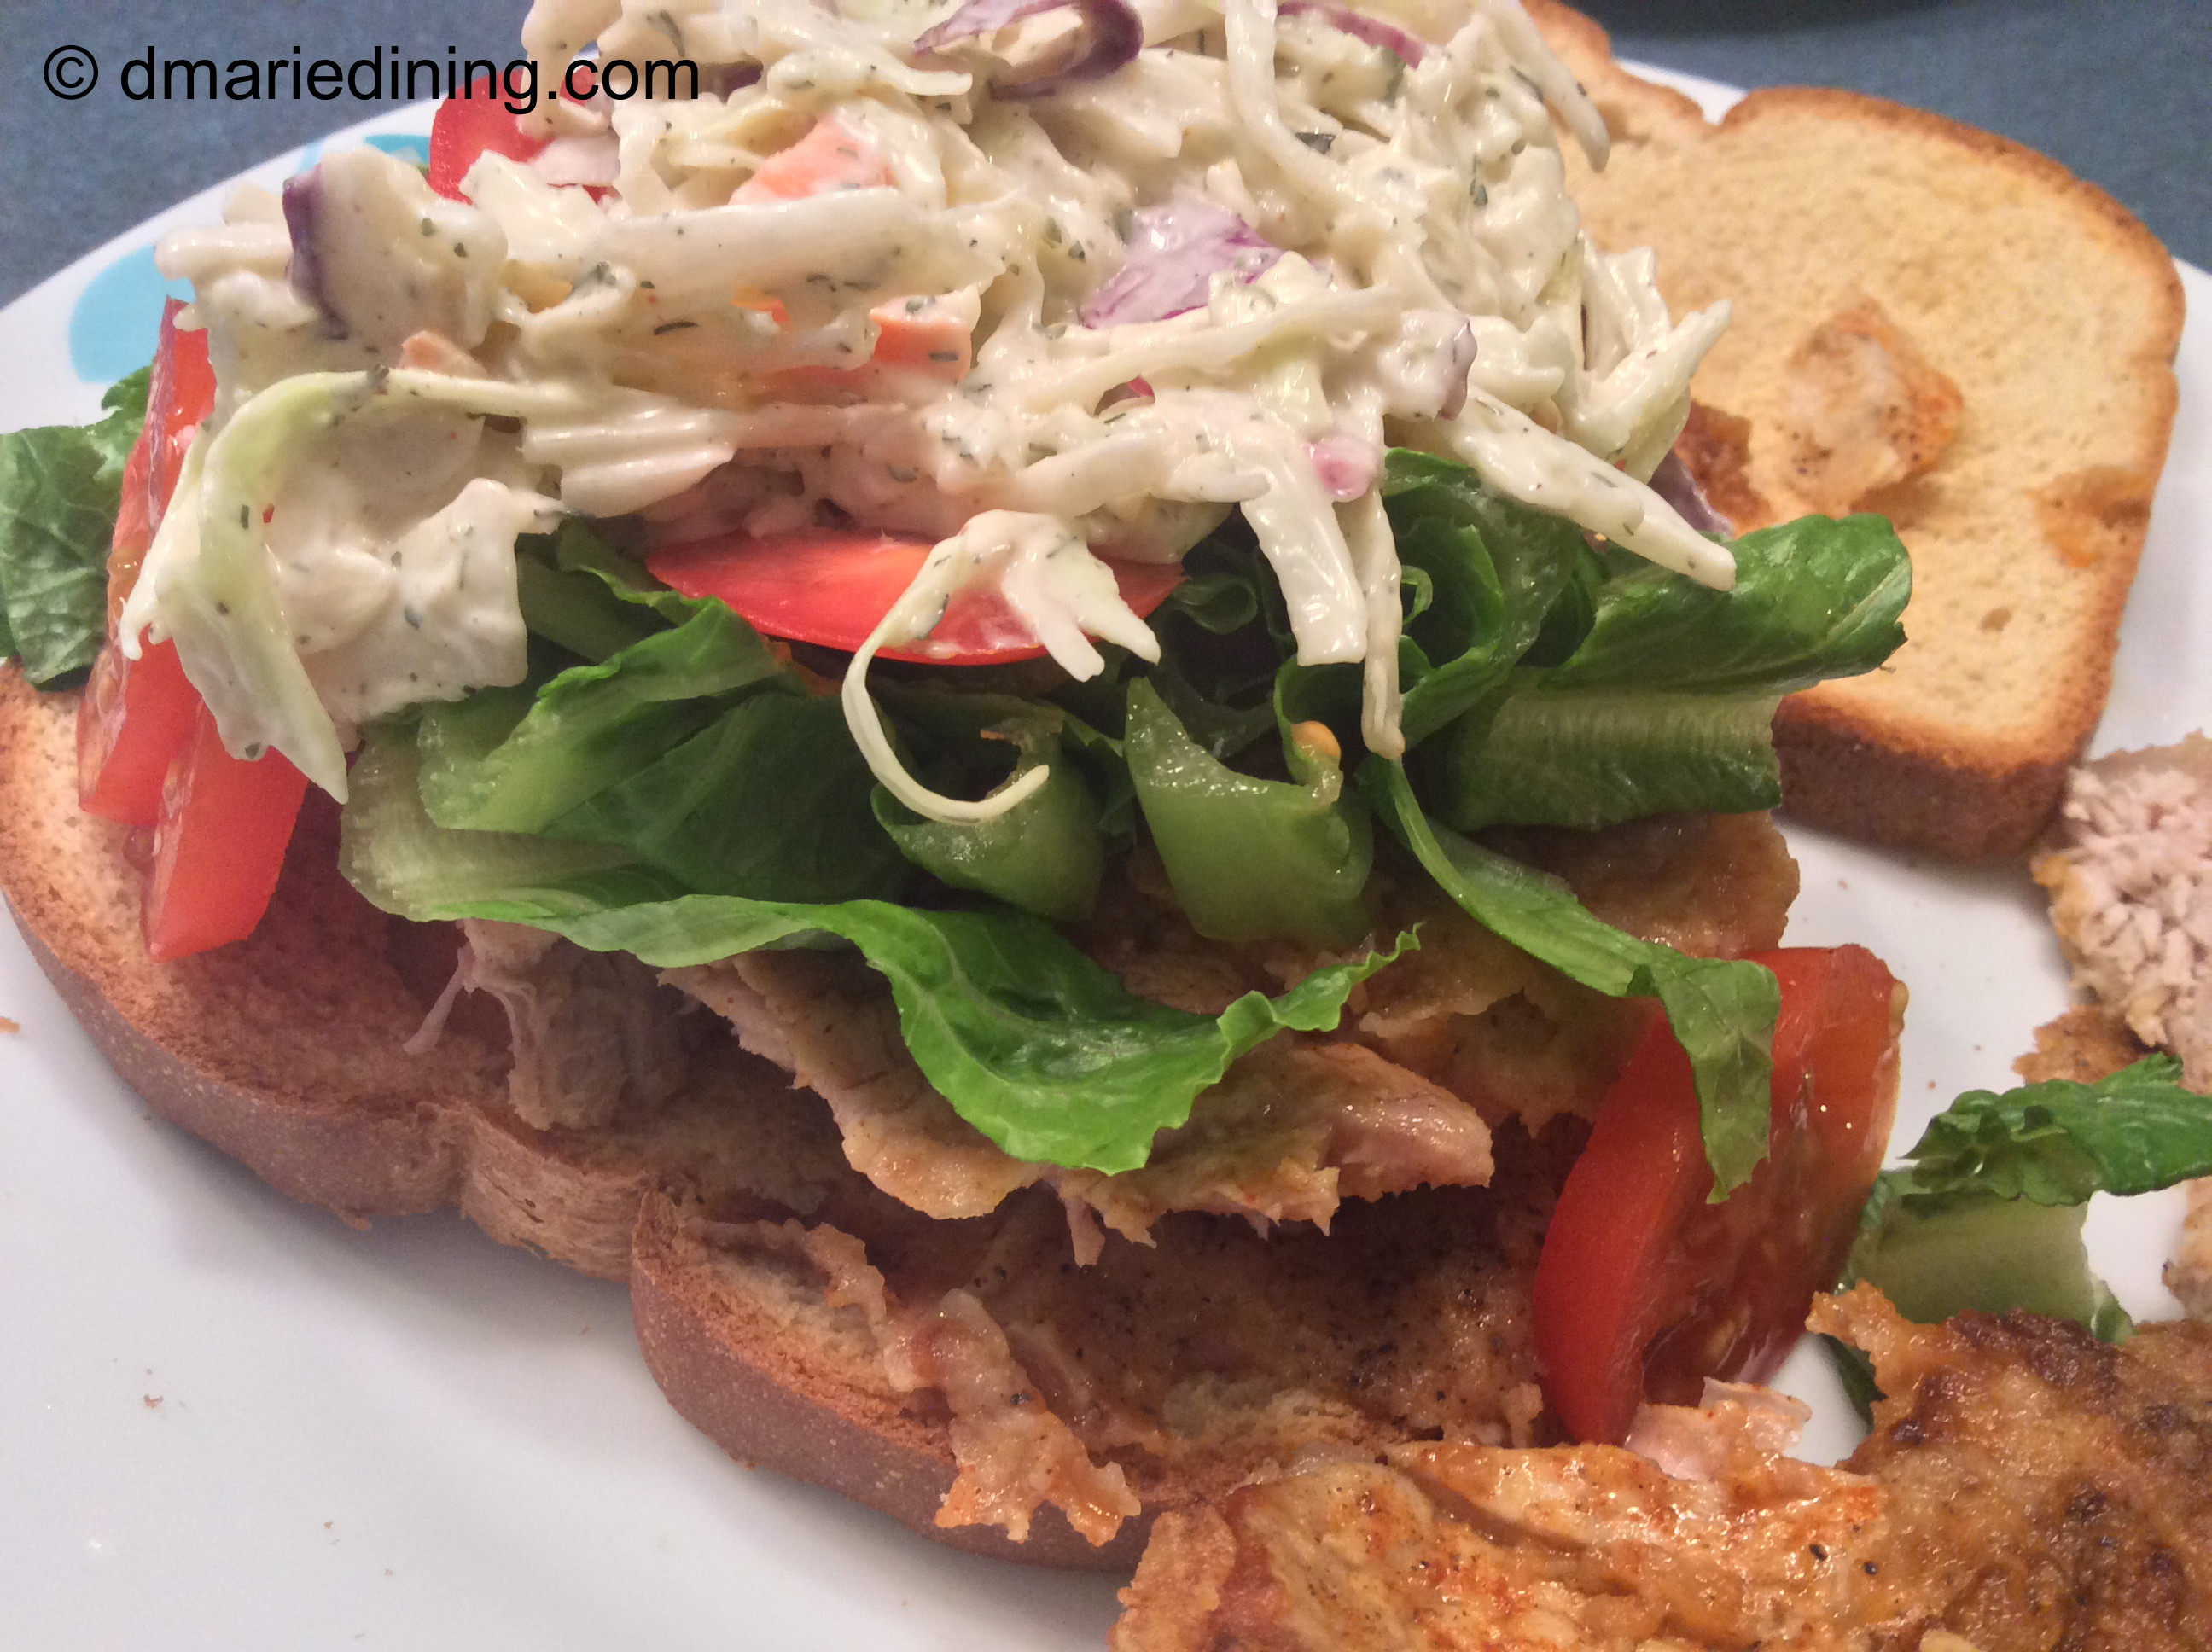
As for my hubby, he jazzed up his pork chop sandwich by adding lettuce, tomato and the cole slaw I made to go with the sandwiches. After thinking about my hubby’s creation, I realized the sandwich he made was similar to another sandwich I make which has chicken instead of pork chops. Great minds think alike.

img_5349_1

Enjoy!

Mommy’s Pork Chop Sandwich

Ingredients:

2 – 3 pork chops

2 – 3 cibatta rolls sliced

1 medium tomato sliced (optional)

1 cup vegetable oil

1 cup flour

½ cup shredded lettuce (optional)

½ cup cole slaw (optional)

1 tsp mustard

salt

seasoned salt

black pepper

hot sauce

Adobo seasoning

smoked paprika

Heat oil in a large frying pan over medium high heat.

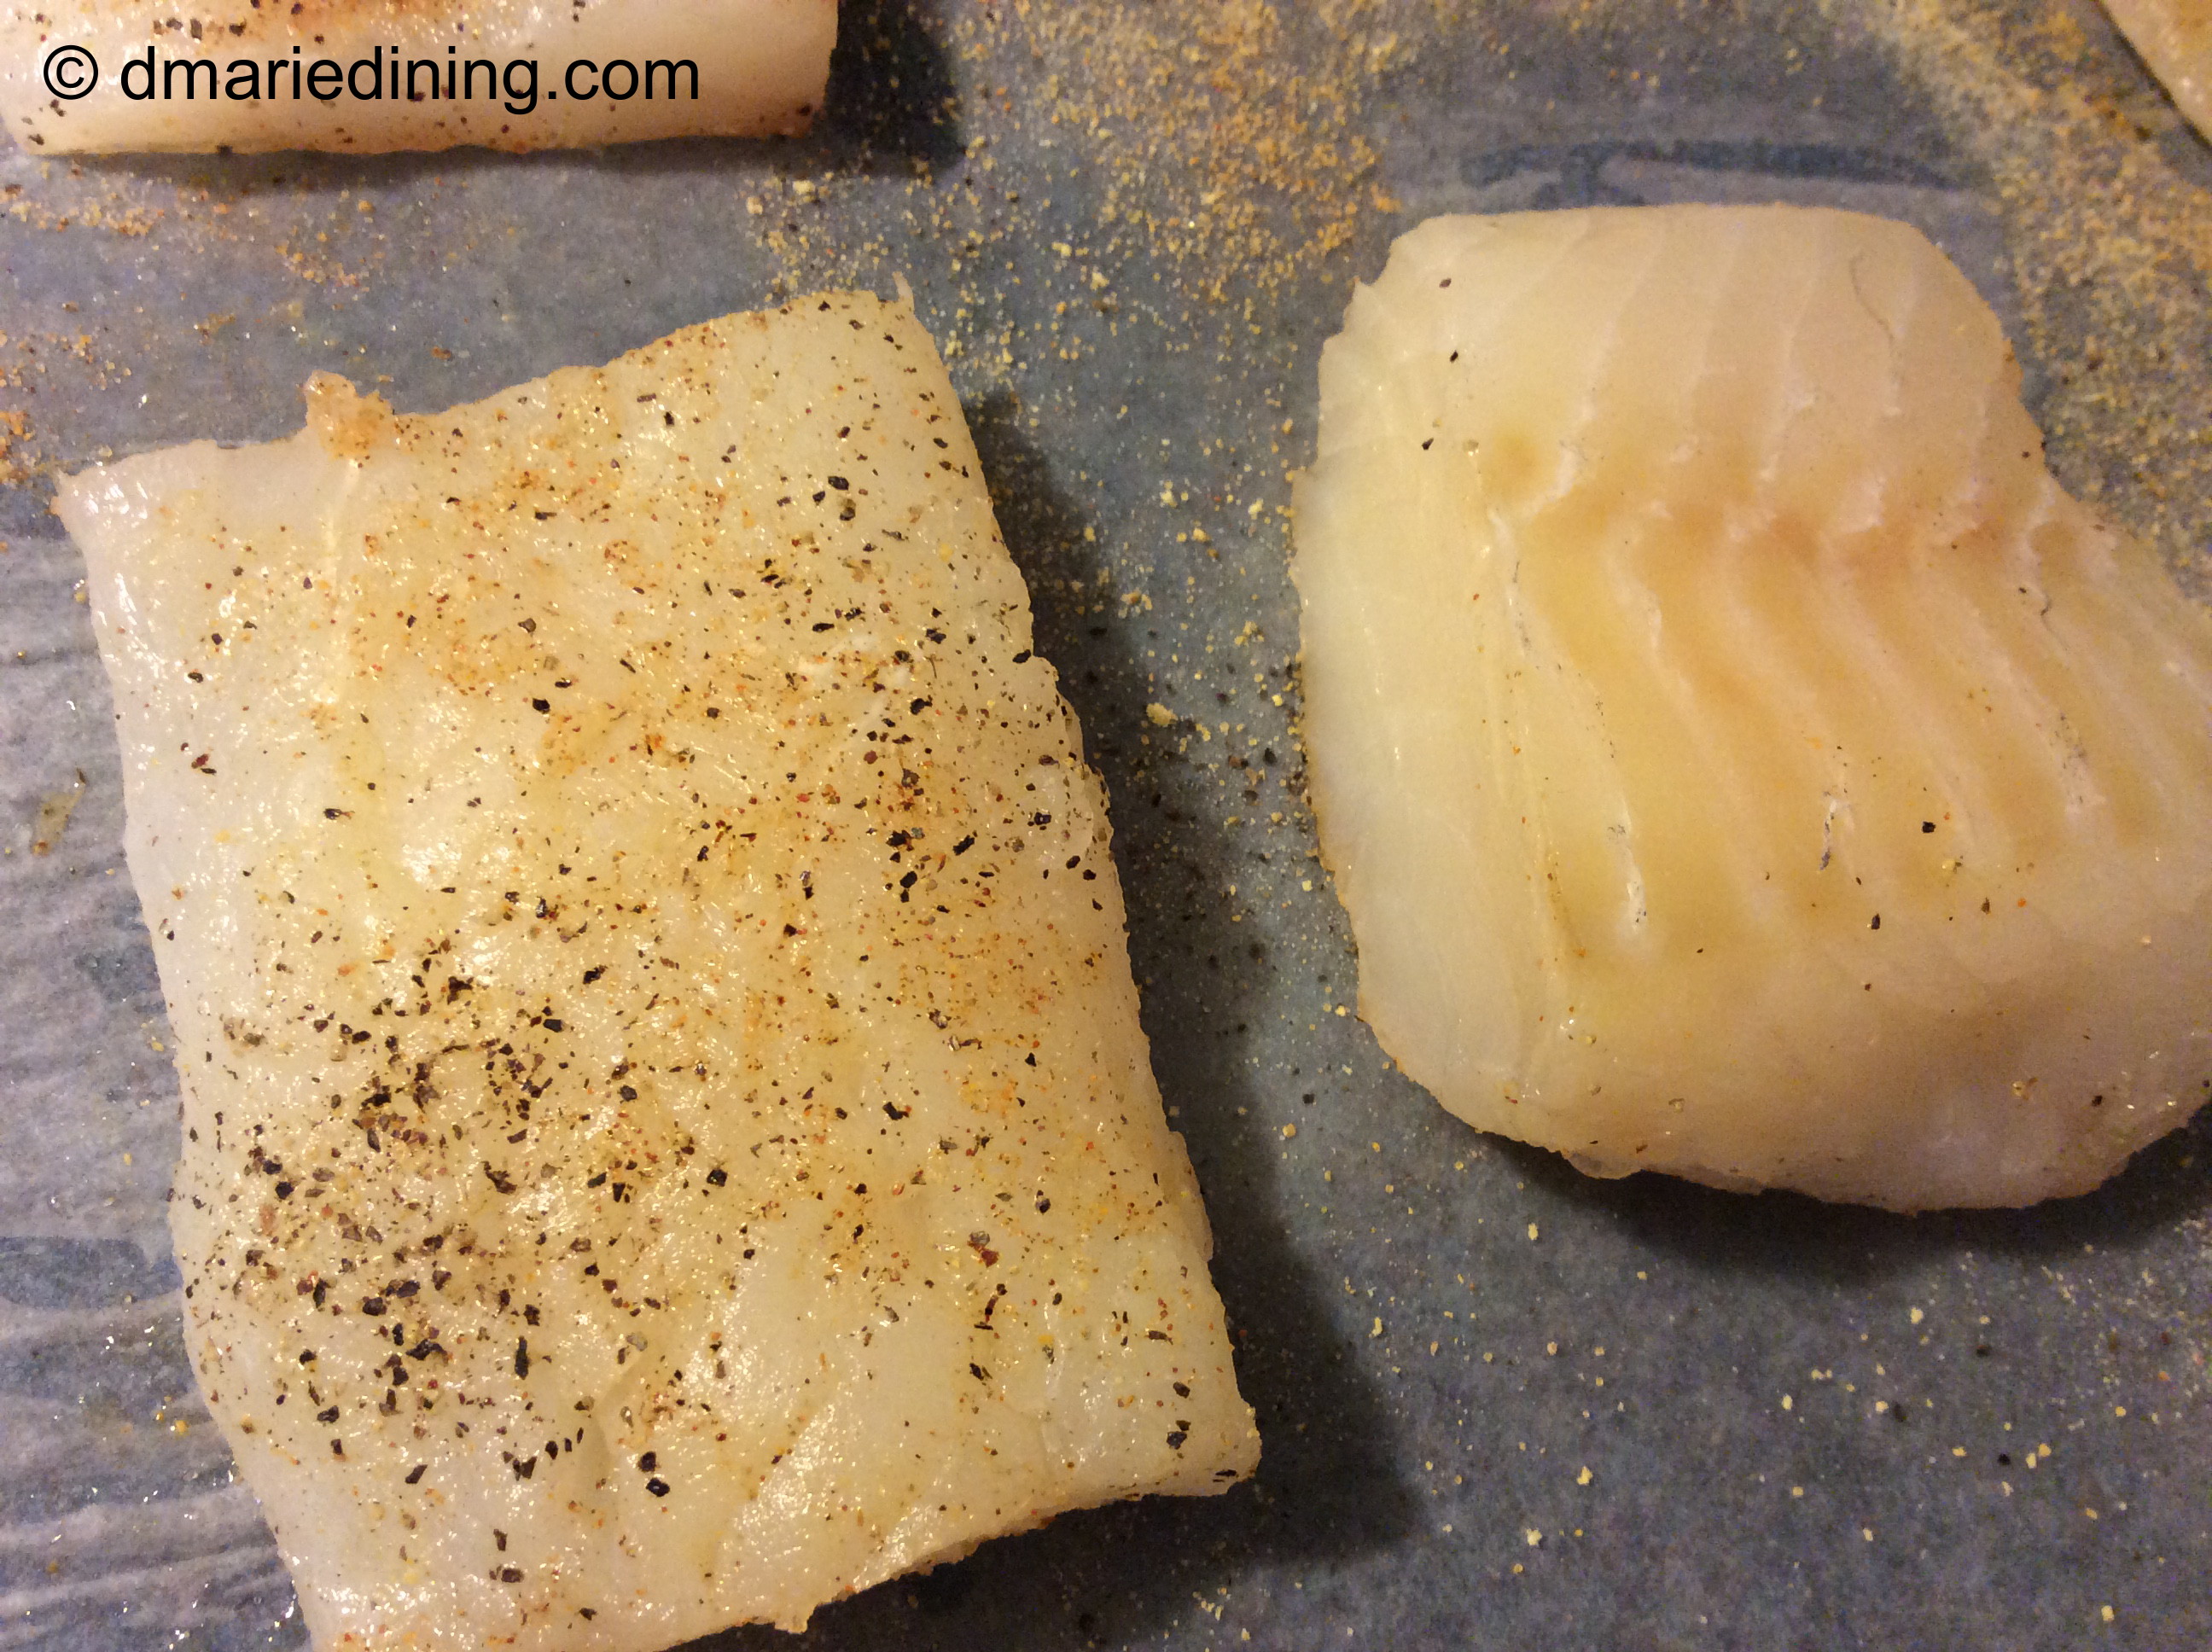
Place flour in a shallow dish and season with a little Adobo seasoning, seasoned salt and pepper.

Season pork chops with salt, pepper and Adobe seasoning. Sprinkle with smoked paprika. Dredge seasoned pork chops in flour. Shake off excess flour. Gently place chops in hot oil. Fry until golden brown and cooked all the way through. Approximately 5 minutes on each side. Drain on paper towels.

Spread mustard on one side of each sliced roll. Place one pork chop on each roll. Shake hot sauce over pork chop (you decide the level of spiciness). Top pork chop with the other slice of bread.

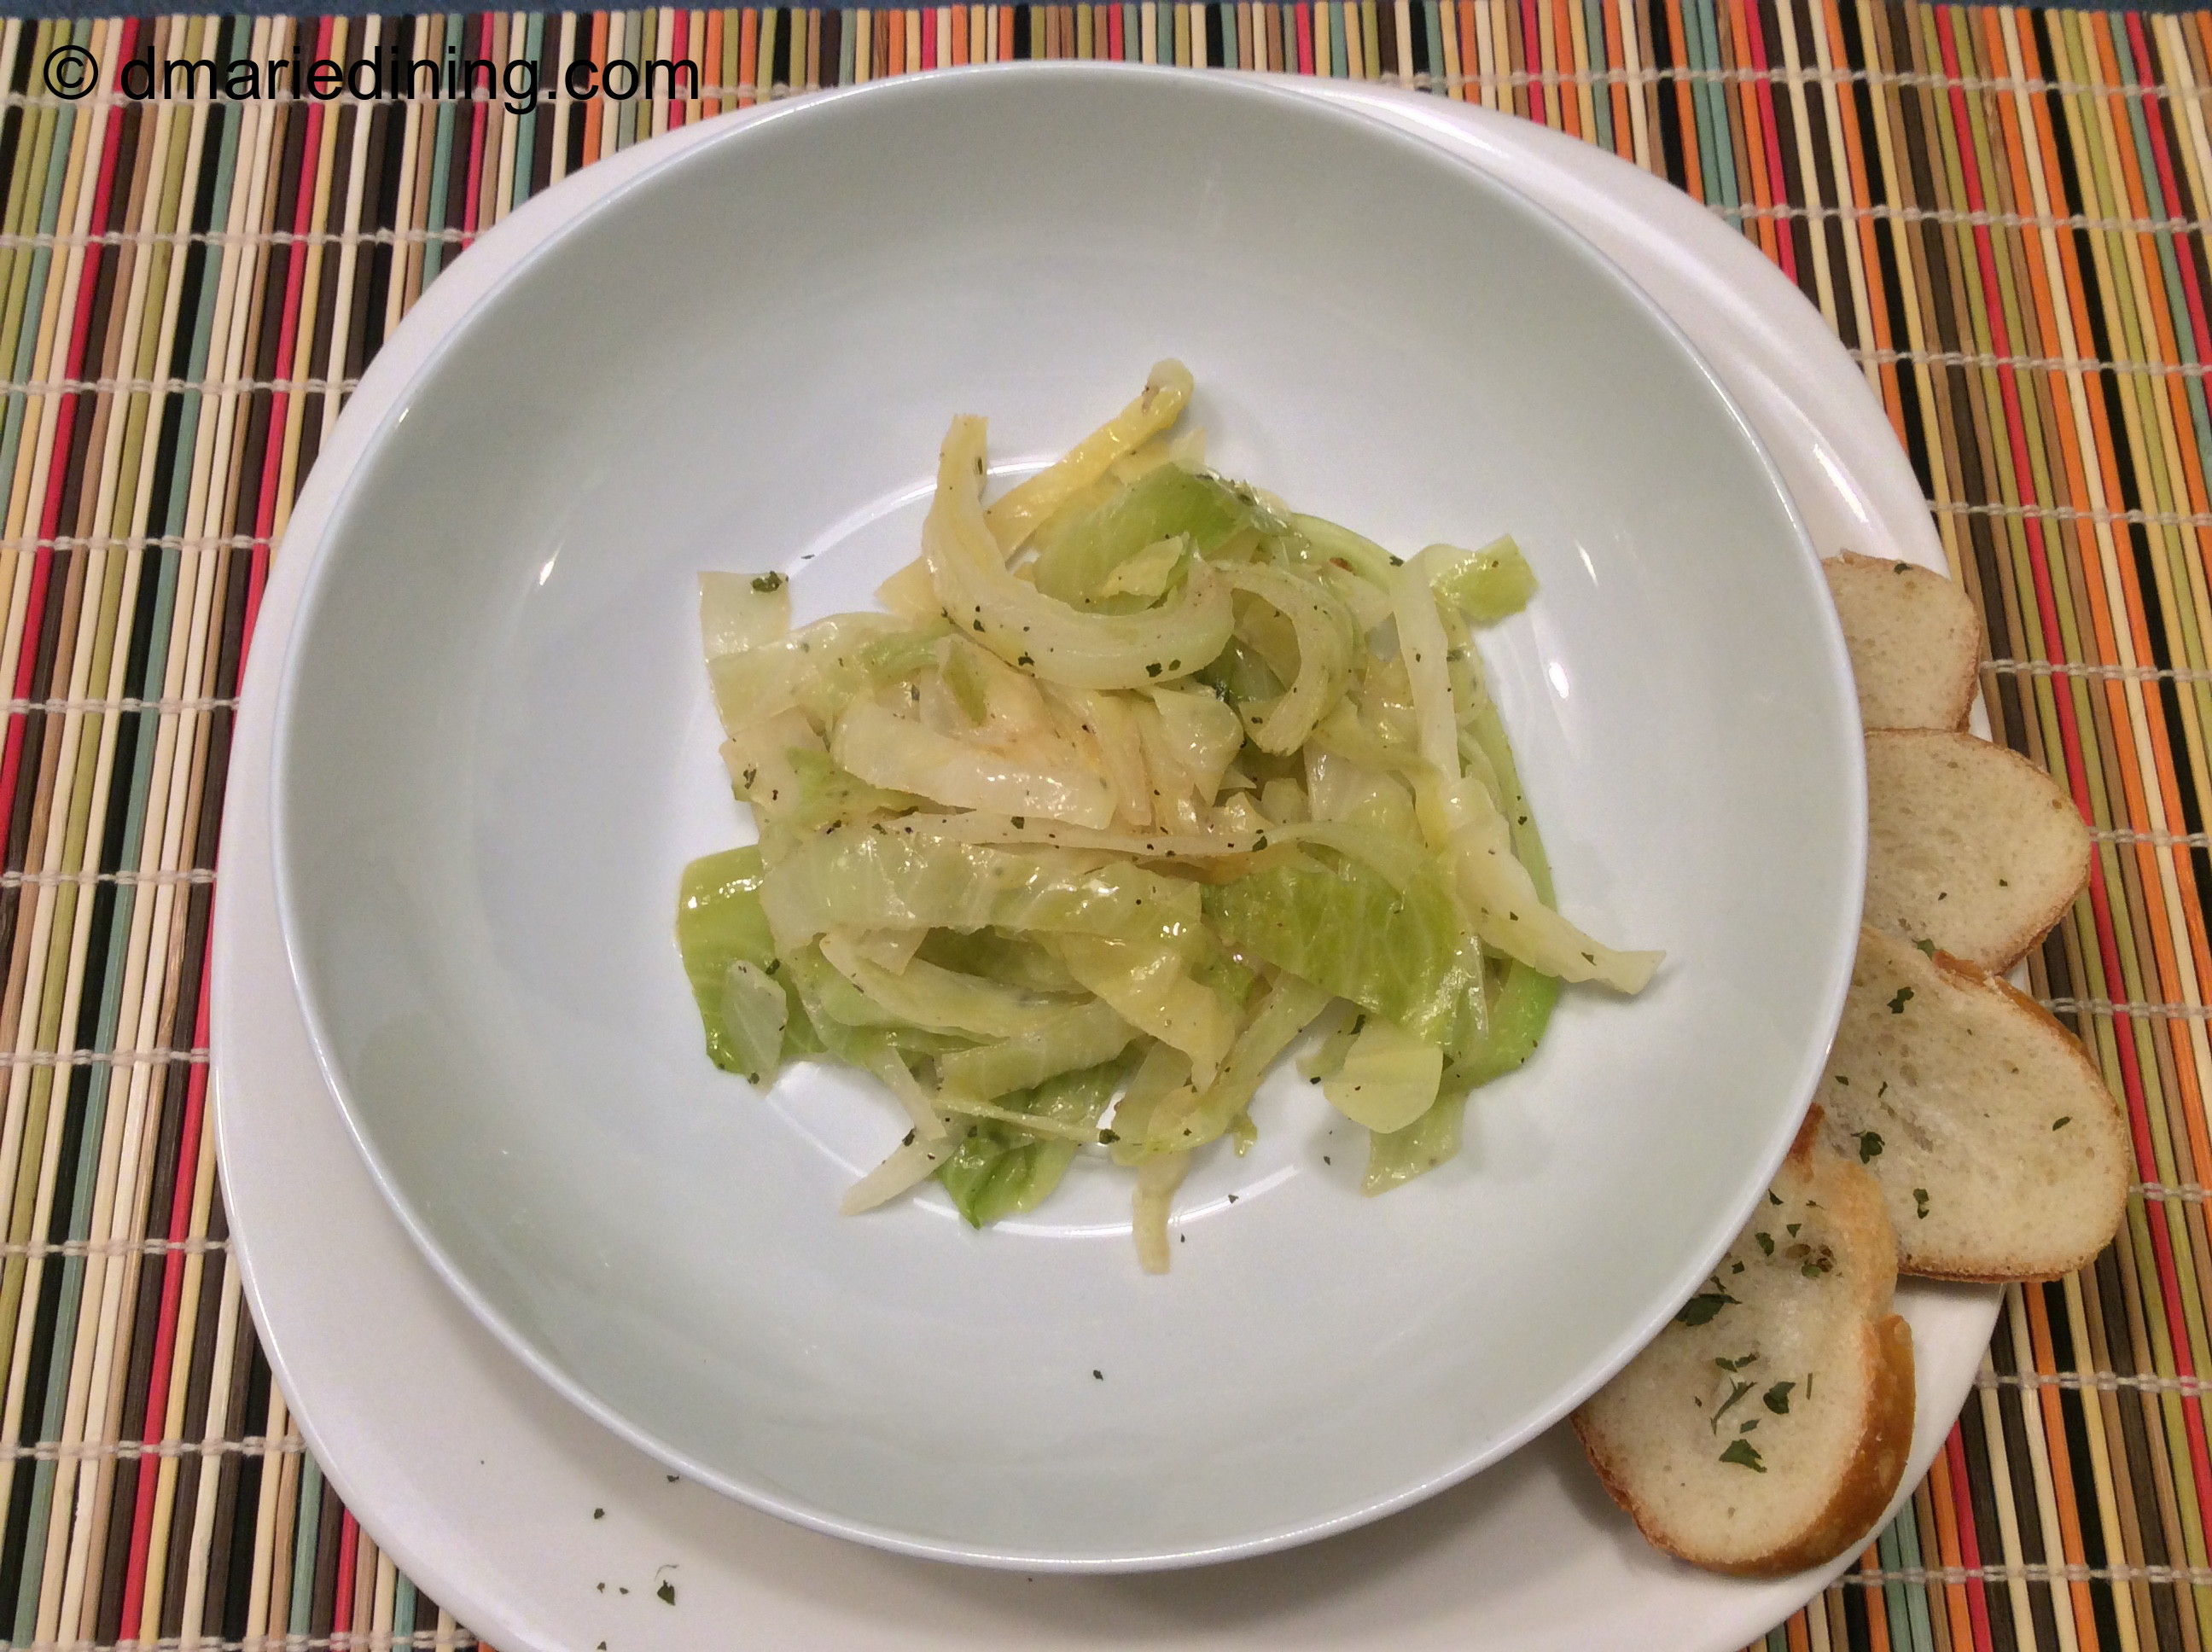
Optional: Add sliced tomato, lettuce and cole slaw.

Eat Up!


Follow my blog with Bloglovin

Lentil Stew

img_5395_1

Don’t ask me why but I have had lentils on my mind for the past week. I think it was because I wanted to make some red lentil soup and discovered I didn’t have any lentils. Since I usually find them at Trader Joe’s I had to wait until my weekend ritual of running errands to be on that side of town. Once I got to the store and spotted the red lentils I also spotted green lentils which made me think of a Lentil Stew. Again, I don’t know why.

img_5413_1

Sometimes my imagination kicks in and I just come up with ideas for combinations of food. For the Lentil Stew I thought of carrots, potatoes and tomatoes as the right combination of vegetables to add to the lentils to make a stew. Yes, a stew not a soup. To me, stews are a little heartier than a soup even more than those soups that are thick and packed with vegetables. Stews have a slightly different consistency than soups and are surrounded by a kind of gravy. In the case of Lentil Stew it makes its own gravy.

img_5417_1

Lentil Stew is the type of dish I would make during the winter or on chilly fall days. Granted, the day I first made this stew it was not really chilly but there was a nice gentle breeze. Now that I have tested out the recipe, I know what I will be preparing it quite often when the gentle breezes turn into strong cold winds.

img_5422_1

Lentil Stew

Ingredients:

1 pkg green lentils (soak overnight in cold water then drain)

½ cup red lentils (optional)

½ cup shredded carrots (slightly chop)

2 cans roasted diced tomatoes

3 cups chicken broth

1 cup water

2 small potatoes diced

2 scallions diced

2 tbsp olive oil

1 tsp salt

½ tsp black pepper

½ tsp minced garlic

½ tsp cumin

½ tsp basil

¼ tsp ground ginger

Add lentils and water to a large pot. Bring to a boil then cover and reduce heat to medium low. Let simmer while preparing vegetables.

In a large frying pan add olive oil and potatoes over medium high heat. Season potatoes with a little salt and pepper. Saute potatoes until slightly browned. Reduce heat to medium then add onions, carrots, tomatoes and remaining seasonings to the potatoes. Stir and allow veggies to soften. Add veggies and chicken broth to lentils and stir. Allow stew to simmer for 20 – 30 minutes until lentils are tender. Taste to determine if you need more salt. Add additional broth if stew is too thick.

Follow my blog with Bloglovin

Tostadas

IMG_4823_1

Tostadas remind me of an open faced taco or a burrito. I know burritos are not crunchy like a taco but the ingredients I put inside of my burritos are similar to what I put on top of my Tostadas. Not long ago at one of our office celebrations I discovered packaged tostada shells. A co-worker brought in the tostada shells with pulled pork ( a recipe I will try later). I was so excited to see the corn tostada shells I had to find out where she bought them. Unfortunately, she had purchased them at a local store near her house which happens to be far from where I live. Needless to say, I would not be traveling over the state line just for tostada shells.

IMG_4841_1

Of course I started searching for packaged tostada shells in every grocery store I visited. I finally hit pay dirt at a neighborhood grocery store where I shop on occasion for certain types of foods.

IMG_4831_1

Like I said earlier, Tostadas remind me of an open-faced taco. The difference is that I top the Tostadas with brown rice and beans. The rest of the toppings are pretty much the same as my tacos. Check out the Latin section of your local grocery store and you may find the packaged tostada shells. These babies are a big time saver but if you like making your own tostada shells go for it!

IMG_4849_1

This recipe turned out to be a winner with my friends and family because everyone could build their own Tostada from the “fixins bar” I set up. Shredded chicken, beef, beans, rice, tomatoes, fresh avocado, my homemade Guacamole and more made dinner both fun and good to eat.

IMG_4851_1

Tostadas

Ingredients:

4 – 6 tostada shells

1 cup cooked brown rice

1 cup chopped cherry tomatoes

1 lb ground turkey or beef

1 ½ cup queso cheese shredded

1 4 oz can green chiles

1 4 oz can chopped jalapenos

1 pkg taco seasonings

Preheat oven to 375 degrees.

Brown the meat in a medium-sized frying pan over medium high heat. Drain off fat then reduce the heat to medium low. Sprinkle in taco seasoning, green chiles, jalapenos and water. Stir to blend everything together then add browned meat.

Lay out tostada shells on a baking sheet. Sprinkle each shell with a little cheese then layer rice, meat mixture, tomatoes and top with more cheese. Place in oven for 3 – 5 minutes until cheese melts. Remove from oven. Top with sour cream, fresh avocado slices or guacamole.


Follow my blog with Bloglovin

Garlic BBQ Chicken Wings

IMG_3792_1

I am going to admit something to the world. I prefer to take the easy way out when it comes to frying chicken. Chicken wings and specifically chicken wingettes are the easiest pieces to fry if you are frying chicken. Wingettes are already cut into pieces and do not need a lot of cleaning. Other parts of the chicken like the breast and thigh need tender loving care to make sure you get most of the fat and other questionable things off of the chicken. Drumsticks are not hard to clean but they take longer to cook than wings. So yes, I can be a little lazy when it comes to frying chicken. That being said I do love fried chicken and don’t mind frying up a batch of wings for the family any day of the week.

IMG_5107_1

I came up with my Garlic BBG Chicken Wing recipe after watching a food show that showed the cook adding garlic to a butter sauce then pouring it over fried chicken wings. I liked the idea of adding garlic and butter to a BBQ sauce then pouring it over fried chicken wings instead of a plain butter sauce. The result was quite tasty and since I baked the wings after frying them and drenching them in BBQ sauce there was a nice little char to the wing.

IMG_5127_1

This recipe is simple because you can use whatever flavor BBQ sauce you like the best. If you want something a little sweet but spicy, try Stubbs Sweet Heat BBQ sauce. The sauce has a nice tang and you can feel a subtle heat in the back of your throat as you eat. Adding the garlic just added another wonderful level of flavor to the wings. There are so many different flavors of sauce that will work well with this recipe. Start out by experimenting with your favorite BBQ sauce then go from there. I am 99% sure you will enjoy these wings no matter what sauce you decide to use.

IMG_3822_1

IMG_3817_1

Garlic BBQ Chicken Wings

Ingredients:

1 jar Stubbs Sweet Heat Bar-B-Que Sauce

2 pkgs chicken wingettes washed

2 tbsp minced garlic

2 tbsp butter

1 tbsp salt

½ tbsp black pepper

frying olive oil or vegetable oil

Preheat oven to 425 degrees.

In a large bowl season chicken with salt and black pepper. Add oil to a dutch oven or large heavy pot (about half way up the side of the pot. Turn heat to medium high until oil begins to smoke slightly. If you are brave, flick a drop of water into the pot. If it sizzles the oil is hot.

Cook chicken wings in batches (8 – 10 pieces each time) until they are crispy. Drain on paper towels.

In a medium sauce pan melt butter over medium heat. Add garlic and saute for 2 minutes then add BBQ sauce. Stir to mix butter, garlic and sauce. Reduce heat to low to keep warm while cooking chicken.

Add chicken and sauce to a large container with a top. Shake to coat the chicken wings. Spread chicken out on a foil lined baking pan. Bake in the oven for 10 – 15 minutes.

Follow my blog with Bloglovin

Riced Cauliflower and Brussel Sprouts

IMG_4624_1

As she often does, my daughter turned me on to a new food I had never tried or heard of before. This time it was riced cauliflower. When she first told me about it I thought it was some kind of rice that had been processed out of dried cauliflower. So, when I asked one of the folks at Trader Joe’s if they had it riced cauliflower they said no based on my description. My daughter said it could be hard to find so I was not really surprised when Trader Joe’s looked but could not find it among the rice and pasta nor in the freezer section. Of course, when I told D about my trip to Trader Joe’s she put me on the right path and let me know that riced cauliflower isn’t really rice. Instead, the fresh cauliflower is “riced” and cut down to resemble rice. On my next trip to Trader Joe’s I found riced cauliflower in the fresh vegetable section.

IMG_4645_1

Cauliflower is plentiful in the warmer months and is great in salads and soups. I decided to create a different kind of recipe for my cauliflower by pairing it with brussel sprouts. Hence, my Riced Cauliflower and Brussel Sprouts recipe. If I do say so myself the dish was pretty tasty on the first try. One thing to remember when preparing cauliflower is to not overcook it. I learned the hard way just how mushy cauliflower can get if you cook it too long. Riced cauliflower cooks even quicker than cauliflower florets so this is definitely a quick and easy recipe to make.

IMG_4655_1

For my vegetarian friends this recipe is wonderful as both a side dish or a main course (just leave out the bacon). I had a nice sized bowl of Riced Cauliflower and Brussel Sprouts for lunch which was quite filling all by itself. The next time you are searching for a new cauliflower recipe take a chance on making Riced Cauliflower and Brussel Sprouts. I think you will be pleasantly surprised at how delicious it tastes.

IMG_4671_1

Riced Cauliflower and Brussel Sprouts

 Ingredients:

1 16 oz pkg of riced cauliflower

6 – 8 brussel sprouts sliced thin

2 shallots sliced thin

2 slices bacon cubed

½ tsp salt

½ tsp cracked black pepper

¼ tsp lemon zest

¼ tsp garlic powder

juice from ¼ of a lemon

Place bacon in a large non stick skillet over medium high heat. Brown bacon until crisp then drain on paper towels. Set aside.

Drain off all but 1 tbsp of bacon fat. Reduce heat to medium then add shallots and brussel sprouts. Cook until slightly softened. Add riced cauliflower and stir to mix. Sprinkle with bacon (reserve enough bacon to garnish dish). Cook cauliflower until tender but slightly al dente. Top with reserved bacon.

Bon Appetit!

Follow my blog with Bloglovin

Hot Italian Sandwich

IMG_3515_1

A good sandwich always starts with delicious bread. Some of the best bread comes from the bakery at your local grocer. I often find myself searching for different types of rolls for sandwiches when I want to make a tasty but quick family meal.

IMG_3520_1

The other day I found two different flat rolls that inspired me to try a new sandwich. An Italian roll and a jalapeno roll. The Italian roll was sprinkled with Parmesan cheese and oregano while the jalapeno roll was sprinkled with a little grated Parmesan cheese with slices of jalapeno peppers baked into the top of the bread. Both rolls smelled heavenly at the bakery and were so inviting that I had no choice but to put a couple of each in my basket. The Italian roll inspired me to create a Hot Italian Sandwich which turned out to me a winner in the family. I have made this sandwich a few times since my first try and it continues to be something the family enjoys. The sandwich is packed with soppressata, capicola ham and pepperoni sliced from the deli.

IMG_3529_1

Sandwiches are my go to meal whenever we are having a later than usual dinner because my son has a sporting event, school event or I have a bunch of errands after work. By the time we get home I don’t feel like preparing a complicated meal but I still want a balanced dinner. I really just want to get dinner on the table in less than 30 minutes so that we all still have time to relax before going to bed to prepare for another busy day.

IMG_3546_1

IMG_3542_1

Hot Italian Sandwich

Ingredients:
2 – 3 flat bread rolls (jalapeno, Parmesan or regular) sliced in half
6 – 9 slices deli pepperoni
6 – 9 slices deli soppressata
6 – 9 slices deli capicola
1 large tomato sliced thin
4 – 6 slices provolone cheese
4 – 6 slices pepper jack cheese
2 tbsp pesto
¼ tsp red pepper flakes
¼ tsp oregano
1 tbsp Italian dressing
1 cup of shredded lettuce

Preheat oven to 400 degrees.

Mix Italian dressing with lettuce and set aside.

Spread pesto on bottom half of each roll. Place two slices of pepper jack cheese on the bottom half of each roll. Place on a cookie sheet.

On a separate cookie sheet pile 2 slices of capicola, 2 slices soppressata, 3 slices tomatoes sprinkled with oregano and red pepper flakes. Top tomatoes with pepperoni then 2 slices provolone cheese.

Place meats and bread in the oven until cheese melts approximately 2 – 3 minutes. Remove from oven and top bottom half of each roll with meat and lettuce. Place other half of roll on top of the lettuce and cut in half. Serve with chips or a cup of soup.

Follow my blog with Bloglovin

Oxtail Stew

IMG_2957_1

My southern roots are showing. Oxtail Stew is one of those southern dishes that most folks up north don’t really know about. Surprisingly, more and more people are coming into the fold and are enjoying oxtails in various recipes. Historically, oxtails were considered a poor man’s dish since it was a cheaper cut of meat. Still, all across the world this cheaper cut of meat was also considered a delicacy. Oxtails were and are used in stews, soups and special sauces. Today, oxtails are no longer a cheap cut of meat. To the contrary. Oxtails are a little more expensive and can be found among the best choice cuts of meat at any grocery store that carries a variety of meats.

IMG_2982_1

Because my mom is both southern and an amateur chef by profession it meant growing up we often had meals that included every part of an animal’s body. I can honestly say my mom can take any animal on the planet and prepare it so that it smells heavenly. I would also say that same animal probably tastes absolutely delicious but I draw the line at eating certain things regardless of how good it smells. Needless to say, the squirrel, rabbit, turtle and sweet bread dishes my mom made did not touch my lips but boy they sure smelled good cooking.

IMG_3016_1

Back to Oxtail Stew. I was talking to my mom about recipes recently and she told me she had made some oxtails. I started thinking of how good her oxtails in onions and gravy were and how much I missed having them. I decided I should try making my own Oxtail Stew for the blog and create a new memory for my family. I was shocked when I got to the grocers and saw the price on the few packages of oxtail I found next to the Delmonico steaks. Since I had committed myself to making an Oxtail Stew I did a Mary Tyler Moore move and rolled my eyes, shook my head and tossed the oxtails into my shopping cart.

IMG_3003_1

Oxtail Stew is one of those meals you eat with two types of utensils. A fork and fingers. You can use the fork to pull pieces of meat off of the bone then pick up the bone and suck all of those delicious juices and those tiny remaining pieces from the bone. For those of you who eat fried chicken with a knife and fork you would not understand what I mean. Just like most of us use our God given fingers to pick up chicken and eat it off the bone you need to do the same with oxtails. If you don’t, you will miss out on some serious flavors and good eating!

IMG_3020_1

Oxtail Stew

Ingredients:
2 pkgs of oxtails
2 carrots chopped
2 scallions chopped (including green part)
1 large onion chopped
1 garlic clove chopped
1 bay leaf
1 small can tomato paste
2 cups water
1cup beef stock
4 tbsp frying olive oil or vegetable oil
1 tbsp salt
½ tbsp black pepper
1 tsp ground cumin
1 tsp ground coriander
1 tsp curry powder
1 tsp ginger (ground or fresh minced)
1 tsp smoked paprika
1 tsp red pepper flakes (optional)
¼ tsp nutmeg

Season oxtails with all seasonings. Place in a plastic zip lock bag and refrigerate for 2 hours or overnight.

Heat oil in a dutch oven over medium high heat. Brown oxtails on all sides then place oxtails in a pressure cooker with ½ of the diced onions and 2 cups of water. Cook oxtails for approximately 45 minutes. Let pressure cooker cool (run cold water over the top of the pressure cooker to cool faster. Check out handling instructions.). Strain beef stock from pressure cooker and reserve 2 cups.

Saute remaining onions, scallions and carrots in the dutch oven over medium heat until slightly softened and onions are translucent. Reduce heat to medium then add garlic and stir for 1 minute. Do not let the garlic burn. Add tomato paste, reserved beef stock and 1 cup of beef stock. Whisk together. Add oxtails and bay leaf. Cover and let simmer for 2 ½ hours stirring occasionally. Add additional salt to taste. Serve with rice.


Follow my blog with Bloglovin

Bean Soup

IMG_3465_1

There are signs of spring everywhere as the grass begins to turn greener and the daffodils begin to bloom. Still, there is a chill in the air and even threats of snow from the weatherman as winter tries to hang on. All that means I am not quite finished making soups to warm my body and nourish my soul.

IMG_3479_1

Bean Soup does both of those things. A very simple soup with only a few ingredients, Bean Soup is packed with delicious flavors from the beans, vegetables and ham hock broth. I really like making this recipe when I want a bowl of soup that will fill me up but won’t me feel heavy like a full meal does.

IMG_3494_1

This soup practically prepares itself. Once you cook the ham hocks and add the broth to a pot with the other ingredients you can turn it on low and forget about it for 30 to 45 minutes. To jazz up the soup I sometimes add a big buttered biscuit or a wedge of cornbread. No matter what you decide to do, I know you will enjoy this Bean Soup recipe. Spring may be here based on the calendar but winter has yet to say good-bye.

IMG_3501_1

Bean Soup

Follow my blog with Bloglovin

Breakfast Burrito

IMG_3366_1

Weekends are usually the only time I have to make a family breakfast. But, even on the weekends I may be crunched for time to get breakfast on the table. Between basketball games, errands or family outings I sometimes have to pull together a quick meal before we head out the door.

IMG_3374_1

Breakfast Burritos are a quick way to get a relatively balanced breakfast on the table without a lot of fuss. Plus, the burritos are light but filling so you feel satisfied and not hungry a few minutes after eating. I like to add veggies to my Breakfast Burritos to make them seem healthier than if I loaded them with potatoes or other heavy foods like you see in fast food commercials. That being said, it doesn’t mean I don’t like a little bacon on my burrito. Healthy is good but bacon is too!

IMG_3380_1

Getting back to the veggies in the Breakfast Burrito, I count salsa as a veggie. Salsa is basically nothing but veggies. Tomatoes, onions, peppers. Three vegetables in one scoop of salsa. How great is that? Even my youngest son likes salsa. Although he would also tell you he does not like fresh tomatoes. Cooked? Yes. Fresh? No. Crazy I know but it is all a mind game. There are plenty of things in life folks say they don’t like in one form but love them in another form. For instance, I have a friend that refuses to each raw broccoli with dip. However, she is wild about broccoli salad. Go figure. Hmmm… it must be the bacon. Again, bacon is always good. Yea bacon!

IMG_3399_1

Okay, I got off track for a second. Back to the Breakfast Burritos. You can add whatever you like to your burrito. Leftovers are a wonderful filling to Breakfast Burritos as long as they go with eggs. Try my standard version of a Breakfast Burrito then try creating your own version. Whatever you do I know it will be good.

IMG_3405_1

Breakfast Burrito

Ingredients:
8 large eggs
6 slices bacon
3 large tortillas
¼ cup milk
½ cup shredded Colby Jack cheese
¼ cup shredded sharp cheddar cheese
¼ cup salsa
1 tbsp sour cream
1 tbsp butter
cooking spray

Preheat oven to 250 degrees.

Place bacon on a microwave safe plate with a stack of 3 paper towels and cover with a paper towel. Microwave bacon for 4 ½ minutes until crispy. May need to adjust time based on your microwave. Set aside.

Melt butter in a medium size non-stick frying pan. Add eggs and milk. Break up yolks in the pan and stir until eggs are blended with the milk. Stir in cheddar cheese and black pepper. Cook until eggs are scramble, light and fluffy.

Lay a large tortilla on a flat surface. Spread a little cream cheese over the tortilla. This will act as a binding agent to keep the tortilla together when you roll it up. Place a spoonful of scrambled eggs at one end of the tortilla. Layer a little salsa over the egg then sprinkle shredded Colby Jack cheese over the salsa. Add two slices of bacon over the cheese. Fold the closest end of the tortilla over the filling then fold in the two sides. Roll the tortilla tucking in the sides as you go until you reach the other end of the tortilla. Place tortilla on a cookie sheet sprayed with cooking spray. Repeat with remaining tortillas. Bake the tortillas for 5 – 10 minutes to allow cheese to melt and the tortilla is warm.


Follow my blog with Bloglovin

Curried Fish

IMG_9622_1

Have you ever had a day when you were prepared to make one dish but wind up preparing something totally different? I just had one of those days. I was ready to try out a new chicken dish on the family when my hubby made the statement that we were eating a lot of heavy meat lately. He told me it would be nice to have a light salad and/or fish. Keep in mind that I include salads with our meals almost 5 out of 7 days each week. Besides, I don’t consider chicken wings to be a heavy meat like beef or pork. Anyway, I was in a good mood to be flexible and took up the challenge of switching gears and coming up with a lighter meal.

IMG_2525_1

The only fish I had available in the freezer was cod. I didn’t want to just bake the cod so I tried thinking outside the box and prepared a Curried Fish dish over chopped cabbage along with the requested salad. Granted, I had no idea how to make Curried Fish so I decided to tweak one of my curry chicken recipes that would adapt well to using fish instead of chicken.

IMG_2559_1

The biggest difference in making my Curry Chicken dish and the Curried Fish was adding a jar of Marsala. The elevation of both the heat and flavors was amazing. As I have always said, my family loves spicy foods and the Marsala definitely made the Curried Fish spicy. If you don’t like a lot of heat in your food just cut down on the amount of Marsala you use or purchase a milder version of the sauce.

IMG_2552_1

In the end, I was pleased with how the Curried Fish turned out and my hubby was quite happy. He got both a spicy fish dish he loved and the salad he requested. What more could a hungry man want?

IMG_2526_1

Curried Fish

Ingredients:
2 – 3 large cod fillets
1 small green pepper sliced thin
1 small red onion sliced thin
1 clove garlic minced
1 jar Marsala red hot curry sauce
1 13.6 oz can light coconut milk Thai Kitchen
1 15 oz can diced tomatoes with juice
2 cups buttermilk
1 cup prepared rice
¼ cup chicken broth
3 tbsp olive oil

Seasonings:
2 tbsp curry powder
1 tbsp turmeric
1 tbsp salt
1 tbsp black pepper
1 tbsp Adobo
1 tbsp onion powder
½ tbsp cumin
½ tbsp nutmeg
½ tbsp thyme
½ tsp chili powder
¼ tbsp coriander
8 – 10 dashes of hot sauce
pinch of sugar

Cut fish in to large cubes. Season with a little salt and black pepper. Place in a container then pour buttermilk over the fish. Add hot sauce and stir to mix well with fish. Refrigerate for at least 30 minutes.

Saute onions and green peppers with olive oil in a large frying pan for 5 minutes over medium heat. Stir in garlic and cook for 2 more minutes. Do not let the garlic burn. Add cumin, nutmeg, salt, black pepper, turmeric and chili powder. Stir until well combine and cook for a few minutes to release the flavors. Add coconut milk, curry powder, tomatoes with juice and broth. Stir to combine. Add Marsala and continue stirring. Bring to a low simmer. Drain fish from buttermilk and add to sauce. Reduce heat to medium low. Cover and let fish cook for 20 – 25 minutes. Serve over rice or chopped cabbage.

Tip: Use milder version or less Marsala if you do not like really spicy foods.

Follow my blog with Bloglovin