Category Archives: Main Course

Thai Curry Salmon Bowl

On the days I want to prepare a light simple meal I will usually turn to fish or specifically salmon. Salmon is my favorite fish and is very versatile and easy to make.

Today, I did not want to make Blackened Salmon Salad or Teriyaki Salmon. Instead, I wanted to test whether or not salmon would hold up in a Thai curry sauce. I have created curried fish recipes in the past but with slightly different flavors and seasonings. For my Thai Curry Salmon Bowl I used red Thai curry paste I found at the grocery store rather than adding curry powder to the dish. In my humble opinion, the red Thai curry paste had less of a bite than curry seasonings but still had intense flavor. An added bonus was that the house did not smell like curry the next day. I love curry but the seasoning when cooked lingers in the air for quite a while.

“Bowls” are very popular right now and I think eating from a bowl helps to limit portion sizes. Whatever you can fit into a bowl is all you need to eat unless you are starving or the meal is do delicious you just have to go for seconds.

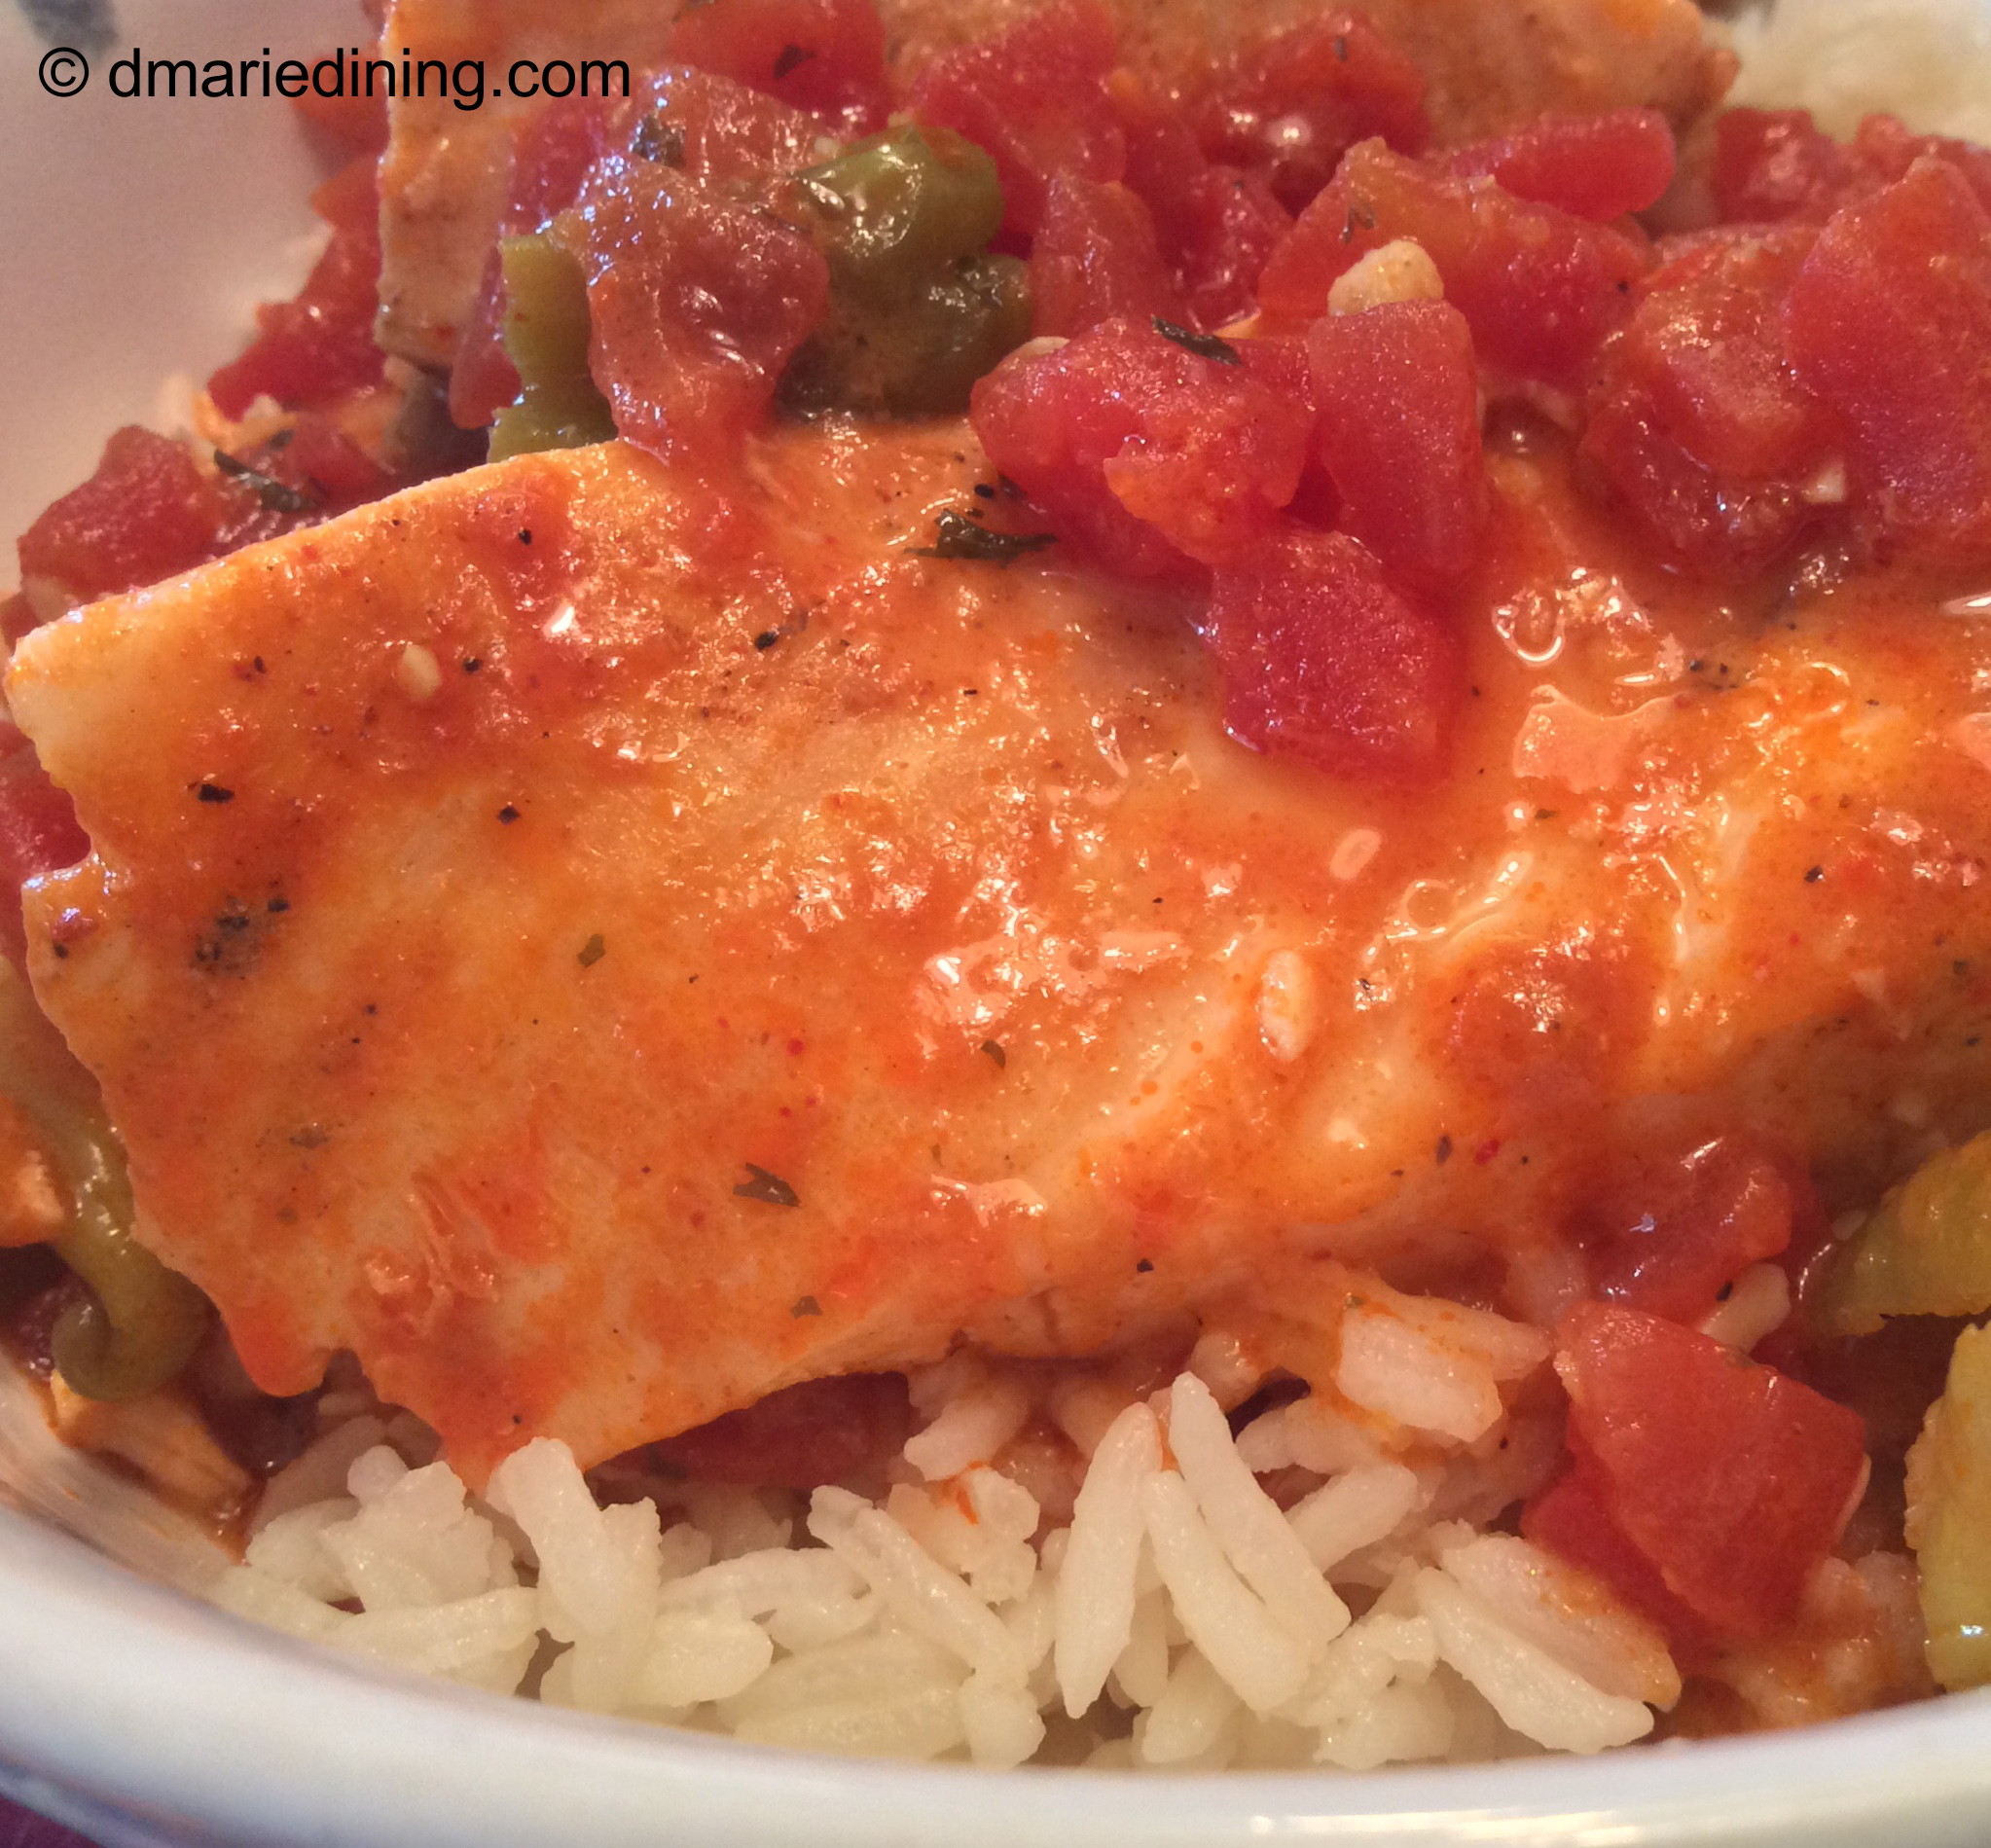
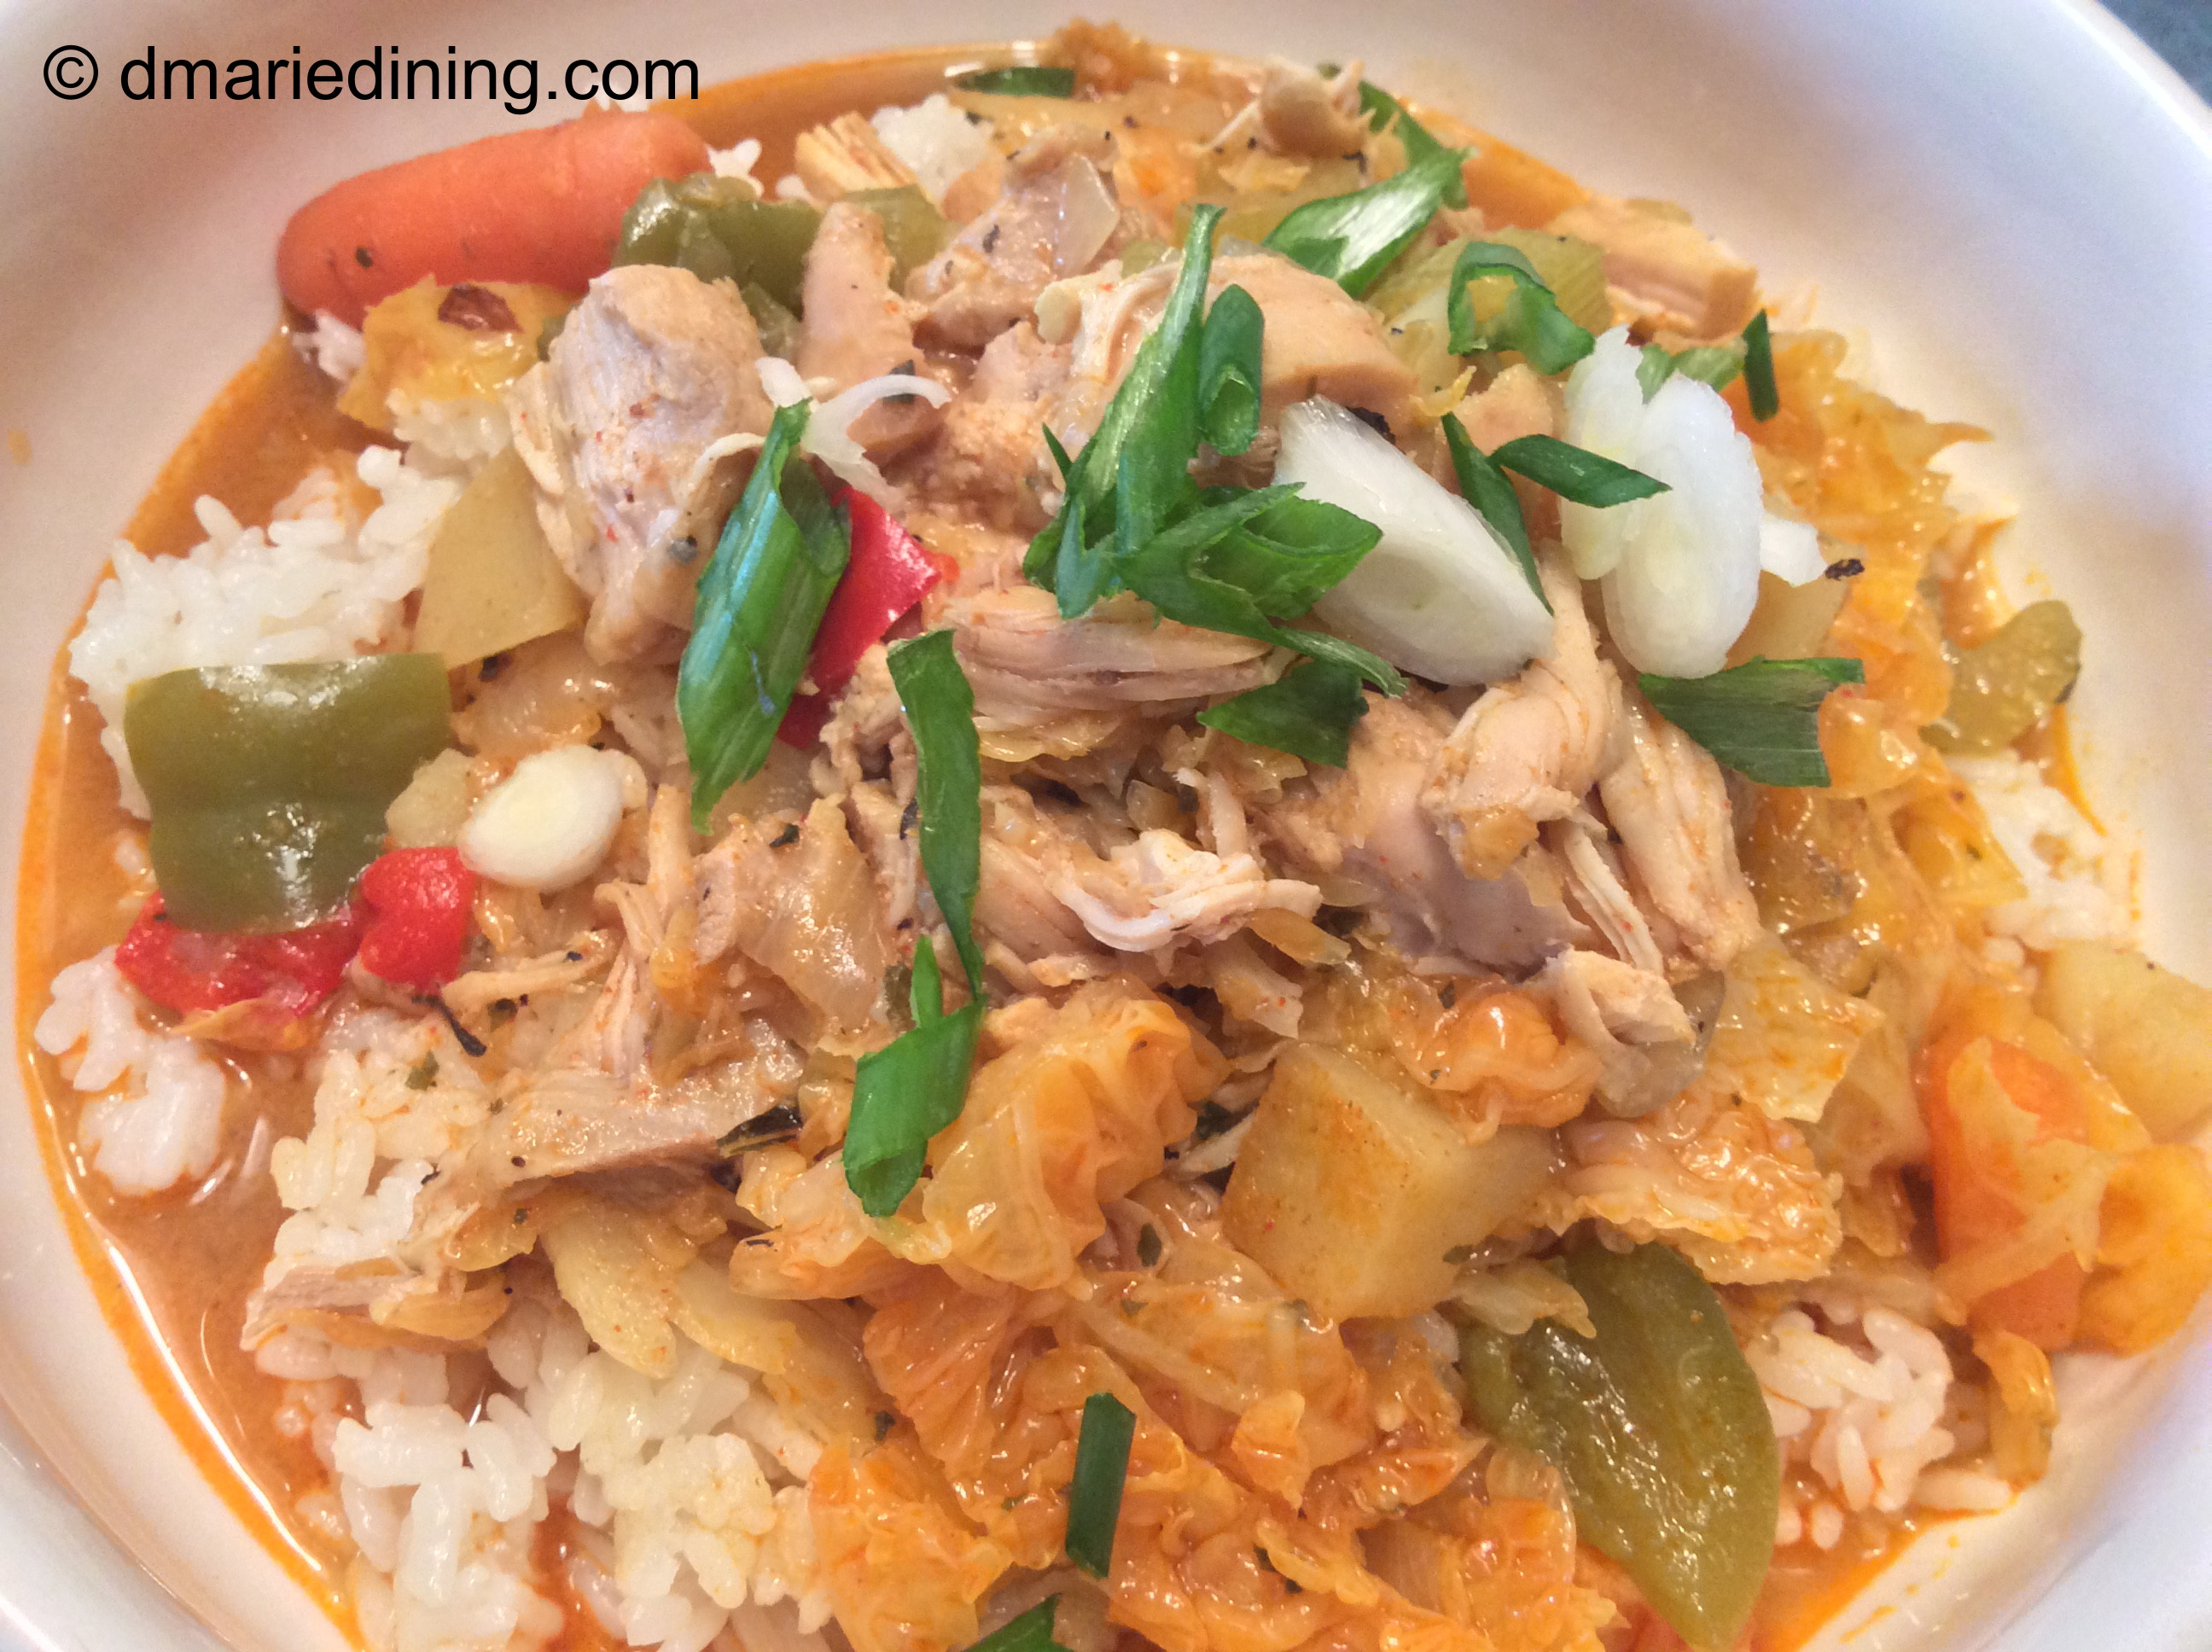
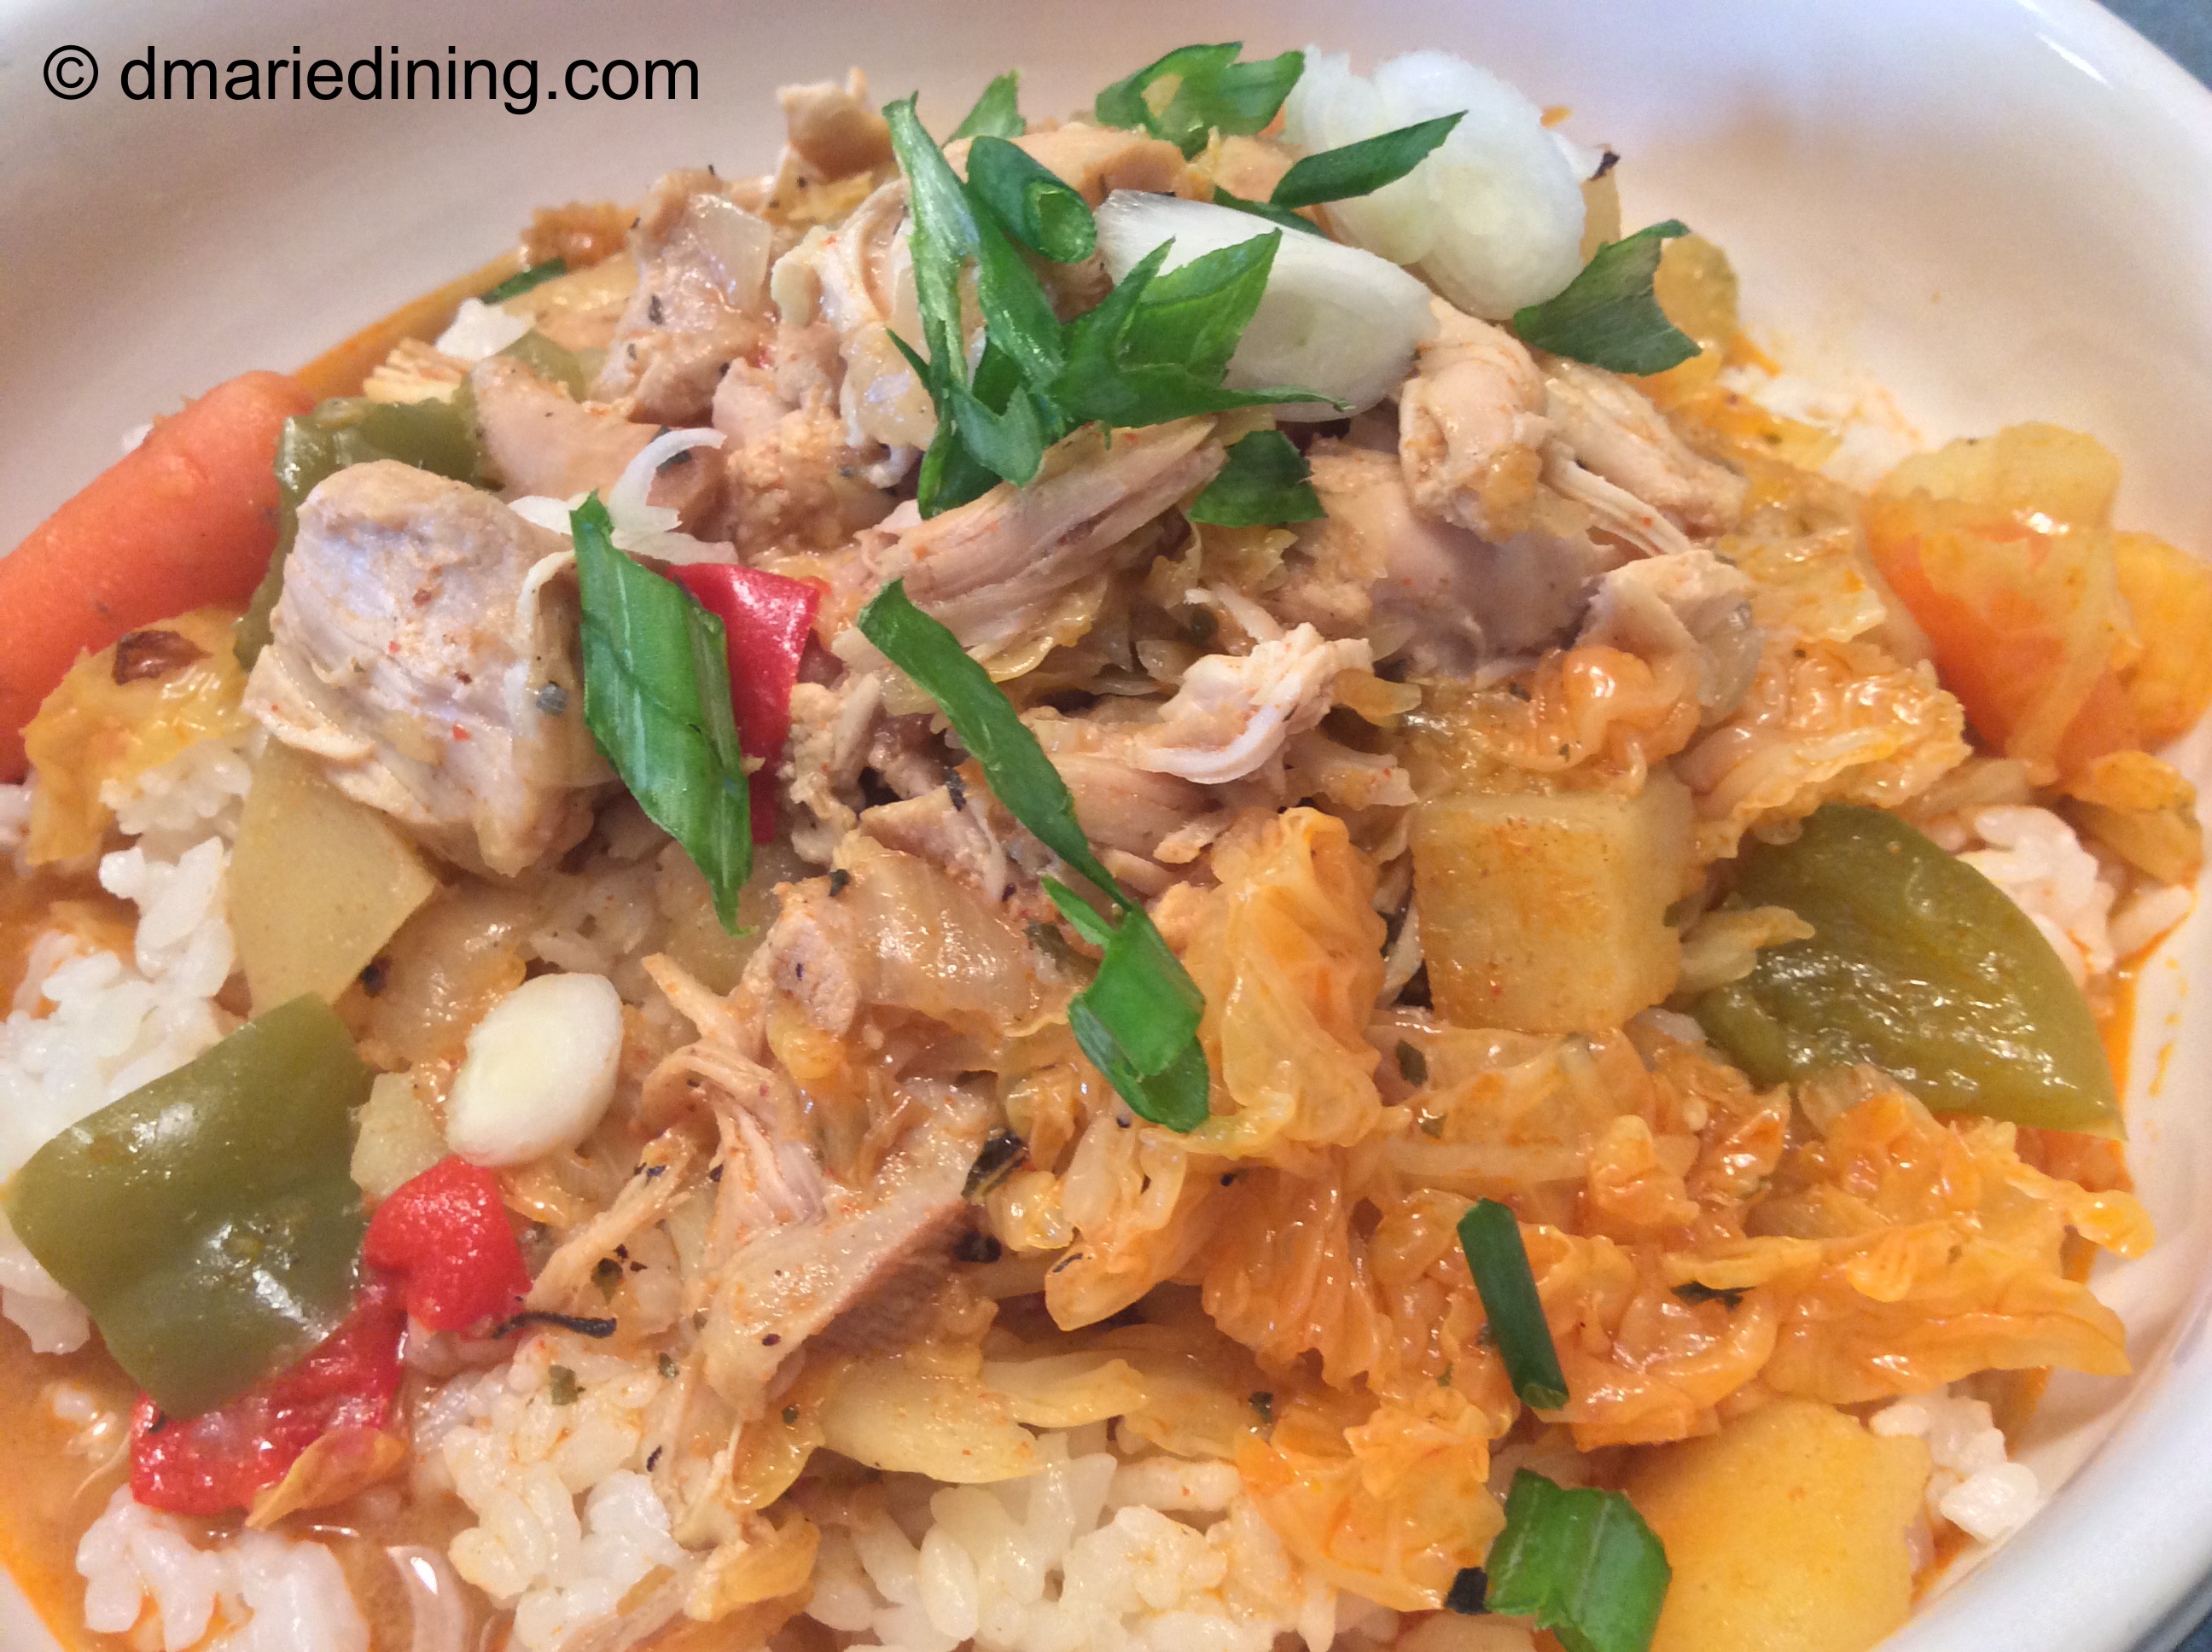
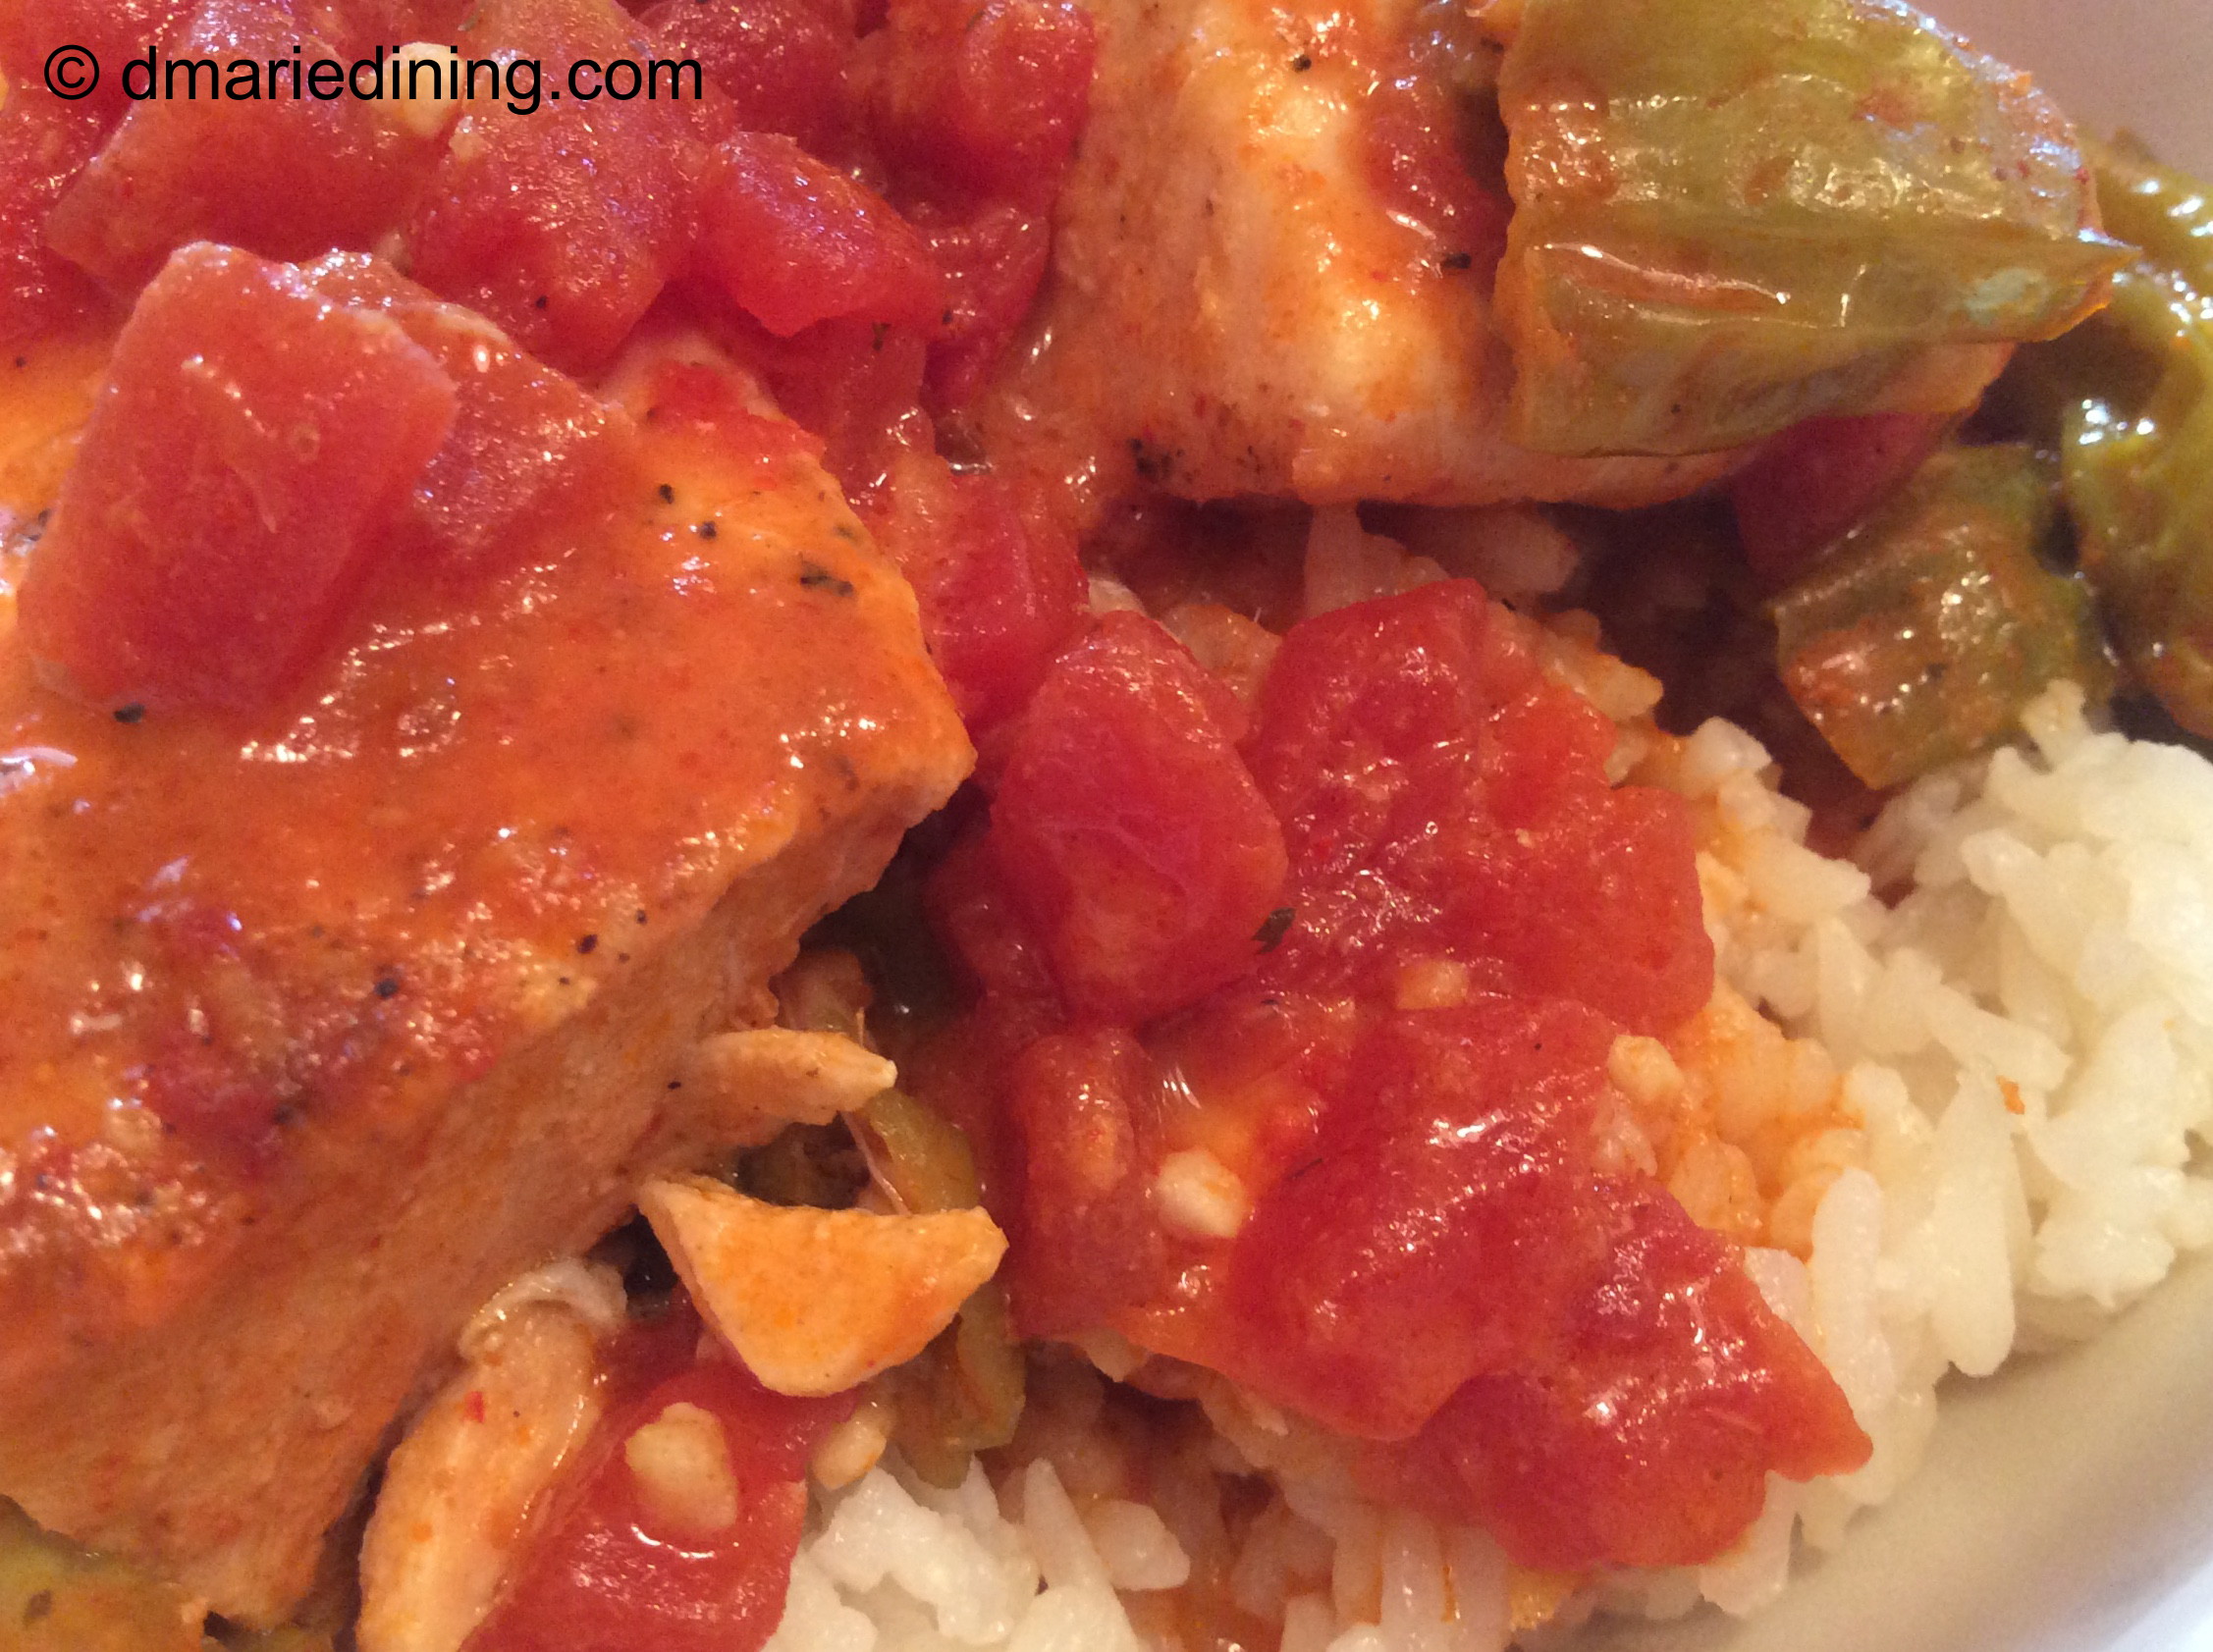
My Thai Curry Salmon Bowl was ultra delicious per both hubby and me. If it had not been so filling on the first round, I would have gone for seconds. Yum!

Thai Curry Salmon Bowl

Ingredients:

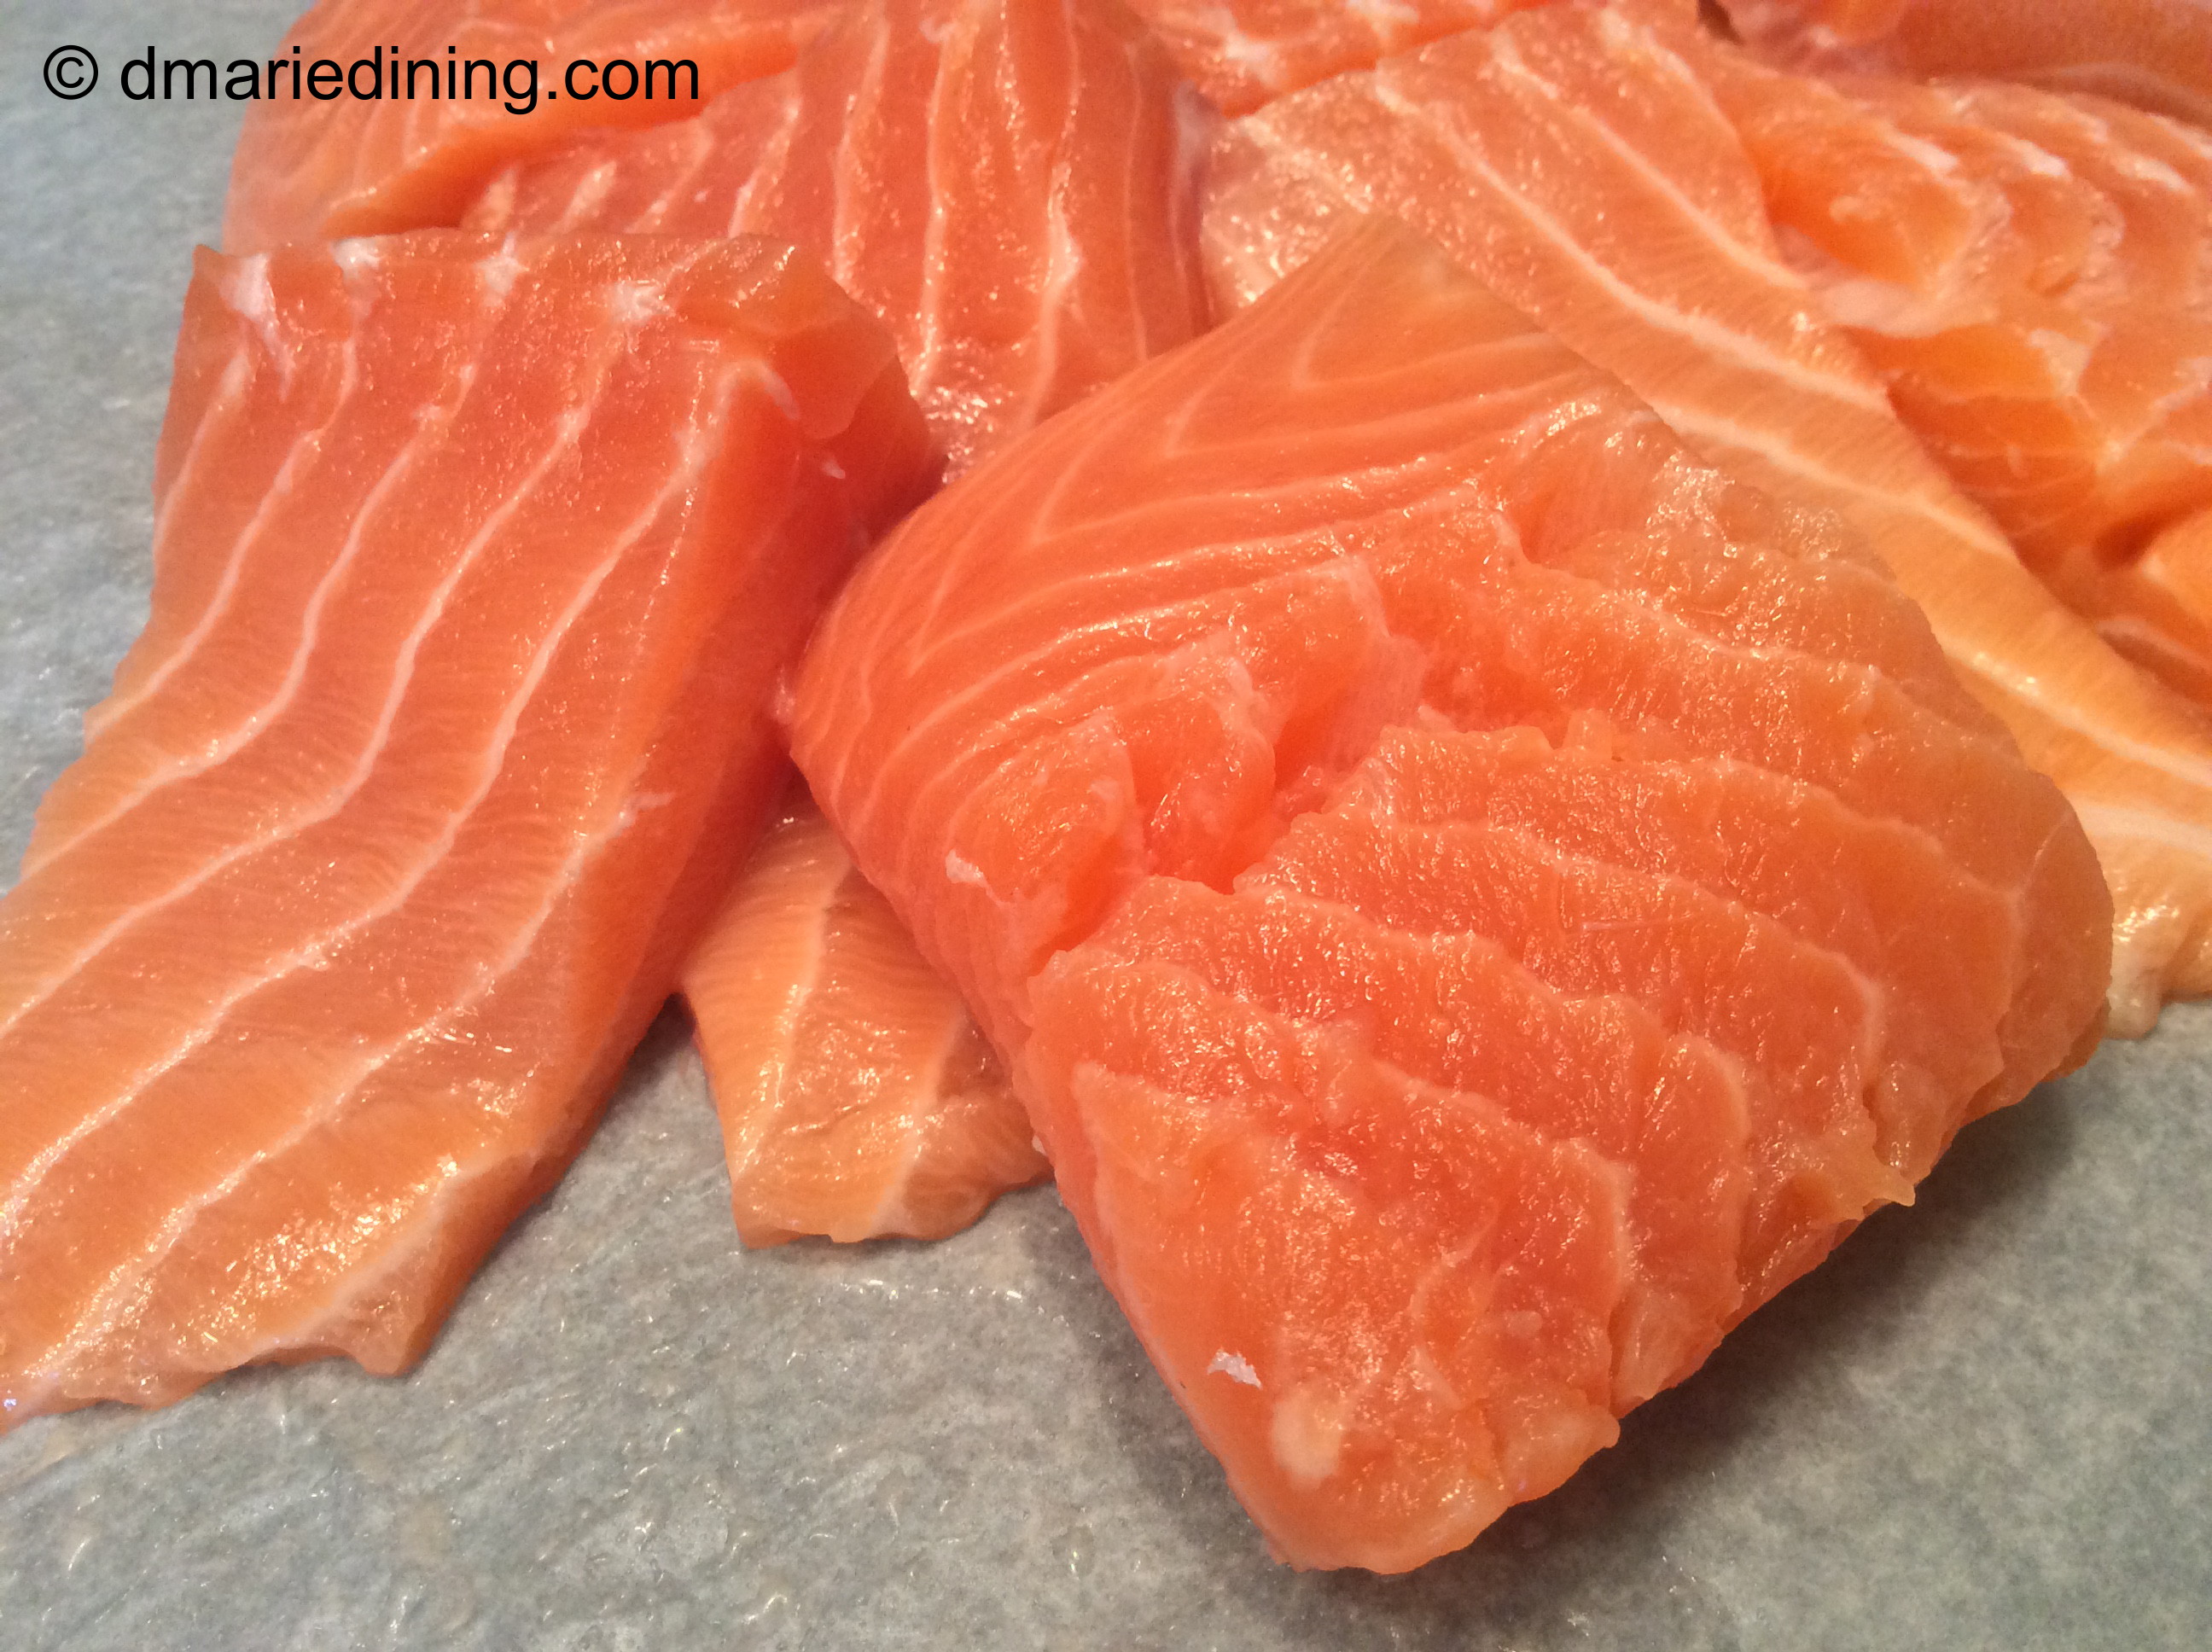
1 – 2 salmon fillets cut into thick chunks

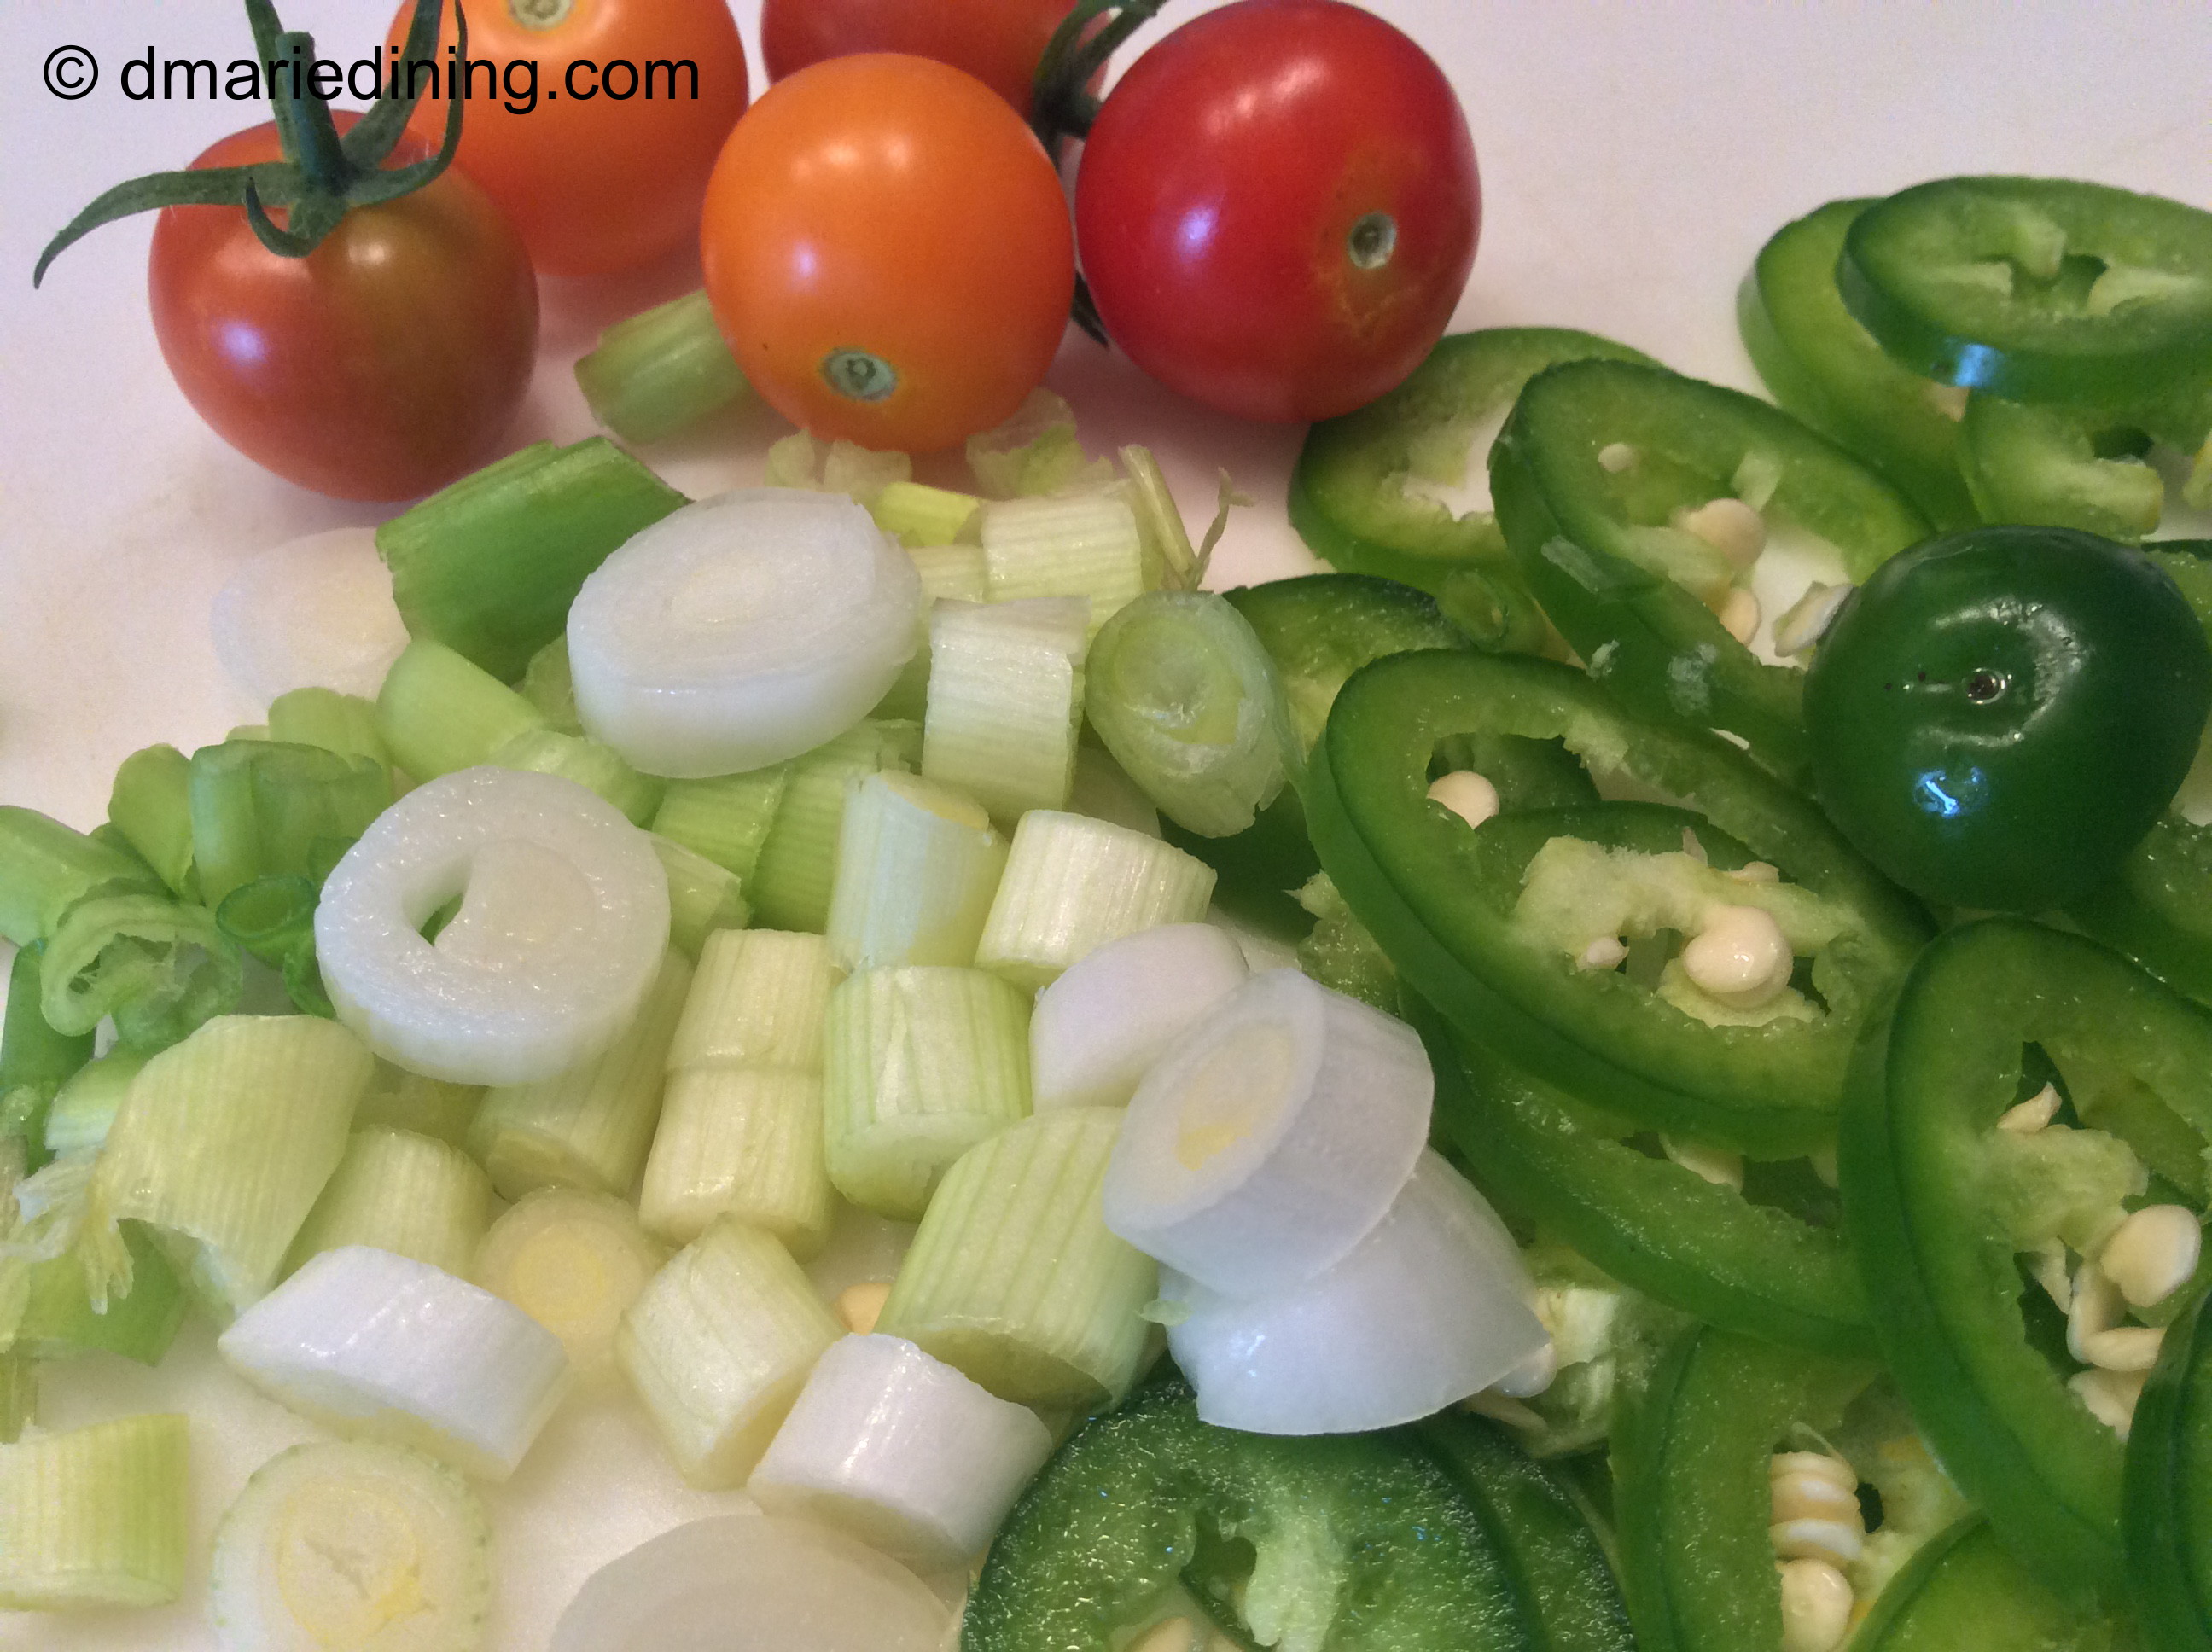
3-4 Shishito peppers diced

1 can lite coconut milk

1 can diced tomatoes

1 small jar red Thai Curry Paste

2 tbsp Kosher salt

2 tbsp ground black pepper

2 tbsp grape seed oil

1 tbsp lemon zest

1 tbsp ginger paste or diced fresh ginger

1 tsp onion powder

1 tsp chili lime seasoning (optional)

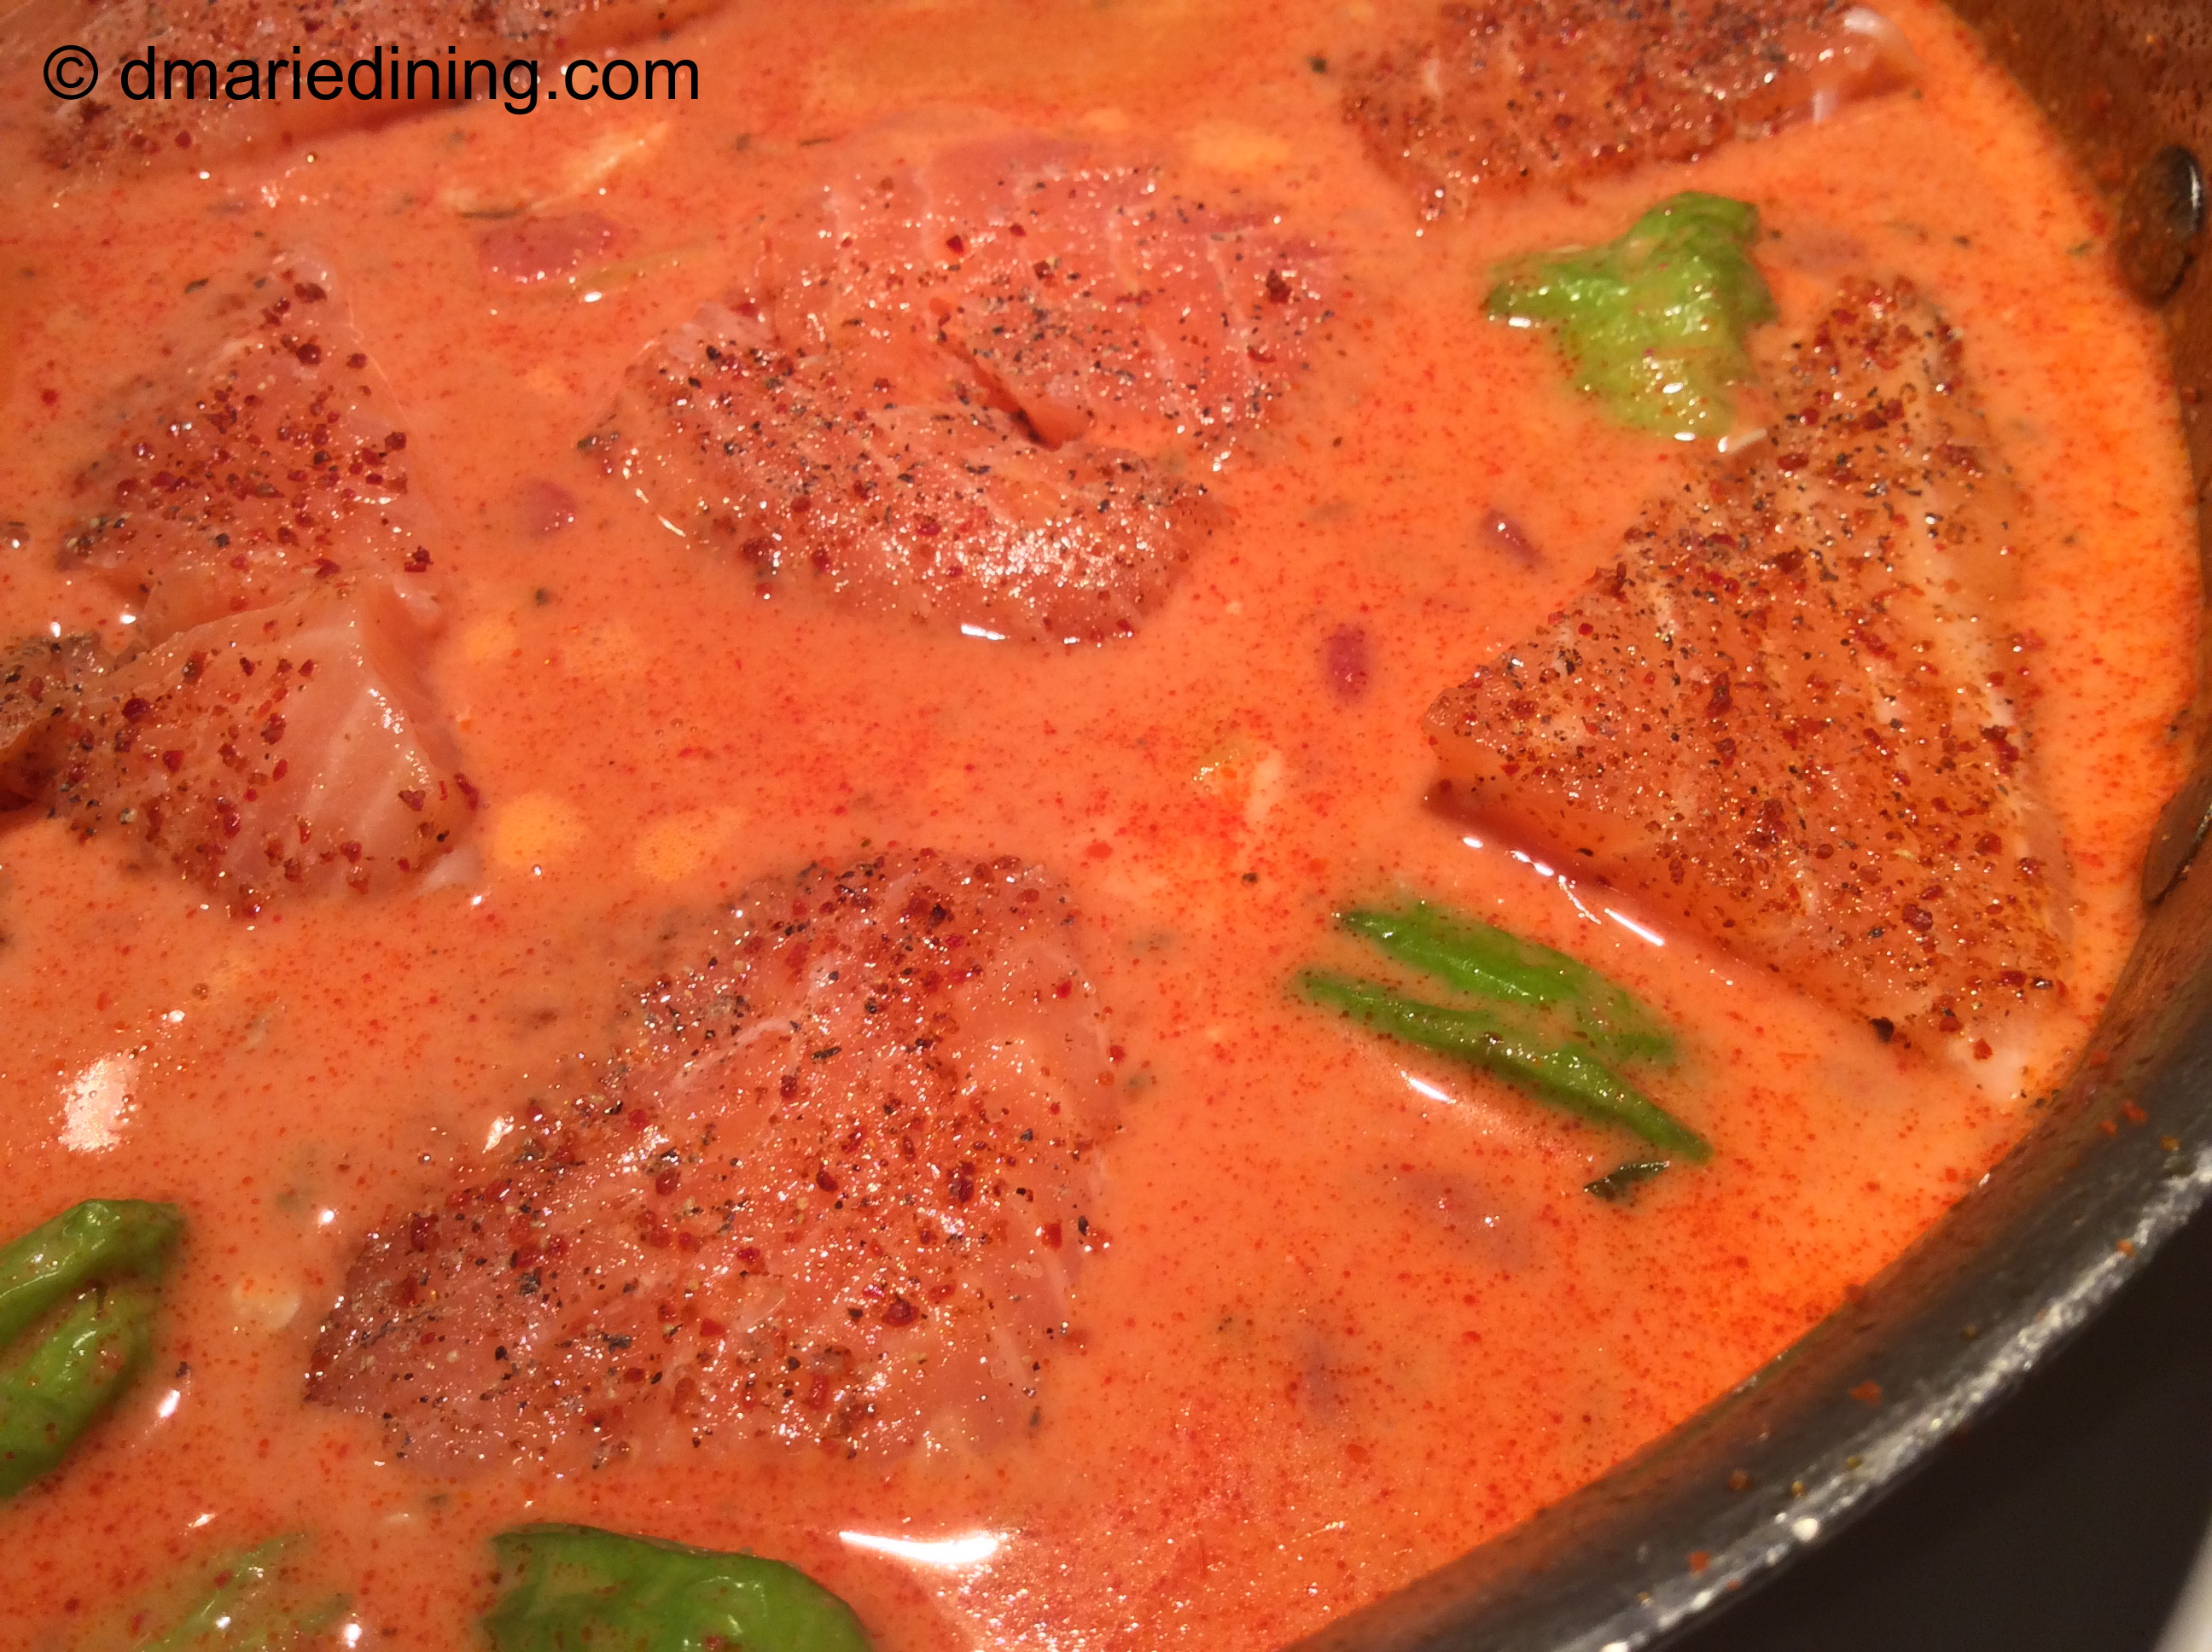
Place salmon chunks on wax paper and season with lemon juice, 1 tbsp Kosher salt and 1 tbsp ground black pepper.

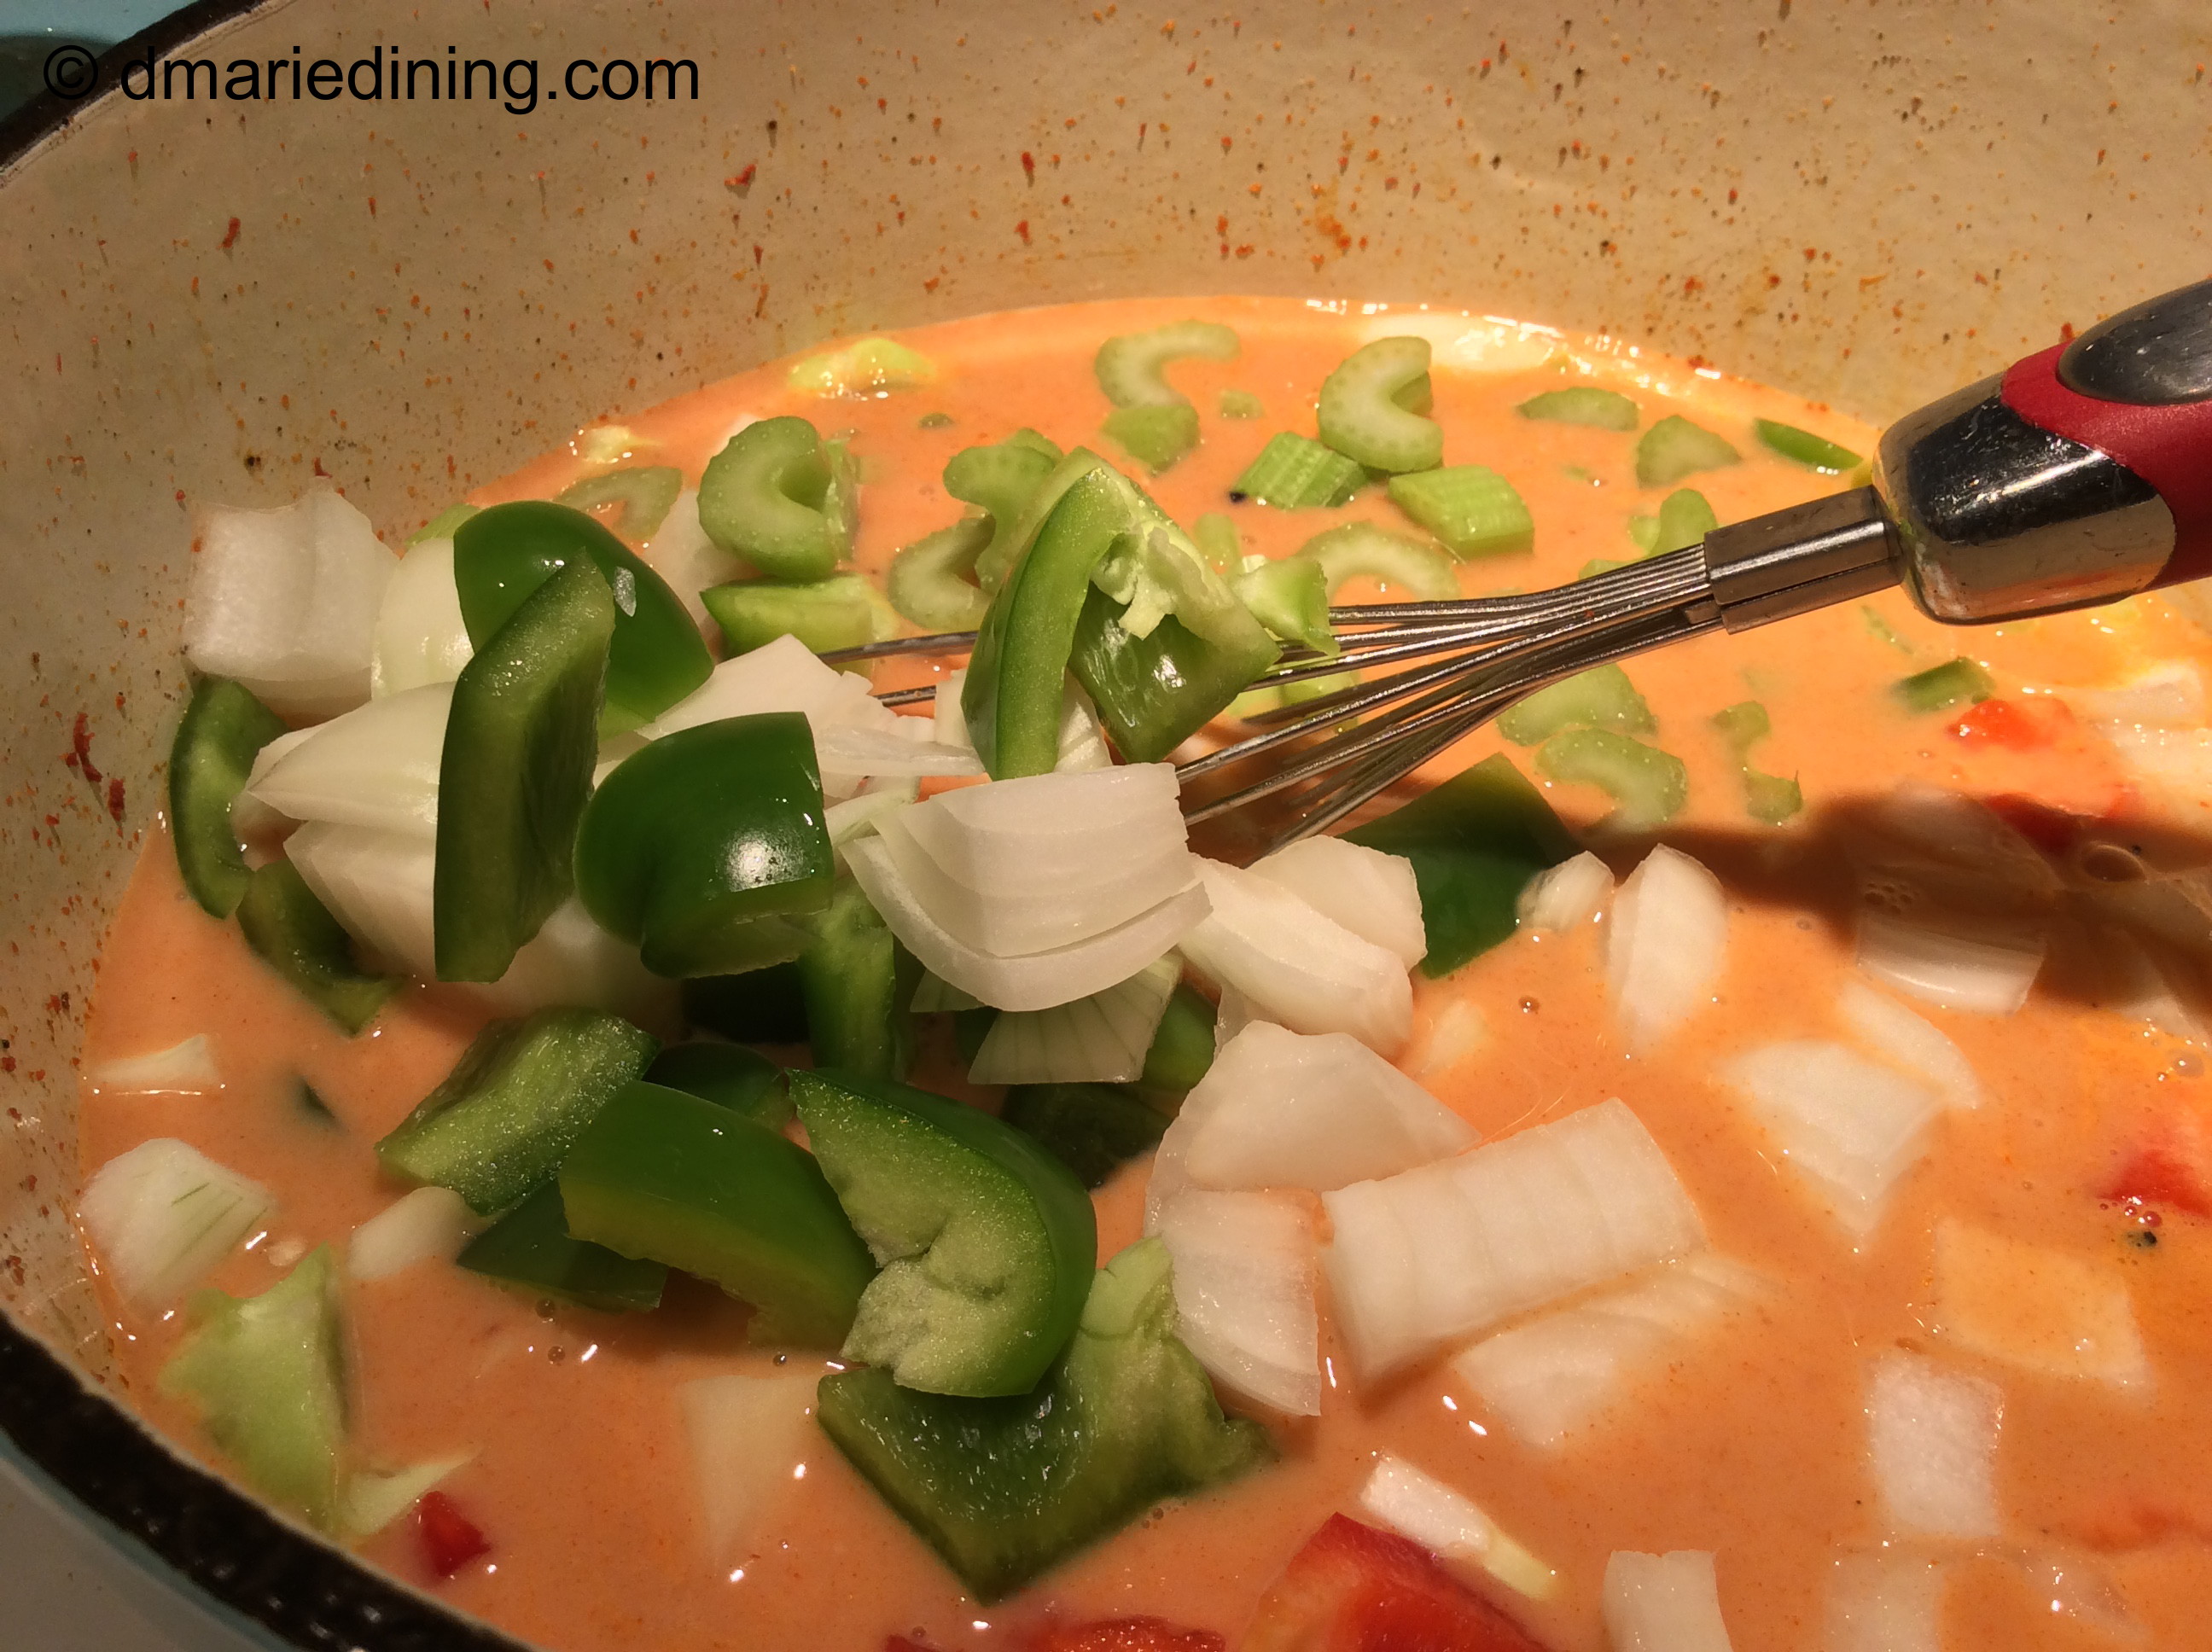
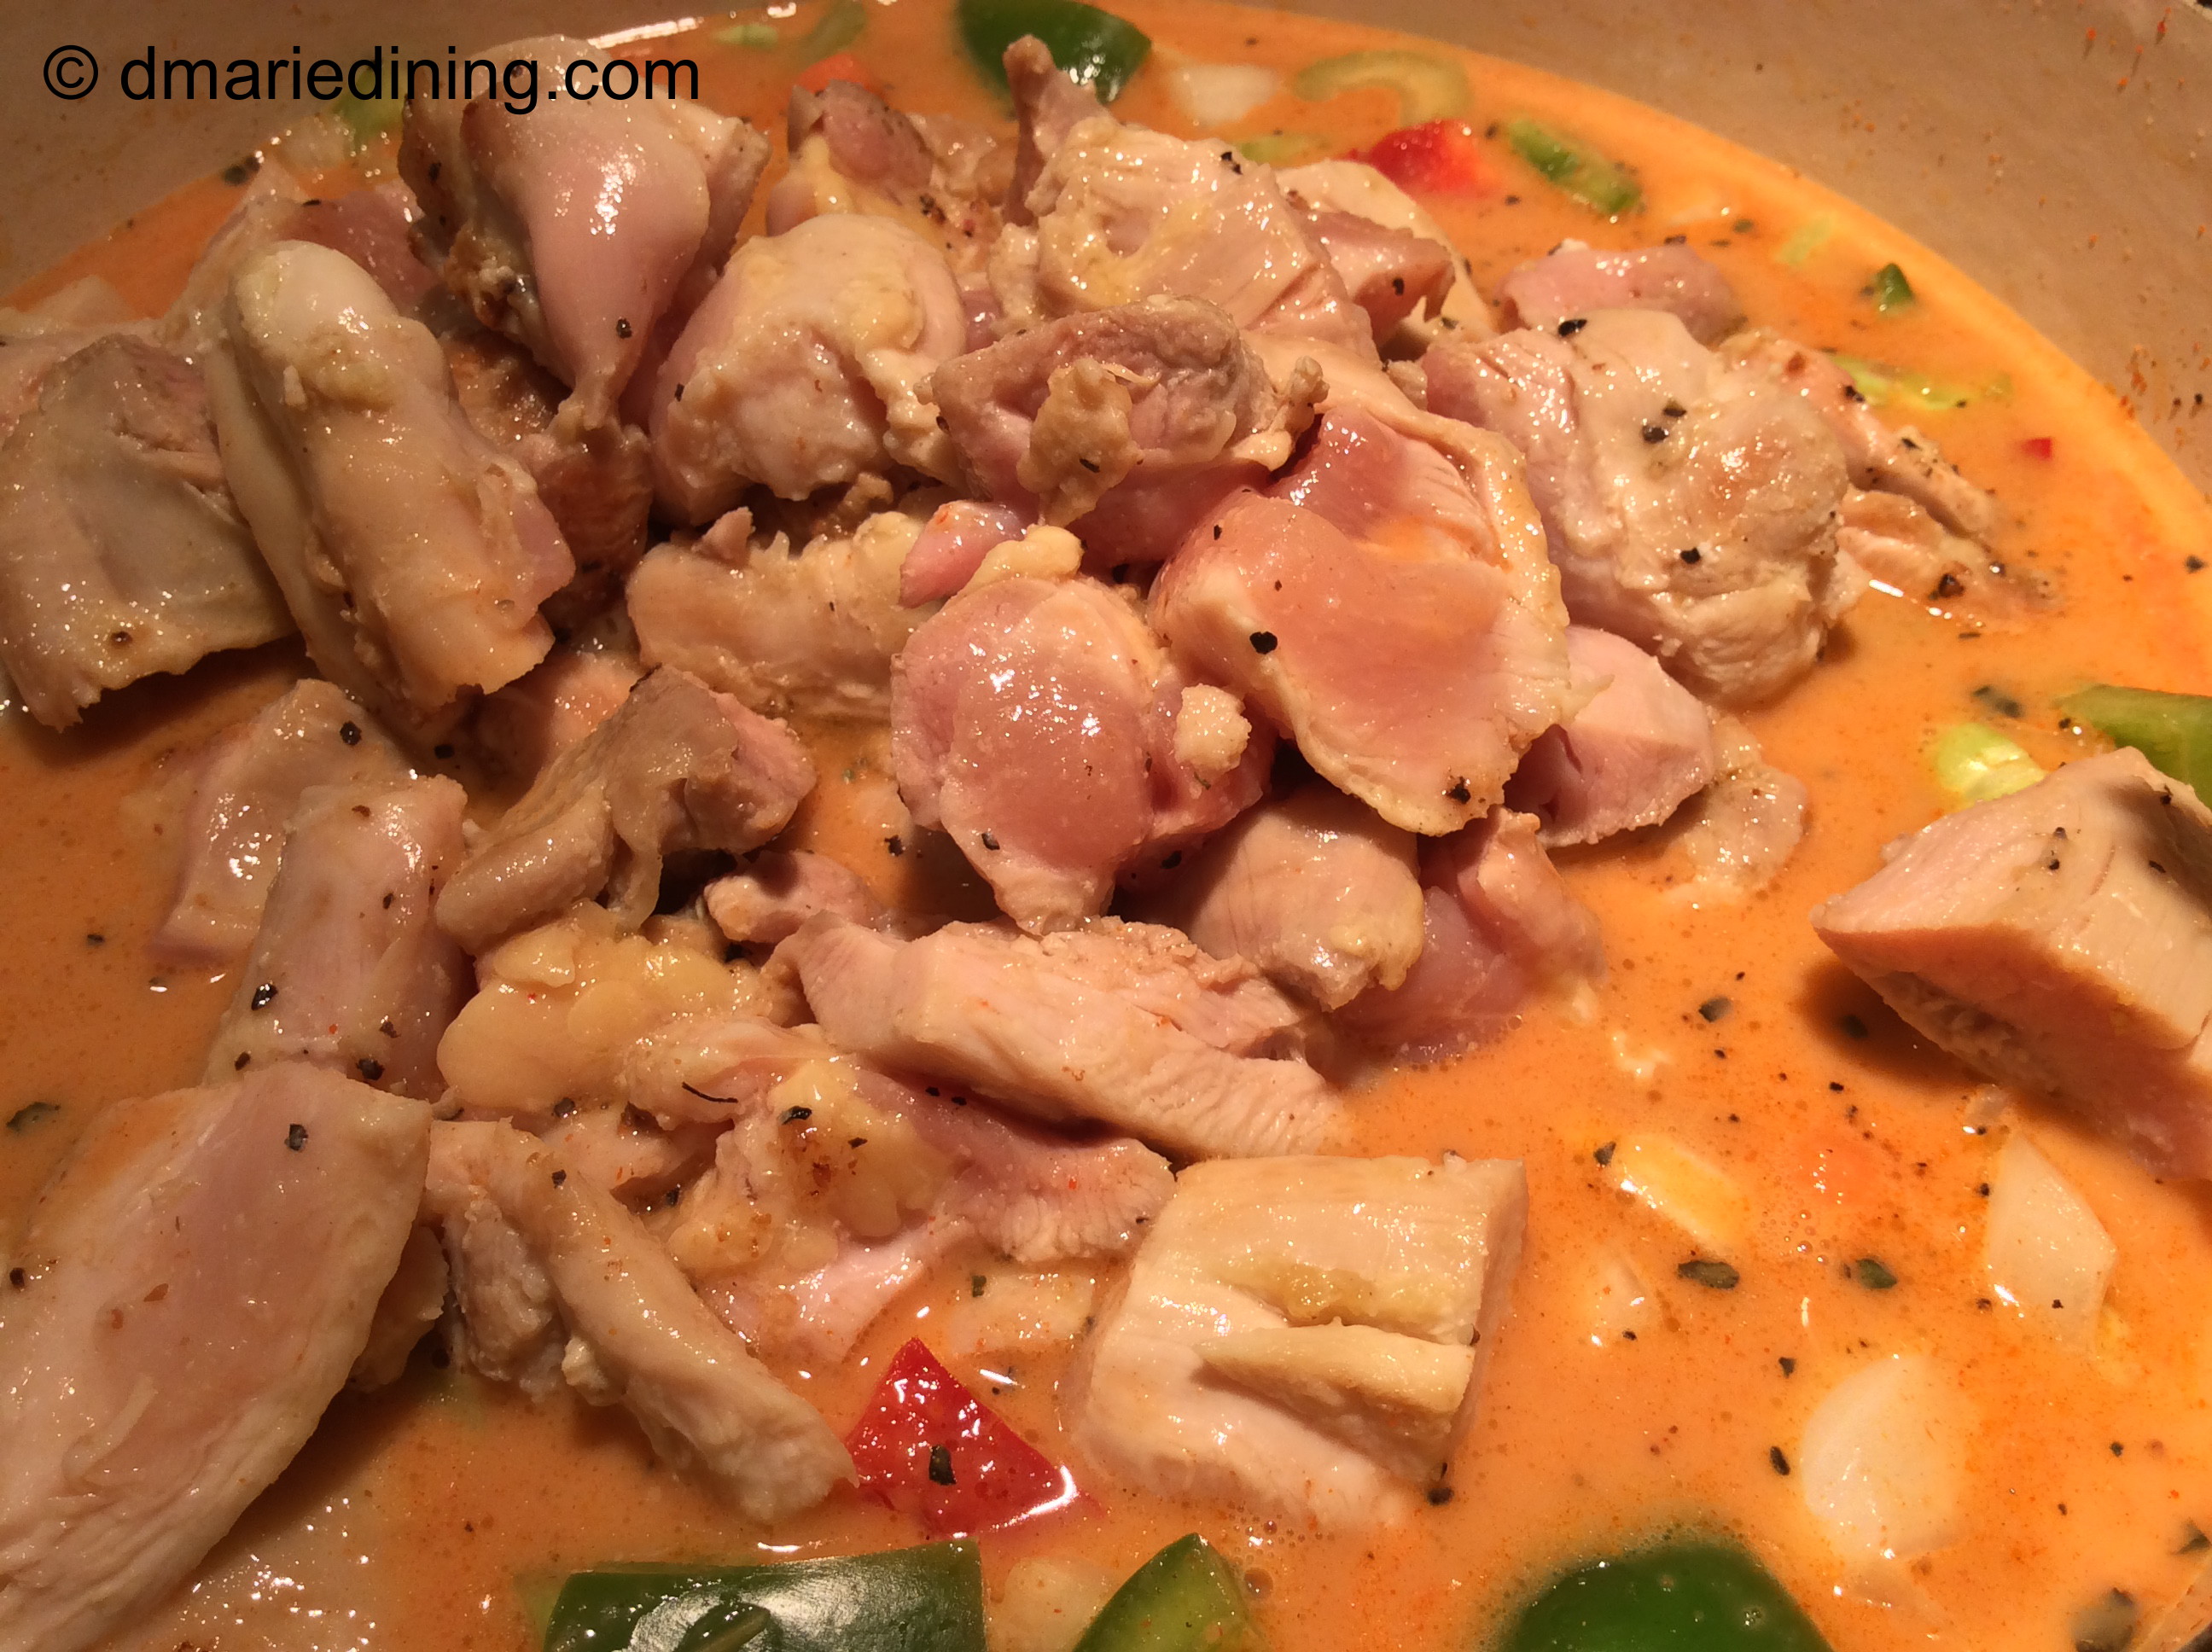
Heat a large skillet over medium heat and add grape seed oil. Let oil heat for about 1 minute then add Thai Curry Paste, ginger paste and garlic. Stir to blend and continue to stir for 1 minute. Add tomatoes, Shishito peppers and lemon zest. Stir to mix. Sprinkle mixture with remaining salt, pepper, onion powder and chili lime seasoning and stir to blend. Slowly pour in coconut milk while constantly stirring. Turn hit down to medium low. Place salmon in the sauce and spoon some sauce over the salmon. Cover and let simmer for 15 to 20 minutes until salmon is cooked all the way through. While simmering spoon sauce over salmon periodically. Serve over a bowl of rice.

Optional Additions:

Sea Scallops

Steamed Cabbage

Roasted Asparagus

Sauteed Mixed Peppers


Follow my blog with Bloglovin

Advertisement

Chicken, Yellow Beets and Pasta

Yellow Beets. Until I decided to create a new chicken and pasta dish I had not seen nor had I tasted yellow beets. During one of my treks to Trader Joe’s I spotted the yellow beets after I saw another customer pick up a package in the vegetable aisle and it looked different from other vegetables. Of course, it could also have been the posted sign saying “New Try Me” that caught my eye.

To be specific, the package contained roasted yellow beets. Immediately, I started thinking about what kind of dish I could possibly make with roasted yellow beets. Since I planned to make chicken and pasta with the lemon chicken I had already thrown into the cart, I figured why not add the roasted yellow beets for more flavor and a pop of color. To add even more color I picked up a package of snap peas to liven up the dish.

I knew from the beginning it was going to be a little tricky to get my youngest son to eat beets. He professes not to like them but it could be because when I made beet salad and the dish turned pink. I thought the dish looked pretty but he thought it looked unappealing at least to his eyes. Even when I just served seasoned plain beets, T would scrunch up his face and gently remove them from his plate. Like I sometimes say, we often eat with our eyes.

Mixing up the yellow beets with the chicken and snap peas was distracting enough that T didn’t really mention the yellow looking thing in the dish. By the time I told him what it was he couldn’t make a face because he had eaten half the food on his plate. I guess blending in the yellow beets is like when my girlfriend added prunes to a cake and didn’t tell me until I had gobbled it up and said how moist and delicious it tasted. I don’t care for prunes but since the cake was good what can I say.

The next time you want to jazz up one of your chicken dishes try adding roasted yellow beets. It can be our little secret.

Chicken, Yellow Beets and Pasta

Ingredients:

1 box vermicelli pasta

1 pkg roasted yellow beets cut into ½ inch pieces

1 pkg fresh snap peas

1 pkg cooked lemon or grilled chicken

2 – 3 plum tomatoes cubed

2 scallions sliced

½ cup half and half milk

½ cup chicken broth

¼ cup grated Parmesan cheese

3 tbsp butter

1 tbsp Adobo

1 tbsp flour

1 tbsp salt

½ tsp ground black pepper

½ tsp olive oil

½ tsp dried oregano

½ tsp dried parsley

½ tsp dried cilantro

Prepare per package instructions and reserve ½ cup of pasta water. Melt 2 tbsp of butter in a large skillet along with olive oil over medium high heat. Add snap peas, salt and black pepper then stir to mix. Saute for 1 – 2 minutes then remove from skillet and place in a small bowl and set aside.

Place skillet back on the stove. Add 1 tbsp of butter to the skillet and let it melt. Add flour to the skillet and stir until smooth. Pour in milk and broth then whisk until the sauce is smooth. Add Parmesan cheese and remaining seasonings. Stir to combine. Add chicken, yellow beets, snap peas and scallions (reserve 1 tbsp of scallions). Gently stir to mix all ingredients. Add pasta water to thin out the sauce if necessary. Reduce heat to medium and let simmer for 5 minutes. Serve over pasta.

Follow my blog with Bloglovin

Chicken and Cabbage Stew

One pot dishes are good for both hubby and me. Good for me because I don’t have to fuss with a lot of different pots, pans and utensils. It’s good for hubby because he usually washes dishes since I cook so less clean up for him.

When I think about it, that is how my mom and dad operated in the kitchen. My mom is an excellent chef and since she did most of the cooking my dad would wash the dishes. Like my hubby, my dad could fix breakfast but that was about it for him. I can’t complain about hubby’s lack of culinary skills because besides washing dishes hubby vacuums and will wash clothes if I don’t get to them first. My in-laws did a great job raising two sons that are productive and aren’t afraid to help around the house. God Bless my dad and in-laws. I miss them everyday.

Okay, back to my Chicken and Cabbage Stew. This is a relatively quick meal and as previously stated the beauty of it is using only one pot. The one constant in our house is chicken. Yes, I sometimes go on and on about eating so much chicken but you really cannot beat it for the price and the health benefits compared to red meats. Adding a few light vegetables to the pot just enhances the nutritional value and cuts down on calories as well as fat.

Aside from the flavors of the Chicken and Cabbage Stew I liked the colors of the dish. The bright red of the peppers. The pop of orange from the carrots and turmeric broth. Plus, the contrast of green between the cooked green peppers and sprinkle of green onions on top. Eating with your eyes is just as important as enjoying the mixed flavors of any dish.

Chicken and Cabbage Stew

Ingredients:

4 – 6 drumsticks or boneless chicken thighs

2 celery stalks diced

1 green onion diced

1 small green pepper diced

1 small red pepper diced

1 small Napa cabbage shredded

1 bag baby carrots

2 cups chicken stock or broth

3 tbsp grape seed oil or olive oil

2 tbsp tomato paste

2 tbsp salt

1 tbsp seasoned salt

1 tbsp ground black pepper

1 tbsp turmeric

1 tsp onion powder

1 tsp cumin

½ tsp red pepper flakes (optional)

½ tsp dried parsley

Heat oil in a large dutch oven over medium heat. Season chicken with 1 tbsp salt, seasoned salt and ground black pepper. Brown chicken then remove from dutch oven and place on a plate to cool slightly. Remove meat from drumsticks and chop or cube chicken thighs. Set aside.

Reduce heat to medium and add onions (except for green onions), peppers and celery to the pot. Season with remaining salt, onion powder, cumin, dried parsley and red pepper flakes. Stir for 1 minute or until vegetables begin to soften. Add tomato paste and turmeric. Stir to blend with vegetables. Add chicken with juices along with chicken stock and carrots to the dutch oven. Let simmer for 10 – 15 minutes then add shredded Napa cabbage. Stir and continue to cook for an additional 20 minutes until the cabbage is cooked and tender.

Serve over rice and sprinkle with green onion.


Follow my blog with Bloglovin

Baked Chicken with a Mango Chutney Glaze

Truth be told… baked chicken is not very exciting on its own. Yeah, you can add a few seasonings besides salt and black pepper to make it taste good. Plus, sometimes you can kick it up a notch by adding BBQ sauce. But…..

Nothing against BBQ sauce. It is always on hand when I am tired of fixing plain baked chicken. But, today I decided to make Baked Chicken with a Mango Chutney Glaze. I have been thinking about this simple recipe for awhile. The problem was I always forgot to look for chutney sauce when I went to the grocery store. It may have helped if I had put it on the shopping list and then actually looked at the list on my trips to the grocery store. Yes, I do make a list but I don’t always check it while I am shopping. Okay, moving on.

Fortunately, on a recent grocery store run I spotted a jar of mango chutney at Trader Joe’s while perusing jars of different sauces and new spices. Chutney is one of those things you have to try to know if you will really like it. There are so many varieties of chutneys it can be hard to choose which one will compliment a dish. My research showed that chutneys are a staple in Indian cultures. Often it is used as a side relish or condiment and helps bring balance to a dish. Most chutneys are a combination of vegetables, fruits, herbs, vinegar, sugar and spices. However, some chutneys are just fruits or vegetables or even minty.  I thought the chutney would be delicious if used as a glaze on baked chicken .

Spicy, sweet or minty, there is surely a chutney you will find to satisfy your tastes. For my baked chicken I added cayenne to the mango chutney sauce to spice it up a bit more. The hot spice and the sweetness of the mango helped to balance each other out to create a really flavorful dish. If you have never considered adding chutney to an old time favorite chicken dish, give it a try and see just how non-boring your chicken will taste.

Baked Chicken with Mango Chutney Glaze

Ingredients:

4 – 6 chicken drumsticks or chicken thighs

1 small onion sliced

1 jar mango chutney

4 tbsp butter

2 tbsp water

1 tbsp grape seed oil or olive oil

1 tbsp Adobo

1 tbsp salt

1 tsp ground black pepper

1 tsp cayenne (optional)

smoked paprika

cooking spray

Preheat oven to 350 degrees. Melt butter together with grape seed oil in a small pot and set aside.

Spray a baking dish with cooking spray. Layer the backing dish with sliced onions and place chicken over the onions skin side down. Sprinkle chicken with half of the seasonings except for the cayenne then flip and sprinkle then season the skin side of the chicken. Pour melted butter over the chicken. Place in the preheat oven and bake for 1 hour.

While the chicken is baking place chutney in a bowl and add water and cayenne seasoning. Mix until the mango chutney is loose but has a thick soup consistency. Add more water if necessary.

After an hour of baking remove the chicken and spoon the mango chutney over the chicken. Place the chicken back in the oven and bake for another 45 minutes to 1 hour until the chicken is thoroughly cooked and nicely browned.

Serve with your favorite side dishes.

Follow my blog with Bloglovin

Pasta with Sweet Italian Sausage in Sauce

Let me say from the start that even though this recipe is about pasta and sweet Italian sausage this is not necessarily an Italian recipe. It is more of a combination of Italian and Mexican flavors.

Whenever my youngest son asks what’s for dinner and I say pasta he breaks into his happy dance with sound effects. I have said this more than once in my blog… my family loves pasta. Maybe the next time I make pasta I’ll see if I can film the dance and share it on my blog.

Today, I decided I didn’t want to make the usual spaghetti meat sauce using sauce from a jar. Instead, I opted to make my own sauce using canned tomatoes, veggies and sweet Italian sausage. I also wanted to create a few different textures in the sauce so I added white beans which provided both texture and more flavor. Although everything was soft in the sauce, there were different levels of softness if that makes sense. The pasta was al dente. The beans were creamy. The veggies were smooth and the sausage had a nice soft chew. Fortunately, it all worked together and had me doing my own happy dance.

Pasta with Sweet Italian Sausage in Sauce

Ingredients:

2 packages Sweet Italian Sausage links

1 can small white beans drained and rinsed

1 can Mexican stewed tomatoes

1 can fire roasted tomatoes

1 small can tomato paste

1 small green pepper diced

1 small red pepper diced

2 cups water

2 tbsp grape seed oil

2 tbsp fresh hot salsa

½ tbsp ground oregano

½ tbsp dried basil

½ tbsp Adobo

1 tsp Kosher salt

1 tsp ground black pepper

Heat grape seed oil in a large dutch oven over medium high heat. Add sausages in batches and brown on each side. Slice the browned sausages then set aside. Wipe out the dutch oven if the bottom is too brown. Lower the temperature to medium. Add a little more grape seed oil to the pot then add onions ad peppers along with the seasonings. Stir and cook for approximately 2 – 3 minutes. Add both cans of tomatoes, white beans and tomato paste to the pot and stir until well blended with the onions and peppers. Cook for 3 minutes then add the sausages to the pot. Stir and let simmer for 20 – 25 minutes over medium low heat to allow the sauce to thicken.

While sauce is simmering cook pasta according to the package. Spoon sauce over a bowl of pasta and sprinkle with freshly grated Parmesan cheese. Enjoy!


Follow my blog with Bloglovin

Quiche

During warmer weather I shy away from always fixing meals that require me to be around the stove for any length of time. One pot meals and meals that go into the oven are my favorite things to prepare when it is hot.

Quiche is one of those meals you can quickly prepare then stick it in the oven to do its thing while you do something else. Quiche is also versatile because you can use anything you want for the filling whether it is veggies, meat, cheese or a combination of all three. The only thing I haven’t tried in a quiche is pasta. But who knows, that might work too. I’ll let you know if I ever get bold enough to try it.

I have two quiche recipes you can try for my vegetarian friends and meat eaters like me. I encourage you to experiment with the ingredients to make this your own favorite recipe.

P.S. Crab quiche is wonderful too. I’ll write a recipe on that one too sometime soon.

Quiche

Basic Quiche Recipe

Ingredients:

6 extra large eggs

1 ready made pie crust (roll out to fit in pie pan)

½ cup shredded Gruyere cheese

¼ cup shredded sharp cheddar cheese

¼ cup fresh grated Parmesan cheese

¼ cup half and half

1 tbsp butter or olive oil

½ tsp mushroom seasoning (Trader Joe’s)

¼ tsp salt

¼ tsp cracked black pepper

¼ tsp dried parsley

¼ tsp dried thyme

2 dashes of hot sauce (optional)

cooking spray

paprika

Preheat oven to 350 degrees.

Place pie crust in a pie pan sprayed with cooking spray. Gently tap the bottom of the pie crust with a fork to prevent puffing. Set aside.

Beat together eggs, seasonings and half and half until well blended. Fold cheeses into the egg mixture. Sprinkle with a little paprika. Place pie pan on a baking sheet and place in the oven. Bake for 30 to 45 minutes. Test to make sure the quiche is cooked thoroughly by placing a butter knife in the center after 30 minutes. Cook a few minutes more if not completely done. Let the quiche cool for about 5 to 10 minutes then serve with nice soup or salad.

Additional Ideas:

Mushroom Quiche:

Saute 1 package each of baby portobella mushrooms and white button mushrooms in 1 tbsp of butter or olive oil. Place on the bottom of the pie crust then pour egg and cheese mixture over the mushrooms. Bake according to basic the recipe.

Chicken and Broccoli Quiche:

Season one package of cooked diced white meat chicken with a little salt, onion powder and pepper.  Set aside.  Blanche 1 package of broccoli florets in salted water for about 3 minutes. Remove from water and place in a bowl of ice cold water to stop the cooking process. Drain and sprinkle broccoli with a little salt. Place chicken and broccoli in the bottom of the pie crust then pour egg and cheese mixture over the filling. Bake according to the basic recipe.


Follow my blog with Bloglovin

Sticky Ginger Pork Chops

During the coronavirus pandemic I have had to be a little more creative with putting dinner on the table. Since most of us are shut up in the house it means cooking a lot more. Especially for those of us who had college kids return home. My youngest had to come home to complete his senior year of college (Congratulations to T on his graduation 5/21/20). The traditional mom side of me makes me want to have a nice dinner every day for the family. When it was just hubby and me I bailed on cooking dinner and opted for healthy take out food more than I probably should have done. Sorry hubby! Don’t worry, hubby really didn’t suffer because the take out was usually his favorite meal from a Korean BBQ restaurant EB told me about. Hubby could eat their food every other day if I was so inclined.

Anyway, back to the Sticky Ginger Pork Chops. Growing up, pork chops were one of my favorite foods. My dad used to tell people I could eat five pork chops in one sitting. Yes, he was exaggerating because my mom usually only made two pork chops per person. So, unless someone else was giving up their pork chops I couldn’t eat five of them at one time. Granted, I am a meat eater and if I only had a plate of pork chops for dinner and no side dishes, I might have been able to eat at least three chops in my younger days. Today, I eat only one unless I am super hungry then I could eat two.

Sticky Ginger Pork Chops came from a recipe I saw on the Test Kitchen show. They showed how to make Sticky Pork Spareribs instead of pork chops. I used pork chops because my local grocer had a fantastic sale on a large package of chops for less than $4.00 so I couldn’t pass them up. When it came time to cook the pork chops I decided to tweak the Sticky Pork Spareribs to create my own recipe.

My recipe has the basics of the Test Kitchen recipe but with a few changes based on what I had in the refrigerator and pantry. The end result was a thumbs up so I knew the recipe was blog worthy. Enjoy!

Sticky Ginger Pork Chops

Ingredients:

4 – 6 bone in pork shops

3 scallions diced

½ cup chicken stock or broth

2 tbsp sea salt

2 tbsp olive oil

2 tbsp honey

2 tbsp soy sauce

2 tbsp slice fresh ginger

2 tbsp rice vinegar

2 tbsp rice wine

1 tbsp garlic powder

½ tbsp cracked black pepper

1 tsp red pepper flakes (optional)

Preheat oven to 350 degrees.

Season pork chops with sea salt, garlic powder and cracked black pepper. Heat olive oil in a large cast iron skillet over medium high heat. Add pork chops in batches and brown on both sides (place browned pork chops on plate while cooking other pork chops). Lower heat to medium and place all pork chops back in the skillet. Sprinkle with red pepper flakes and ginger slices. Drizzle with honey, soy sauce, rice wine and rice vinegar. Sprinkle with scallions and then pour in chicken stock. Bring to a boil then remove from heat. Cover the skillet with foil then place in the oven to bake. Baste the pork chops after the first 15 minutes and cook for 15 minutes more. Remove the foil then baste again and cook for another 30 minutes. Serve with your favorite side dishes.

Follow my blog with Bloglovin

Skillet Baked Spaghetti

I am dedicating this post to my hubby and mother-in-law (may she rest in peace).

Hubby and I were discussing our childhoods the other day and reminiscing about the comfort foods our mothers would make. One of the comfort foods my hubby mentioned was the baked spaghetti his mom would prepare for the family. Mom B. had a special frying pan with rings in the bottom that she would use to bake the spaghetti in. I kind of remembered a similar pan from my childhood my mom would use but I don’t think she used it for baking.

Skillet Baked Spaghetti was pulled together based on how Mom B. would make her baked spaghetti. As always, I added my own twist to the recipe but hubby said my version did remind him of his mom. What a great compliment. I was happy that we could share a moment from his childhood and feel the same warmth and comfort his mom’s cooking would bring to the family.

Fast forward to today and now I have a recipe I can share with my kids and grand kids that makes them feel the comfort we felt from old family recipes. Pasta is usually a hit with my family. Add spice to the mix and a crispy cheesy topping and it’s a home run.

Thanks Mom B. for leaving hubby with a wonderful memory and giving me a delicious recipe.

Skillet Baked Spaghetti

Ingredients:

1 box vermicelli pasta (prepare per package instructions and save ½ cup pasta water) al dente and drained

1 pkg hot sausage links (casing removed)

1 pkg Italian sausage links (casing removed)

1 large jar spaghetti sauce

1 cup shredded mozzarella cheese

¼ cup freshly grated Parmesan cheese

2 tbsp salt

1 tbsp ground black pepper

1 tbsp ketchup

1 tsp dried oregano

1 tsp dried basil

½ tsp turmeric

½ tsp onion powder

¼ tsp red pepper flakes (optional)

Preheat oven to 350 degrees.

Brown the sausages in medium non-stick skillet over medium high heat. Remove most of the grease from the skillet then add the spaghetti sauce, ketchup and seasonings (except for the red pepper flakes). Stir to mix then reduce heat to medium low and simmer for 5 – 10 minutes.

After preparing pasta drain it and reserve ½ cup of the pasta water. Place the pasta back in the pot and add the spaghetti sauce. Mix well and add a little pasta water if the spaghetti seems dry. Spray a large cast iron skillet with cooking spray and drizzle a little olive oil on the bottom of the pan.

Place have of the spaghetti in the skillet then top with ½ of the shredded mozzarella and ½ of the Parmesan cheese. Top with the remaining spaghetti and sprinkle with the remaining cheese along with the red pepper flakes. Bake for 15 – 20 minutes until the top is slightly crispy and golden browned.

Follow my blog with Bloglovin

Mixed Pasta with Kielbasa

Roasting vegetables is one of my favorite ways to prepare vegetables because it is a quick process that brings out a lot flavor. Before I started my blog I never thought about roasting unless it was chicken. Instead, I would just saute vegetables in a pan. Believe it or not the two techniques of sauteing vs. roasting will affect the nutritional value and flavor depending on the vegetable.

I did a little research and found that both roasting and sauteing are healthy methods of preparing vegetables. Steaming is the best way to go and grilling is better than frying when trying to maintain nutrition. Both tomatoes and onions maintain their antioxidant capacity after baking but green peppers tend to lose antioxidant capacity when baked. No, that has not stopped me from baking peppers because I like the taste. It’s just good information to know when preparing them.

Mixed Pasta and Kielbasa was a last minute recipe I came up with based on what I had on hand for dinner. I keep a jar of dried mixed pasta which are the remnants of different boxes of pasta. Elbow, penne, bow tie – whatever! Pasta is pasta. All that really matters is what you add to the pasta. On the night I made Mixed Pasta with Kielbasa I had some baby spinach, tomatoes and a package of kielbasa I needed to cook.

The end result was pretty tasty and definitely a hit with my pasta eating crew. It is hard for me to mess up pasta when dealing with an audience that loves pasta in any shape or form. But, I know just how delicious my pasta dishes are when they go for seconds and this one certainly hit the mark. Seconds all around!

Mixed Pasta with Kielbasa

Ingredients:

1 ring of smoked kielbasa sliced

1 small onion sliced thin

1 pkg baby leaf spinach

1 pkg vine ripe tomatoes quartered

½ green pepper seeded and sliced

1 cup mixed pastas (penne, twists, cavatappi, etc) cooked al dente per package

½ cup chicken broth

¼ shredded mozzarella cheese

3 tbsp olive oil

2 tsp salt

1 tsp Adobo

½ tsp onion powder

½ tsp ground black pepper

¼ tsp red pepper flakes

Preheat oven to 400 degrees.

Add tomatoes, onions and green peppers to a rimmed baking sheet. Season with 1 tsp of salt and pepper. Sprinkle with 2 tbsp oil and toss to coat. Roast in oven for 20 – 25 minutes until slightly charred. Set aside.

Brown kielbasa in 1 tbsp of olive oil over medium high heat. Add chicken broth, roasted vegetables and remaining seasonings to the kielbasa. Stir to mix well. Toss in pasta and stir. Cook until pasta is heated up then sprinkle with cheese. Serve immediately.


Follow my blog with Bloglovin

Blackened Salmon Salad

Salmon is my go to meal whenever we go out to eat and there is nothing that truly peaks my interest on the menu. Salad is one of my family’s favorite foods so put salmon and salad together and you have one of my top 10 meals. Blacken the salmon and you can forget about it!

The reason I am bragging about my Blackened Salmon Salad is because once hubby tasted it he said “Babe, you must have done something different with the salmon”. I braced myself because I wasn’t sure if the next sentence would be good or bad so I just stared at him. The next sentence was “because you’ve never fixed salmon like this and it is delicious. Let’s have more of this!”.

It has taken me a minute to learn how to make a really good blackened salmon fillet. Hubby didn’t realize I have tried making blackened salmon in the past but never quite got the seasonings right. Plus, I didn’t pair it with a great salad. I know most folks might say how hard can it be to make salad. My answer is not hard but not every salad tastes the same or is wonderful. Each salad is different depending on the combination of ingredients. Basic ice berg lettuce, hot house tomatoes and cucumber salads are for bland palates. Mixed greens, plum tomatoes, various cheeses, avocado and spices create a more exciting and flavorful salad. Mixed greens are also more nutritious than ice berg lettuce which is really just green water. If you have a choice, choose mixed greens, baby leaf spinach or even romaine lettuce for your salads.

Bottom-line… The blackened salmon will be the center piece of your meal and will keep folks asking for more.

Blackened Salmon Salad

Ingredients:

2 – 4 salmon fillets

6slices bacon cooked crisp and crumbled

2 – 3 boiled eggs chopped

1 ripe avocado sliced thin (squeeze juice from ½ a lime over avocado)

1 large plum tomato sliced thin

1 package mixed greens

¼ cup shaved fresh Parmesan cheese

¼ cup sliced red onion

¼ cup water

2 tbsp butter

2 tbsp olive oil

salt

lemon pepper

paprika

Cajun seasoning

Gazebo Room Greek Salad Dressing and Marinade

cilantro (optional)

red pepper flakes (optional)

seasoned croutons (optional)

Heat frying pan over medium high heat. Add butter and olive oil. Rinse salmon and pat dry. Season salmon with a little salt, lemon pepper, cilantro, Cajun seasoning and paprika. Once butter begins to brown slightly add salmon skin side up. Sprinkle skin with a little salt, lemon pepper, and paprika. Cook for 5 minutes until fillet begins to darken but does not burn (gently lift salmon to check color after 3 minutes). Flip the salmon fillet and cook for another 5 minutes until the skin begins to crisp up then add water and cover with a lid. Turn down heat to medium low and cook and additional 2 – 3 minutes.

Remove from heat and let salmon rest while building the salad.

Salad:

Place mixed greens in a large bowl. Add eggs, bacon, tomato and cheese. Toss with salad dressing. For each salad bowl lay slices of avocado over the salad then place a salmon fillet in the middle of the salad. Sprinkle with red pepper flakes.


Follow my blog with Bloglovin